![]()
User Manual
Model No.: KOl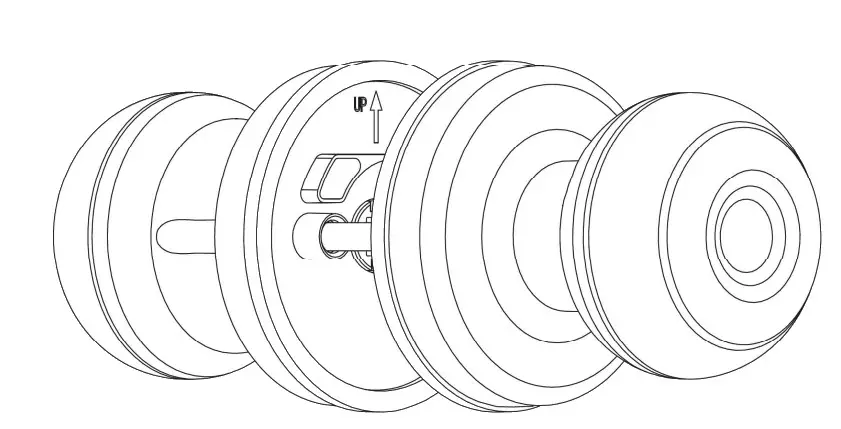
IMPORTANT: Read the instructions carefully before operating the appliance and keep them for future reference.
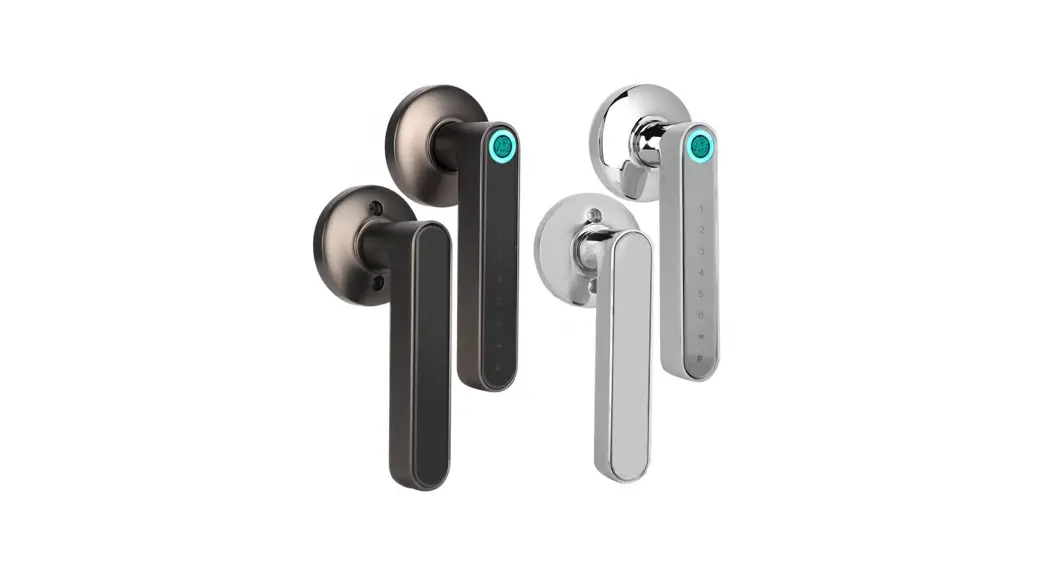
Product Description
Product Dimensions 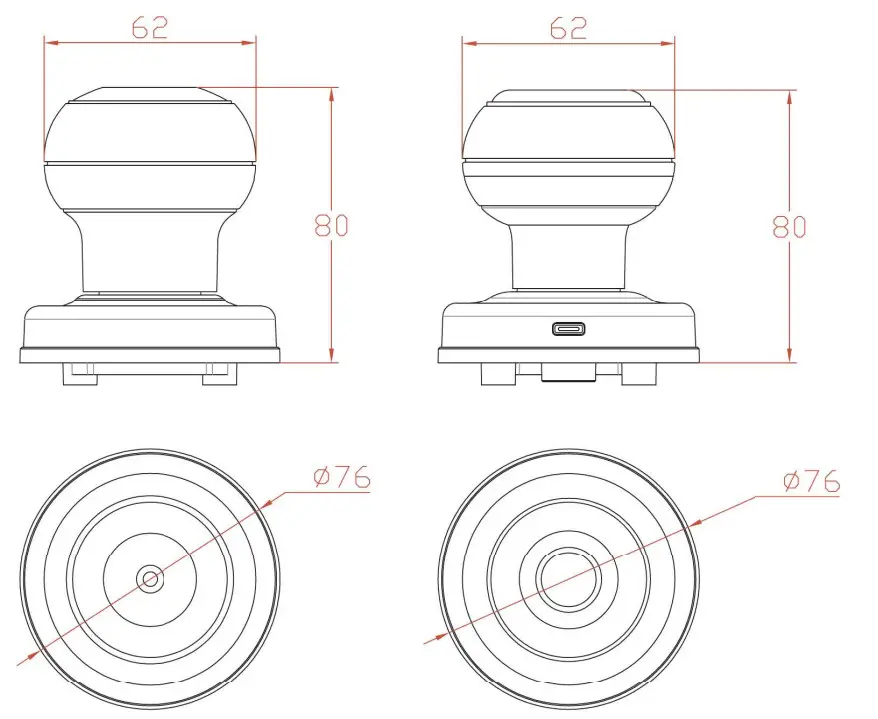
ONE Product Features
- Unlock way: Fingerprint Key, APP
- Password
- Emergency power interface: Type-C
- Secure lock mode
- Door thickness:35-55mm
- Suitable for residential areas, apartments, offices, office buildings, etc.
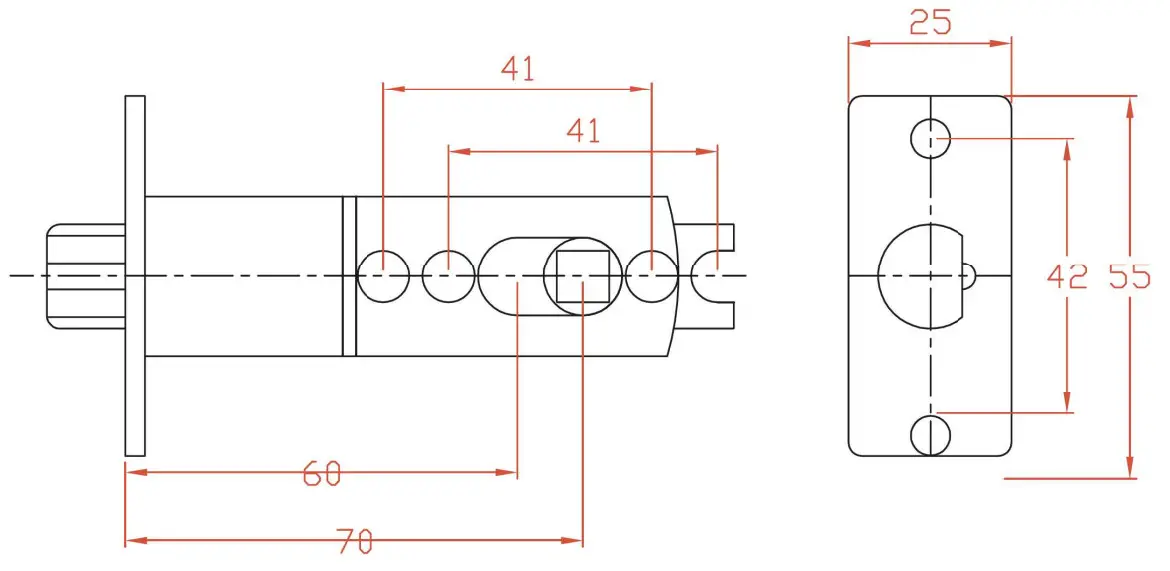
According to the opening of the lock body used,the distance of the square hole of the lock body needs to be adjusted according to the distance between the door edges. For the opening size, please refer to the opening diagram on the end page.
TWO Product Ribbon 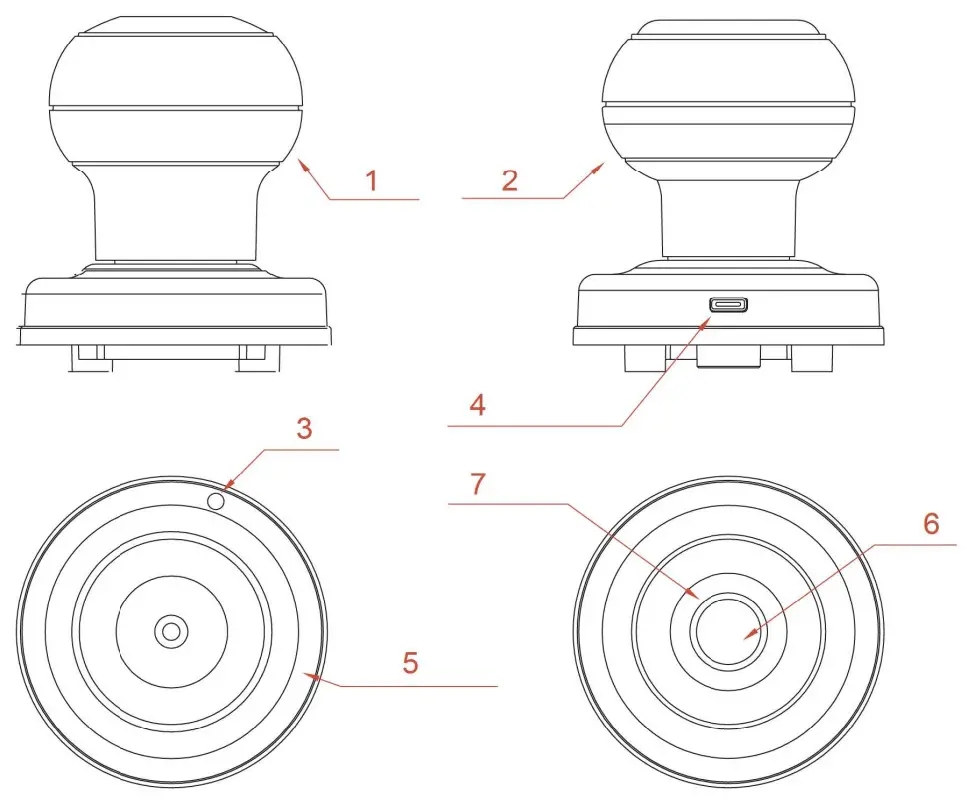
- Interior knob
- Exterior knob
- Reset button
- Type-C USB interface 5. Battery cover
- Fingerprint reader
- LED Indicator
Lock Body Opening Diagram 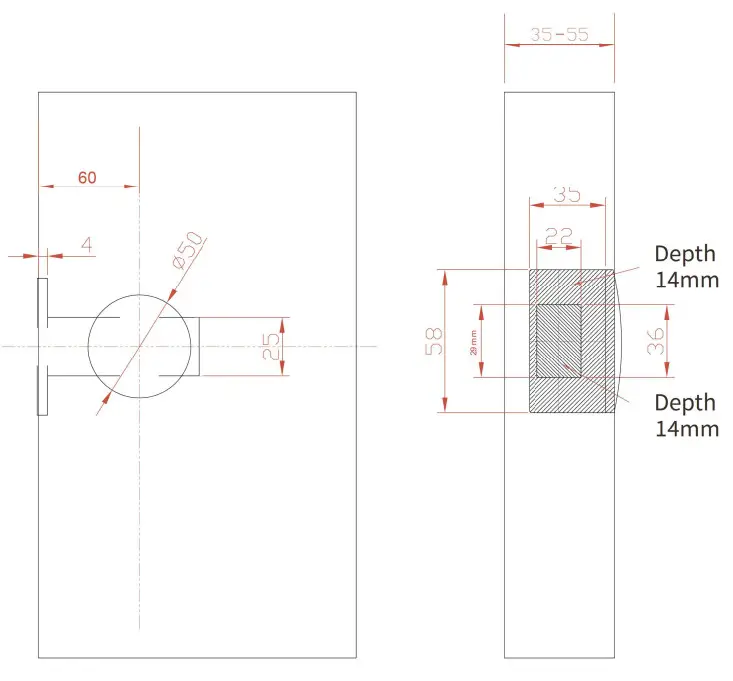
Specificataions
| Technical Parameters | ||
| NO | Name | Parameter Description |
| 1 | USB | Type-C/ 5V2A |
| 2 | Fingerprints max | 20 |
| 3 | Low power warning | 4.8V±0.2 |
| 4 | Voltage range | 4.5-6.5V |
| 5 | Stand-by current | <90uA |
| 6 | Working current | <250mA |
| 7 | Unlock time | P—1.5 sec |
| 8 | Range of working Temperature | -5-55 ° C I |
| Packing List | |||
| Name | PCS | Name | PCS |
| Exterior knob | 1 | Strike box | 1 |
| Screw B | 2 | Manual | 1 |
| Interior knob | 1 | Screw A | 4 |
| Key | 2 | Latch | 1 |
| Data line | 1 | White box | 1 |
| Pin | 1 | Strike plate | 1 .2 |
How To Use
Installation Method
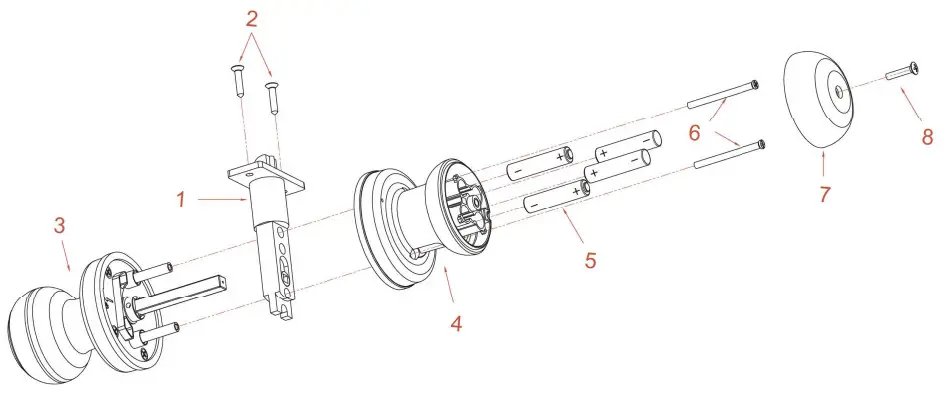
- Install the three-bar lock body (pay attention to the direction of the oblique tongue and the direction of opening the door). See Figure Step; unscrew the fixing screws of the lock body, as shown in Figure Step 2.
- Install the front panel as shown in step®, and then insert the square iron and the pair of pull studs into the corresponding holes of the three-bar lock body.
- Install the rear panel as shown in step @. After removing the rear panel lock from the box, use a screwdriver to unscrew the battery cover screws as shown in step 8. After the front and rear wiring are connected, install the rear panel. Pay attention to: The UP i faces upwards. After adjusting the rear panel, tighten the pair of pulls.
- Installation method of 7# alkaline battery: install the battery (note: pay attention to the direction of the positive and negative electrodes when installing the battery), as shown in the figure below;
Welcome
Geek Tale bids you welcome to a world of smart home devices, smart locks, and smart surveillance. We at Geek Tale strive to explore and develop the smart home industry for the good of all.
We use cutting-edge technologies to develop products fit and ready for the market. Please visit our website www.geektechnology.com
Before installing, please scan the QR codes to watch our easy step-by-step installation video.
If you have questions regarding the installation process please contact us by mail at [email protected]
or by phone at 1-844-801-8880/(862)352-0406.


