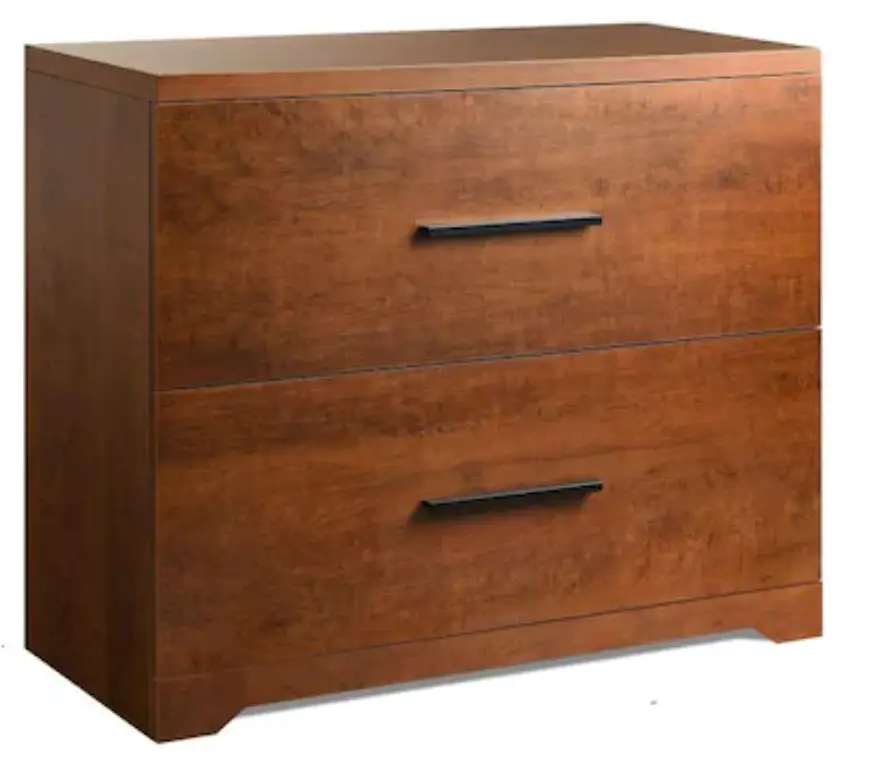
UNBRANDED SXB056844 2 Drawer Wood Walnut File Cabinets
IMPORTANT INFORMATION
![]() READ CAREFULLY. KEEP THIS INFORMATION FOR FURTHER REFERENCE.
READ CAREFULLY. KEEP THIS INFORMATION FOR FURTHER REFERENCE.
- Please read the following instruction carefully and use the product accordingly.
- Please keep this manual and hand it over when you transfer the product.
- This summary may not include every detail of all variations and considered steps. Please contact us when further information and help are needed.
NOTES
- Please follow the assembly instructions precisely and only use the product as intended.
- If an odor is present when first opening the package, please leave the unwrapped product in a shaded and ventilated area for a few days to air out.
- Prior to assembly, please check the product for defects or missing accessories. If any defects are found or accessories are missing, do not use product as damage or injury may occur;
Please contact us for assistance and replacement. - It is suggested you regularly check the products bolts and connections to ensure safe use.
- Assemble the item on a soft flat and clean surface to avoid scratches and damage.
- It is recommended that two people assemble this product.
WARNING
- During assembly, keep parts and packaging materials away from children and pets as there could cause injury and are a potential choking hazard.
- Avoid sharp objects or corrosive chemicals to prevent damage to the product.
- Please open the item slowly and cautiously to avoid pinching your hands by metal joints, especially children.
ANTI-TIP WARNING
- Serious or fatal crushing injuries can occur from furniture tip-over. To prevent this furniture from tipping over it must be permanently fixed to the wall.
- Since different wall materials require different types of fixing device, for advice on suitable
fixing systems, contact your local specialized dealer.
 |
|
EXPLODED DRAWING
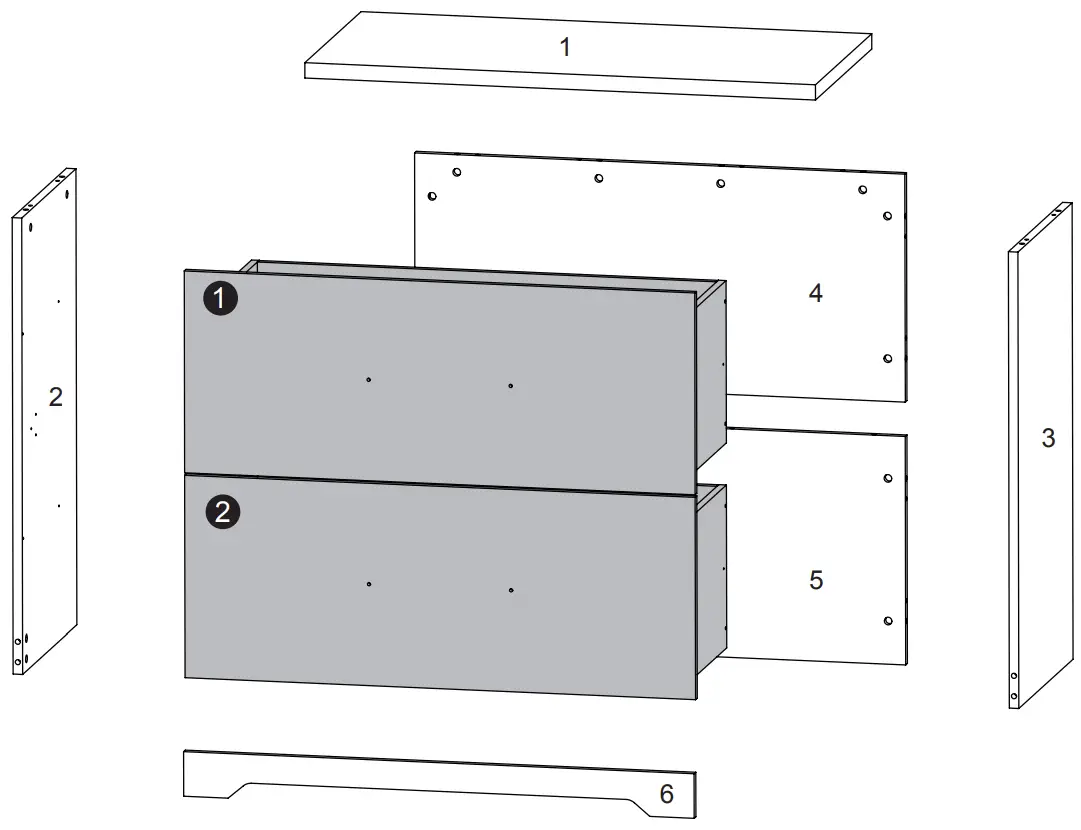

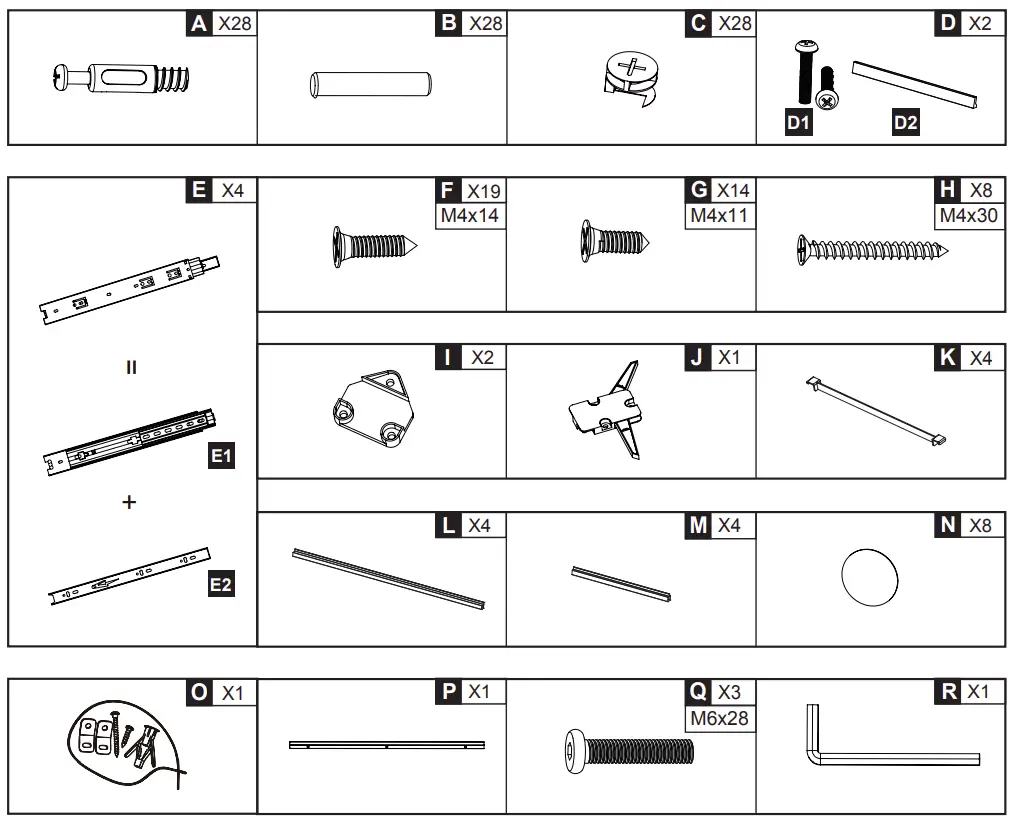
PARTS
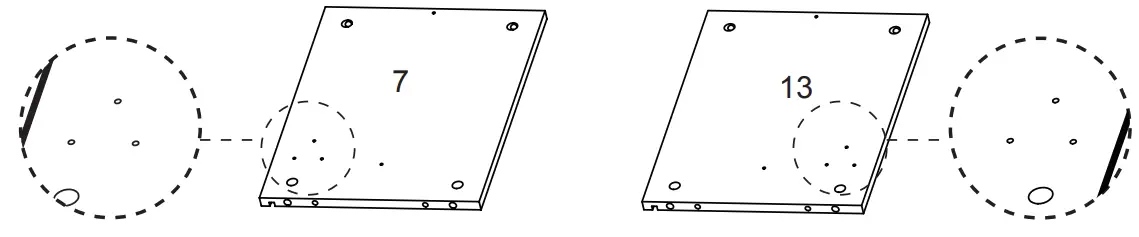
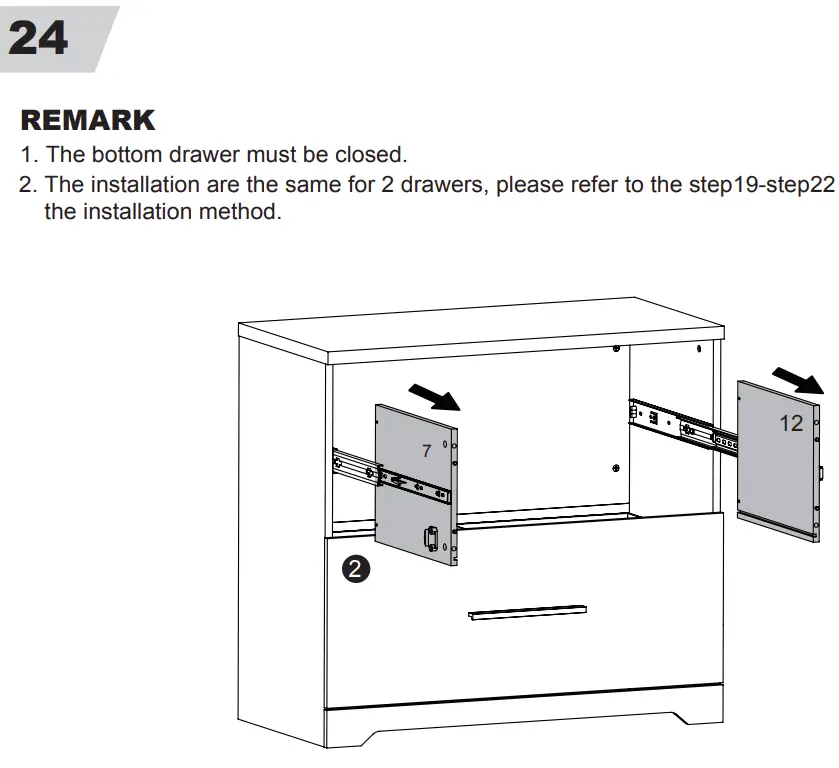
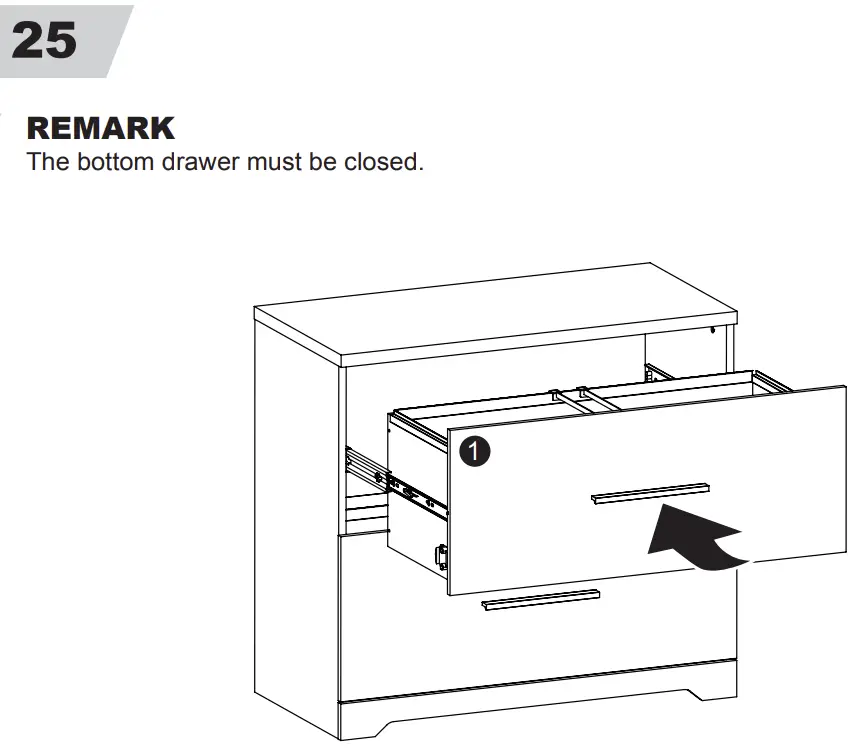
REMARK
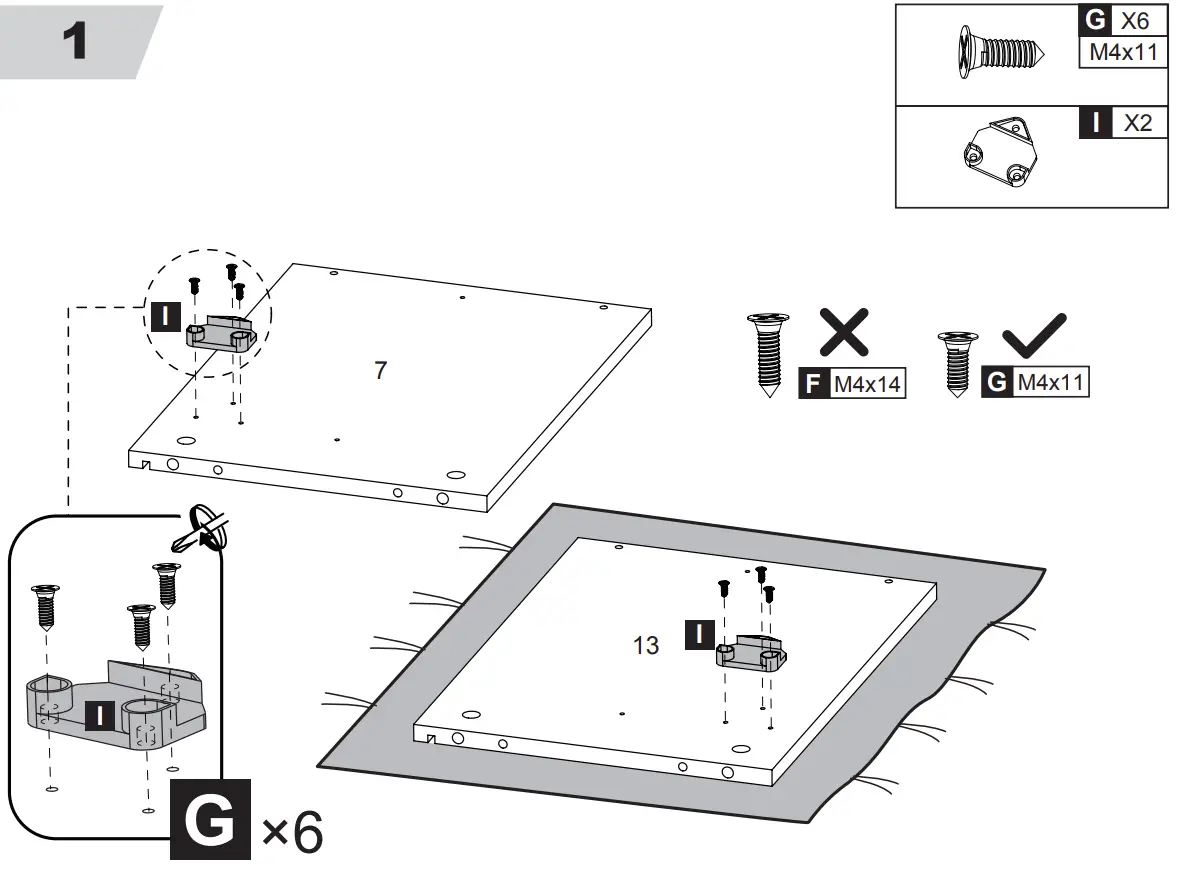
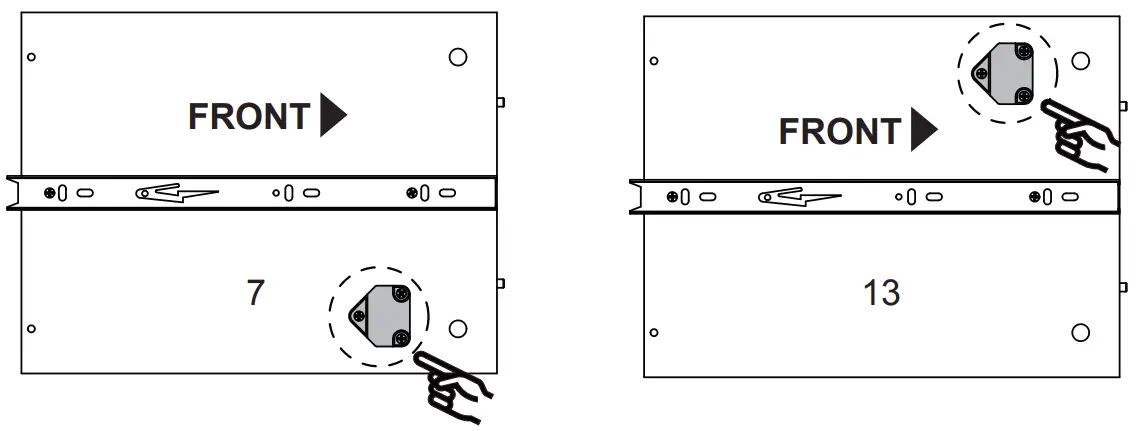
Part 7 board is assembled on the upper drawer ❶ ;
Part 13 board is assembled on the bottom drawer ❷ ;
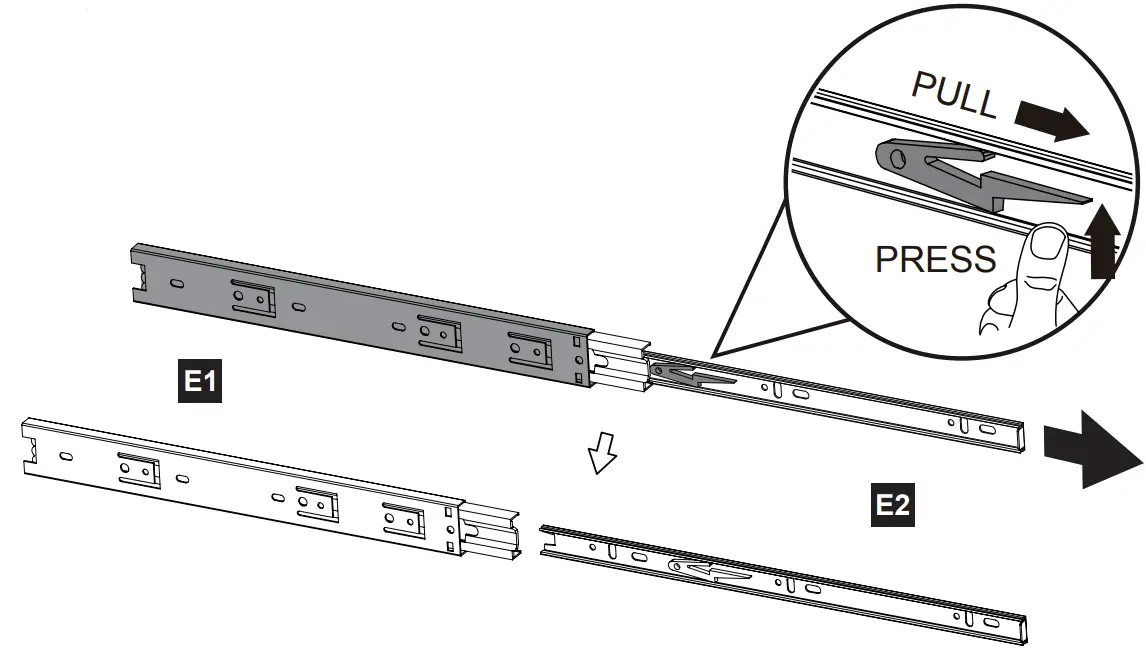
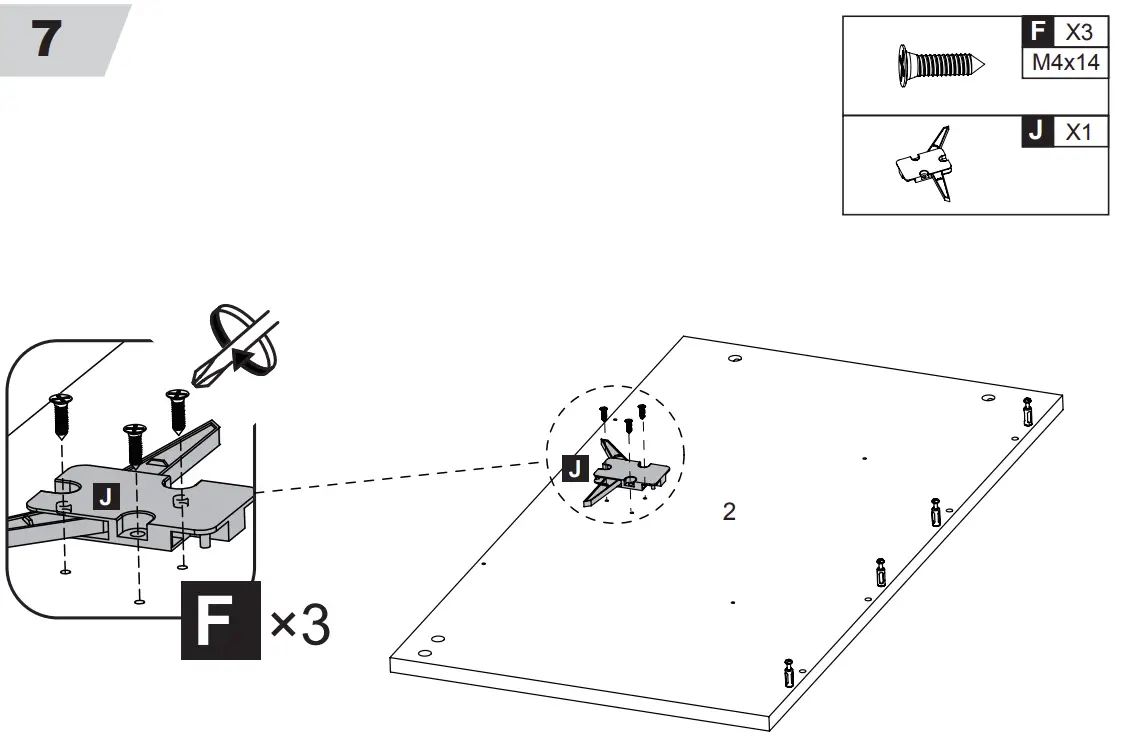
REMARK
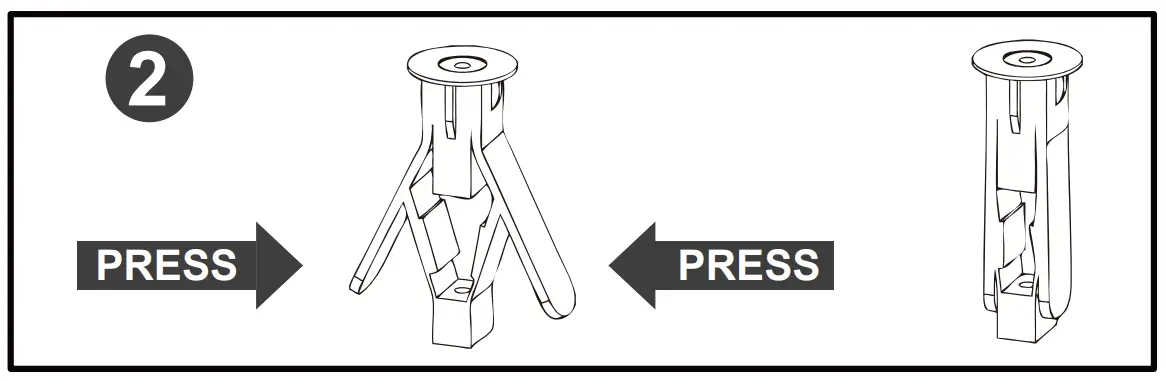
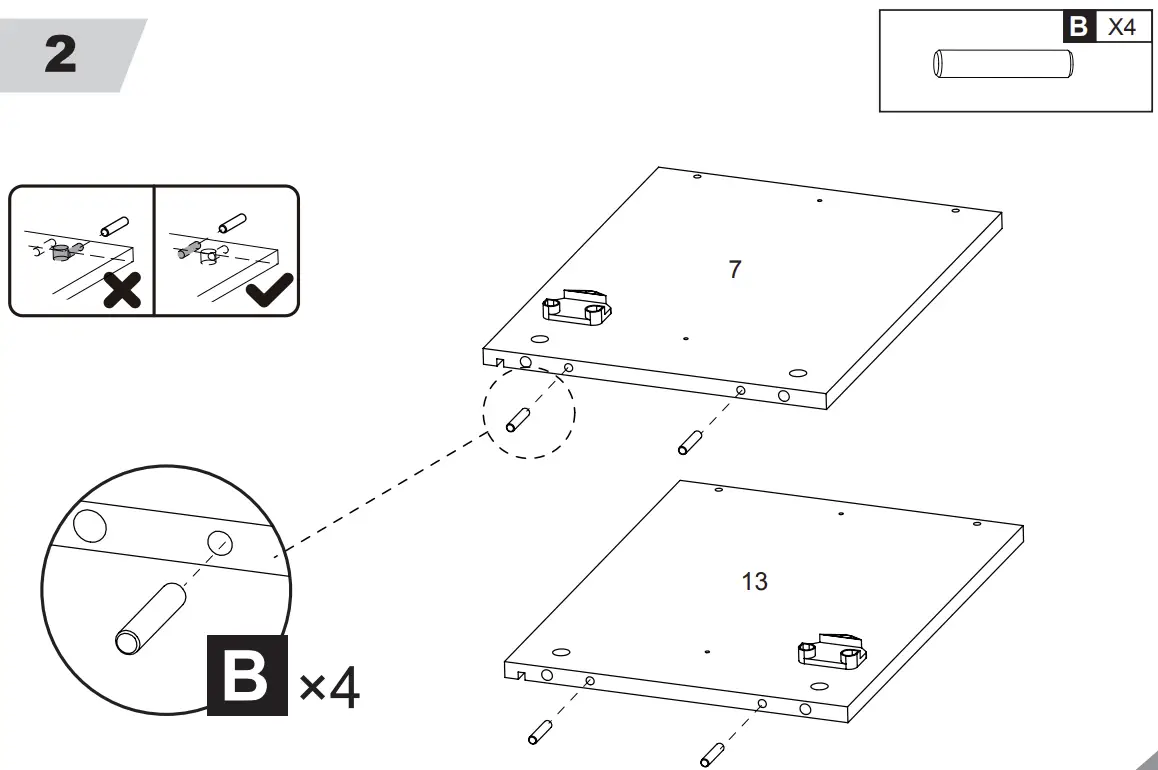
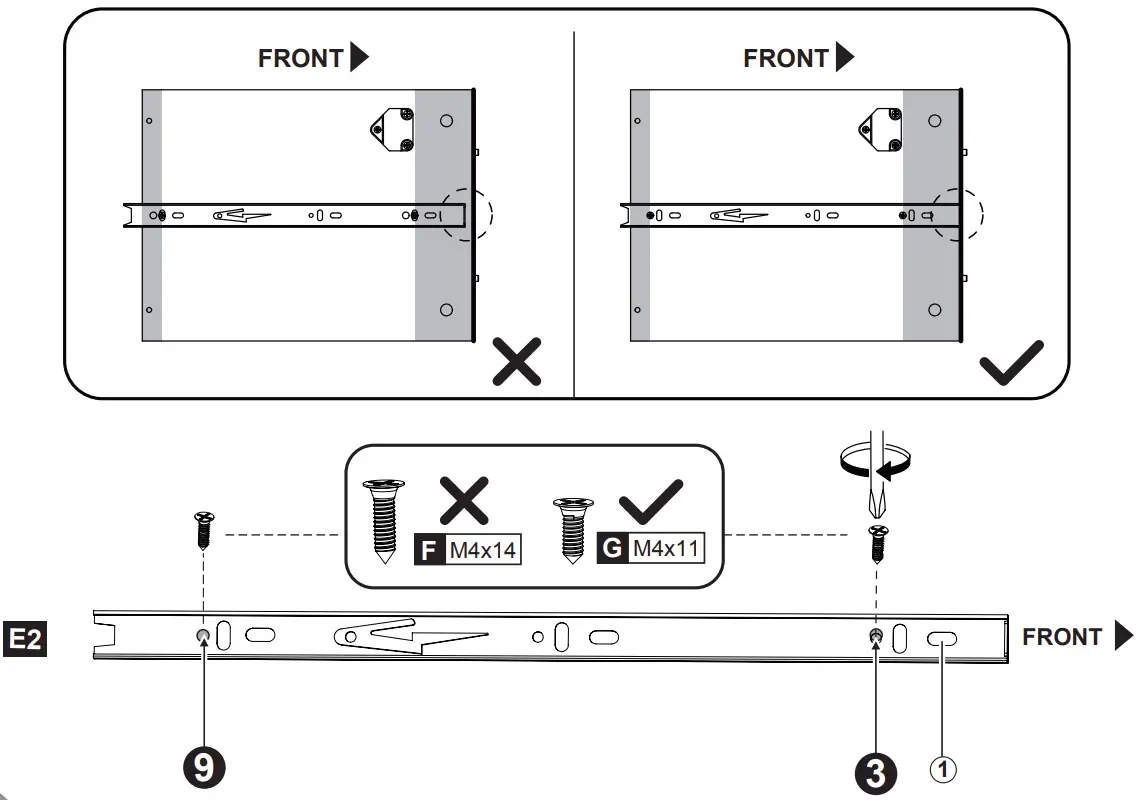
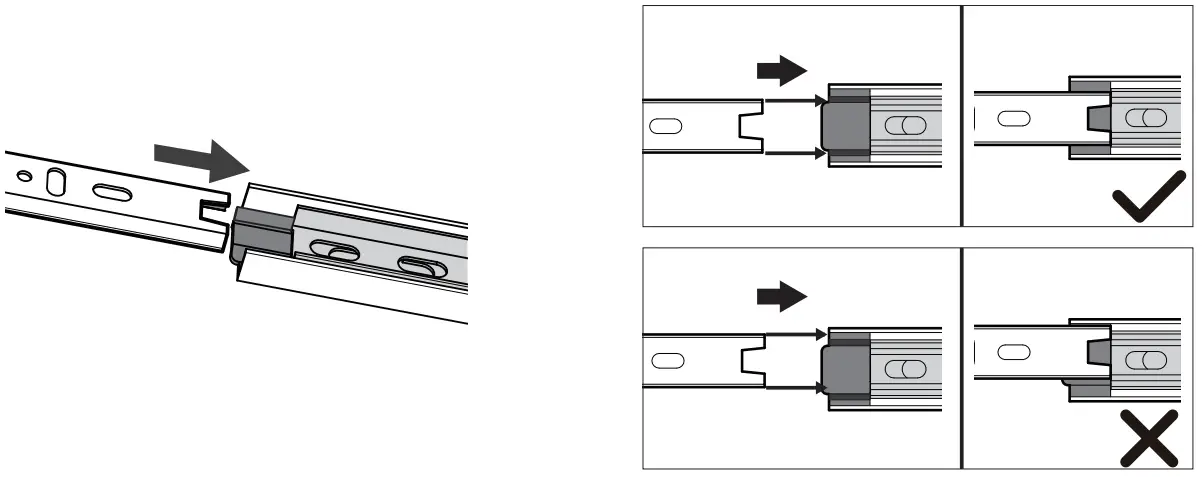
- Press the plastic part in the indicated direction to separate drawer runner
E1andE2before assembling. - Please grip the part while sliding the part.
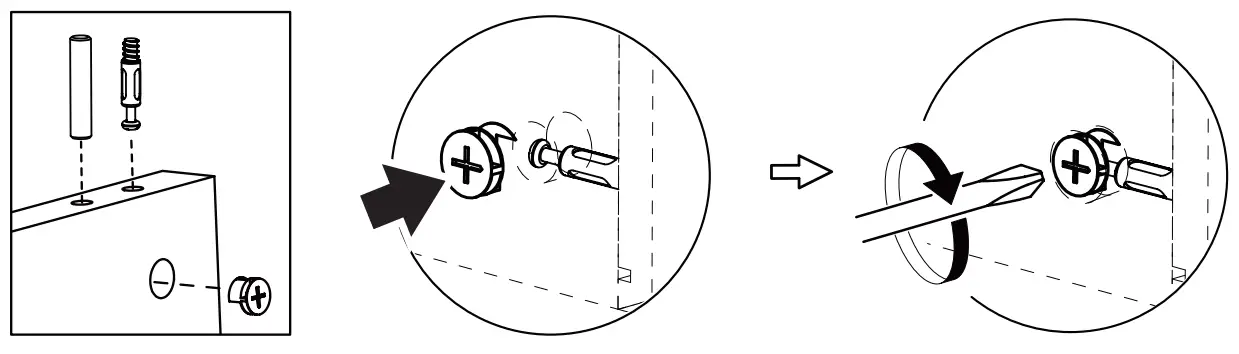
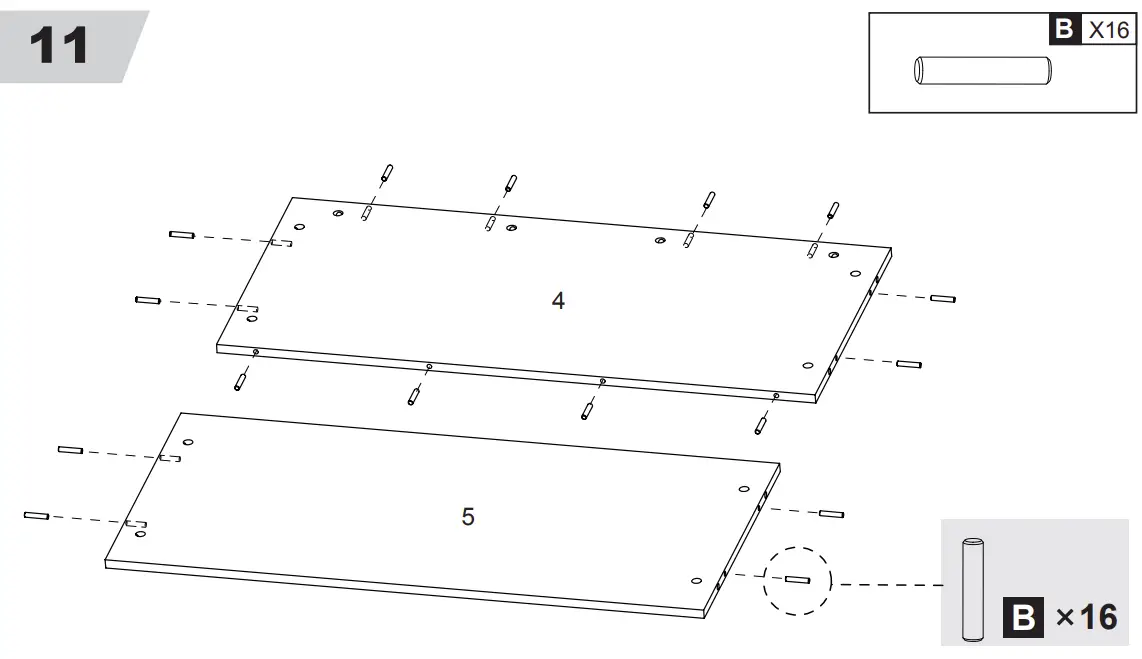
MINIFIX POSITION
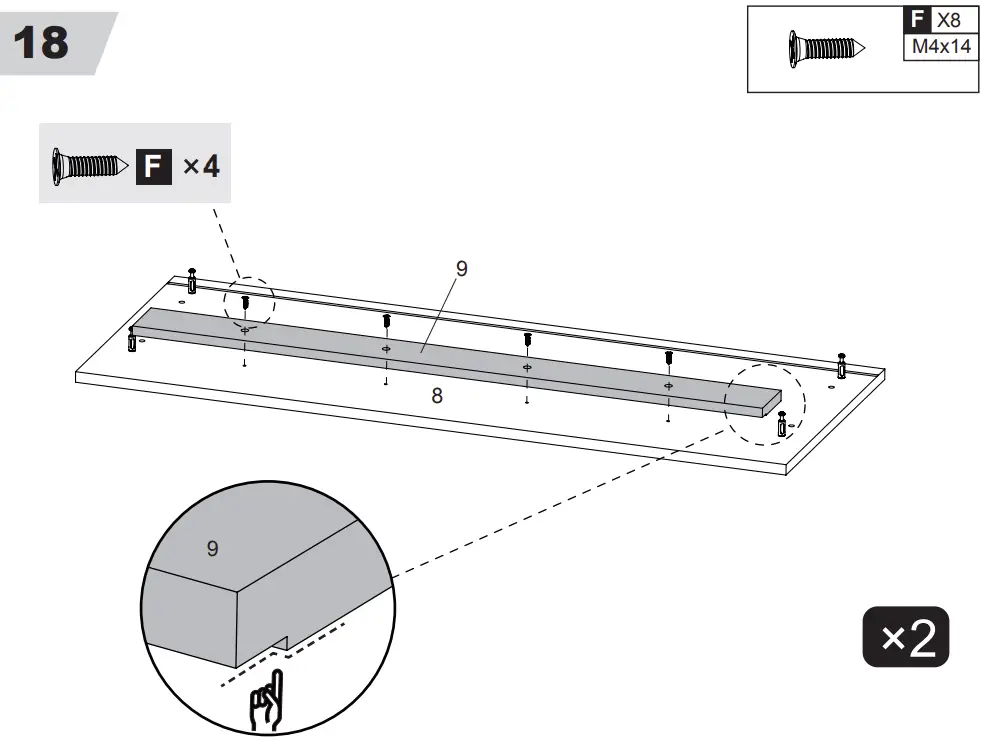
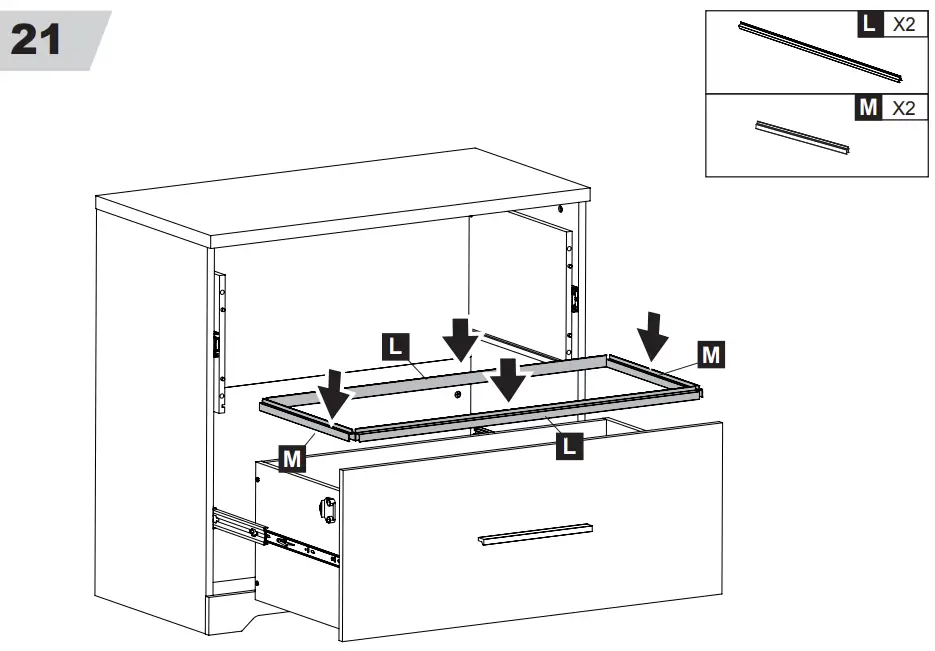
REMARK
Put a blanket under the board to avoid scratch or damage.
REMARK
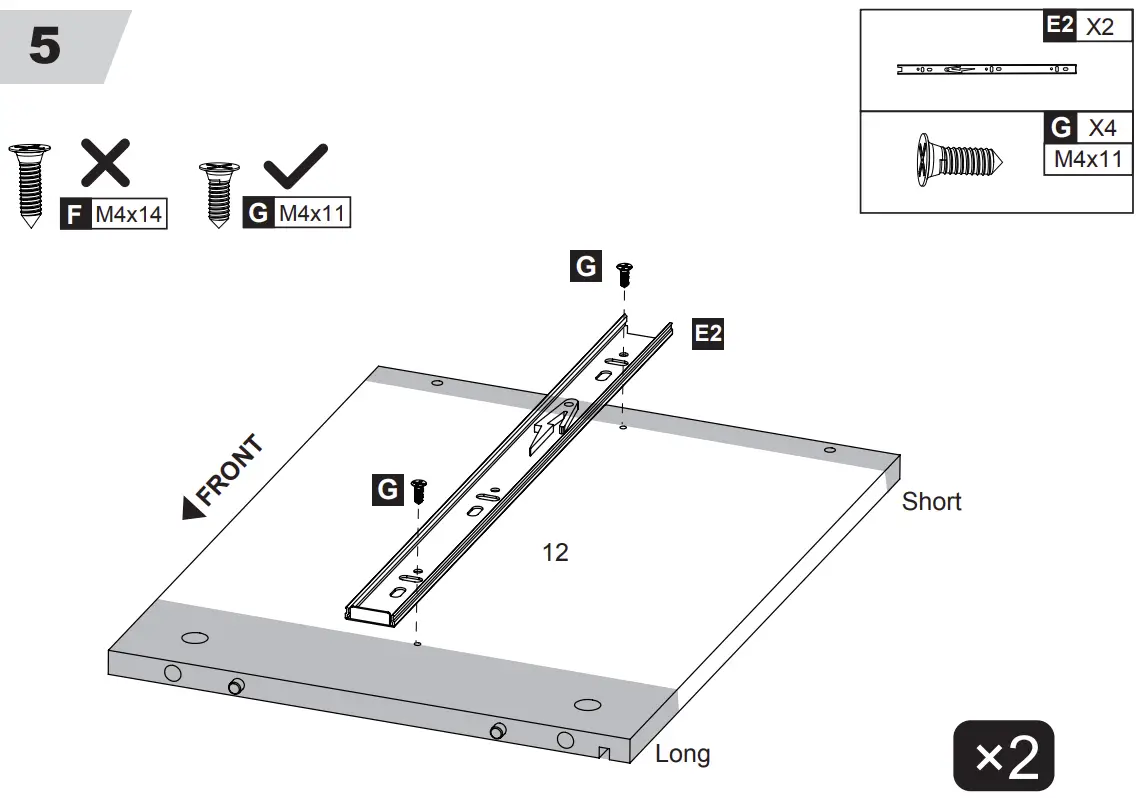
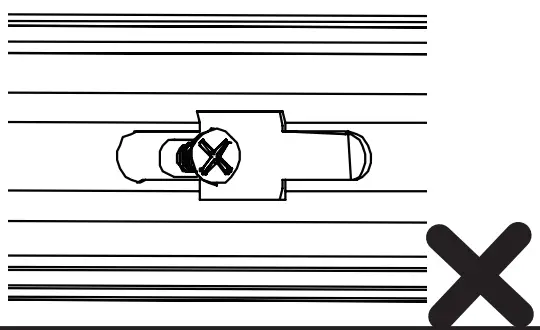
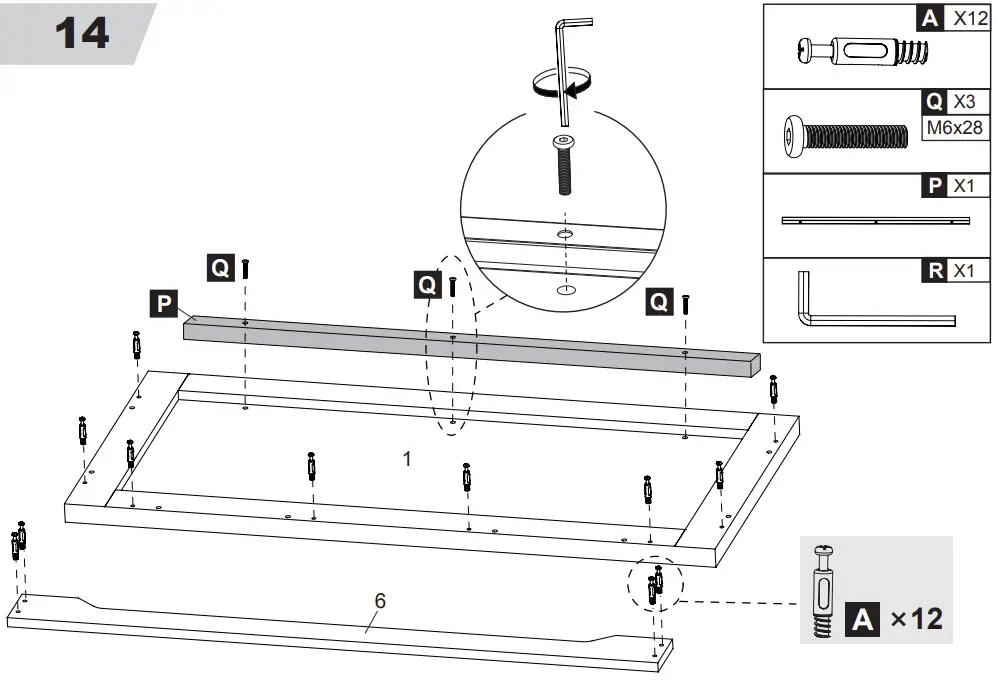
Please do not screw too deep or A too shallow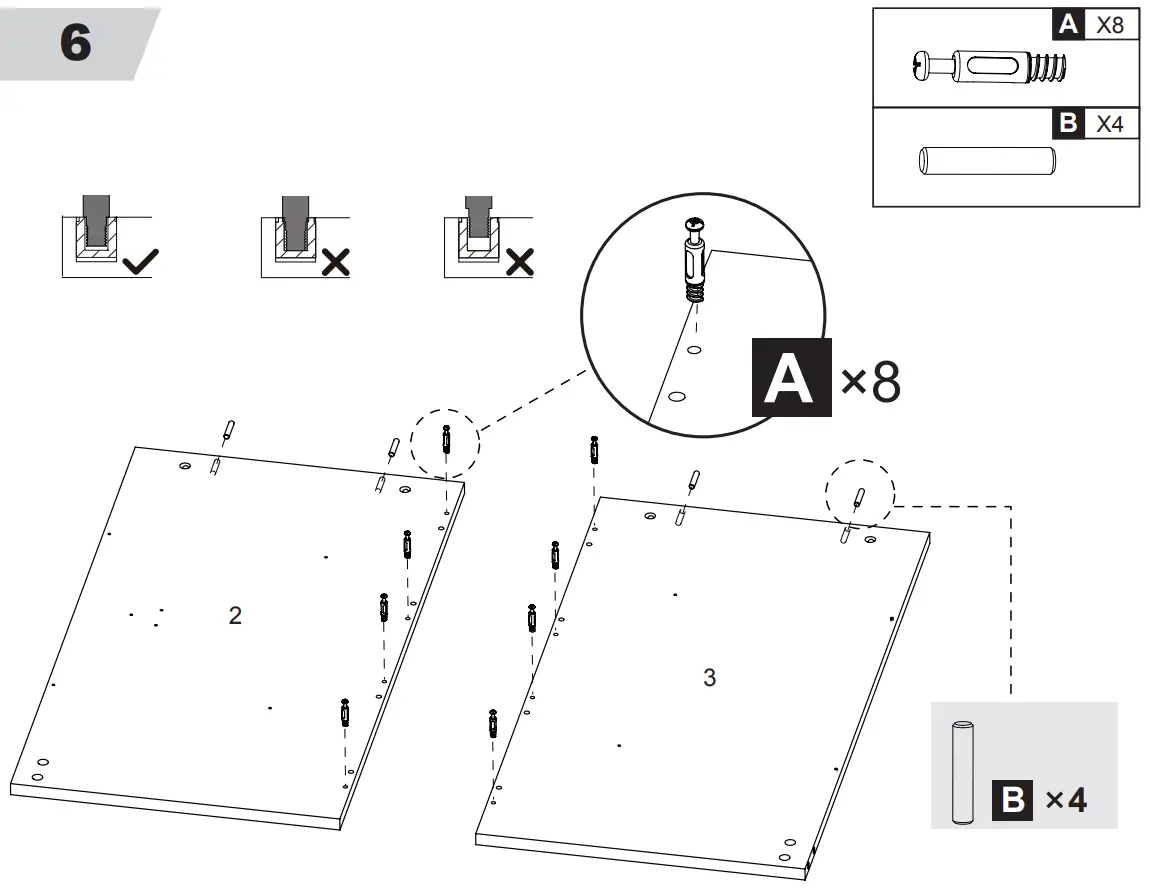
| When installing, please make sure the screws are flattened, not crooked; Otherwise the drawers will not be installed perfectly. | 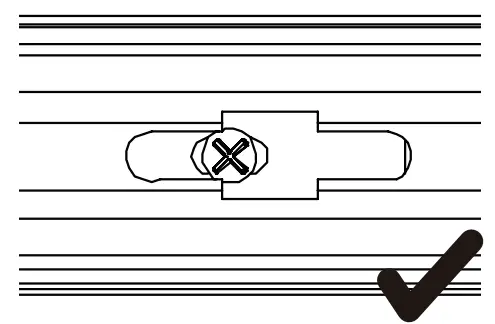 |
 |
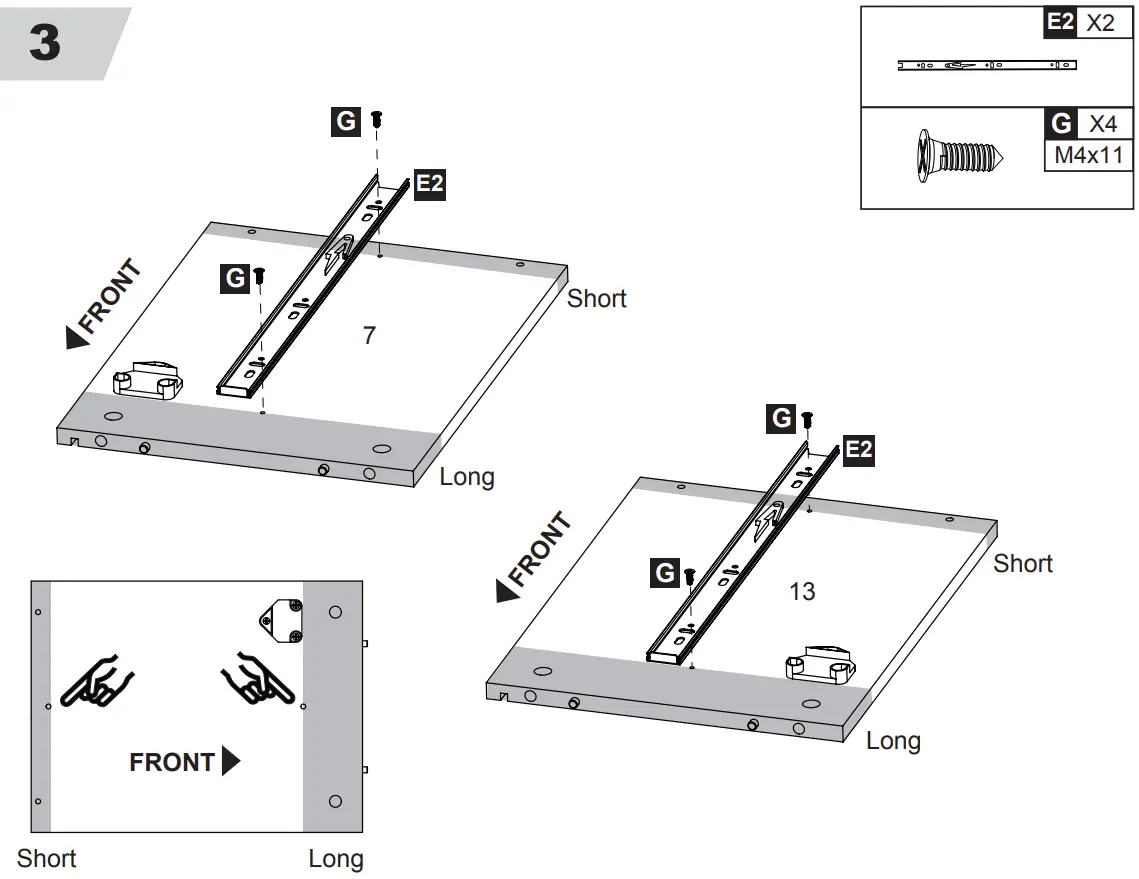
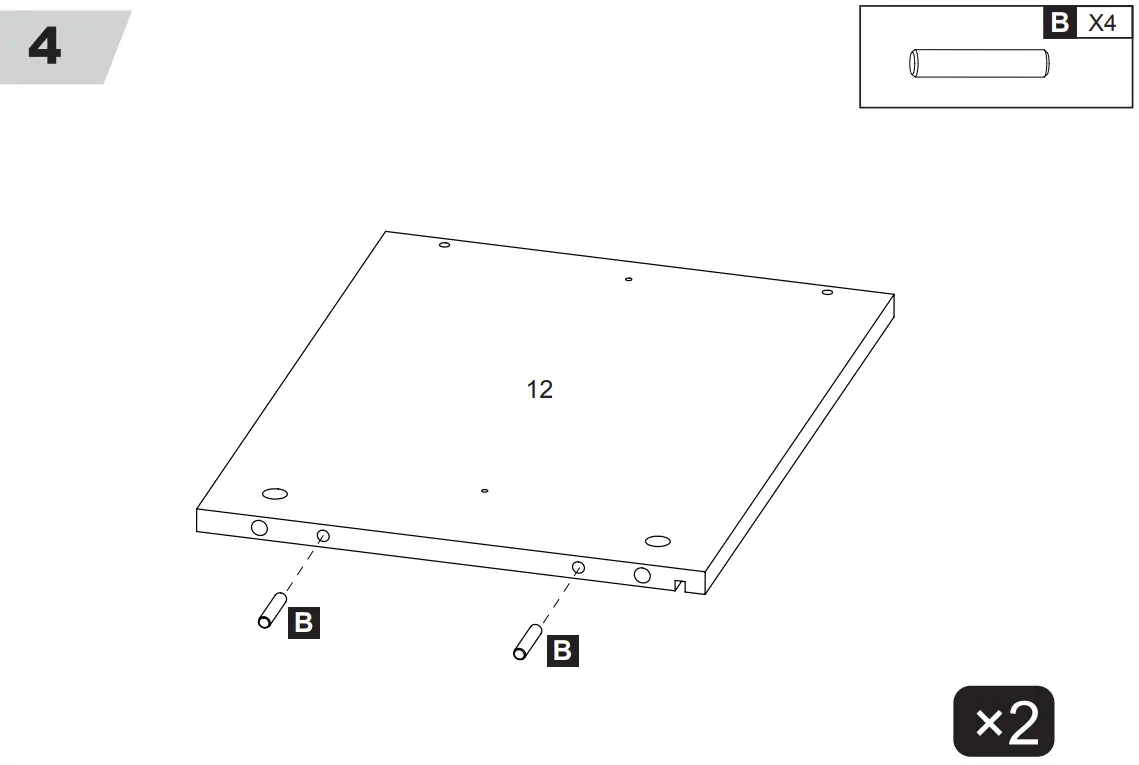
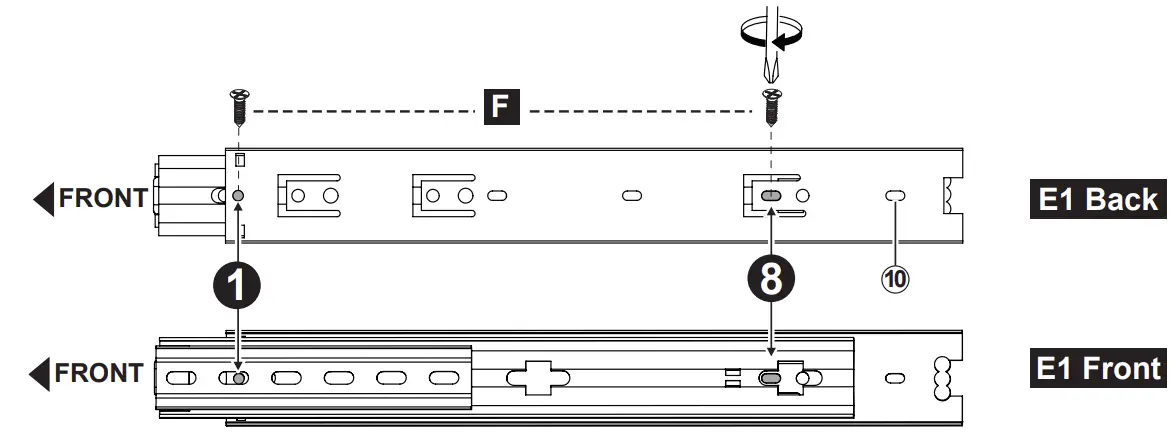
- Please locate the holes from the back of part
 .
. - Then please install part from the front of part .

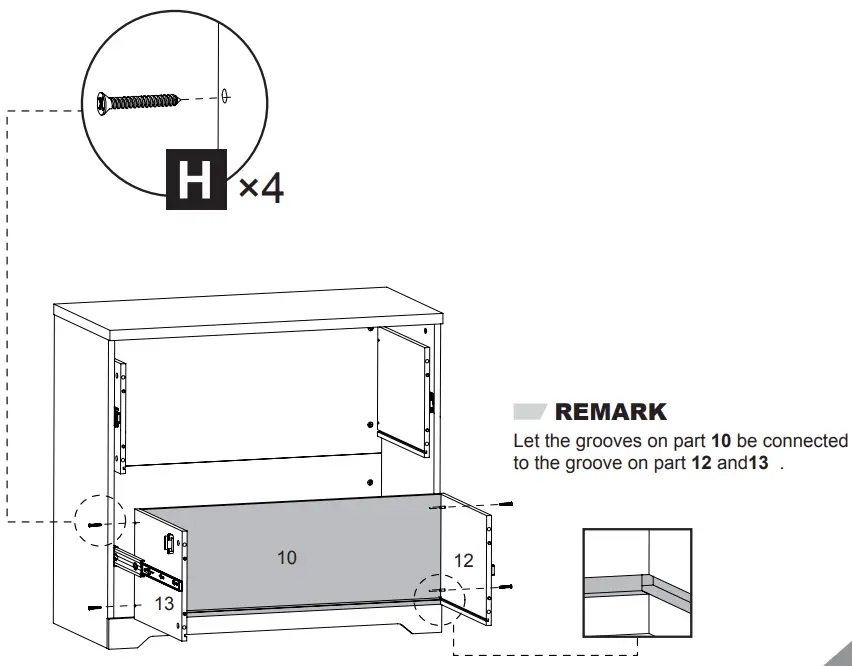
 REMARK
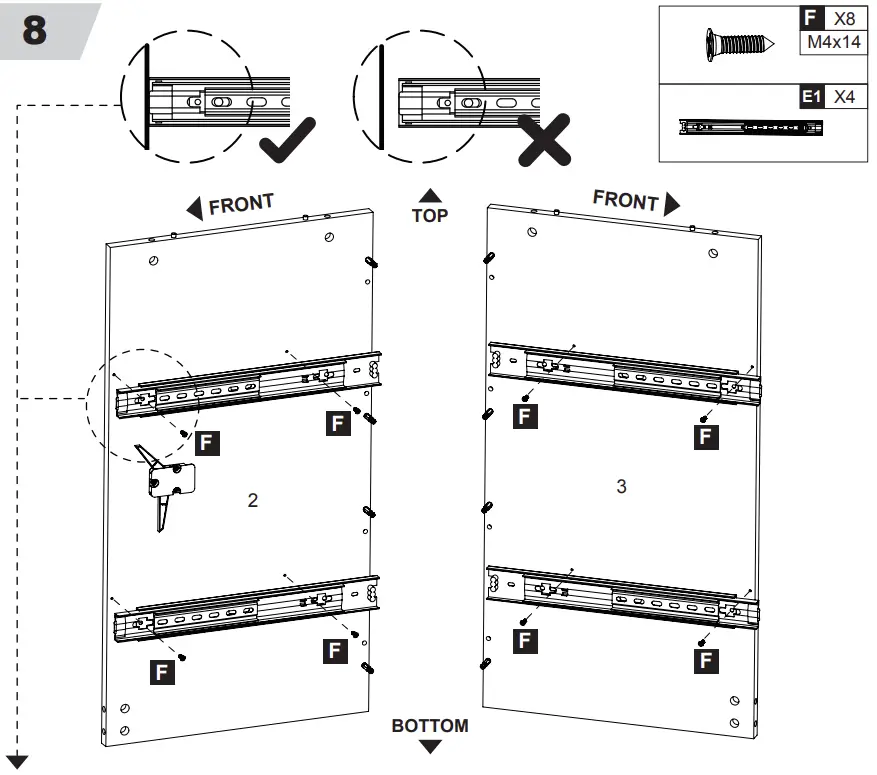
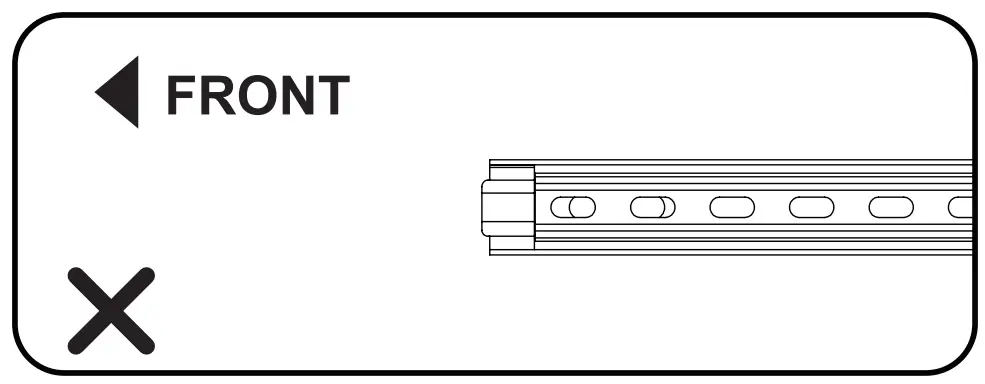
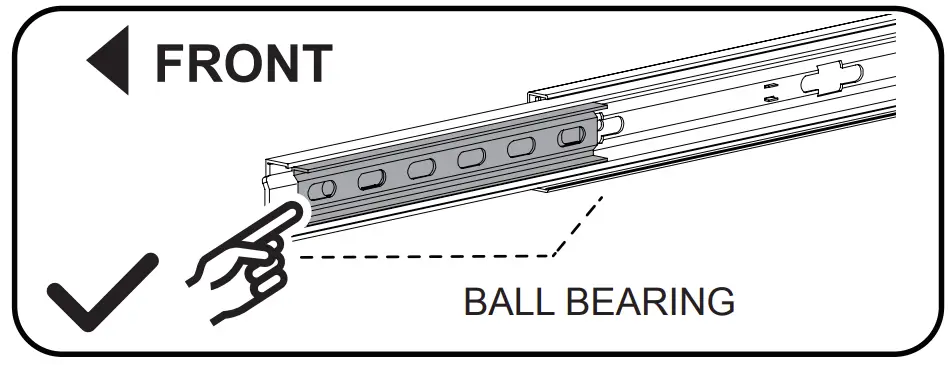
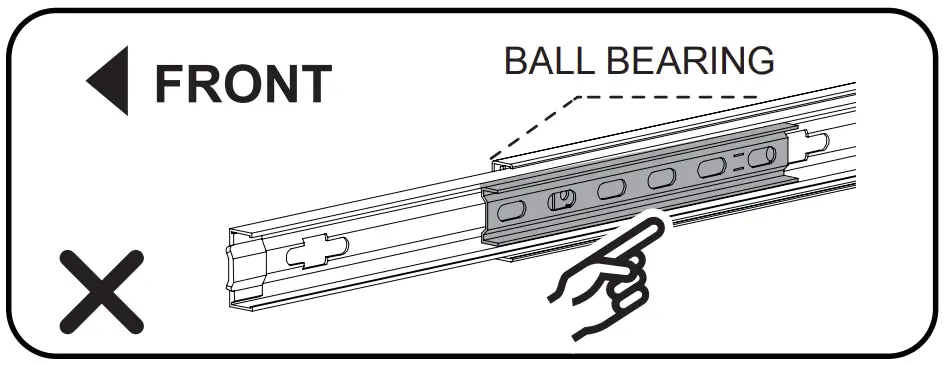
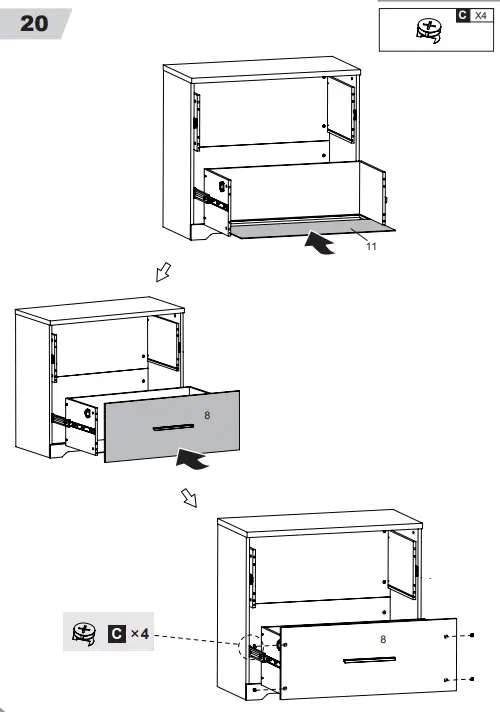
- Please full extend the slide runners.

- Simply push the ball bearing cart all the way to the end of the slide(in both sides).


REMARK
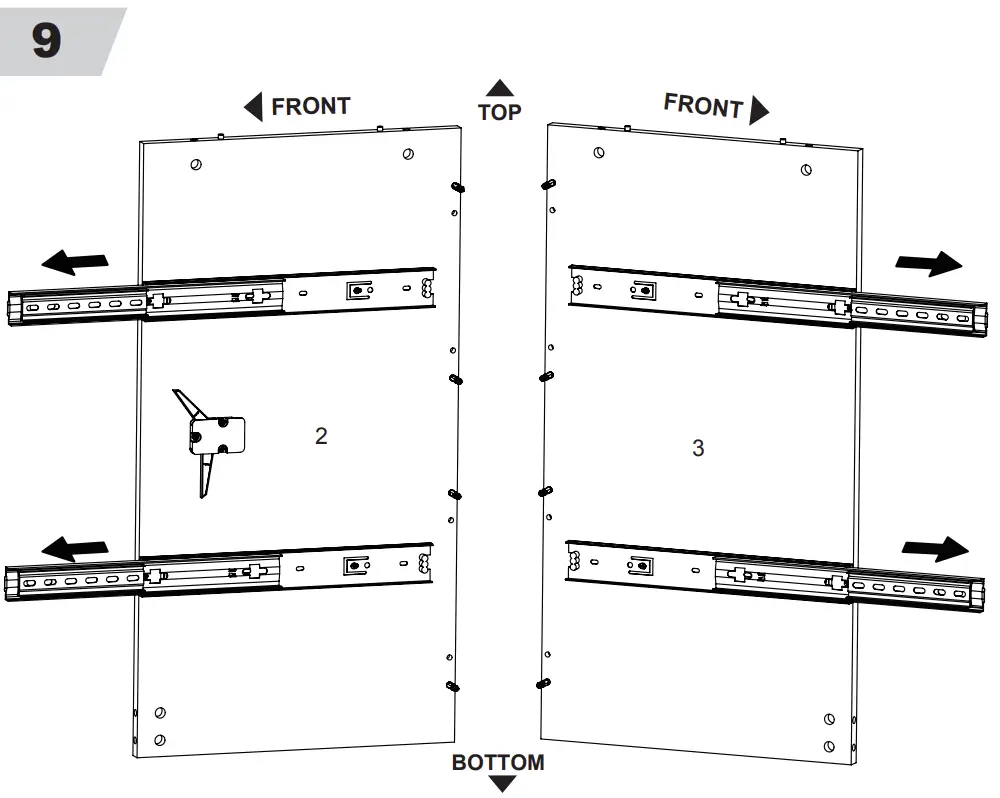
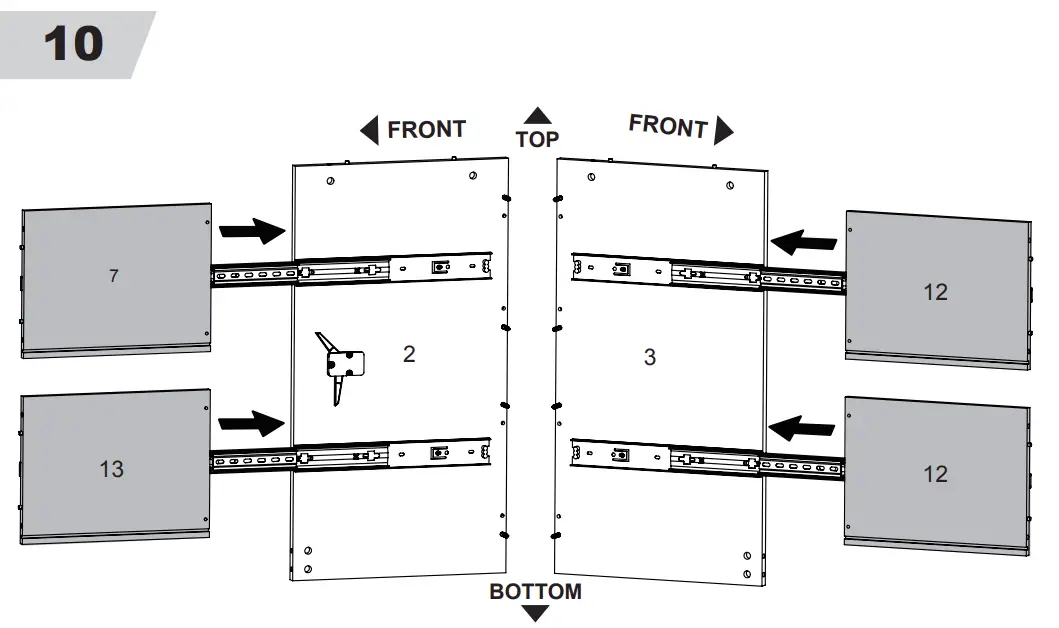
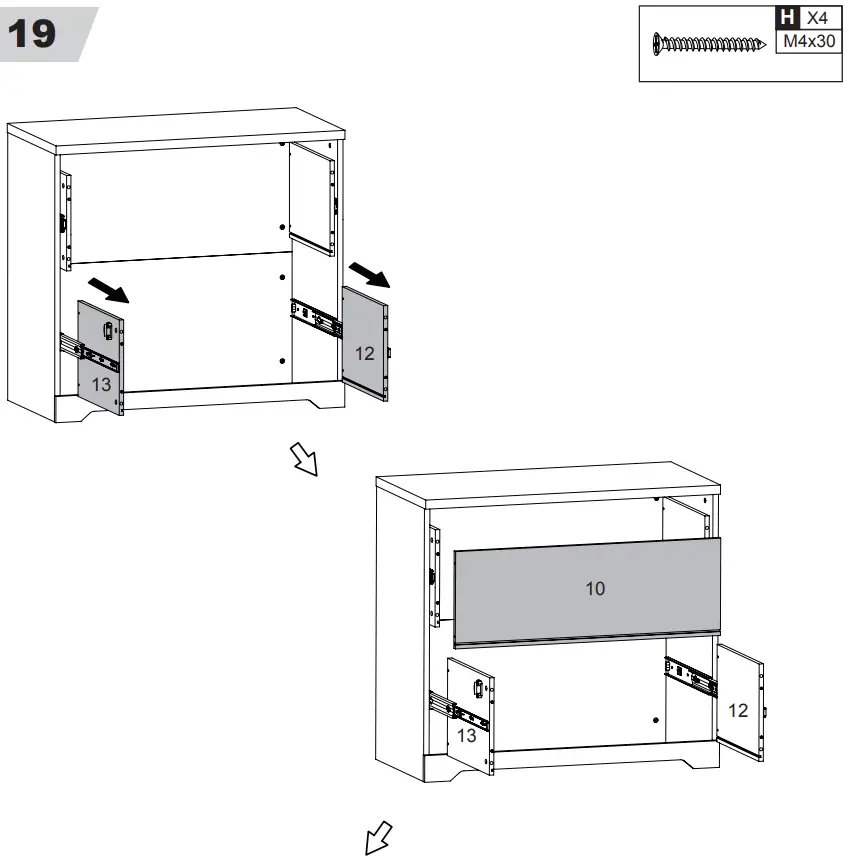
- Note the difference between the part 7 and the part 13.

- Align the slide runners on the drawer with the unit and push it carefully inside until it stops.
- If the drawer does not go in smoothly please take it out and repeat the step.


| ANTI-TIPPING DEVICE |
WALL ANCHORING GUIDE
The hardware you should use to secure your furniture to the wall depends on both the type of furniture you have and your wall material.
Attaching your furniture to cavity wall with anti-tipping device | ||
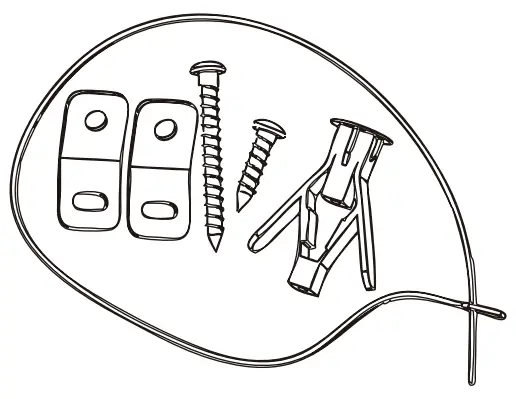 Anti-tipping device bag Anti-tipping device bag |
|
|
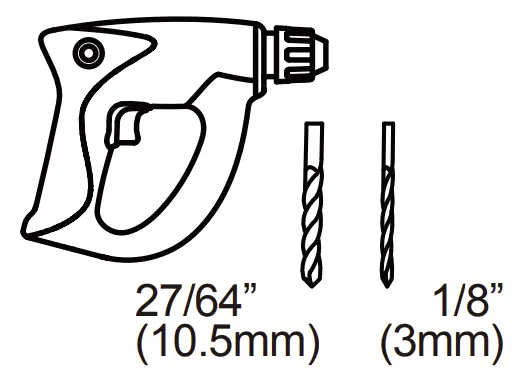 Electric drill (not provided)
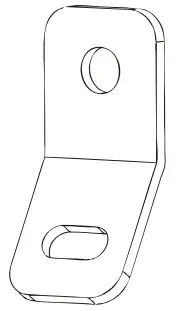 Fixing hole (round)
Type of Wall Material
Using the guide below, identify your wall material and choose the correspongding steps.
| Mark the attachment point(s) with a pencil at the appropriate height | ||
|
|
|
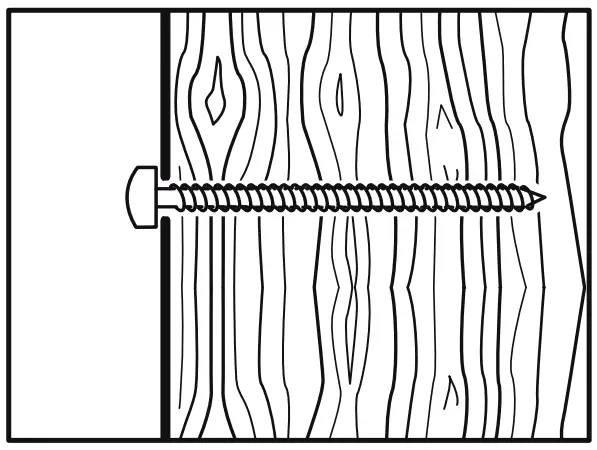 Drywall or plaster with available wood stud
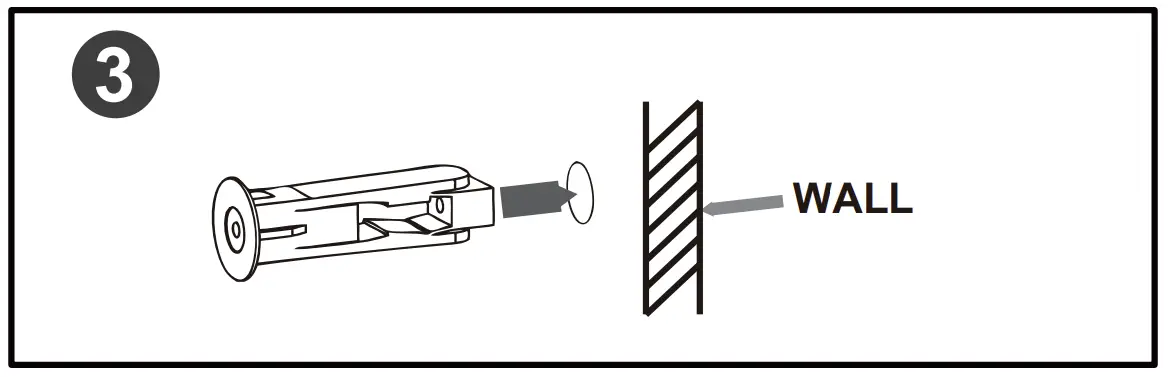
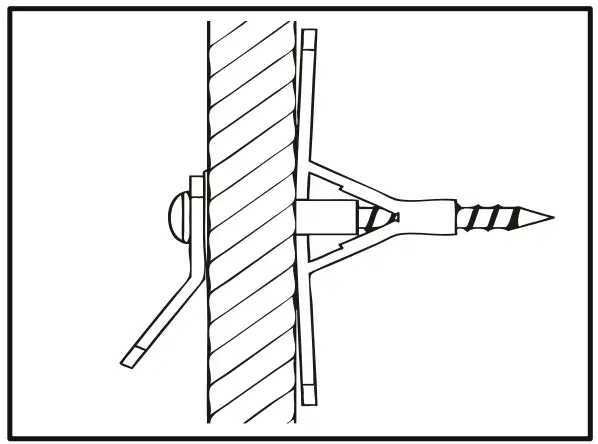 Drywall without available wood stud
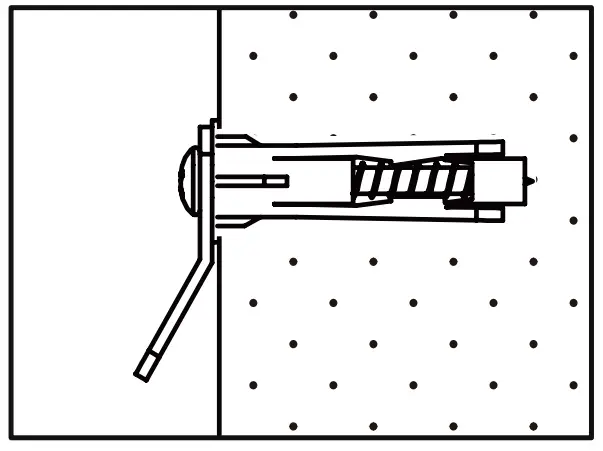 Masonry
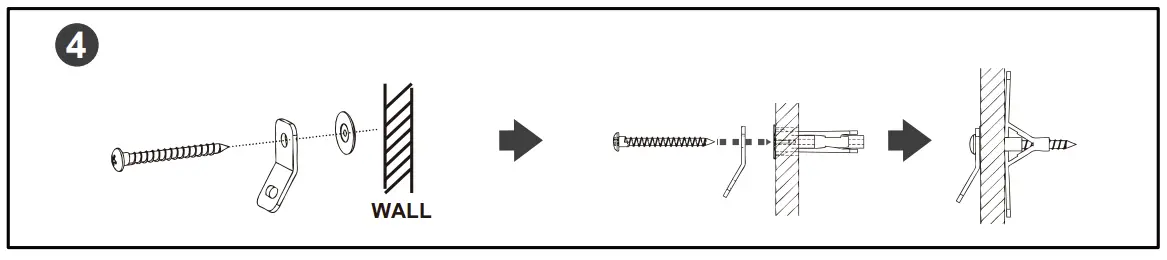
Follow the appropriate pictogram instructions on the following pages ,drive the screw(s) with washer(s) through the brackets and tighten screw(s) firmly into the plastic plug(s) in the wall. Do not over-tighten
If your wall material is not listed here, |
STEP
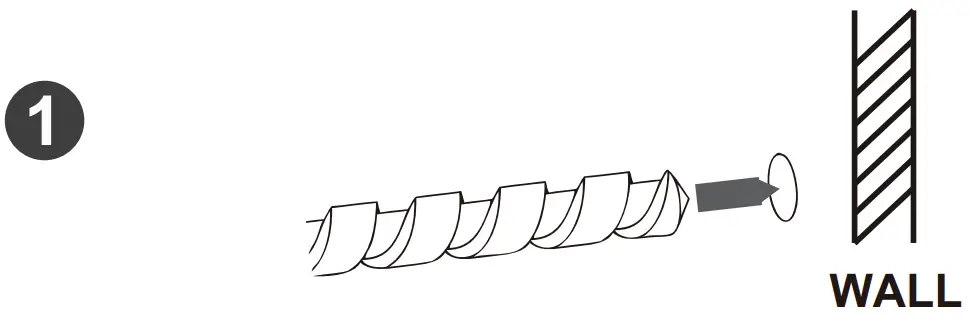
Drill a hole in the solid wall ( Wood wall or Concrete wall )
using a 0.41~0.43 inches ( 10.5~11mm ) drill bit.