

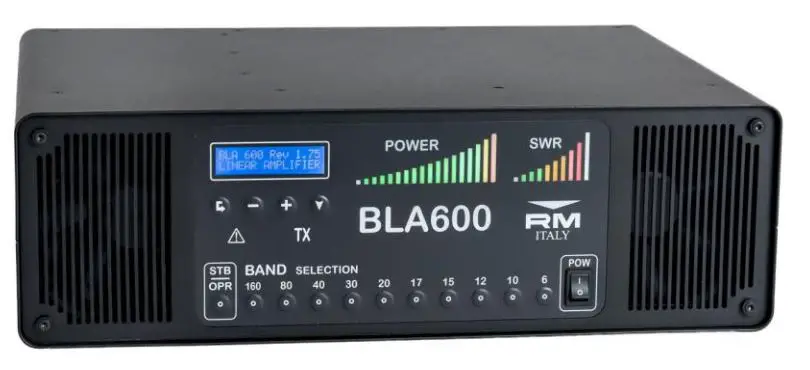
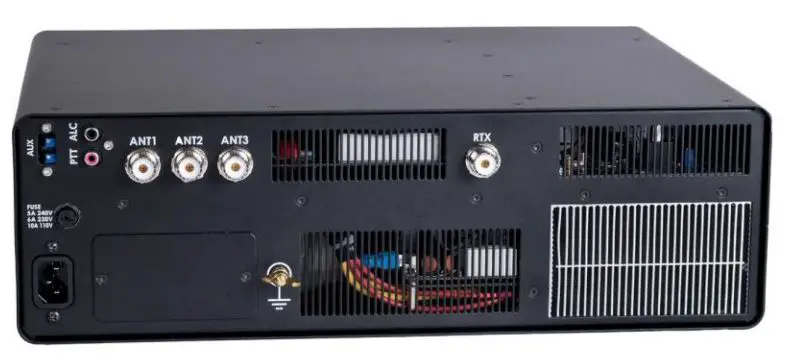
RM Italy BLA-600
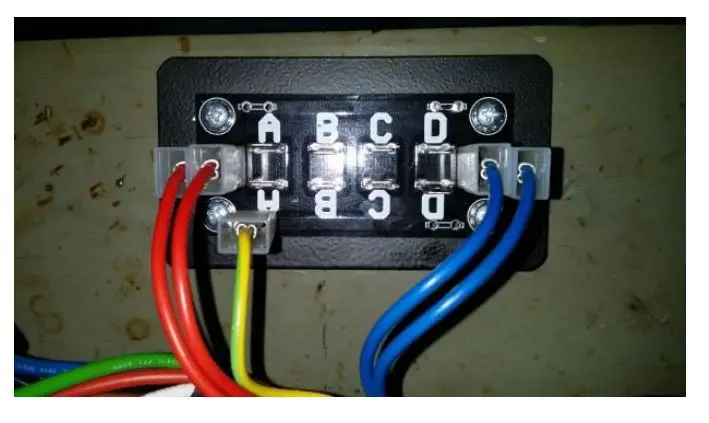
Disassembly Procedure
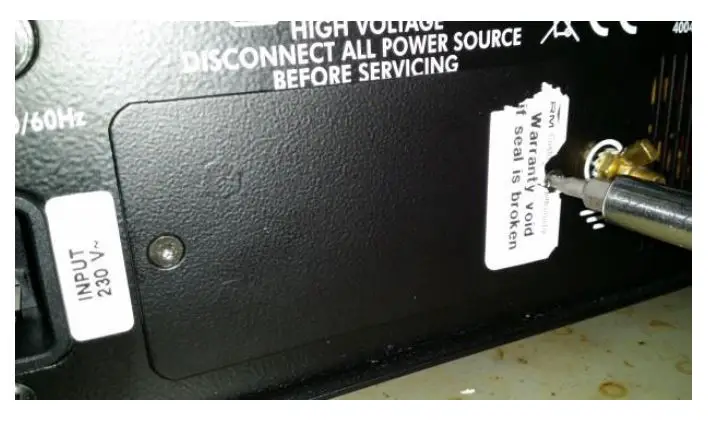
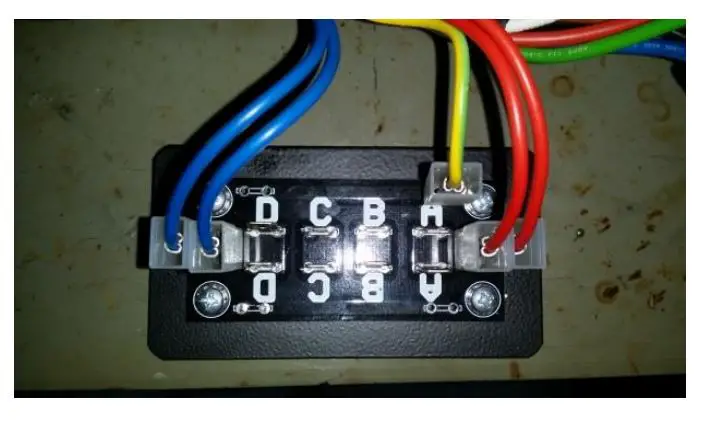
With a TORX (TX10) screwdriver unscrew the right had side screw underneath the warranty seal.
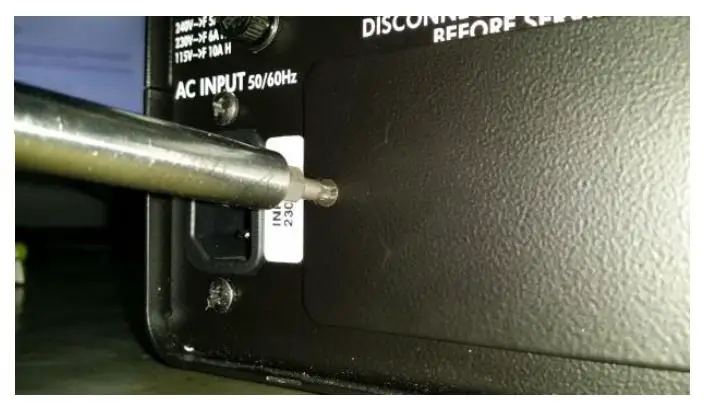
With a TORX (TX10) screwdriver, unscrew the left hand screw near the AC input connector.
Pull out the panel to extract the voltage change system with the corresponding cables.

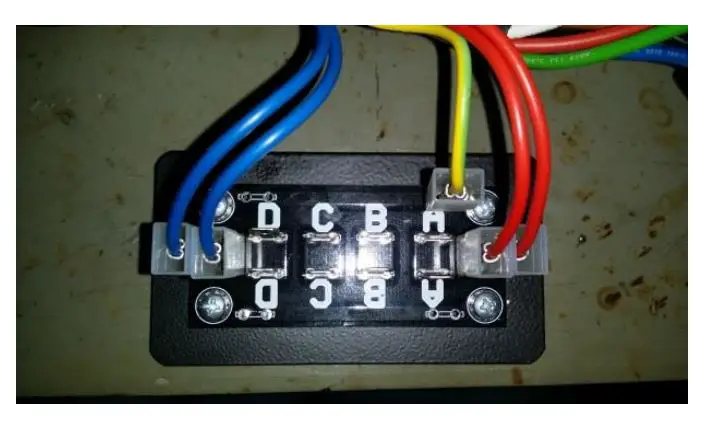
With pliers, remove all the numbered cables from the panel. Do not pull the cables to disconnect the connector.
At this point you should find the panel as in the picture. Now you are ready to set the AC input voltage of the amplifier.
RM Italy BLA-600
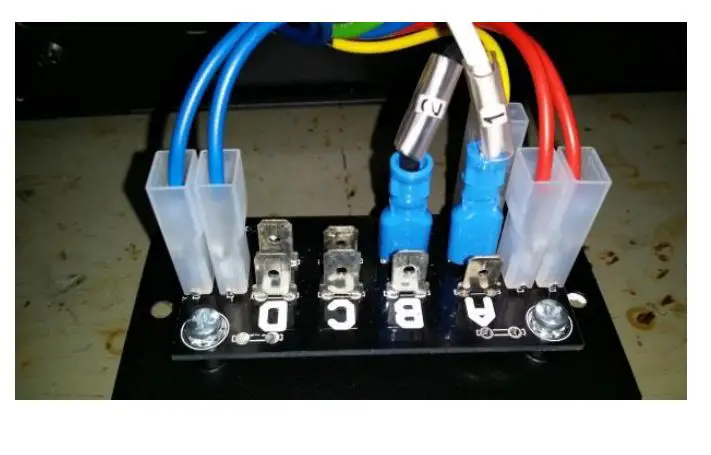
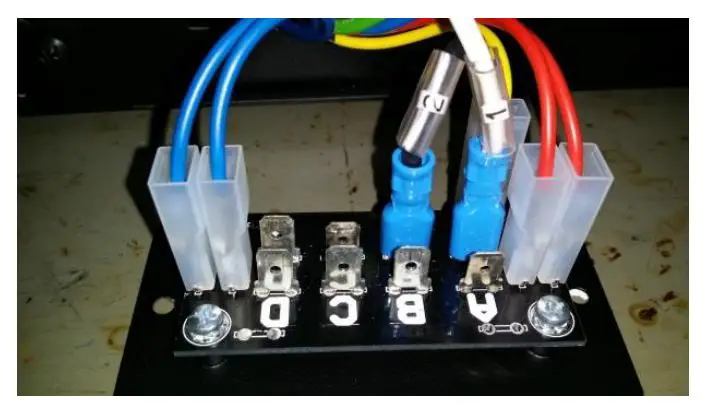
115VAC Setup
At this point you should find the panel as in the photo.
Now you are ready to set the AC input voltage of the amplifier.
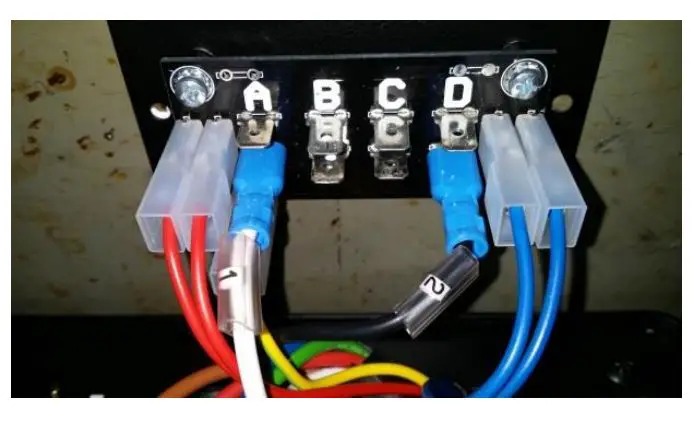
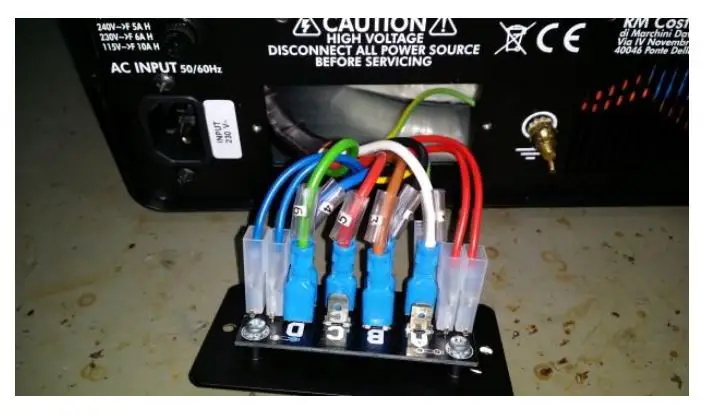
Connect cable “1” to one of the spade lugs labelled “A”
Connect cable “2” to one of the spade lugs labelled “D”
Connect cable “3” to one of the spade lugs labelled “A”
Connect cable “4” to one of the spade lugs labelled “D”
Connect cable “5” to one of the spade lugs labelled “B”
Connect cable “6” to one of the spade lugs labelled “C”
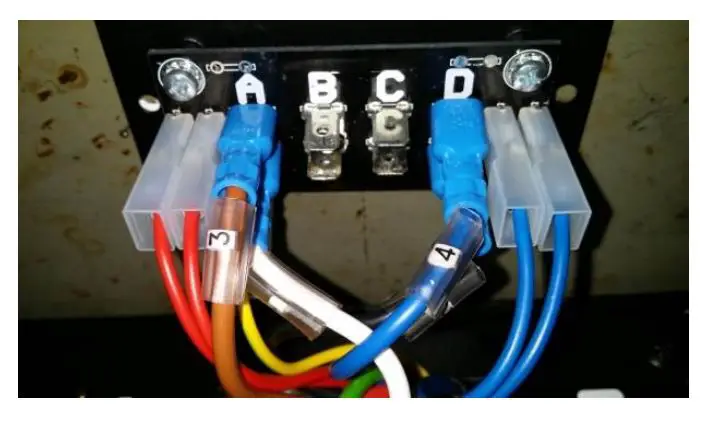
RM Italy BLA-600
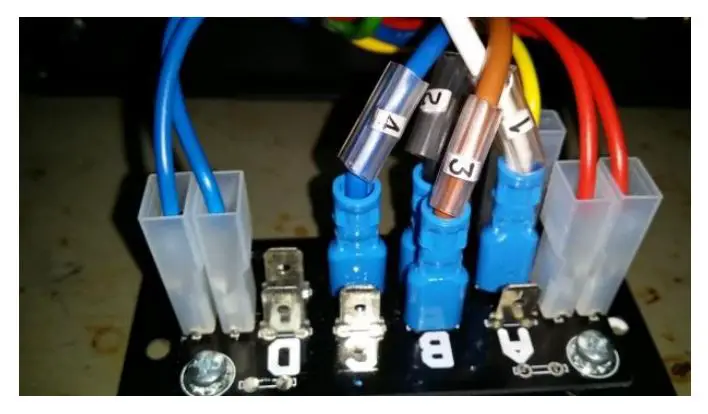
230VAC Setup
At this point you should find the panel as in the photo.
Now you are ready to set the AC input voltage of the amplifier.
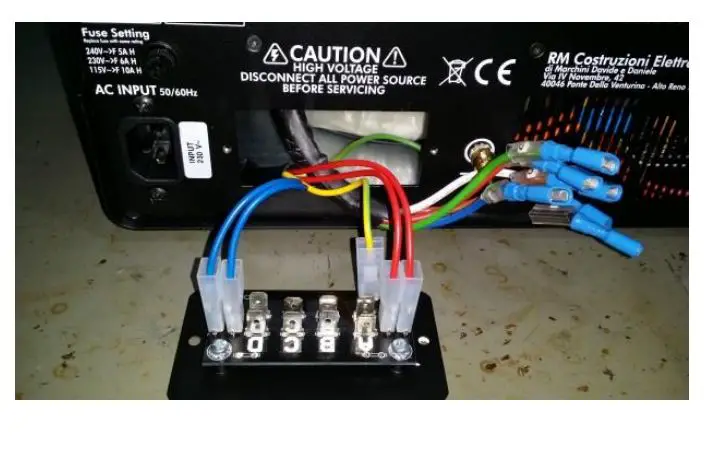
Connect cable “1” to one of the spade lugs labelled “A”
Connect cable “2” to one of the spade lugs labelled “B”
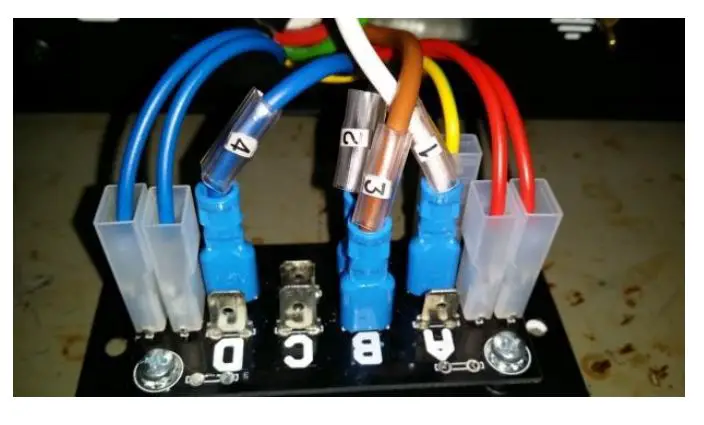
Connect cable “3” to one of the spade lugs labelled “B”
Connect cable “4” to one of the spade lugs labelled “D”
Connect cable “5” to one of the spade lugs labelled “C”
Connect cable “6” to one of the spade lugs labelled “D
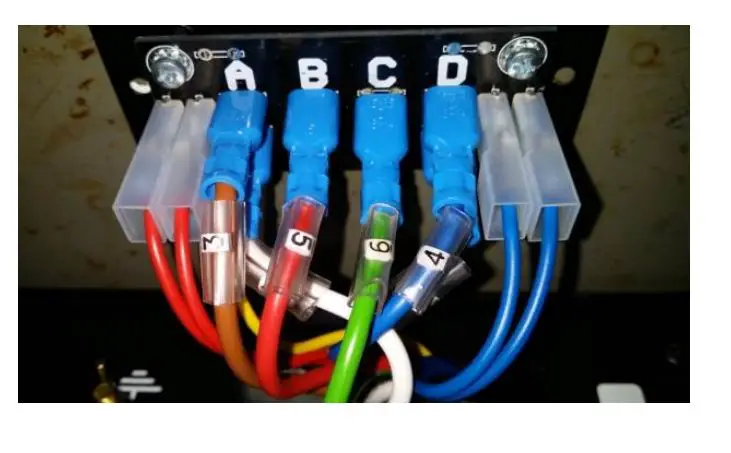
RM Italy BLA-600
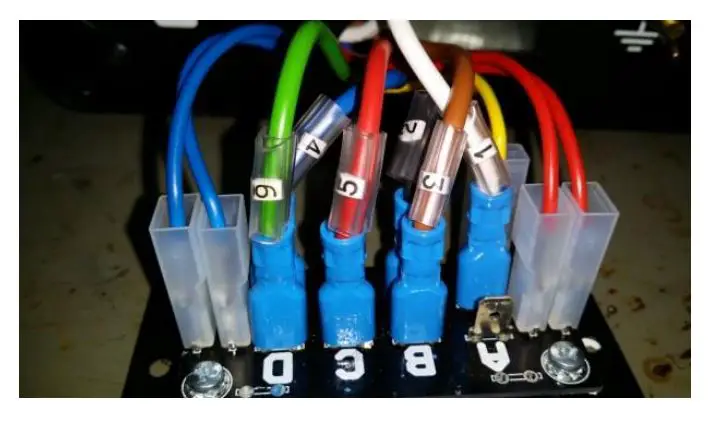
240VAC Setup
At this point you should find the panel as in the photo.
Now you are ready to set the AC input voltage of the amplifier.
Connect cable “1” to one of the spade lugs labelled “A”
Connect cable “2” to one of the spade lugs labelled “B”
Connect cable “3” to one of the spade lugs labelled “B”
Connect cable “4” to one of the spade lugs labelled “C”
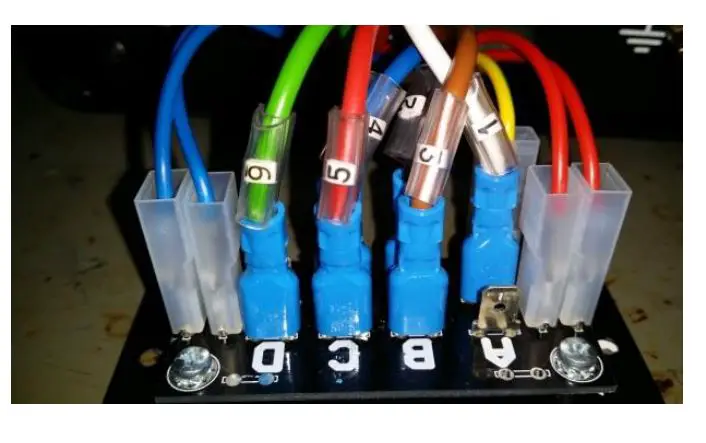
Connect cable “5” to one of the spade lugs labelled “C”
Connect cable “6” to one of the spade lugs labelled “D
RM Italy BLA-600
Supply Voltage and Fuse Information
Supply Voltage information:
Supply Voltage 50/60 Hz 1200VA max |
120 Vac +/- 5% |
230 Vac +6%, -10% |
240 Vac +10%, -6% |
When making a change to the input voltage, the input Fuse must also be changed:
AC Input Fuse 5 x 20 mm F LBC 250V (Fast Blow) |
115 Vac Supply 10A |
230 Vac Supply 6A |
240 Vac Supply 5A |
RM Italy BLA-600 Input Voltage Set Up and Voltage/Fuse Information
Courtesy of DX Engineering – 16 August 2018

DX Engineering – 1200 Southeast Ave. – Tallmadge, OH 44278 USA – Phone 800-777-0703


