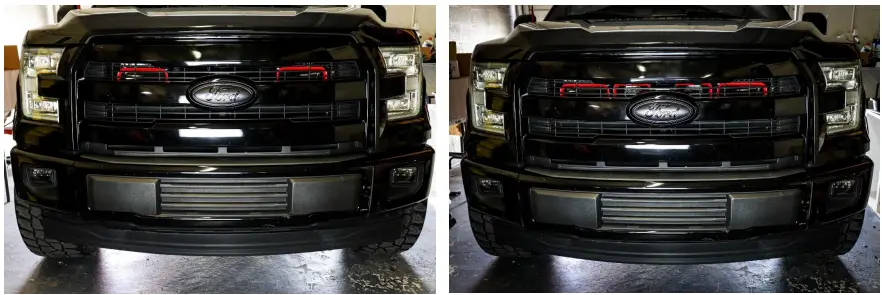
VELOSSA TECH VT-BM-0239 Big Mouth Intake Installation Guide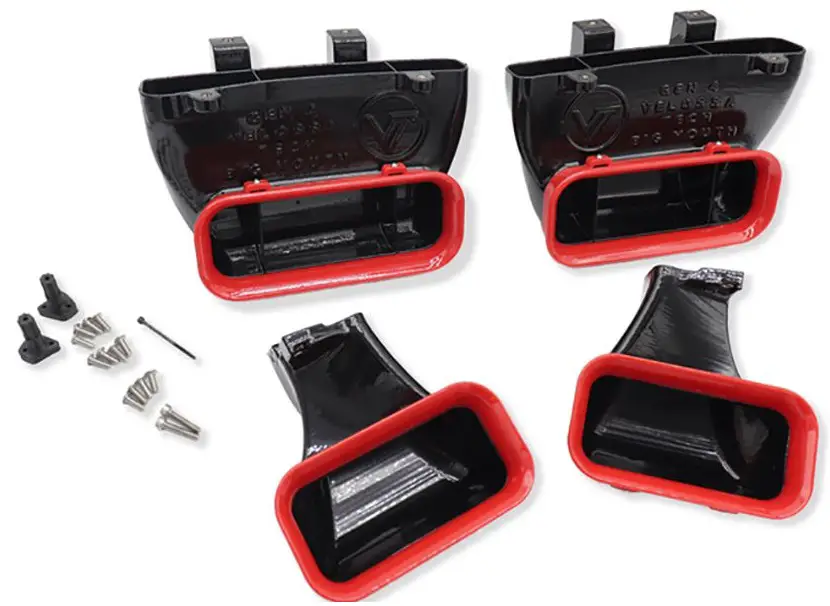
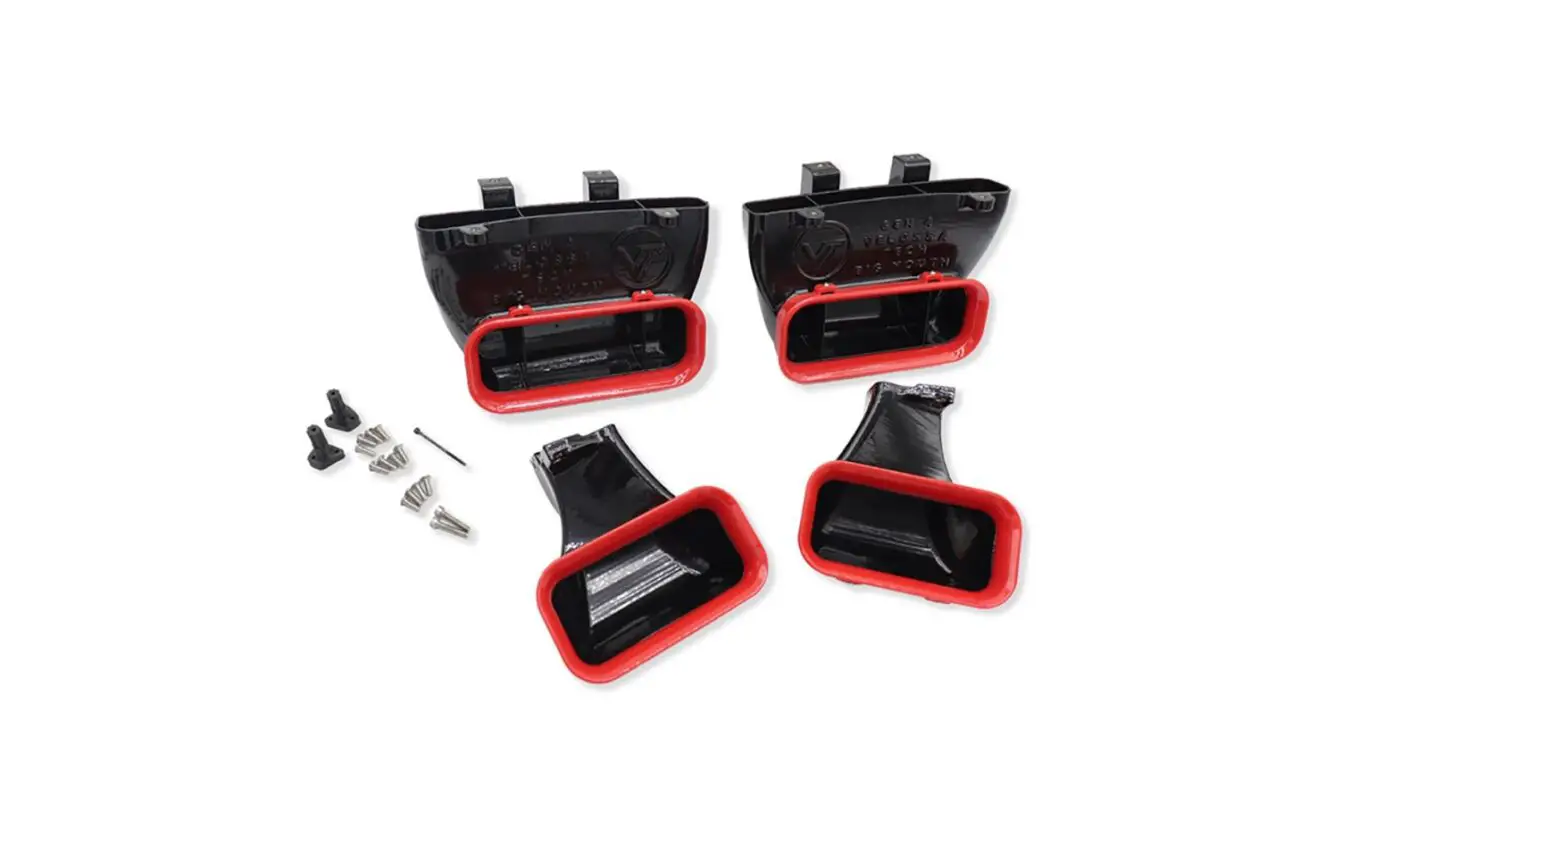
Kit Contents
Please review this document before attempting installation.
You will need basic hand tools and about 2 hours of installation time.
Please review the table below and make sure you have received the kit contents.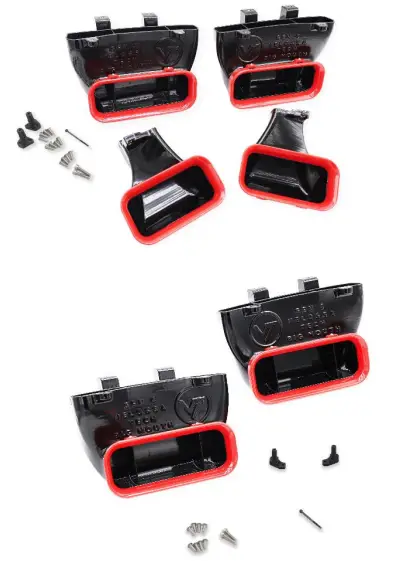
| Kit Contents (QUAD Kit) | Qty |
| rv• 5 x 14mm Button Head Screw | 12 |
| Drill Templates (A+B+C+D) | 4 |
| Ne5 x 25mm Cap Screw | 2 |
| 2 rye 3 x 60mm Cap Screw | 1 |
| AGS Simulator Spline Shaft | 1 |
| “D” 1 AGS Simulator Spline Shaft “P” 1 | 1 |
| Kit Contents (DualKit) | Qty |
| MX 5 x 14mm Button Head Screw | 8 |
| Drill Templates (A+B+C+D) | 2 |
| MX 5 x 25mm Cap Screw | 2 |
| MX3 x 60mm Cap Screw | 1 |
| AGS Simulator Spline Shaft | 1 |
| AGS Simulator Spline Shaft “P” | 1 |
Cowl Templates
After removal of the grille/cowl assembly, you will need to use the supplied templates to drill ¼” holes in the locations shown. (Dual kits only have two templates).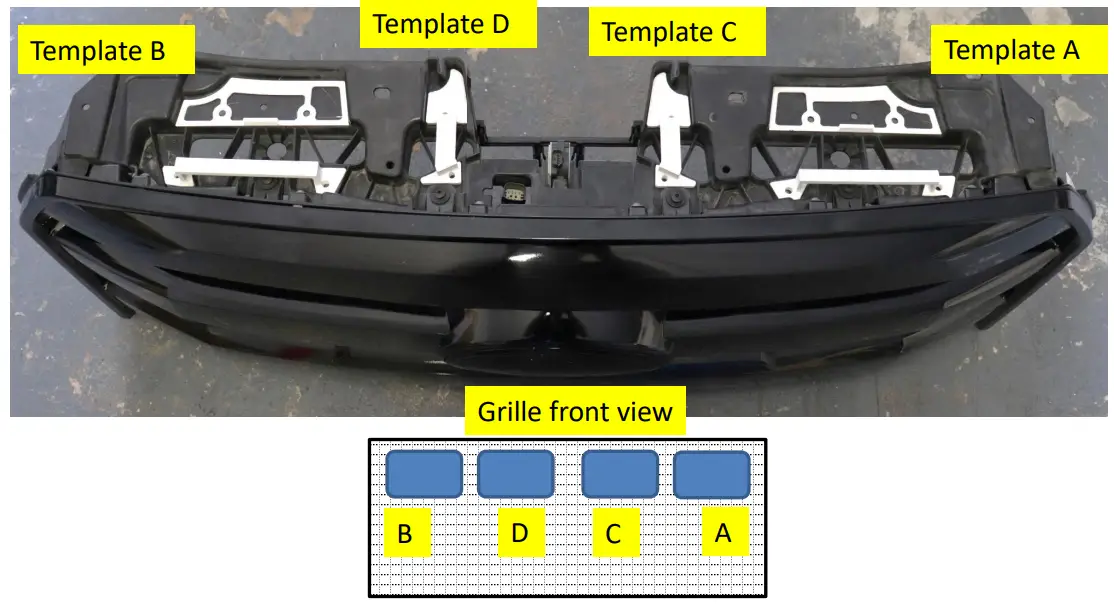
Stock Components Removal
Remove the top 4 AGS flaps to allow clearance for the BIG MOUTH intakes. You can flex these flaps at their center, and then bend them downward to unhook the engagement pegs. See below.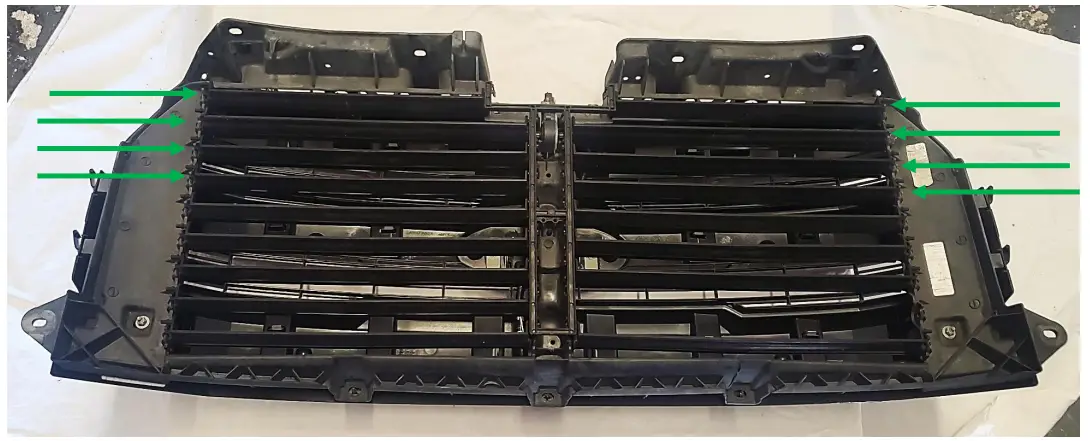
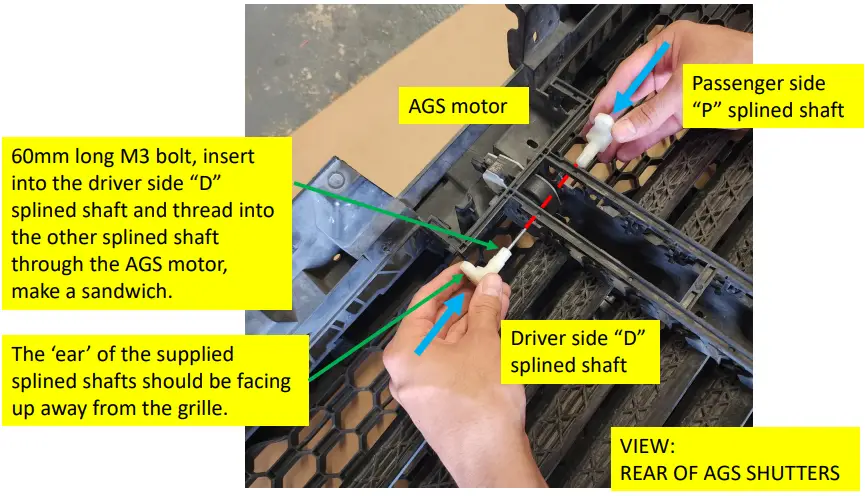
AGS Simulator
This assembly was engineered and tested to allow the AGS to continue to function, which will prevent a soft code from showing up on the dash for some 13th gen F150 models.
AGS Simulator
Use Allen key to fasten the sandwich together, tighten until snug, do not over-torque.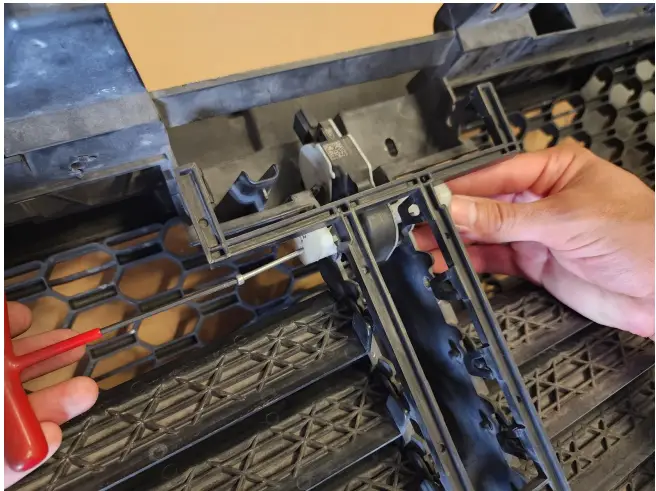
AGS Simulator
Finalize the assembly by screwing the 5mm bolt into the ears, ensure they bottom out and go through the AGS peg-holes as shown. (You can manually move the AGS to align the peg holes).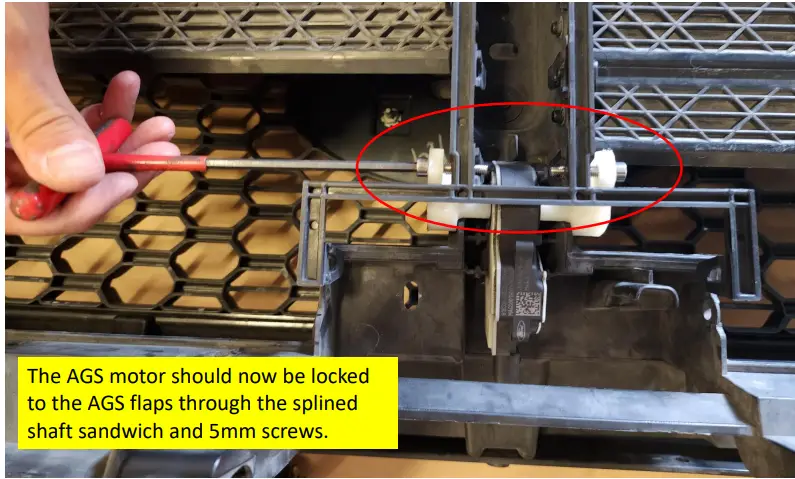
AGS Simulator Testing’
Once the AGS Simulator install is complete, temporarily reinstall the bumper (no need to fully fasten yet), reconnect the AGS motor, turn your car on and allow the AGS system to perform its initiation cycle. If your flaps successfully open and close without interference, the install is successful and the AGS is fully functiona
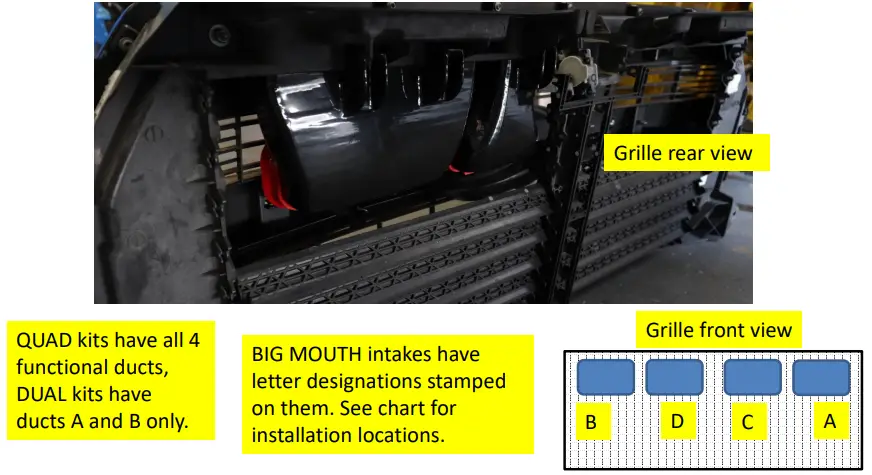
Assemble BIG MOUTH Ram Air
From underneath the cowl openings, align the BIG MOUTH ram air intakes with the holes drilled, and fasten with supplied button head screws.
Finalize
You can make an adjustment to the BIG MOUTHs to ensure they are level. Place bumper on the vehicle however do not fasten it yet, inspect visually for alignment and level of your BIG MOUTH intakes. If you need more adjustment, go back and drill bigger holes in the shroud to allow play room, then tighten as needed. You may add shims between the cowl shroud and the BIG MOUTH fastening points to help with leveling for your particular vehicle.