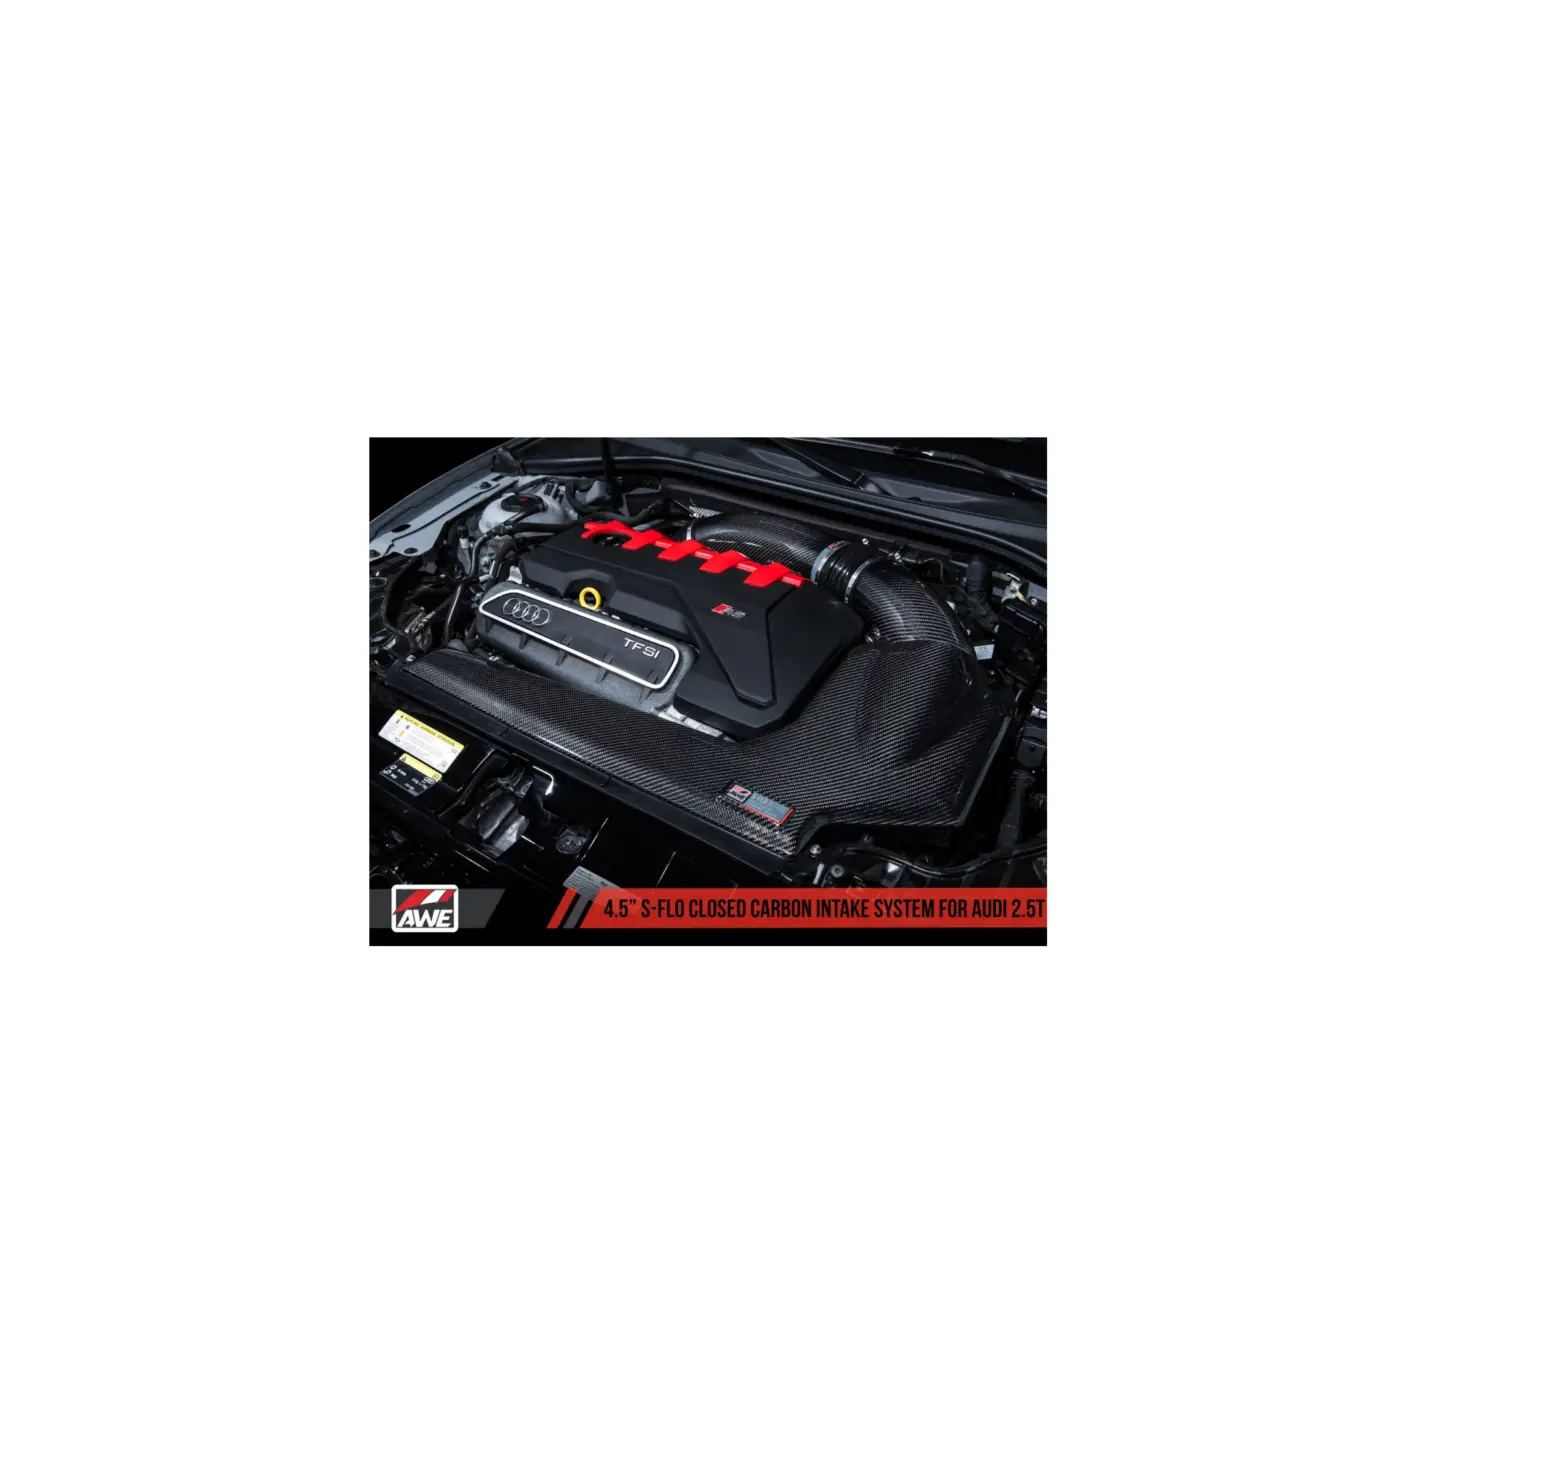
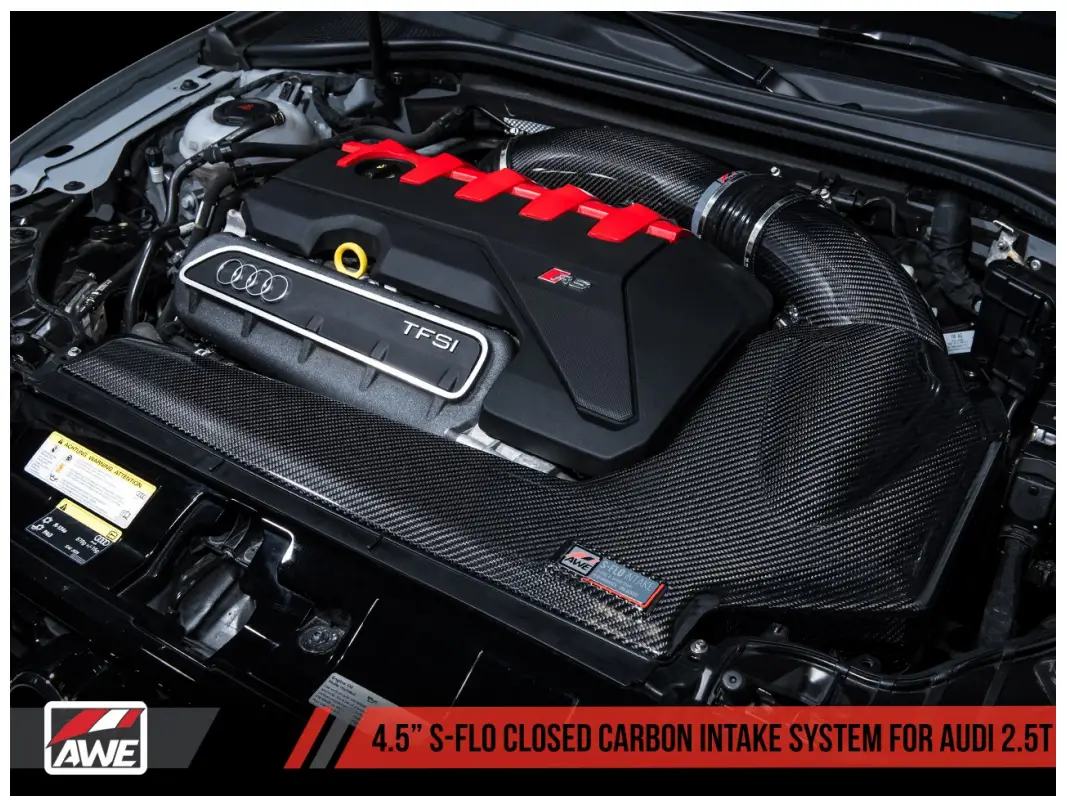
AWE 2660-15050 4.5 S-FLO Closed Carbon Intake System
For up-to-date fitment information, please visit the product page on AWE-Tuning.com.
2660-15050 AWE 4.5″ S-FLO Closed Carbon Intake System for Audi RS 3 / TT RS
Welcome to the AWE family, and congratulations on your purchase of the AWE S-Flo Carbon Intake for the Audi RS3 and TTRS. Exquisite build quality and craftsmanship, coupled with industry leading performance, distinguish this intake system from all others.
*For up to the minute fitment information, be sure to visit the AWE website. As always, AWE Performance Specialists are standing by for any questions, right here.
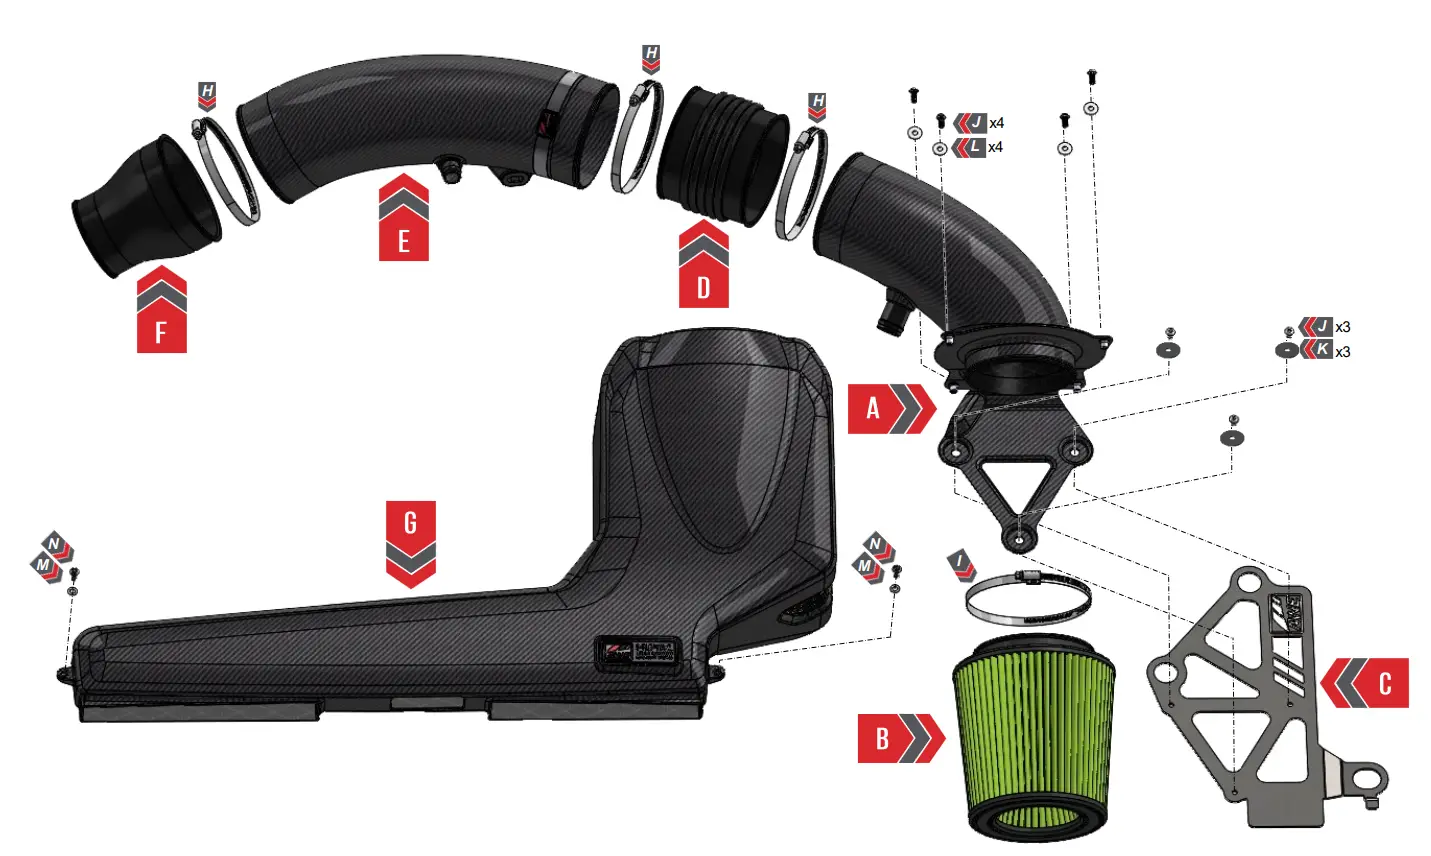
PARTS LIST
 INSPECT ALL PARTS PRIOR TO DISASSEMBLY OF VEHICLE; IF DAMAGED OR MISSING, PLEASE CONTACT THE PLACE OF PURCHASE IMMEDIATELY.
| AWE 4.5″ S-FLO Closed Carbon Intake System | |||
| Arrow | QTY | Description | Part Number |
| A | 1 | 2.5T filter tube | 500031 |
| B | 1 | 4.5in cone filter | 400002 |
| C | 1 | Filter mounting plate | 120028 |
| D | 1 | Flex coupler 4.5in | 300008 |
| E | 1 | 2.5T turbo inlet tube | 500030 |
| F | 1 | Turbo coupler | 500007 |
| G | 1 | 2.5T air box housing | 500032 |
| H | 3 | 100-120 worm drive clamp | 5574K25 |
| I | 1 | 110-130 worm drive clamp | 5574K26 |
| J | 7 | Carbon tube bolts | 94500A231 |
| K | 3 | Over sized washer | 91116A150 |
| L | 4 | #10 washer | 96659A104 |
| M | 2 | M5 flat washer | 93475A240 |
| N | 2 | M4x12x0.7 bolt | 91292A117 |
| 1 | Cable tie | 7130K59 | |
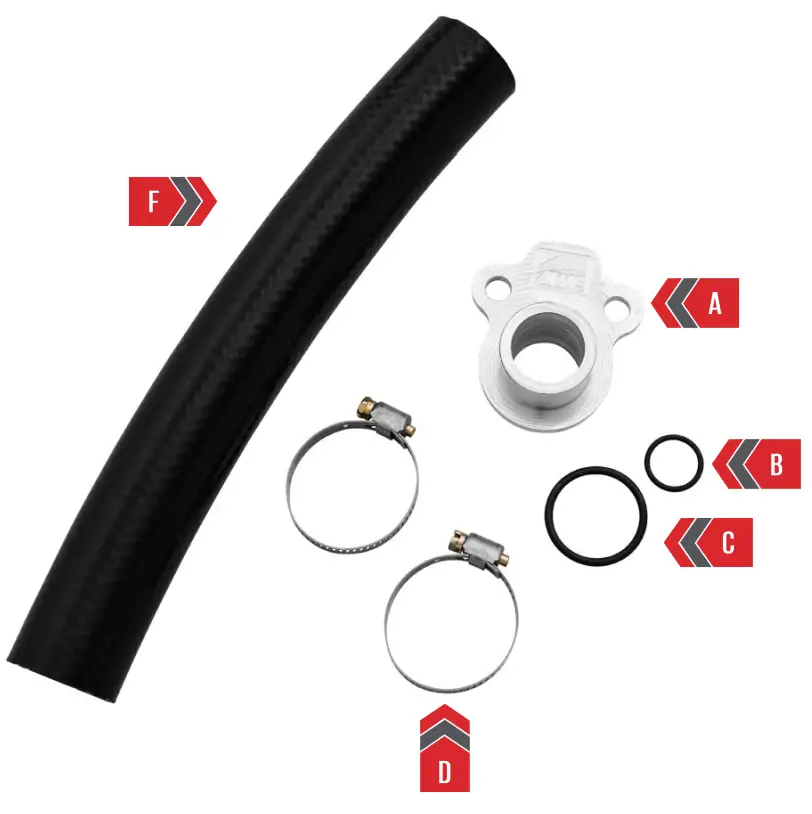
| AWE DV Adapter Kit for 2019+ Models | |||
| Letter | QTY | Description | Part Number |
| A | 1 | 2019+ 2.5T DV adaptor | 150006 |
| B | 1 | Oil-resistant soft buna-n O-rings, 1/16 fractional width | 2418T121 |
| C | 1 | Oil-resistant soft buna-n O-rings, 3/32 fractional width | 2418T145 |
| D | 2 | Worm-drive clamps, 5/16″ band width, 24-38mm clamp ID | 5388K24 |
| F | 1 | 1″ ID black high temp reinforced silicone heater hose – 8.75” | HTHH-100-BLK |
 NOTE: Always refer to the manufacturer’s service manual for precise torque specifications on all OEM fasteners.
 CAUTION: The engine may be VERY HOT — allow adequate time for the system to cool down before disassembly. Severe burns and injury will occur if skin comes into contact with a hot engine.
INSTALLATION INSTRUCTION
STEP 1
Begin by removing the engine cover by carefully pulling it upward, as seen in Figure 1-1 and 1-2.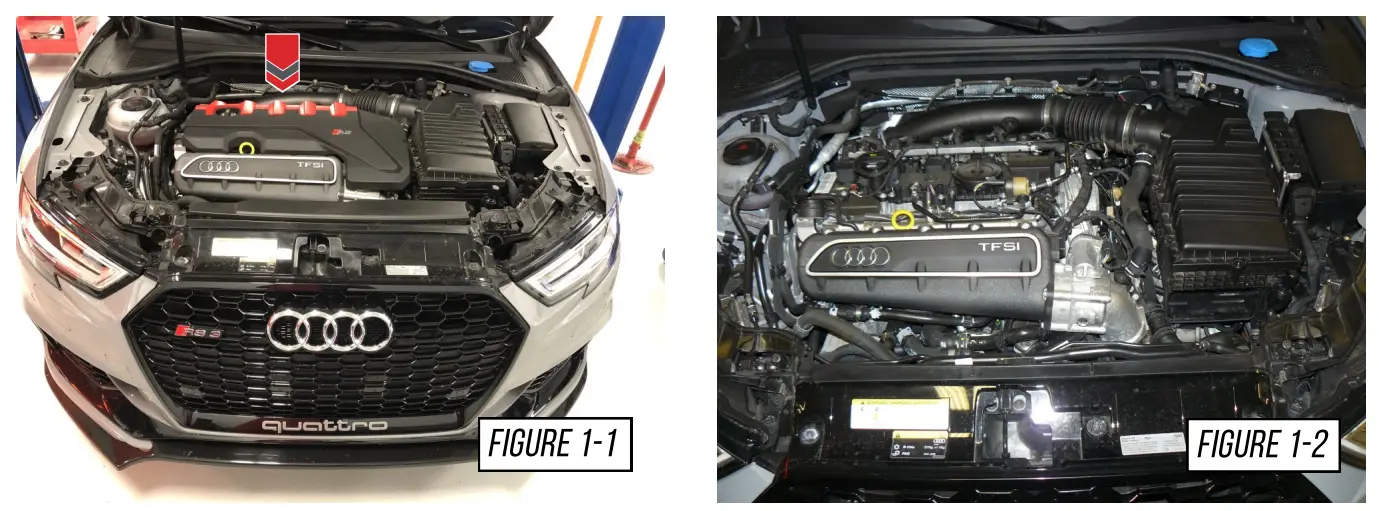
STEP 2
Remove the OEM inlet duct, by removing the 2 screws pointed out in Figure 2-1, then carefully push it towards the engine and remove it from the vehicle, shown in Figure 2-2.
Note: These screws will not be reused with the AWE carbon inlet duct.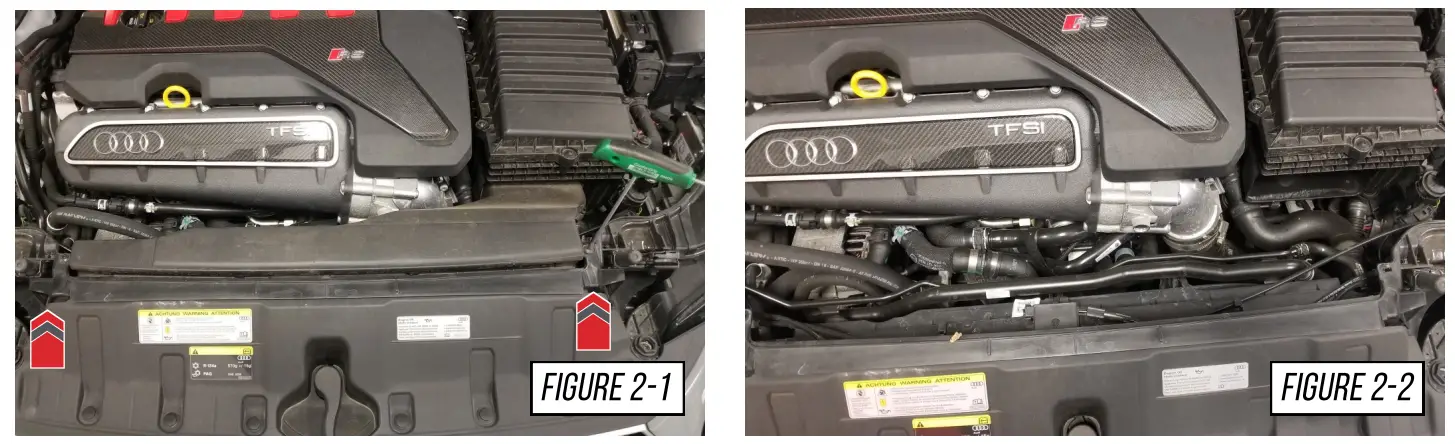
STEP 3
Loosen the 2 hose clamps holding the OEM intake hose in place, shown in Figure 3-1, then carefully remove the intake hose from the intake, shown in Figure 3-2.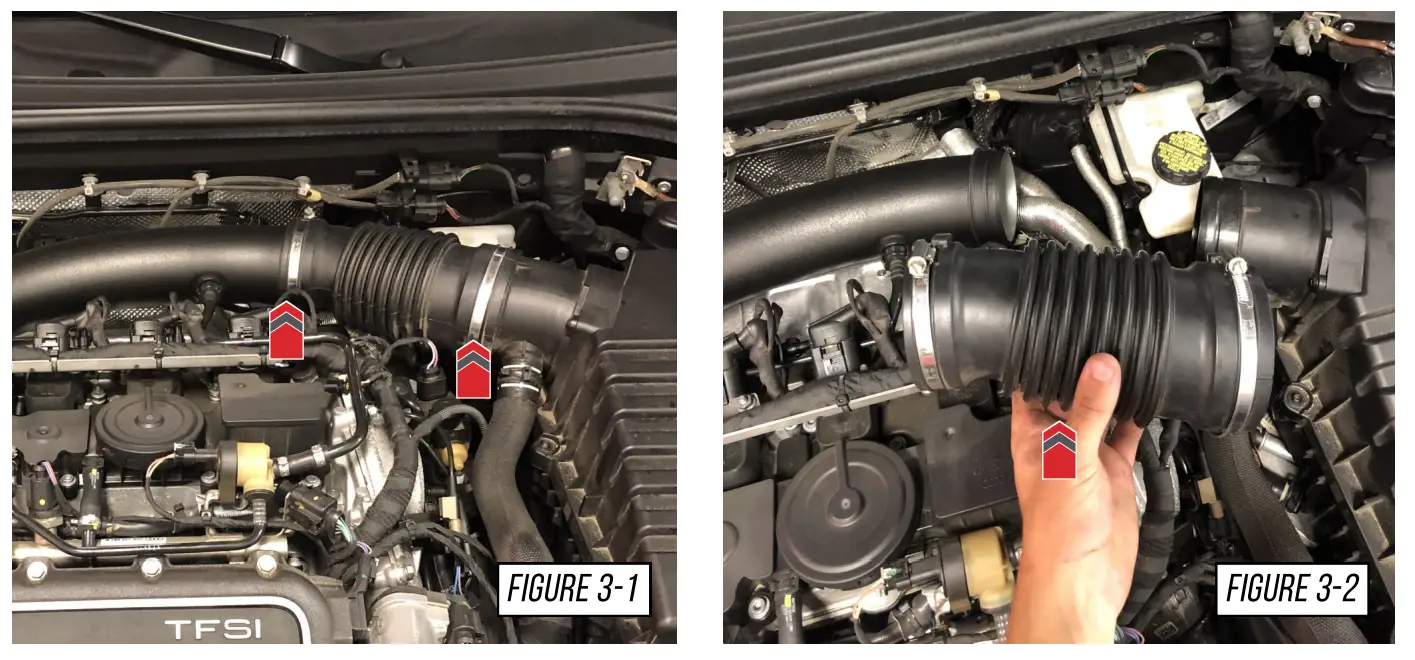
STEP 4
Pre-2018 model only.
Remove the hose from the OEM intake, pointed out in Figure 4-1. To remove, squeeze the clamp tabs together and wiggle the hose off, shown in Figure 4-2.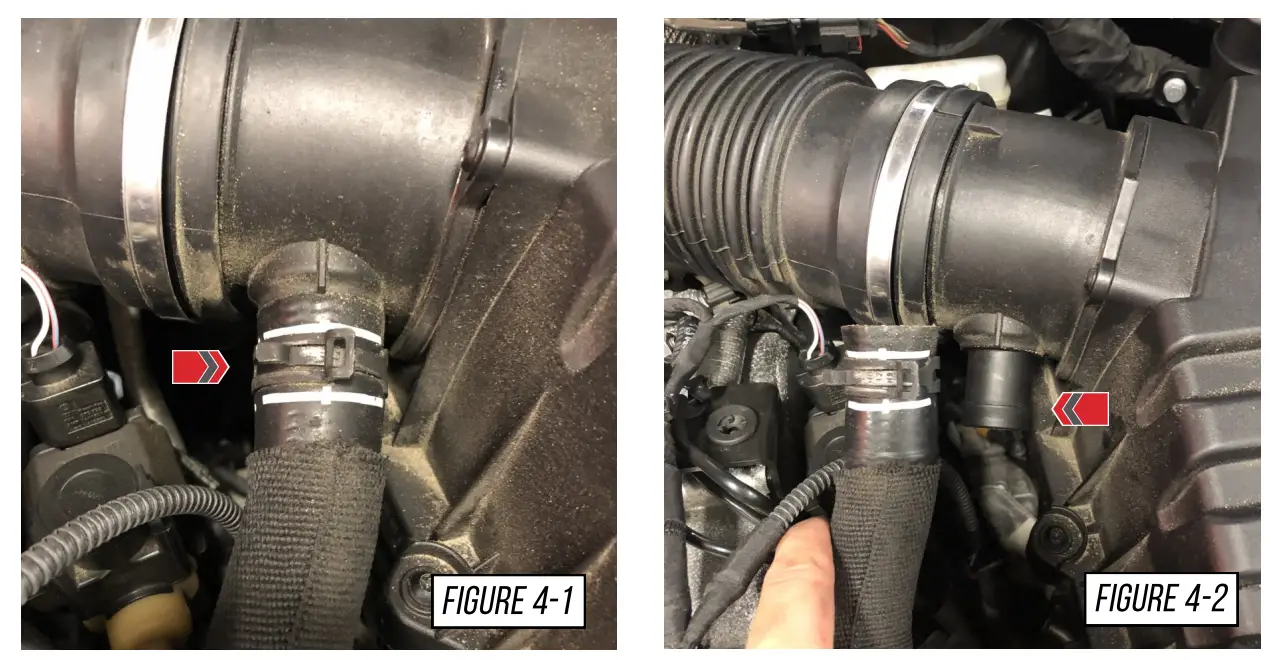
STEP 5
2019+ model only.
Remove the 2 bolts on the engine side of the OEM diverter valve hose, shown in Figure 5-1. This will allow the diverter valve hose to be removed with the OEM intake, shown in Figure 5-2.
Note: These 2 bolts will be reused in the install of your AWE diverter valve.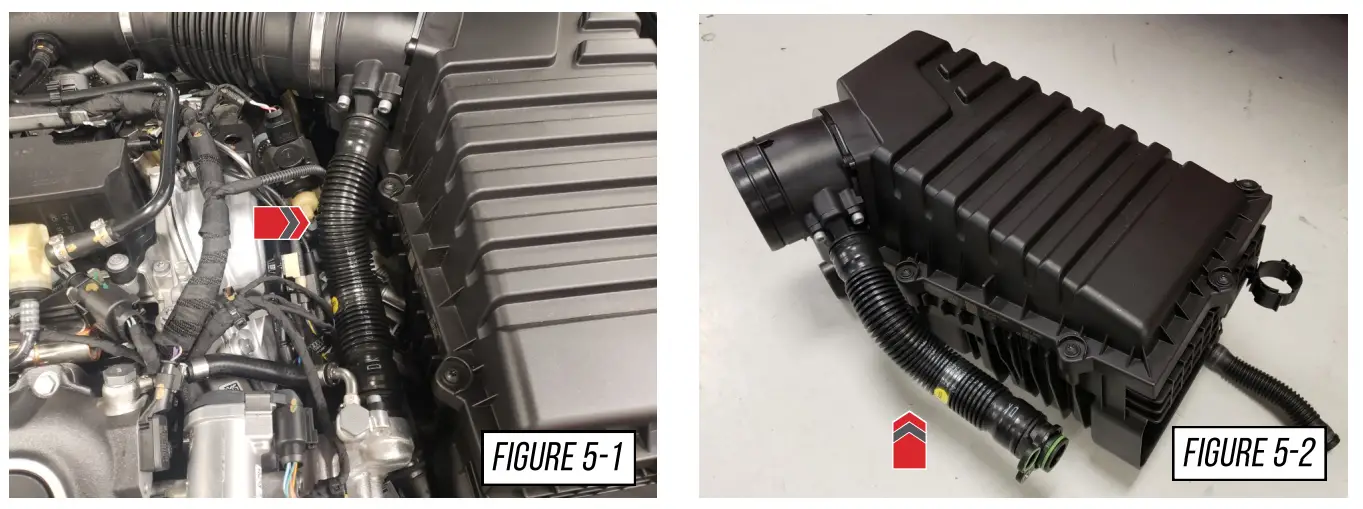
STEP 6
Remove the OEM air intake box, shown in Figure 6-1, by first detaching the sensor at the front of the air box, then pulling it upwards detaching it from the OEM rubber mounting grommets below the air box, shown in Figure 6-2.
Note: These 3 rubber grommets, these will be reused with the AWE intake system.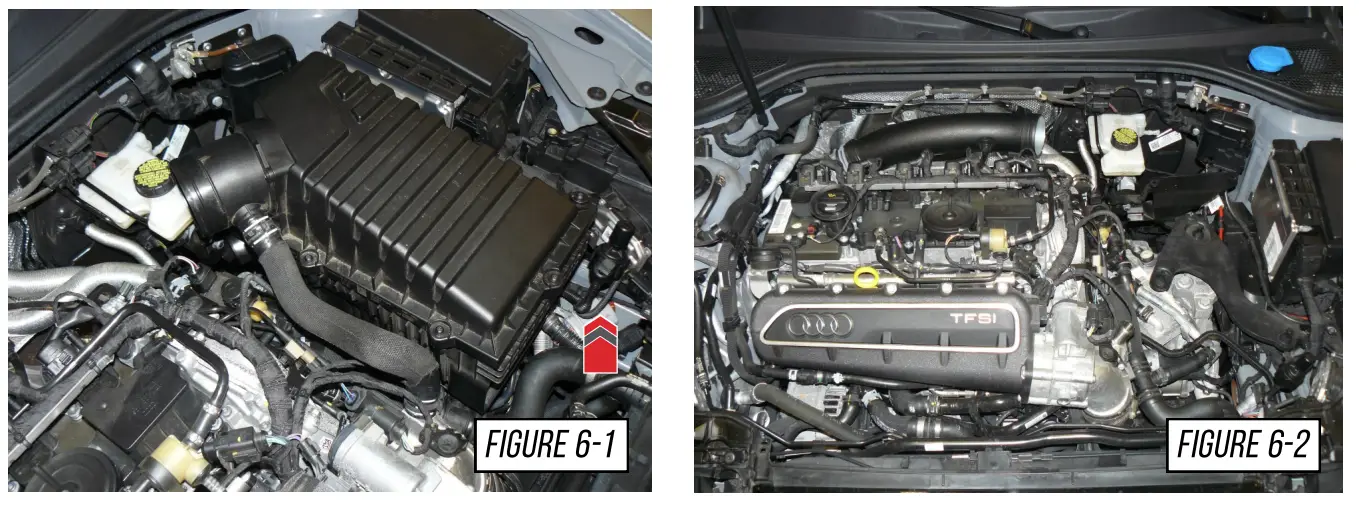
STEP 7
Remove the OEM intake tube by first removing the attached hose by pinching the connecting tabs (A) and pulling it off. Remove the bolt at the bottom of the tube (B), the head of the bolt faces the firewall, both shown in Figure 7-1. Next squeeze the hose clamp and pull the intake tube off of the turbo inlet, shown in Figure 7-2.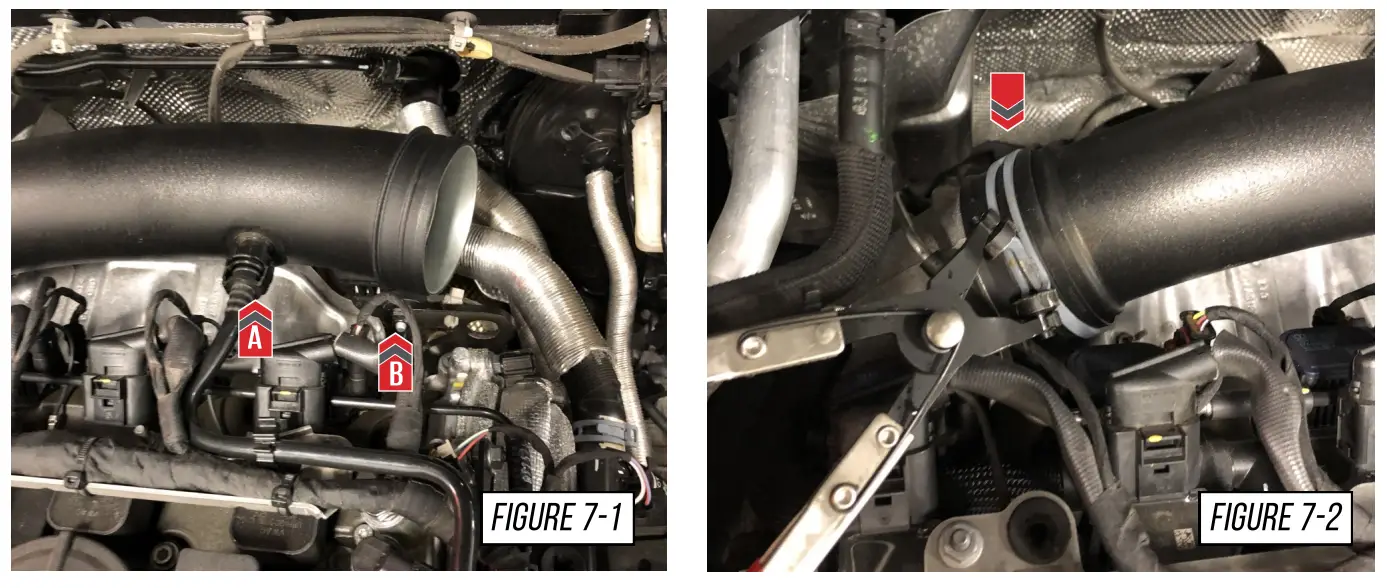
STEP 8
2019+ model only.
Gather the AWE diverter valve adapter and the 2 O-rings provided, and install these onto the diverter valve, as shown in Figure 8.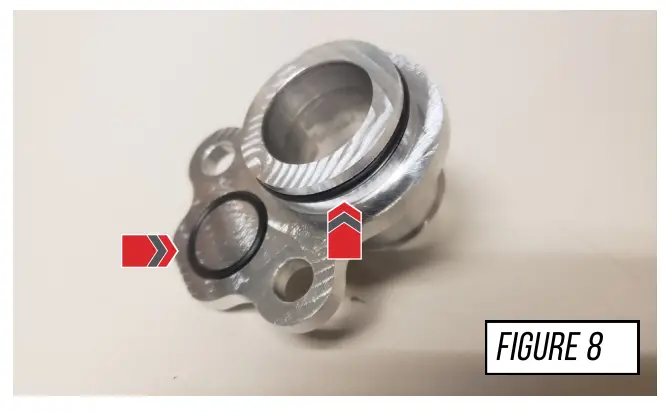
STEP 9
2019+ model only.
With the O-rings installed onto the adapter, install it into the OEM location, and reinstall the 2 OEM bolts removed earlier, shown in Figure 9.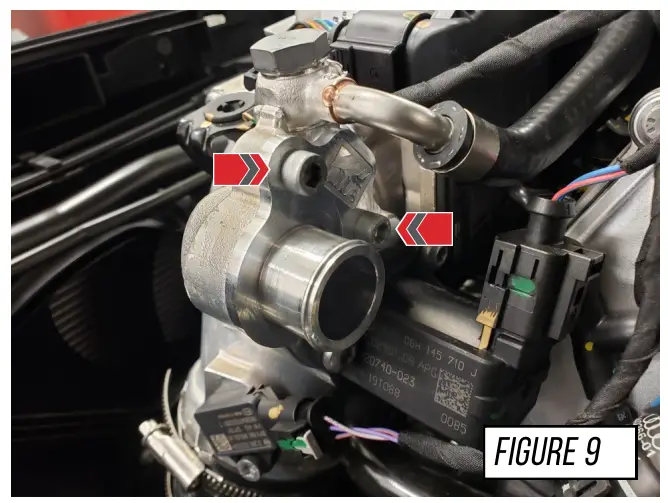
STEP 10
Install the AWE turbo inlet coupler to the 4.5” AWE intake tube with the supplied 100-120 worm drive clamp, shown in Figure 10.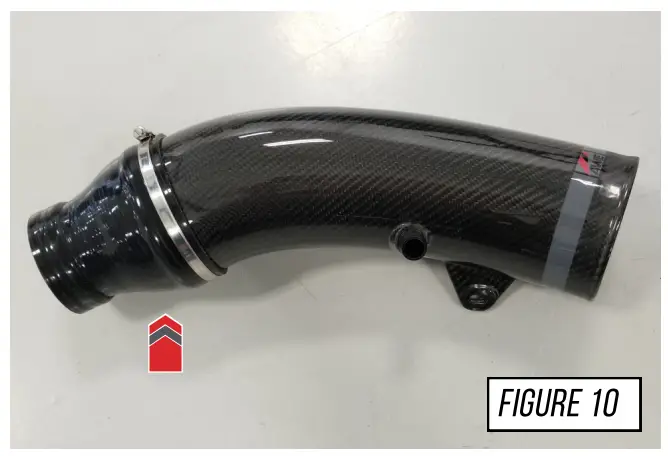
STEP 11
Install the 4.5” AWE intake tube to the turbo inlet using the OEM hose clamp (A), reattach the plastic line (B), and reinstall the OEM bolt (C), as shown in Figure 11.
Note: The OEM black plastic line (B) will not reuse the factory clip, due to the increased carbon tube size, use a supplied cable tie to secure the line (D) Carful to not overtighten the hardware, as carbon could crack.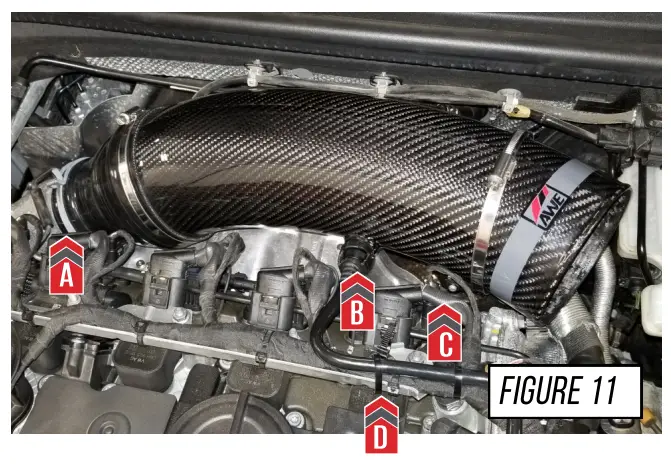
STEP 12
Slide the supplied 4.5” silicone flex coupler hose with the 2 supplied 100-120 worm drive clamp, as shown in Figure 12.
Note: Do not tight hose clamps at this point.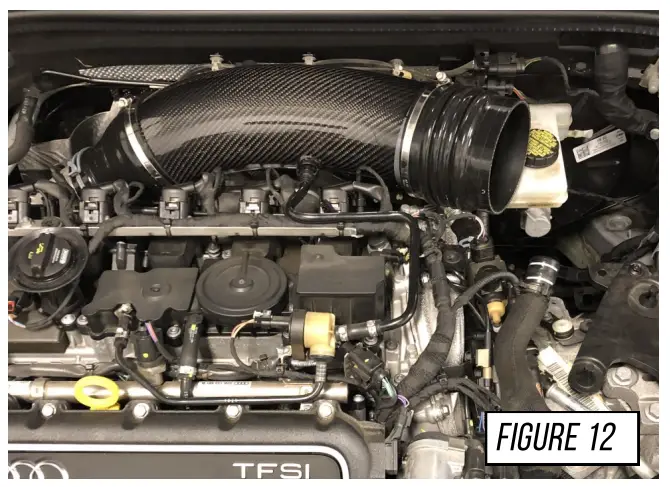
STEP 13
Gather the AWE mounting bracket and push in the 3 OEM rubber mounting grommets, as shown in Figure 13.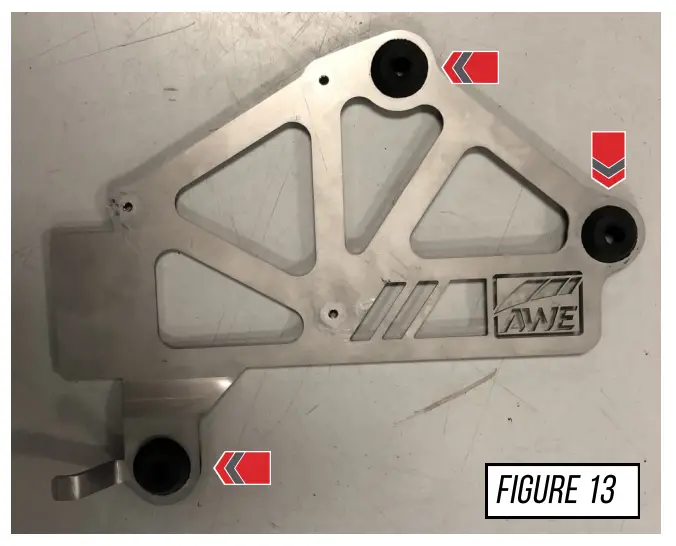
STEP 14
Secure the AWE carbon intake tube onto the AWE mounting bracket, with the 3 supplied screws and oversized washers, as shown in Figure 14. Carful to not overtighten the hardware, as carbon could crack.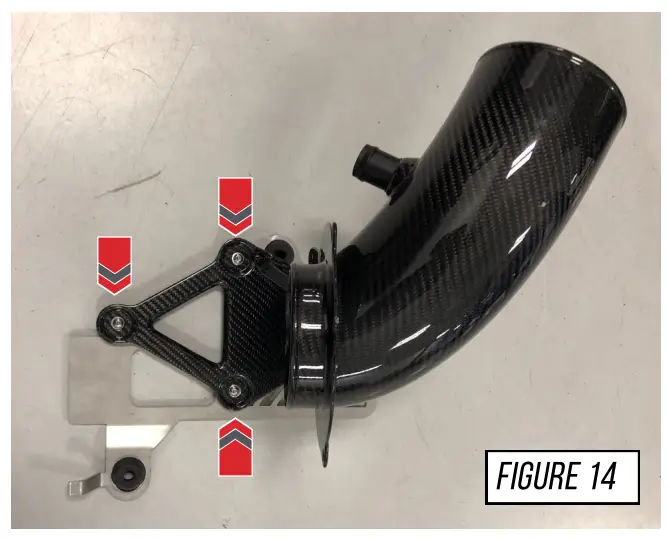
STEP 15
Install the AWE air filter onto the AWE intake tube and tighten the 110-130 hose clamp, as shown in Figure 15.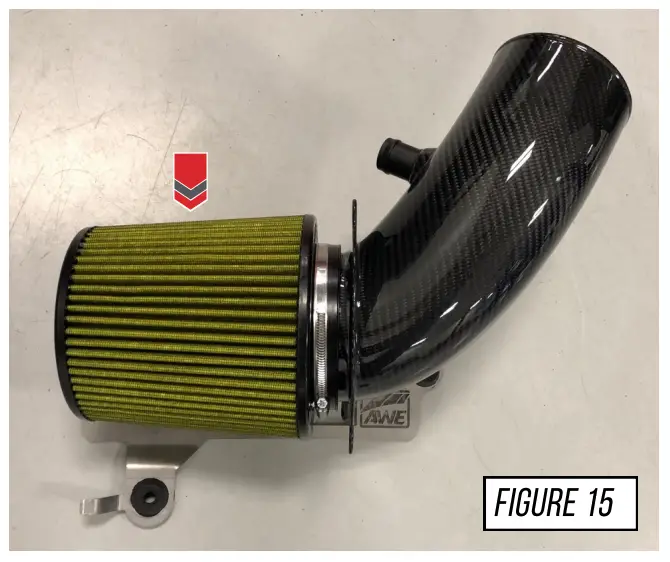
STEP 16
Gather the AWE air filter section and the AWE carbon fiber inlet section. Slide the inlet section over the filter, as shown in Figure 16.
Note: Do not install the 4 screws that attach the 2 sections, this allows for easier installation.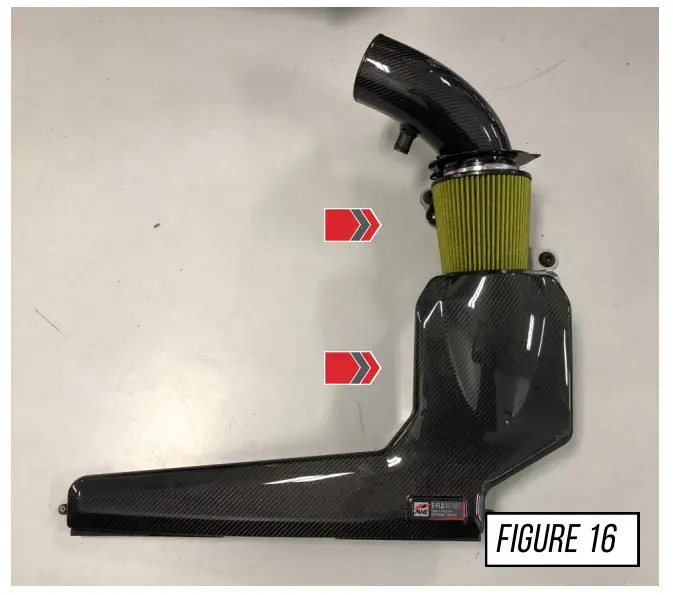
STEP 17
Install the AWE carbon fiber inlet and filter section, carefully maneuver the inlet duct into the factory location and aligning the silicone flex hose to the carbon fiber filter tube. Ensure you get the 3 OEM rubber grommets to press into the mounting tabs, as seen in Figure 17.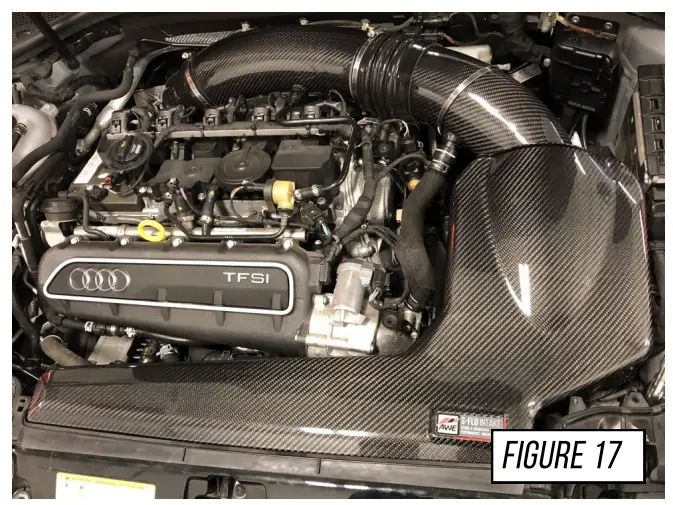
STEP 18
With the intake in the correct place, install the 4 supplied screws and regular washers, into the back of the filter section, as shown in Figure 18. Careful not to over tighten hardware, as carbon could crack.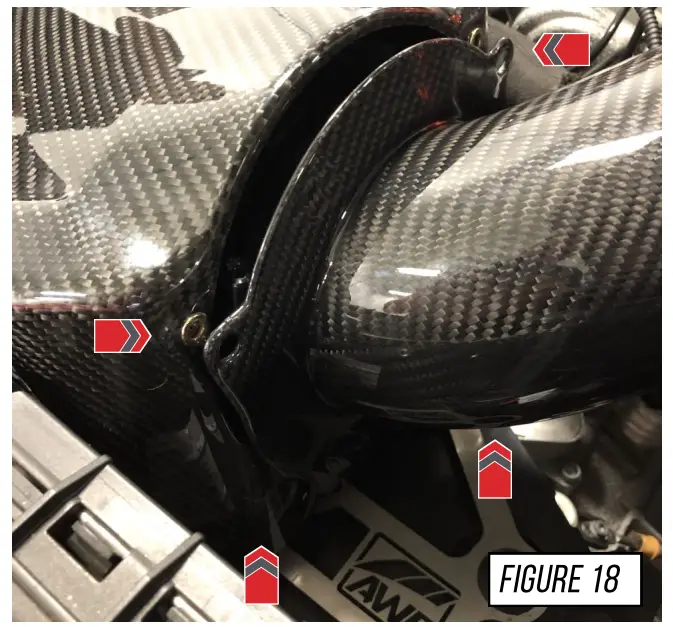
STEP 19
Pre-2018 only.
Reinstall the hose and clamp removed earlier, as shown in Figure 19.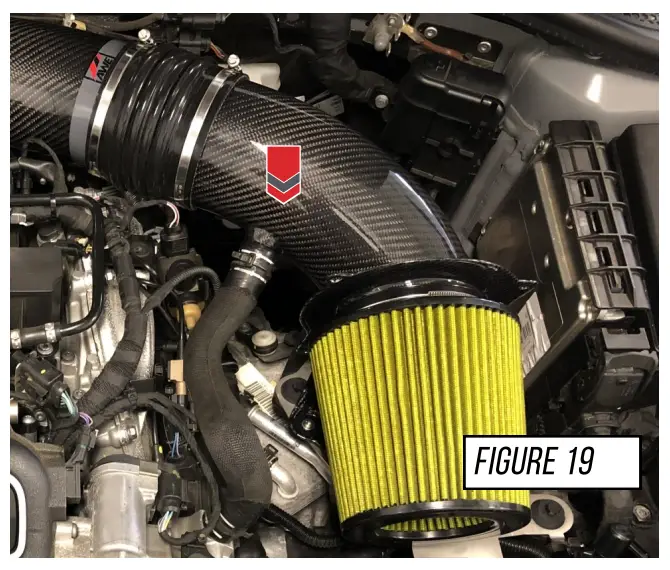
STEP 20
2019+ model only.
Install the provided hose and hose clamps, shown in Figure 20.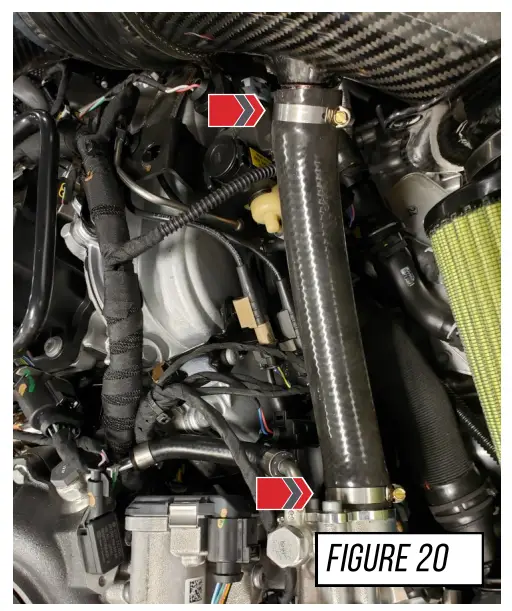
STEP 21
Clip the OEM sensor onto the AWE mounting plate shown in Figure 21.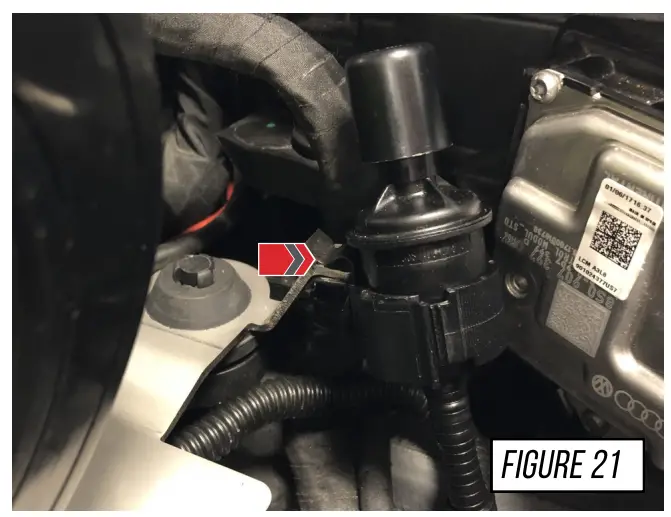
STEP 22
Align the silicone flex hose and tighten the 2 hose clamps, as shown in Figure 22.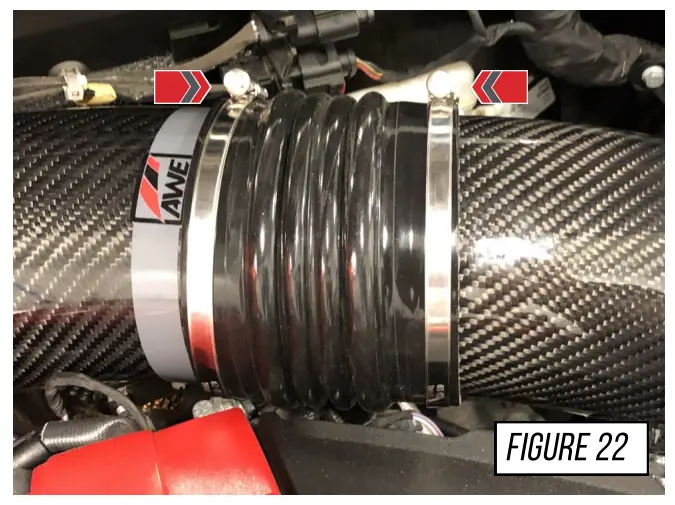
STEP 23
Install the supplied hardware into the AWE carbon inlet duct.
Note: Use the supplied hardware.
STEP 24
Reinstall the OEM engine cover by pressing it back into place, as shown in Figure 24.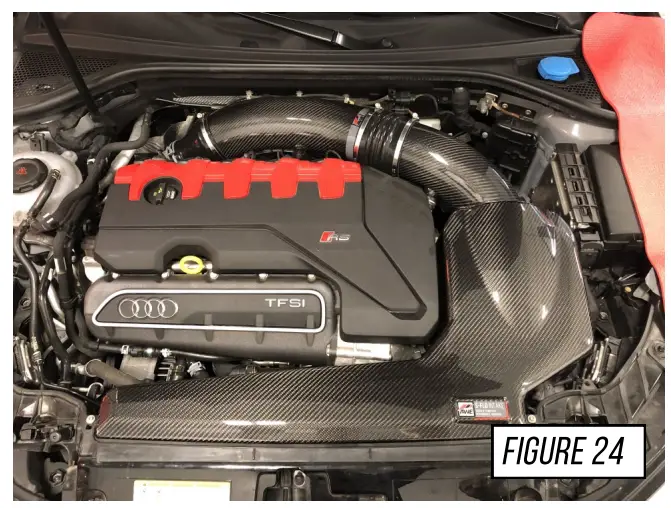
TROUBLESHOOTING
| Issue | Solution |
| Wrong or missing parts | Double check the parts list for your system and compare them with what you received. Fill out our contact form, found below and let us know what parts you need. |
| Check engine light | Make sure all hoses are reinstalled and are all secure. |
CARE
This is a re-usable air filter that can be cleaned when dirty and put back into service.
Please inspect the air filter element every 25,000 miles for integrity. Clean every 50,000 miles under normal operating conditions, sooner in dusty conditions. Contact AWE to purchase a filter maintenance kit.
Any questions or comments, please do not hesitate to contact us:
AWE
215-658-1670
CONTACT FORM
WARRANTY
Up-to-date warranty information is found HERE.