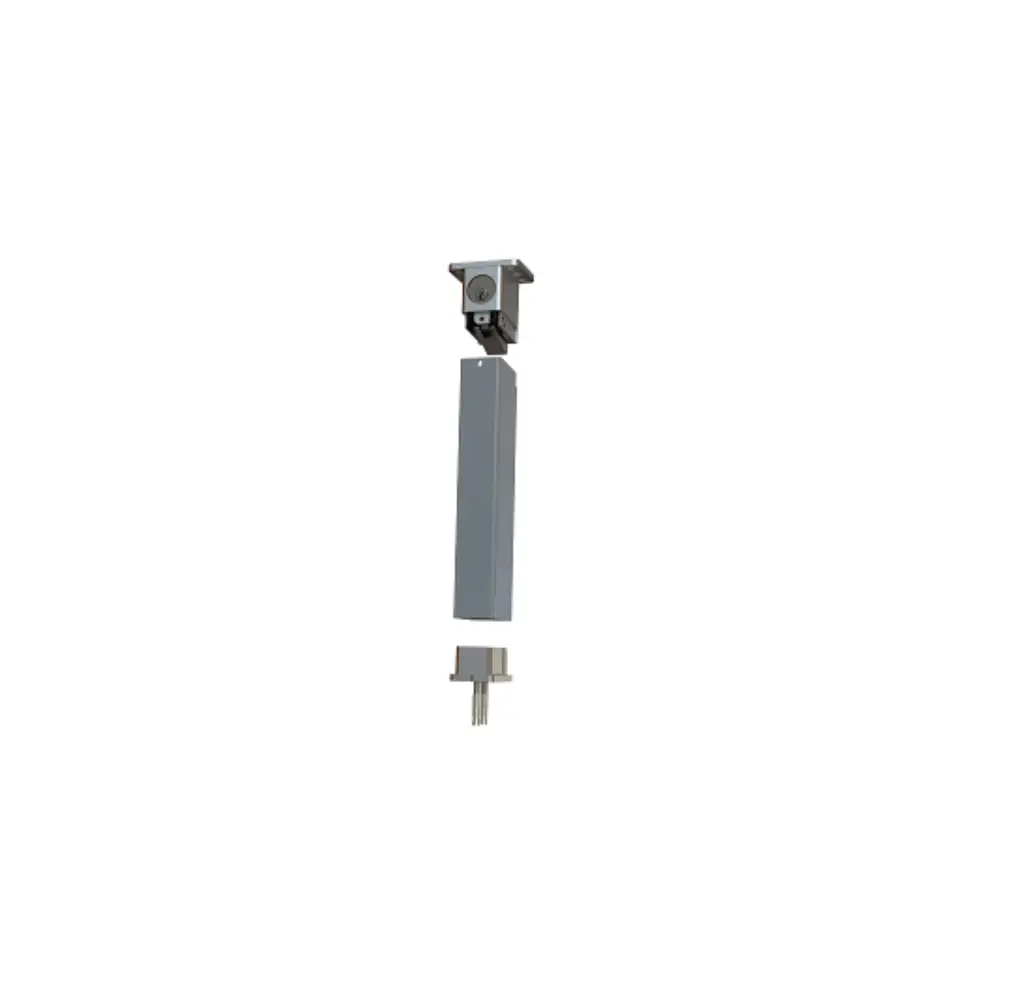
PDQ 9300 Series Mullion Keyed Removable

INSTALLATION INSTRUCTIONS
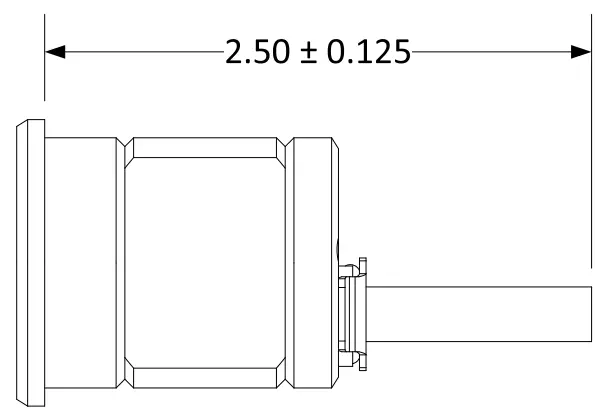
FOR KEY REMOVABLE, CUT CYLINDER TAILPIECE
- Measure and adjust tailpiece
- Cylinder is sold separately

ASSEMBLE TOP BRACKET
- For Key removable, secure cylinder in faceplate with cylinder cup
- Secure faceplate in top bracket using (2) ¼-20 x 5/8″ FHMS
- Verify latch retracts by key
- For non-key removable. Verify latch retracts with screwdriver
KEY REMOVABLE TOP BRACKET

MARK CENTERS
- Mark center of opening on frame and floor

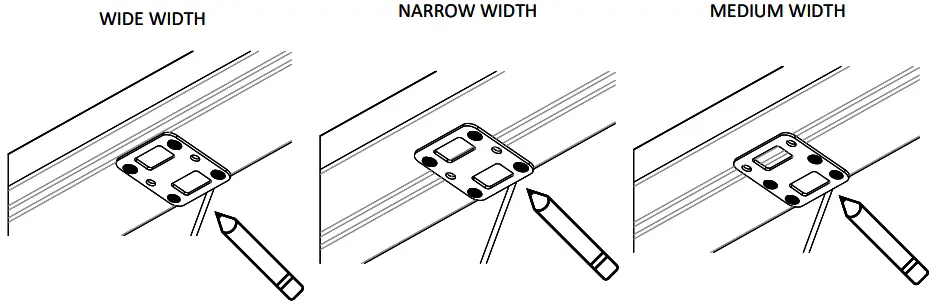
PREPARE FRAME
- Using provided shim as template, mark, drill, and tap (4) 5/16-18 holes
- Frame reinforcement is required

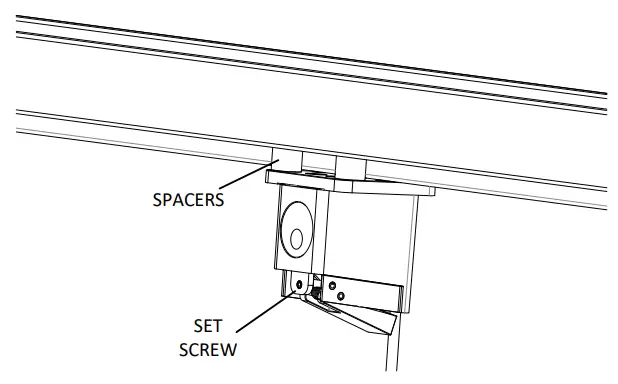
INSTALL TOP BRACKET
- For wide/medium frame, secure top bracket to frame using (4) 5/16-18 x 5/8″ screws
- For narrow frame, add (2) ½” OR 5/8″ spacers. Use 5/16-18 x 1½” screw for each spacer
- Install set screw flush with faceplate

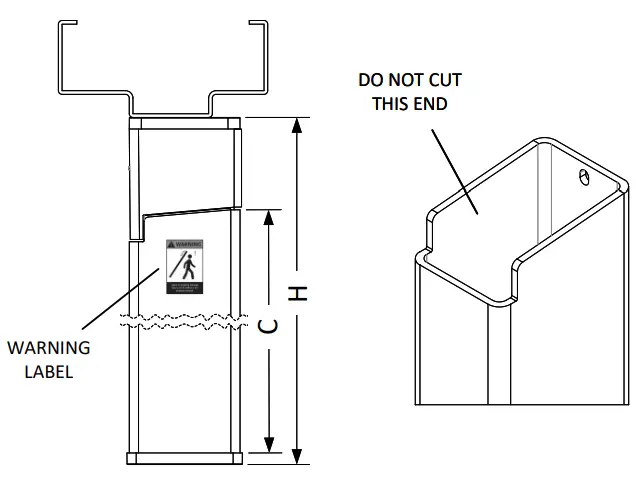
CUT MULLION TUBE
- H = Height of opening from frame stop to finished floor
- C = Cut length of mullion tube
- C = H – 2 13/16″
- If there is a threshold, cut it off so mullion and bottom bracket lay flat
- Install warning label near top of mullion

INSTALL BOTTOM BRACKET
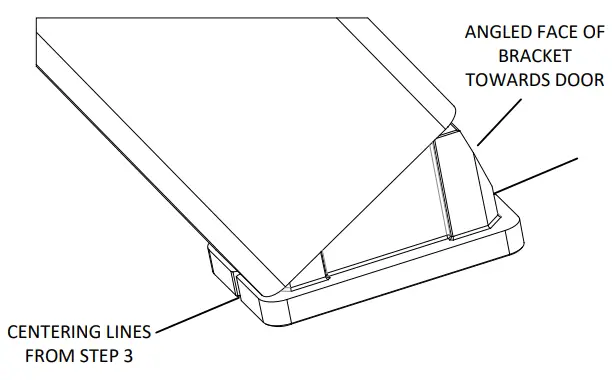
- Place mullion on bottom bracket
- Close doors and slide into top bracket. Make mullion flush with the doors
- Verify centering notches align with marked center in Step 3
- Carefully remove mullion. Mark and drill (2) 3/8″ holes 2″ deep
- Secure bottom bracket using 3″ anchors

ADJUST AND TEST FUNCTION
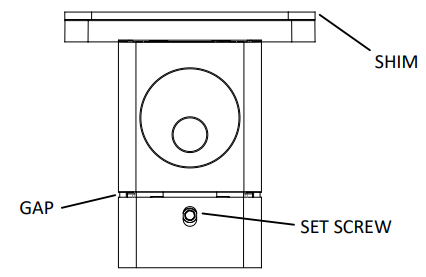
- If gap between mullion and top bracket is greater than 1/8″ install template as shim above top bracket
- Adjust set screw CCW until mullion does not rattle
- Verify mullion is released when key is turned

Phone: 833-2-PDQTEC | www.pdqlocks.com
639403 Rev1 – 12-1-22