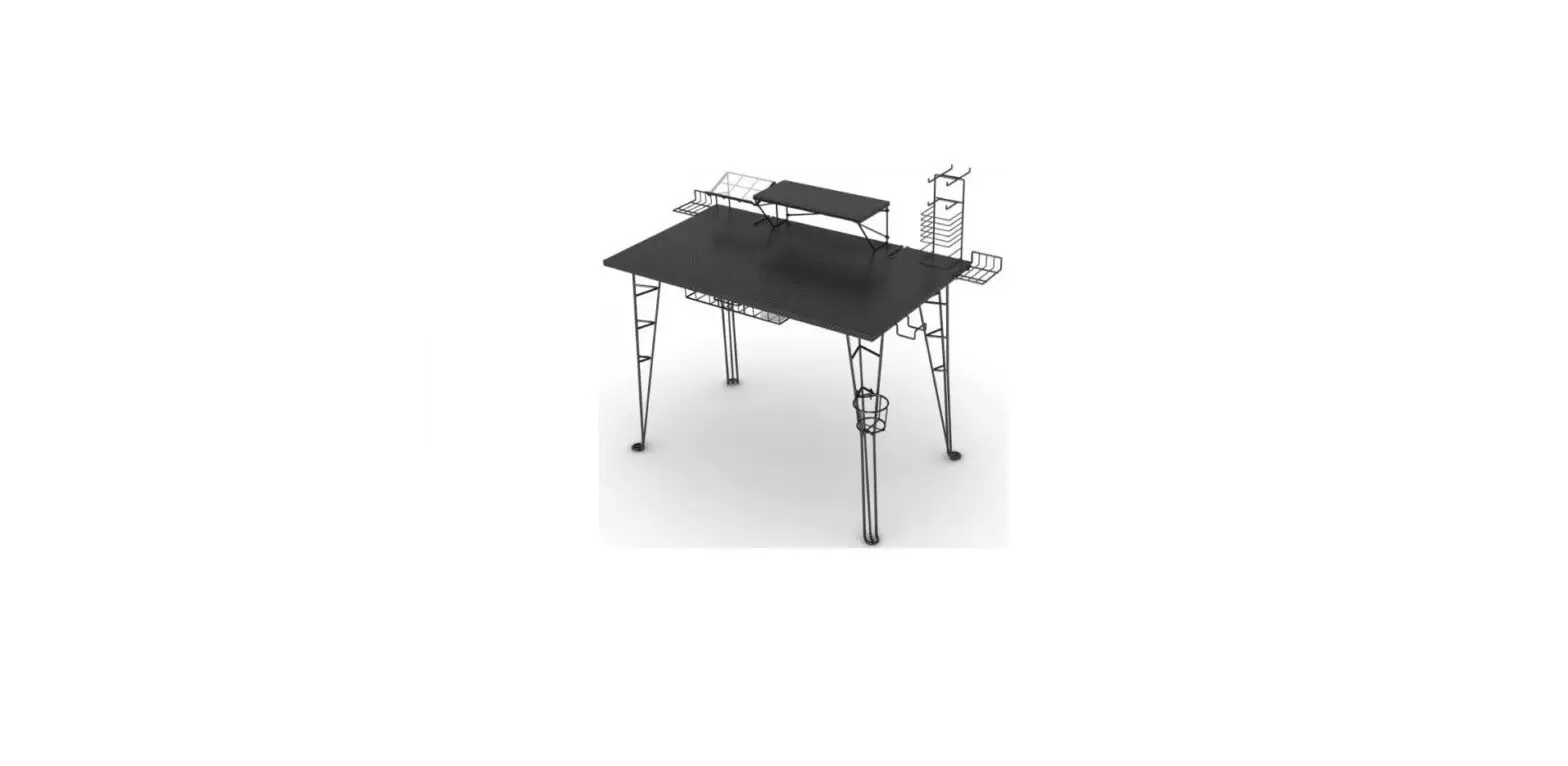

Atlantic Original 33935701 Gaming Desk
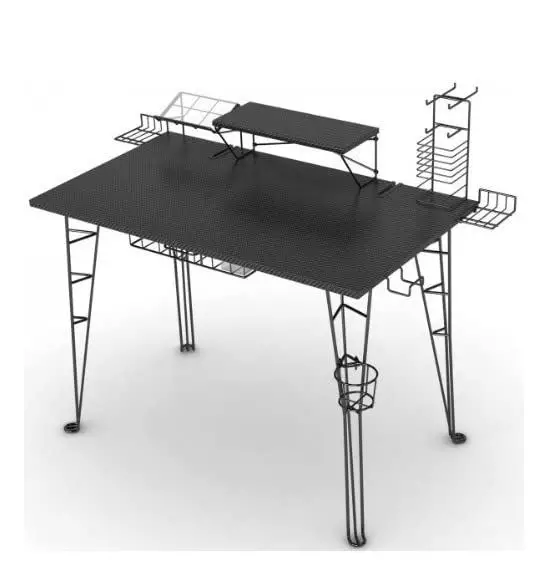
Congratulations on your latest Atlantic purchase. Follow these instructions and you’ll have this new product assembled in no time. If you need any help, or to order missing/replacement parts, please call 1-800-747-2660 or email [email protected].
Assembly Tips
- Become familiar with the instructions and all parts.
- Make sure that all parts are in the box and in good condition.
- Assemble the product on the open flat carton or a rug to protect the product and your floor.
- Some heavy products need a second person to assist in the assembly.
- The use of power tools is not recommended.
- It is strongly recommended that at least two people carry out the assembly. Assemble the product close to a wall.
- With each step, first, insert and hand-tighten all bolts and screws by hand. After ALL, BOLTS are slightly screwed in, fully tighten bolts with a Phillips screwdriver in a sequential pattern (clockwise or counterclockwise).
Caution
- Never let children climb on furniture or play with furniture.
- Do not sit or stand on furniture.
- Do not place aweight that is heavier than the recommended load rating on the furniture surface.
- Do not overload shelves.
- Use care when moving furniture. Furniture can tip over if moved improperly.
- Improper handling can result in cuts and lacerations.
- Do not install on a sloping surface.
Care Instructions
Use electrostatic dust cloths to clean furniture. Do not set hot or cold containers directly on the furniture surface.
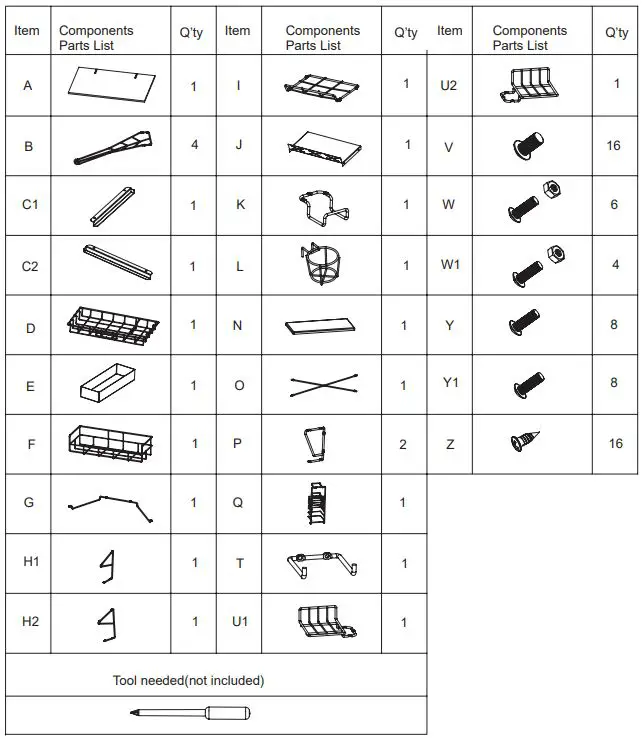
Part List
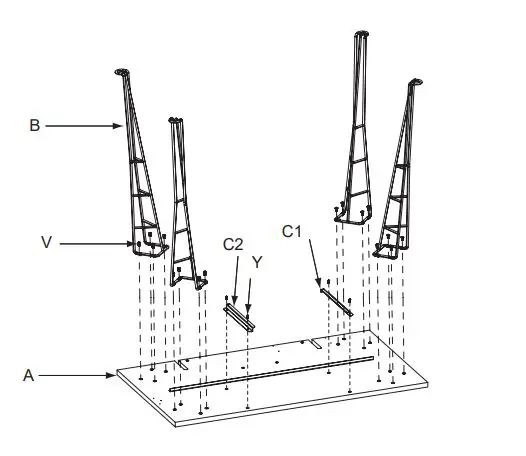
- Fix the legs (B) to the top panel (A) with screws (V), and fix the drawer rail (C1 & C2) of the drawer to the top panel with screws (Y).

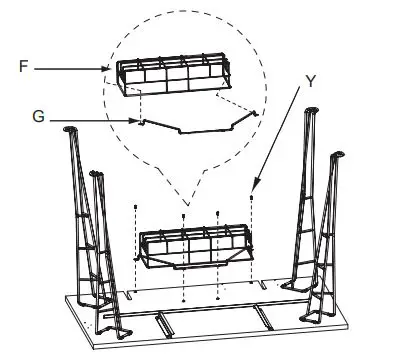
- Insert the holding wire (G) into a surge protector (F), then fix it with screws (Y).

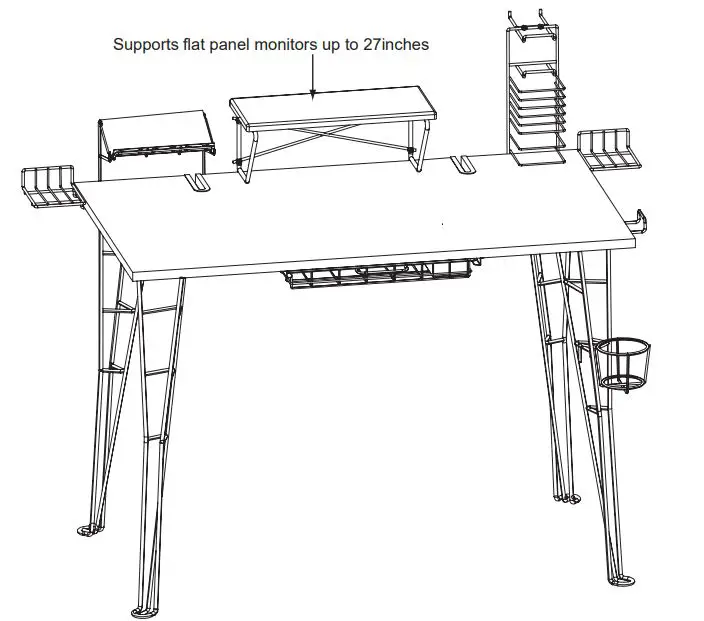
- Turn the unit upright,then
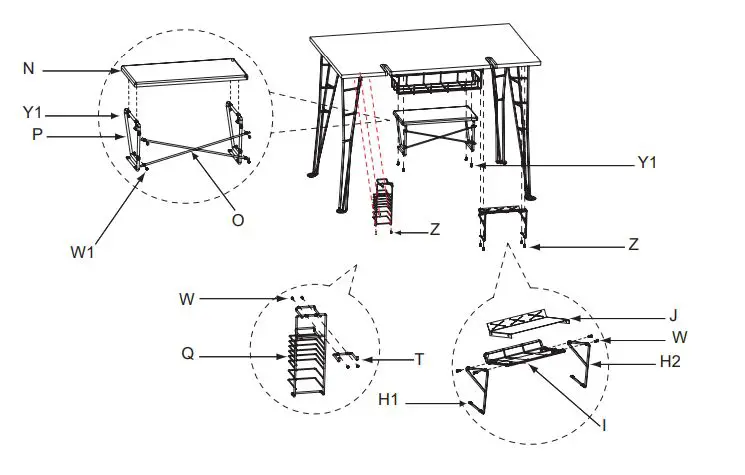
a- Attach the monitor panel (N) to the wire support (P) with screws (Y1), fix the X bar (O) with screws and nuts (W1), then fix the monitor shelf to the top panel with screws (Y1).
b- Attach the media holder hook (T) to the media holder (Q) with screws and nuts (W), then fix the media holder to the top panel with screws (Z).
c- Attach the charging station shelf (I) and plastic sheet(J) to the wire support (H1 & H2) with screws and nuts (W), then fix the charging station to the top panel with screws (Z).
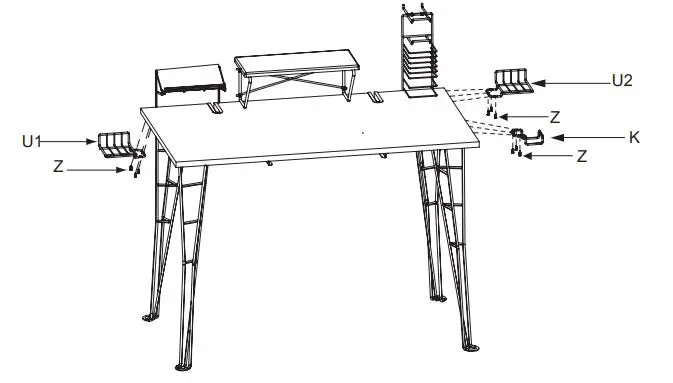
- Fix the speaker tray (U1 & U2) to the top panel with screws (Z),fix the headphone holder (K) with screws (Z).

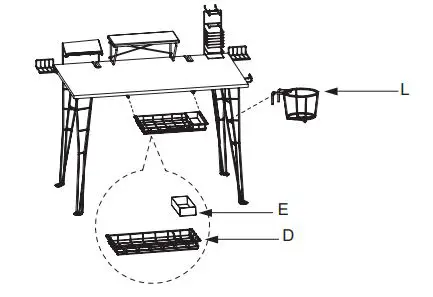
- Fold the plastic sheet (E) to rectangular shape,then put it into drawer (D), insert the drawer into the rail, hang the cup hold (L) to the leg.
Product Warranty: Atlantic Inc. warrants to the original purchaser that its products are free from defects in materials or workmanship. If after inspection, we find that the product was defective in materials or workmanship, we shall repair or replace the product at our discretion. This warranty does not cover accidental damage, misuse, improper care, or alteration and excludes claims for incidental or consequential loss. This limited warranty applies to products purchased in the U.S. and Canada.
Keep this Instruction Manual for future reference. Keep your original proof of purchase (store receipt).
If parts are missing, DO NOT return them to the store. To order missing / replacement parts or for assembly assistance please contact [email protected]. Or call 1-800- 747-2660 M-F, 8 am- 5 pm, P.S.T.
U.S. and other foreign patents pending /
Patentes de los EUA y países extranjeros en trámite / Brevets en cours pour les États-Unis et autres pays / U.S. und andere ausländische Patente sind hängig
All rights reserved / Derechos Reservados /
www.atlantic-inc.com
R1.0 110712# 33935701
Frequently Asked Questions


