![]()
iPhone 4 Battery Replacement
Your iPhone 4 won’t hold a charge? Replace the battery on your iPhone 4.
Written By: Walter Galan
INTRODUCTION
Your iPhone 4 won’t hold a charge? Replace the battery! Luckily, replacing the battery on the iPhone 4 requires minimal disassembly. If your battery is swollen, take appropriate precautions.
For optimal performance, after completing this guide, calibrate your newly installed battery: Charge it to 100% and keep charging it for at least two more hours. Then use your iPhone until it shuts off due to low battery. Finally, charge it uninterrupted to 100%.
http://www.youtube.com/watch?v=KYvjuWg06l4
 TOOLS:
P2 Pentalobe Screwdriver iPhone (1)
(if iPhone has external pentalobe screws)
Phillips #000 Screwdriver (1)
iFixit Opening Tool (1)
Anti-Static Project Tray (1)
![]() PARTS:
PARTS:
iPhone 4 Replacement Battery (1)
Step 1 — Rear Panel
![]() Before you begin, discharge your iPhone battery below 25%. A charged lithium-ion battery can catch fire and/or explode if accidentally punctured.
Before you begin, discharge your iPhone battery below 25%. A charged lithium-ion battery can catch fire and/or explode if accidentally punctured.![]() Power off your iPhone before beginning disassembly.
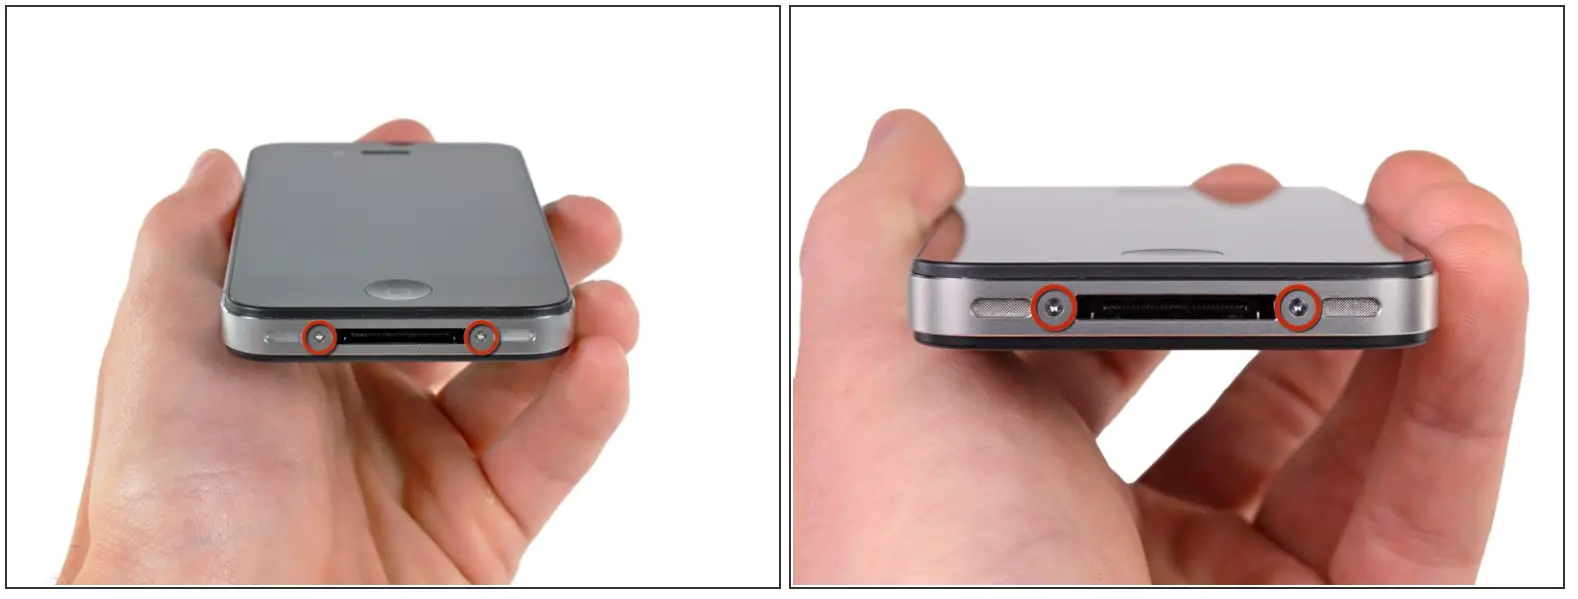
Power off your iPhone before beginning disassembly.![]() Your iPhone 4 rear cover may have either two #000 Phillips screws or Apple’s 5-Point “Pentalobe” screws (second image). Check which screws you have, and ensure you also have the correct screwdriver in order to remove them.
Your iPhone 4 rear cover may have either two #000 Phillips screws or Apple’s 5-Point “Pentalobe” screws (second image). Check which screws you have, and ensure you also have the correct screwdriver in order to remove them.![]() Remove the two 3.6 mm Pentalobe or Phillips #000 screws next to the dock connector.
Remove the two 3.6 mm Pentalobe or Phillips #000 screws next to the dock connector.![]() Be sure the driver is well seated when removing Pentalobe screws, they are very easy to strip.
Be sure the driver is well seated when removing Pentalobe screws, they are very easy to strip.
Step 2
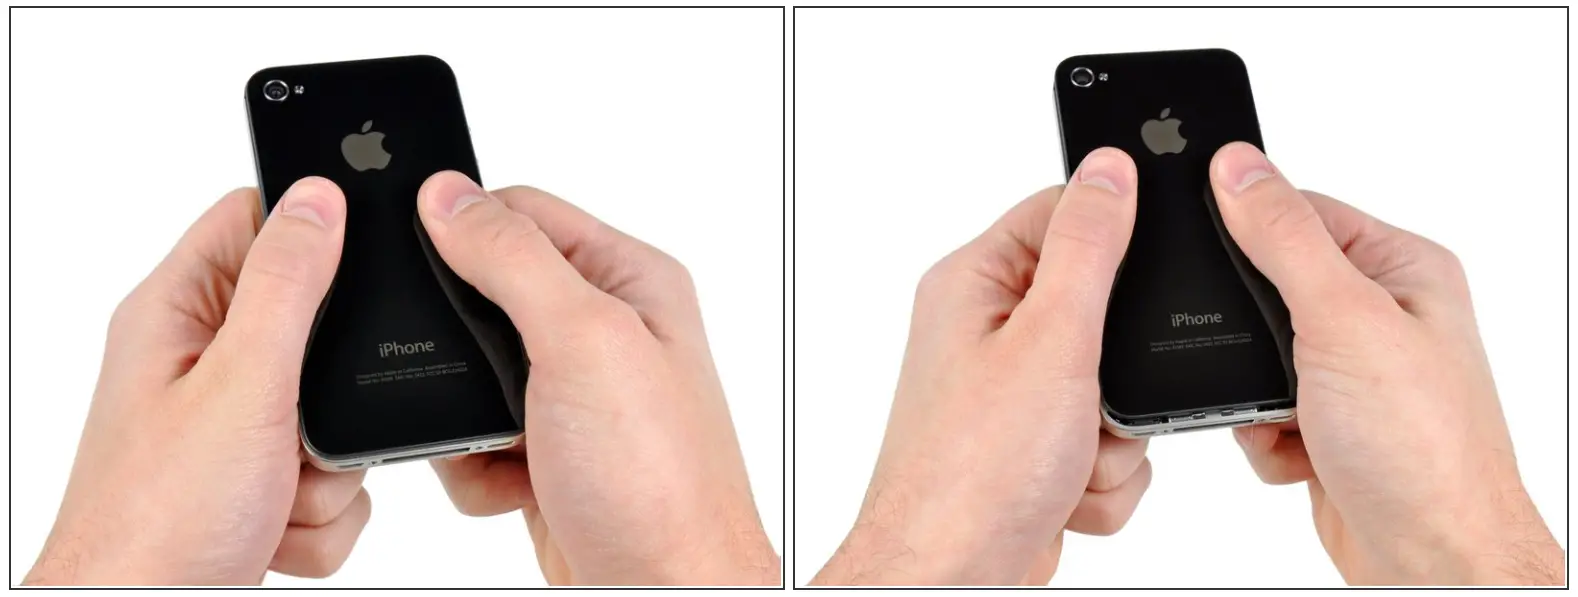
![]() Push the rear panel toward the top edge of the iPhone.
Push the rear panel toward the top edge of the iPhone.![]() The panel will move about 2 mm.
The panel will move about 2 mm.
Step 3
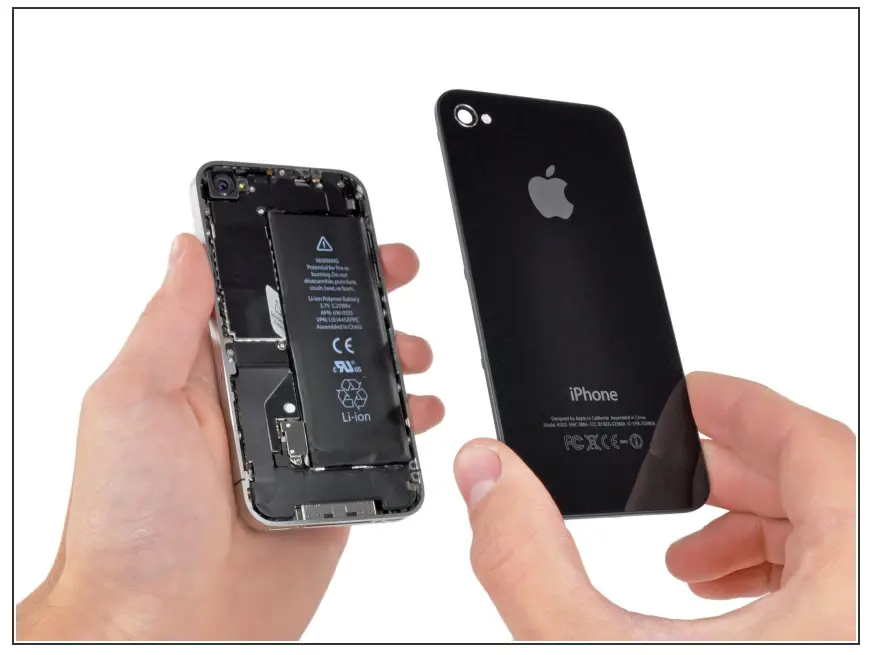
![]() Pinch the rear panel with your fingers and lift it away from the iPhone. Alternatively, use a Small Suction Cup.
Pinch the rear panel with your fingers and lift it away from the iPhone. Alternatively, use a Small Suction Cup.![]() Be careful not to damage the plastic clips attached to the rear panel.
Be careful not to damage the plastic clips attached to the rear panel.![]() If you are installing a new rear panel, be sure to remove the plastic protective sticker from the inside of the camera lens and the sticker from the large black area near the lens.
If you are installing a new rear panel, be sure to remove the plastic protective sticker from the inside of the camera lens and the sticker from the large black area near the lens.
Step 4 — Battery
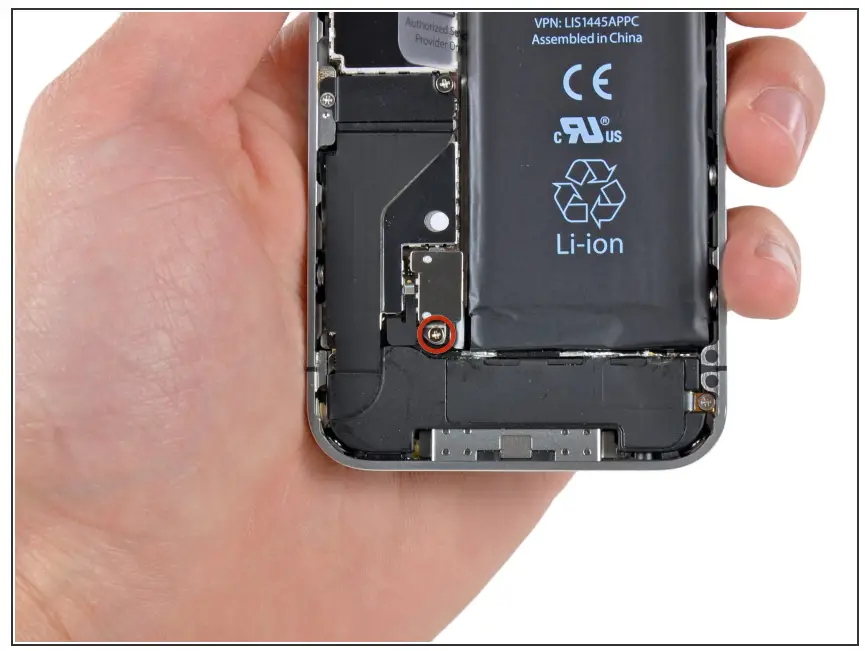
![]() Remove the single 2.5 mm Phillips screw securing the battery connector to the logic board.
Remove the single 2.5 mm Phillips screw securing the battery connector to the logic board.![]() Some devices may have two screws, one of which holds down the contact pad which is located above the screw indicated in red in the photo.
Some devices may have two screws, one of which holds down the contact pad which is located above the screw indicated in red in the photo.
Step 5
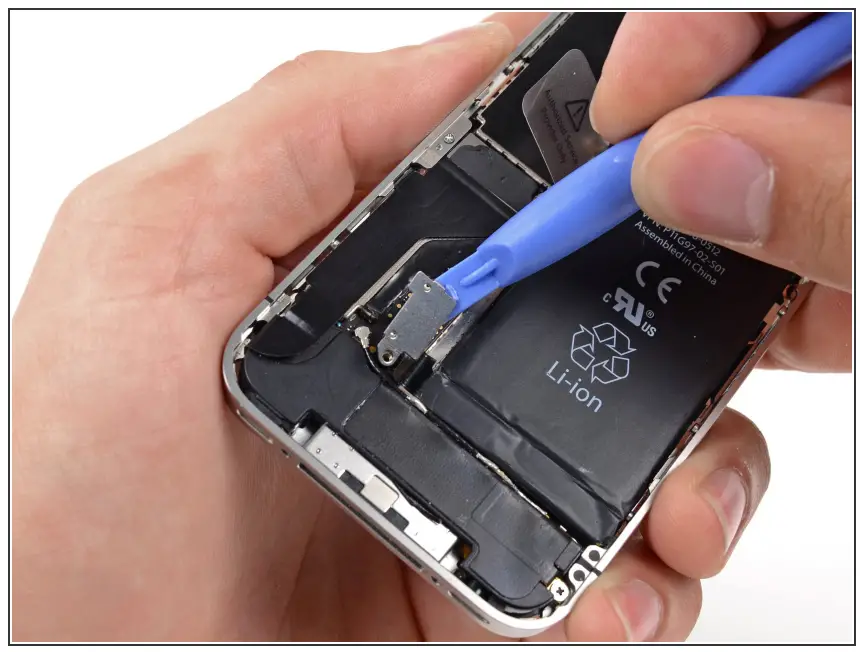
![]() Use a plastic opening tool to gently pry the battery connector up from its socket on the logic board.
Use a plastic opening tool to gently pry the battery connector up from its socket on the logic board.![]() Pry from the top and bottom of the connector bracket—there isn’t as much of an overhang on the sides, and you may damage the connector.
Pry from the top and bottom of the connector bracket—there isn’t as much of an overhang on the sides, and you may damage the connector.![]() Be very careful to only pry up on the battery connector and not the socket on the logic board. If you pry up on the logic board socket, you may break it entirely.
Be very careful to only pry up on the battery connector and not the socket on the logic board. If you pry up on the logic board socket, you may break it entirely.![]() Remove the metal clip covering the antenna connector.
Remove the metal clip covering the antenna connector.
Step 6
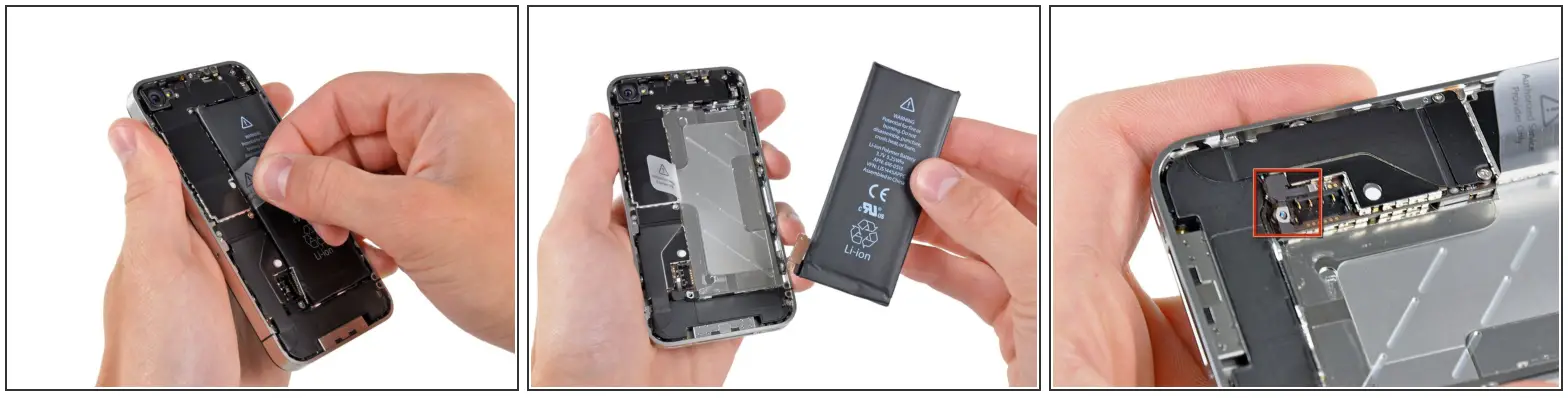
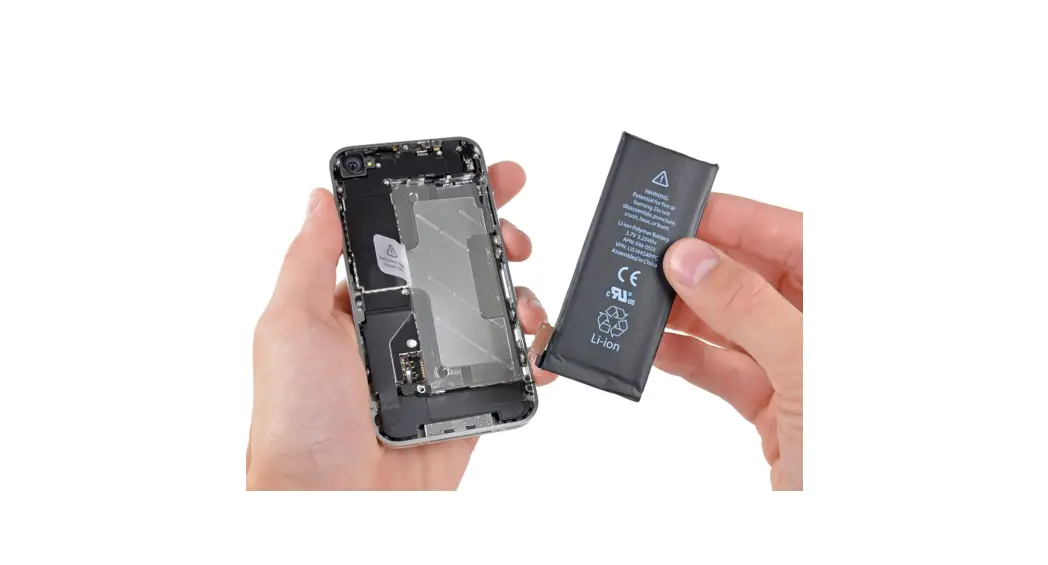
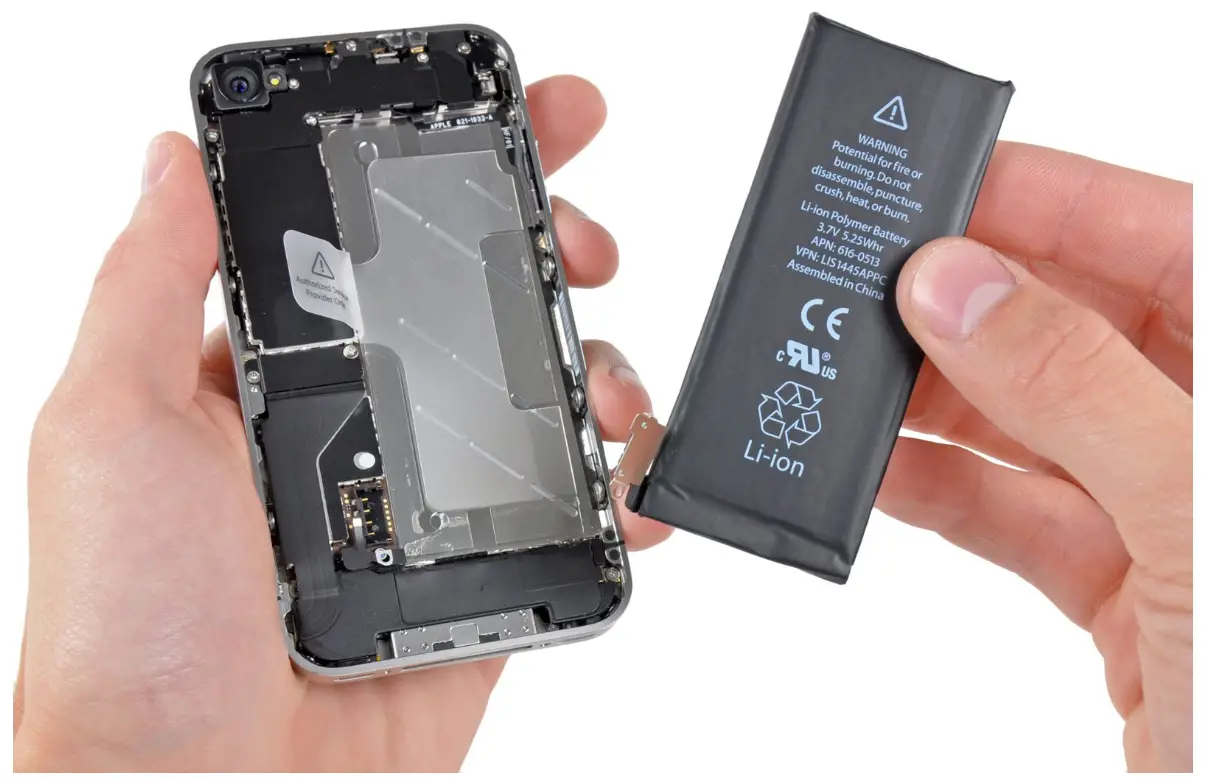
![]() Use the clear plastic pull tab to gently lift the battery out of the iPhone.
Use the clear plastic pull tab to gently lift the battery out of the iPhone.![]() If the tab breaks before the battery are freed, apply a few drops of high concentration (over 90%) isopropyl alcohol under the edge of the battery. Wait about one minute for the alcohol solution to weaken the adhesive. Carefully slide a spudger under the battery tab to release the adhesive.
If the tab breaks before the battery are freed, apply a few drops of high concentration (over 90%) isopropyl alcohol under the edge of the battery. Wait about one minute for the alcohol solution to weaken the adhesive. Carefully slide a spudger under the battery tab to release the adhesive.![]() Prying in other places may cause damage. Don’t try to forcefully lever the battery out. If needed, apply a few more drops of alcohol to further weaken the adhesive. Never deform or puncture the battery with your pry tool.
Prying in other places may cause damage. Don’t try to forcefully lever the battery out. If needed, apply a few more drops of alcohol to further weaken the adhesive. Never deform or puncture the battery with your pry tool.![]() If there’s any alcohol solution remaining in the phone, carefully wipe it off or allow it to air dry
If there’s any alcohol solution remaining in the phone, carefully wipe it off or allow it to air dry
before installing your new battery.![]() If your replacement battery came in a plastic sleeve, remove it before installation by pulling it away from the ribbon cable.
If your replacement battery came in a plastic sleeve, remove it before installation by pulling it away from the ribbon cable.![]() Before reconnecting the battery connector, be sure the contact clip (shown in red) is properly positioned next to the battery connector.
Before reconnecting the battery connector, be sure the contact clip (shown in red) is properly positioned next to the battery connector.![]() Before reassembly, clean metal-to-metal contact points with a de-greaser such as Windex. The oils from your fingers have the potential to cause wireless interference issues.
Before reassembly, clean metal-to-metal contact points with a de-greaser such as Windex. The oils from your fingers have the potential to cause wireless interference issues.![]() Perform a hard reset after reassembly. This can prevent several issues and simplify troubleshooting.
Perform a hard reset after reassembly. This can prevent several issues and simplify troubleshooting.
Compare your new replacement part to the original part—you may need to transfer the remaining components or remove adhesive backings from the new part before installing.
To reassemble your device, follow the above steps in reverse order.
Take your e-waste to an R2 or e-Stewards certified recycler.
Repair didn’t go as planned? Check out our Answers community for troubleshooting help.
This document was generated on 2022-08-02 at 08:34:01 AM (MST).
© iFixit — CC BY-NC-SA
www.iFixit.com![]()


