![]() Battery Replacement
Battery Replacement
Instruction Manual
DualShock 4 Battery Replacement
Replace the battery in your DualShock 4.
Written By: Mark
INTRODUCTION
Use this guide to replace the 3.7 lithium-ion battery inside the DualShock 4.![]() TOOLS:
TOOLS:
- Essential Electronics Toolkit (1)
- iFixit Opening Tool (1)
- Phillips #00 Screwdriver (1)
![]() PARTS:
PARTS:
- DualShock 4 (JDM-030 and Earlier)Controller Battery (1)
Controller
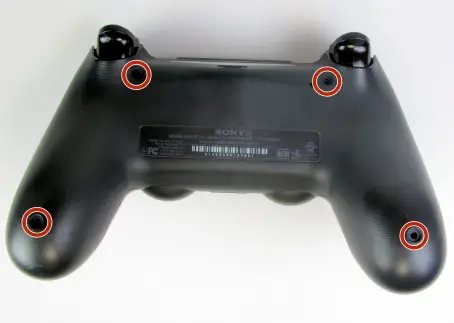
Using the Phillips #00 Screwdriver, remove the four 6.0 mm screws securing the rear cover to the controller.![]() Do not forcefully loosen the screws, as it will amount to permanent damage of the threads, making removal impossible.
Do not forcefully loosen the screws, as it will amount to permanent damage of the threads, making removal impossible.
Step 2
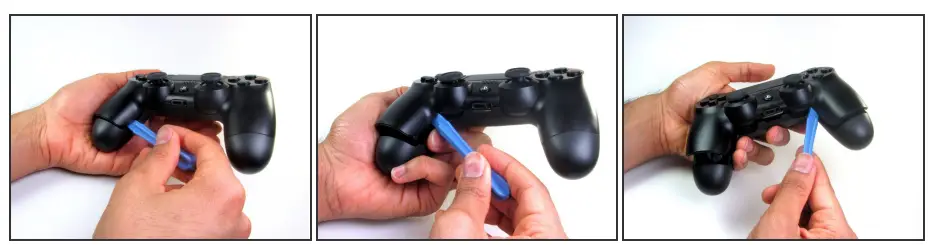
- Beginning with the left handle:
- Pinch the left handle of the controller to introduce an opening.
- Wedge a plastic opening tool into the opening and slide it up towards the joystick.
- Pull down on the plier to crack open the casing.
- Repeat these steps for the right handle.
Step 3
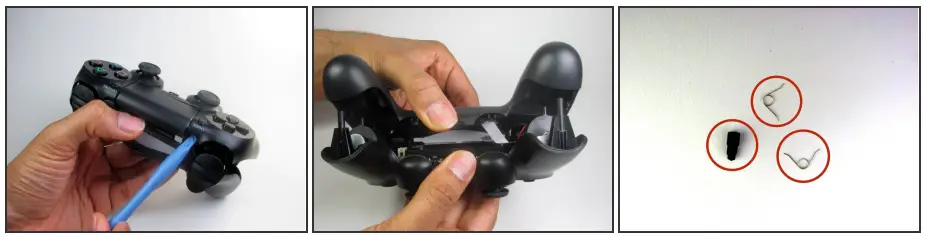
- Wedge a plastic opening tool into the case-splittings and pull down to crack open the casing near the following buttons:
- Share button
- Options button
- Split the plastic covers of the controller apart, taking note that they will still be attached by circuit board ribbons.
 Three small pieces are often released from the framework. To prevent the loss, maintain a controlled work field.
- 2 Trigger Springs
- 1 Grey Reset Button Extension
Battery
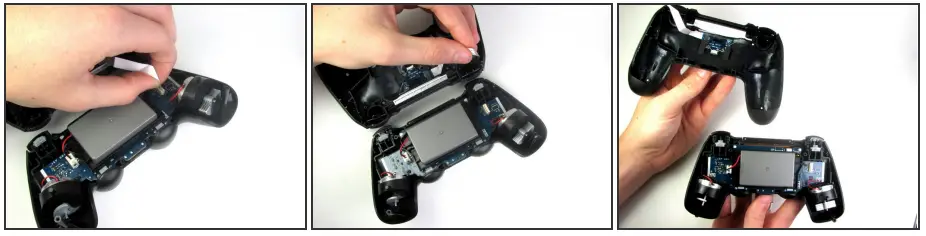
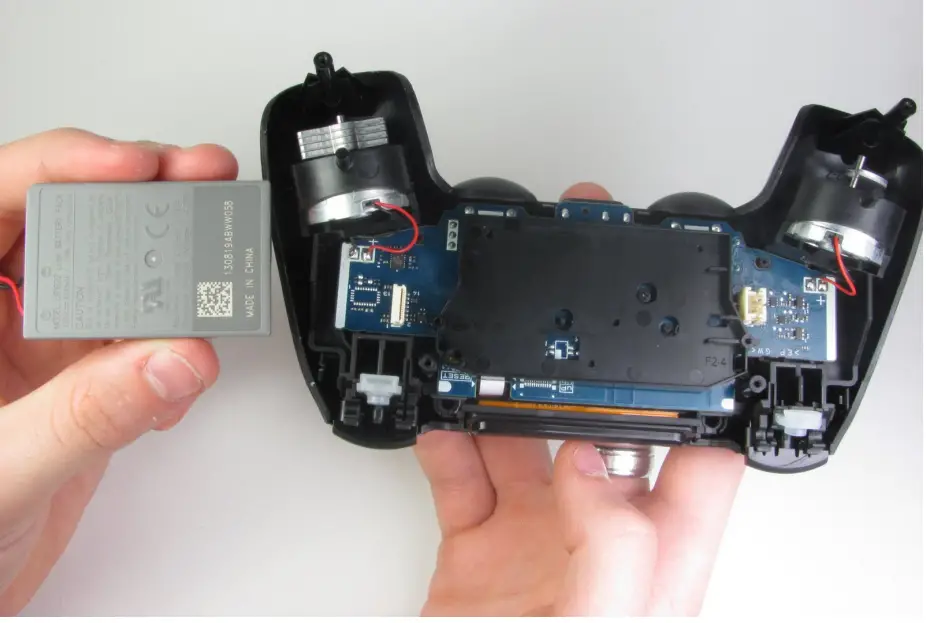
- Detach the motherboard ribbon connecting the two sides of the controller by pulling it straight out with your fingers.
 Note the orientation of the cable and make sure it faces the right way when you reconnect it.
 - After the two halves are separated, place the top of the controller off to the side
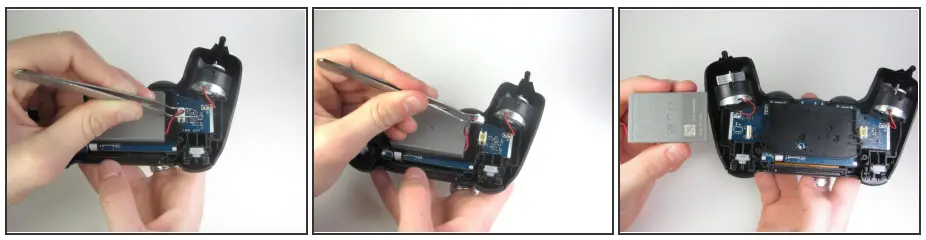
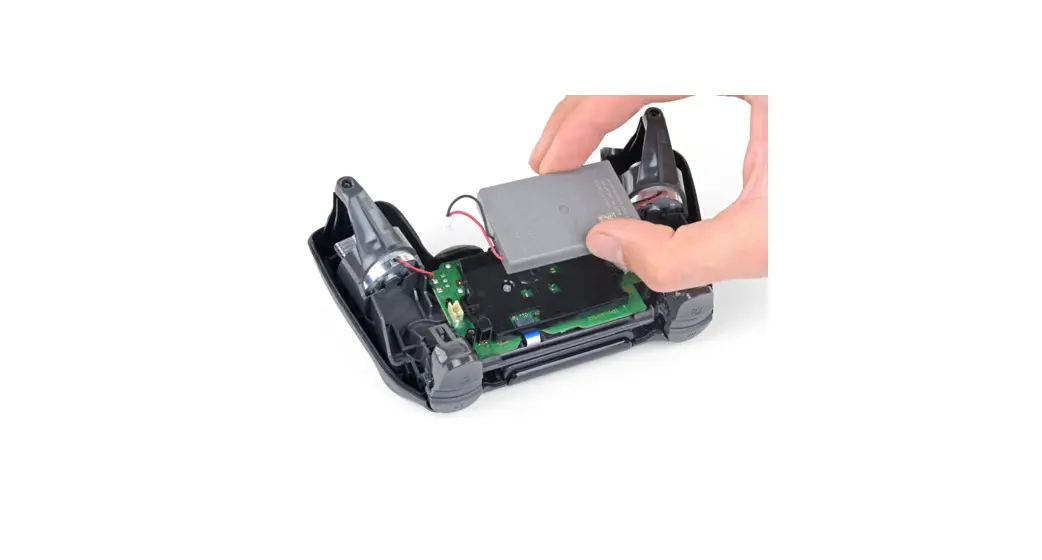
- Using the blunt forceps, remove the battery plug by gently rocking the forceps side-by-side to loosen the plug.
- After removal of the plug from the motherboard, the battery can be lifted off of the controller.
 Hasty removal of the battery plug could warp the plastic grips of the plug.
To reassemble your device, follow these instructions in reverse order.
![]() This document was generated on 2022-06-15 at 04:18:06 PM (MST).
This document was generated on 2022-06-15 at 04:18:06 PM (MST).
© iFixit — CC BY-NC-SA
www.iFixit.com


