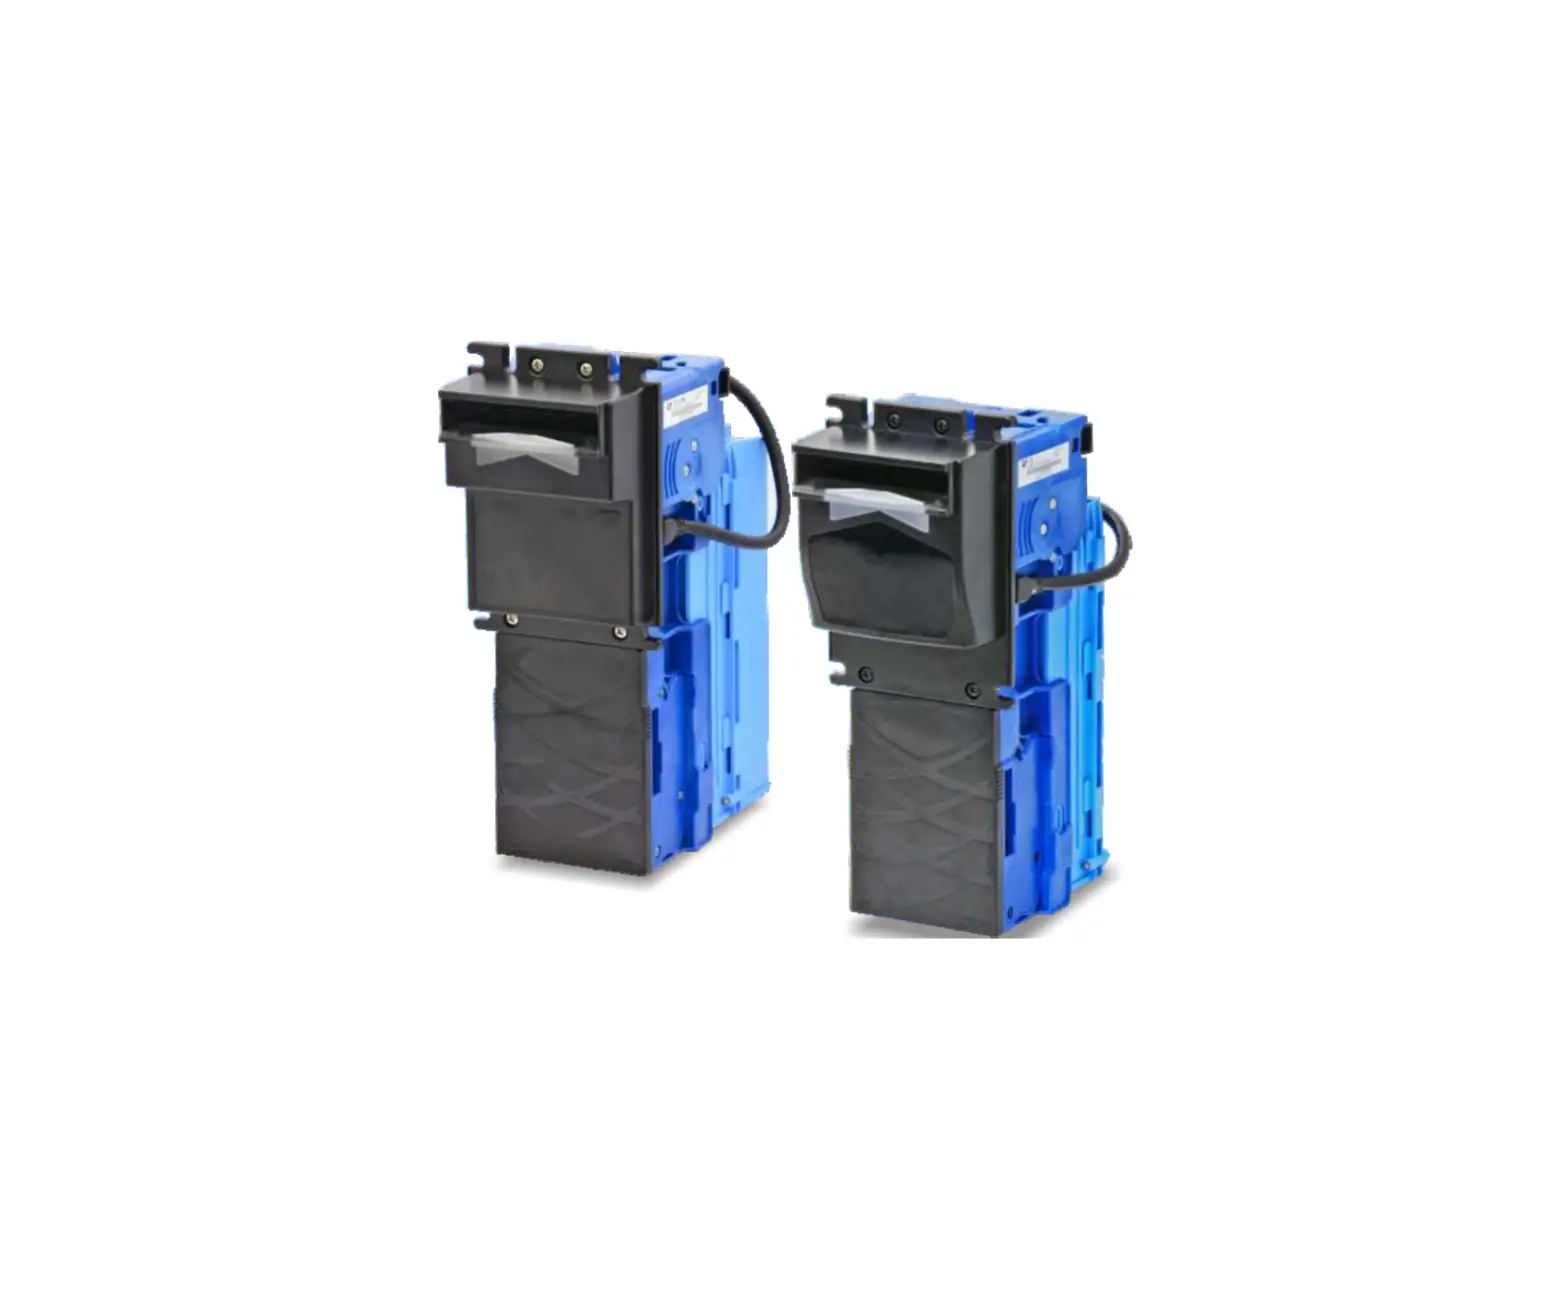
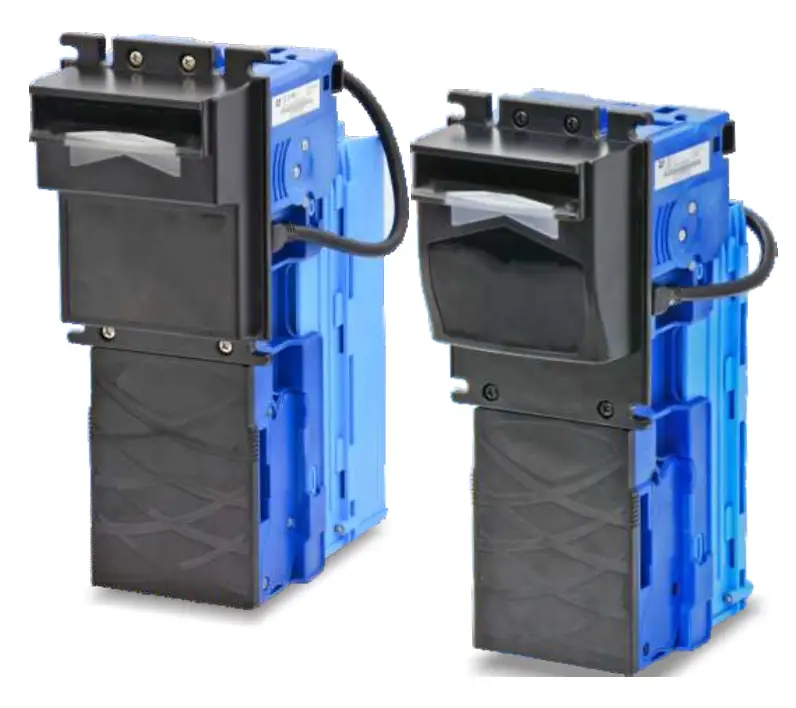
iCT XBA-Mini Bill Acceptor
Introduction
Overview
The XBA-mini Bill Acceptor equips with innovative wide-angle banknote insertion technology to offer superior acceptance rate of 98% or higher. With the outstanding design, the XBA-mini has the ability to provide very high degree of immunity to strong ambient light, and the advanced optical/mechanical anti-fishing structure for better investment protection. The built-in USB port allows firmware upgrades via USB flash drive conveniently.
Features
- Unique wide-angle banknote insertion technology
- High immunity against strong ambient light
- Advanced optical/mechanical anti-fishing structure
- Firmware via USB, MDB-FTL, TTL-Serial.
- Auto-calibration technology and multi-color optical sensors
- Superior validation M.T.B.F 300.000 cycles
- Strong resistance to severe weather conditions
- Improved water draining system
- Equipped with flip-up metal cash box
Specifications
General
| Acceptance Rate | 98% or greater |
| Note: The incomplete bills such as extremely dirty, wet, broken or wrinkled ones are excluded. | |
| Bill Insertion | Four way acceptable |
| Transaction Speed | Approx. 2.5 s to stack |
| Interface | MDB, Pulse, ICT Protocol, JPSTD |
| Installation | Indoor & Outdoor |
Electrical
| Power Source | 12V DC±10% 24V DC±10% 34V DC±10% 24VAC±10% |
| Power Consumption | Standby: 0.2A, 2.4W Operation: 1.0A, 12W Maximum: 2.0A, 24W |
| Operation Environment | Operating Temperature: -15°C~60°C Storage Temperature: -30°C~ ?0°C Humidity: 30%~95%RH(no condensation) |
Mechanical
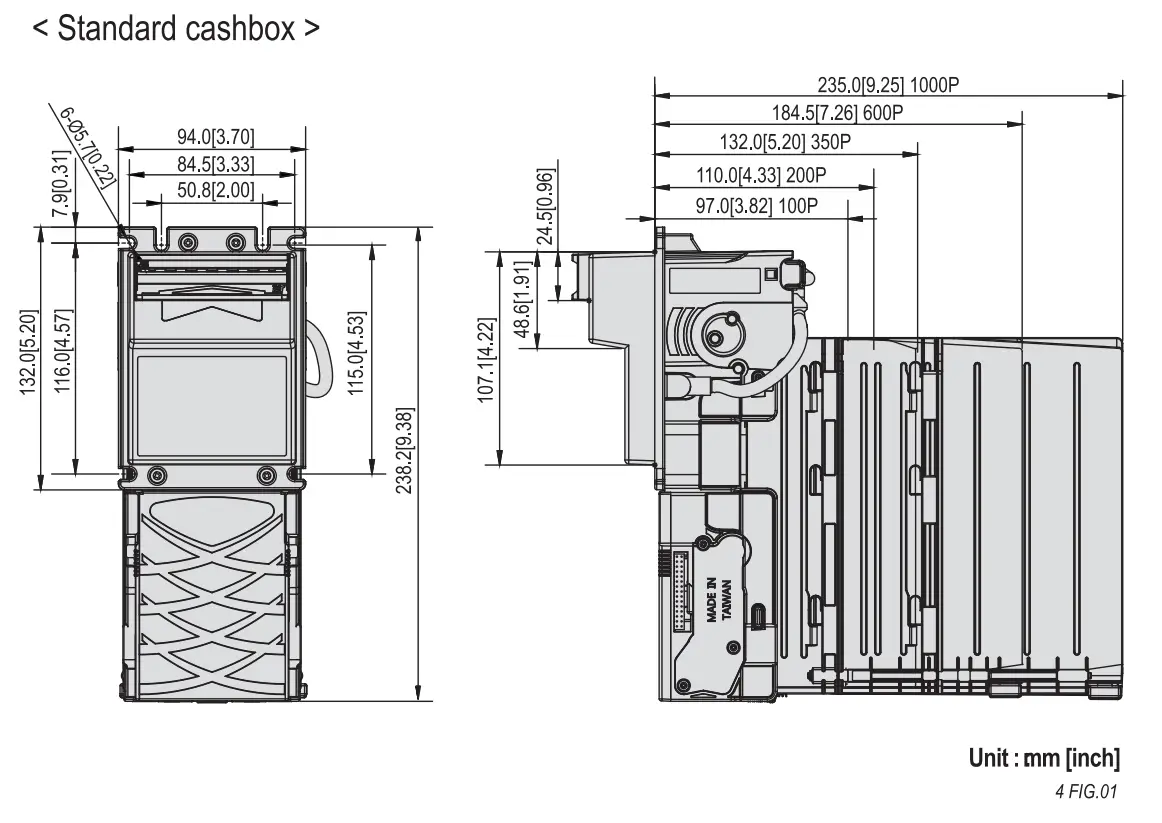
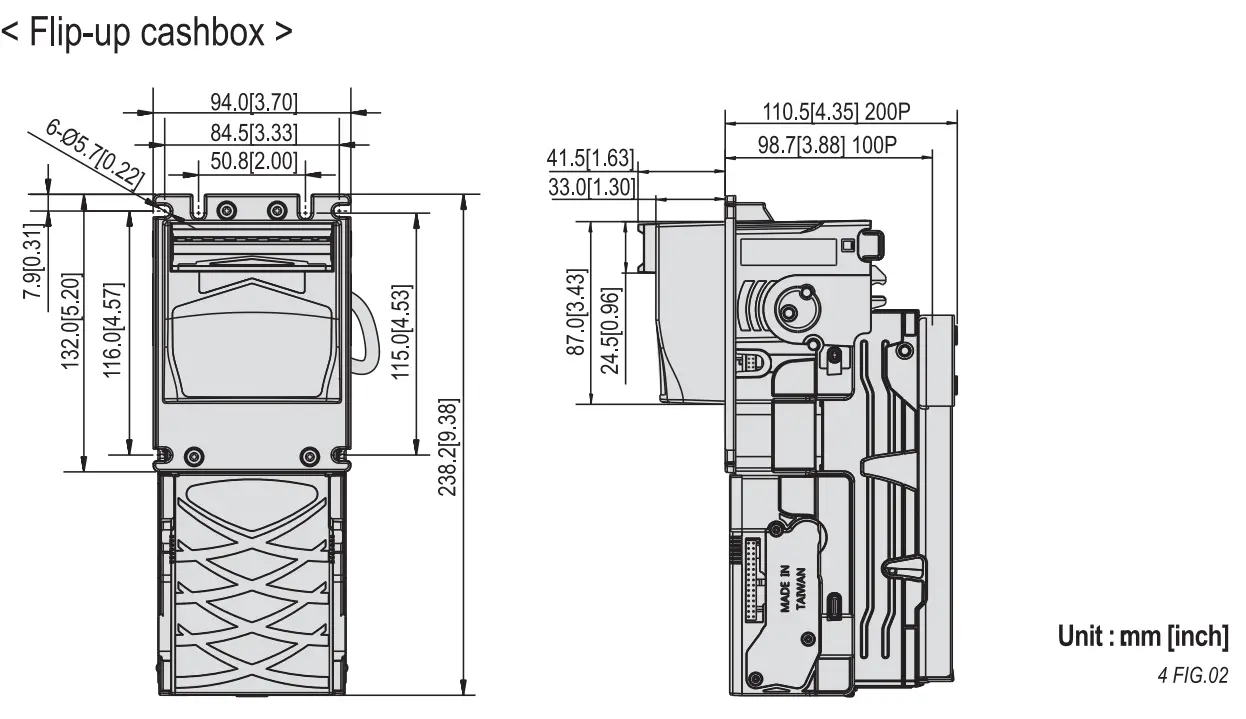
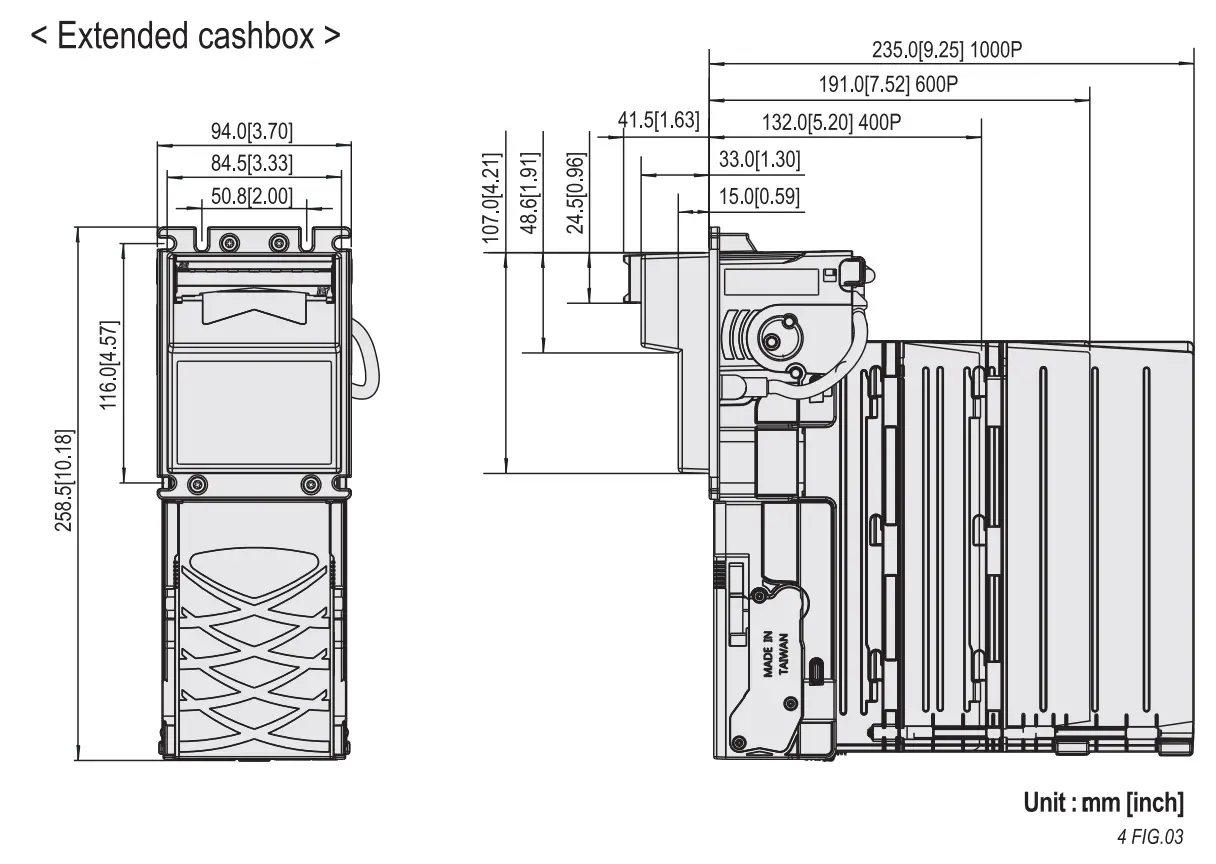
| Bill Capacity | Standard cashbox: Approx.100 bills, 200 bills, 350 bills, 600 bills, 1000 bills.Flip-up cashbox: Approx.100 bills, 200 bills.Extended cashbox: Approx.400 bills, 600 bills, 1000 bills. |
| Weight | Approx.1.2kg~1. 7kg (Depend on Bezel style and Bill box capacity) |
| Bill Accepted Width | Standard/ Extended cashbox: 62~74mm Flip-up cashbox: 62~72mm |
| Bill Accepted Length | Standard/ Flip-up cashbox: 120~160mm Extended cashbox: 120~180mm |
Packing List
| Main | Bill Acceptor |
| Accessory | Harnesses: Refer to 5-1 |
Dimension
Installation
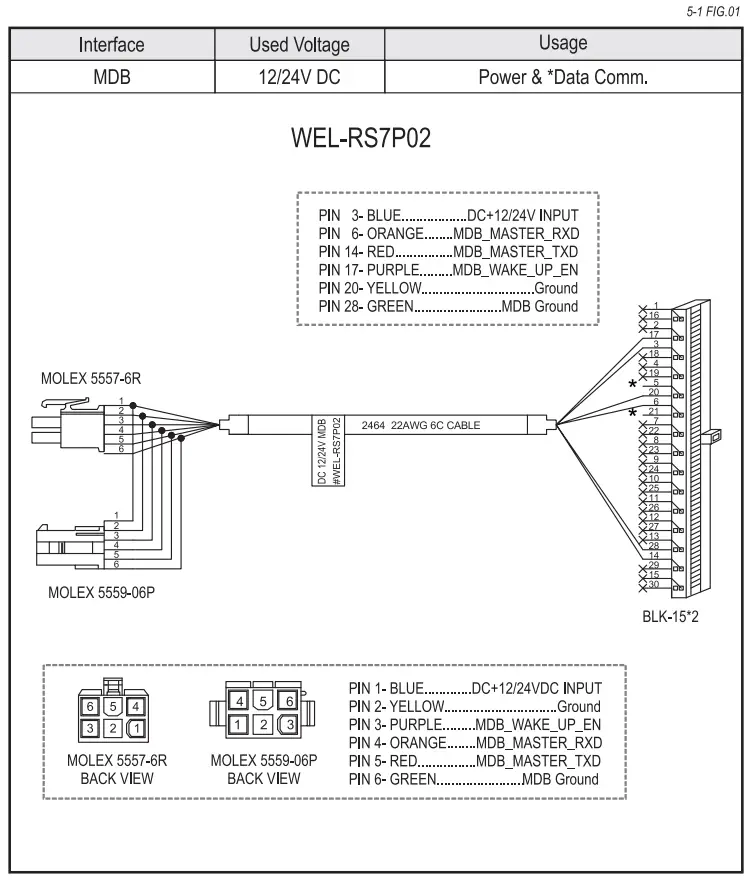
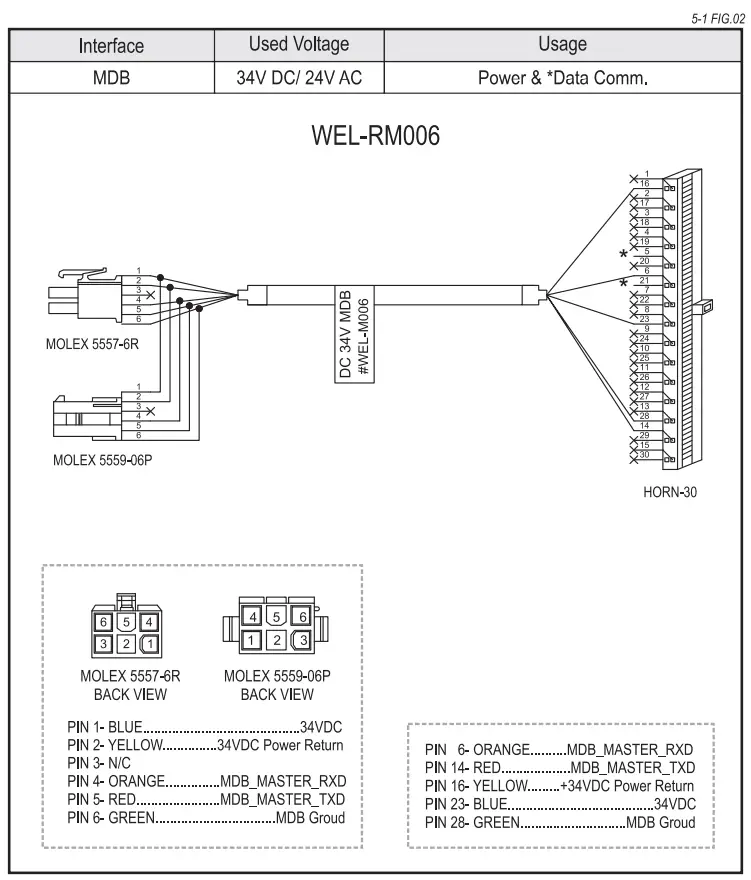
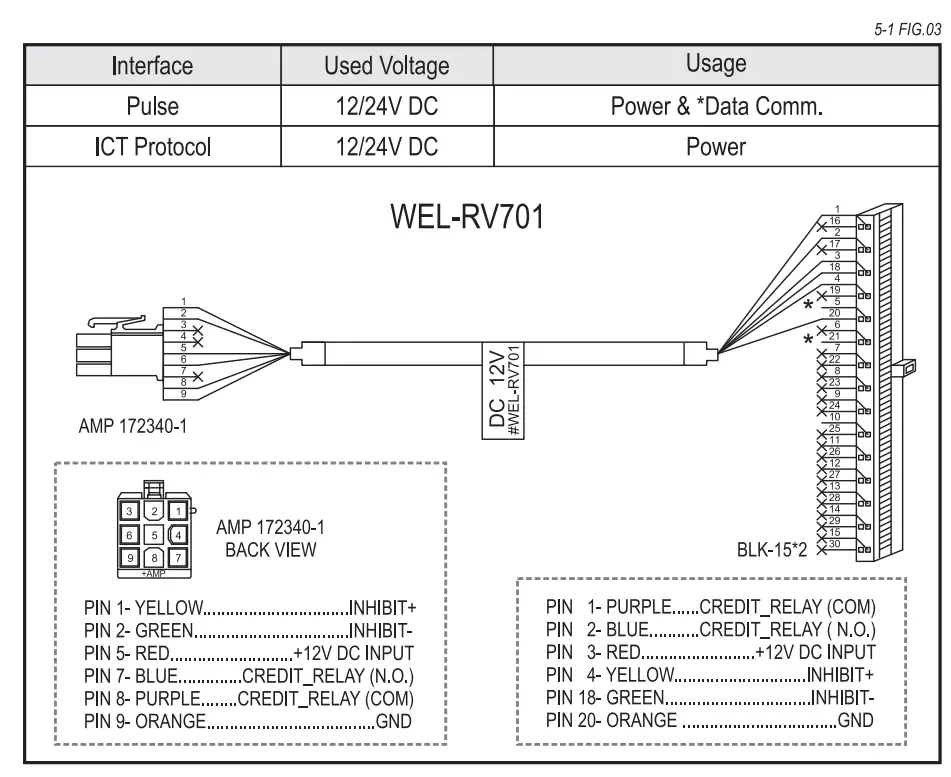
Harness Application
| Interface | Used Voltage | Usage | Harness | Page |
| MOB | 12/24VDC | Power & *Data comm. | WEL-RS7P02 | 7 |
| 34VDC | Power & *Data comm. | WEL-RM006 | 8 | |
| 24VAC | ||||
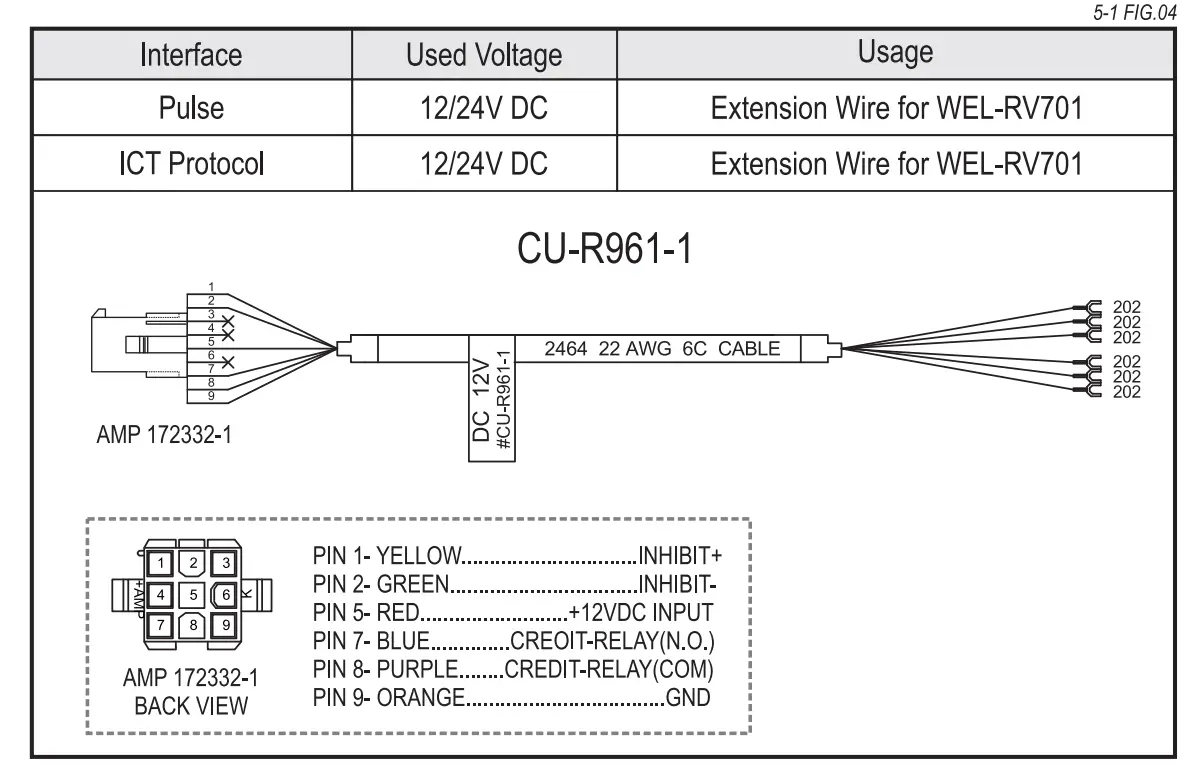
| Pulse | 12/24VDC | Power & *Data comm. | WEL-RV701 | 9 |
| Extension Wire | CU-R961-1 | 9 | ||
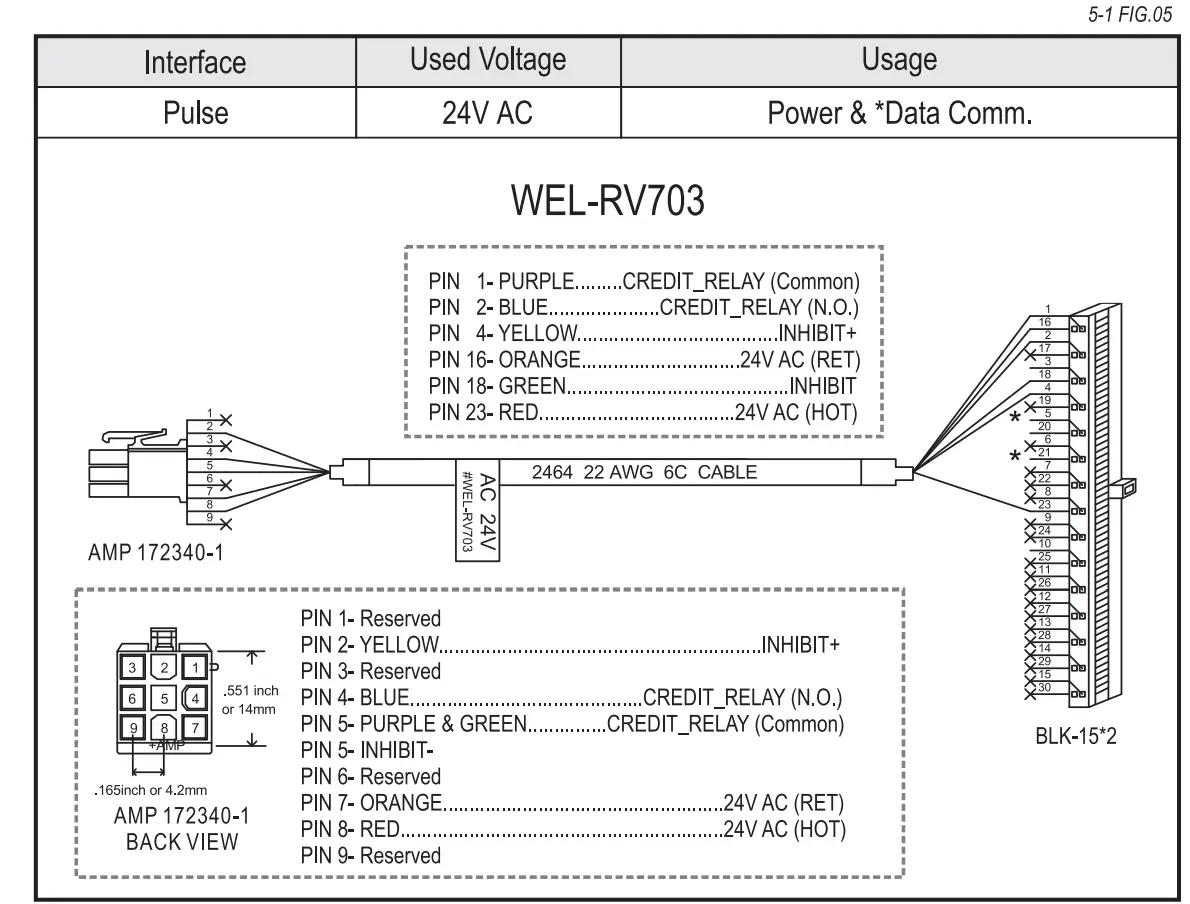
| 24VAC | Power & *Data comm. | WEL-RV703 | 10 | |
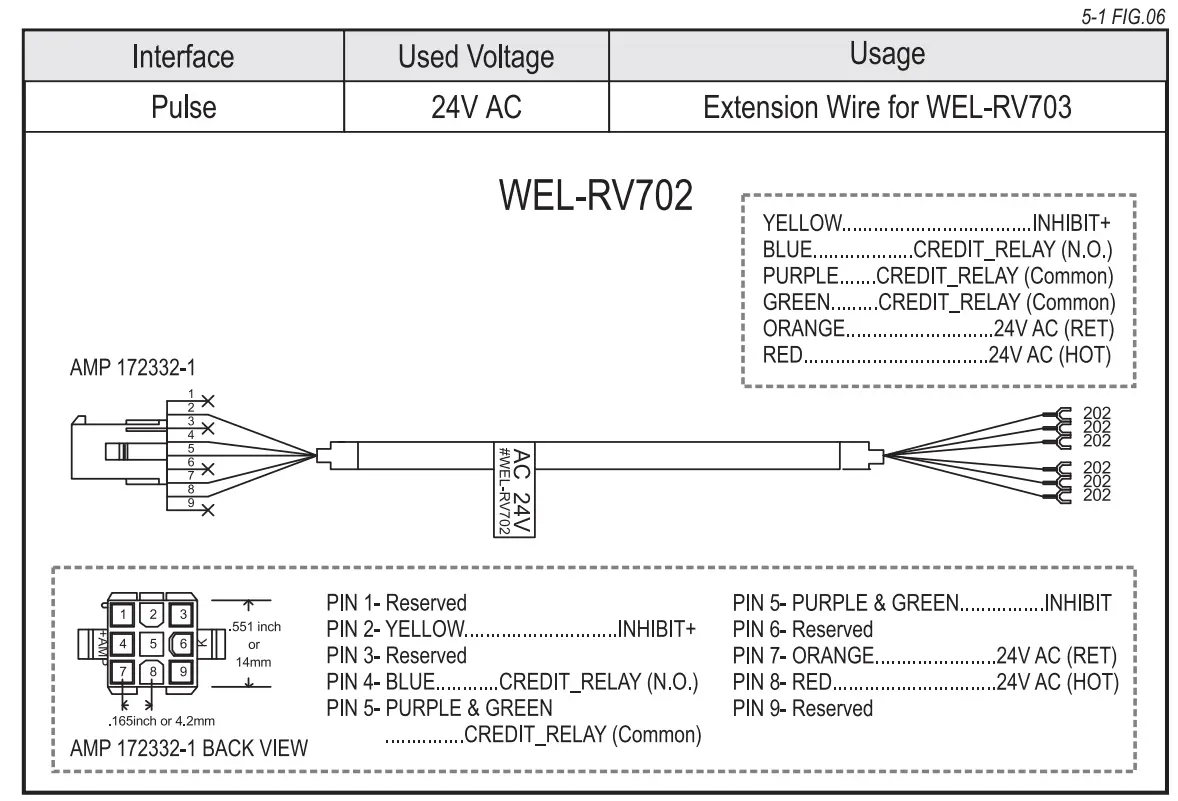
| Extension Wire | WEL-RV702 | 10 | ||
| ICT Protocol | 12/24VDC | Power | WEL-RV701 | 9 |
| Extension Wire | CU-R961-1 | 9 | ||
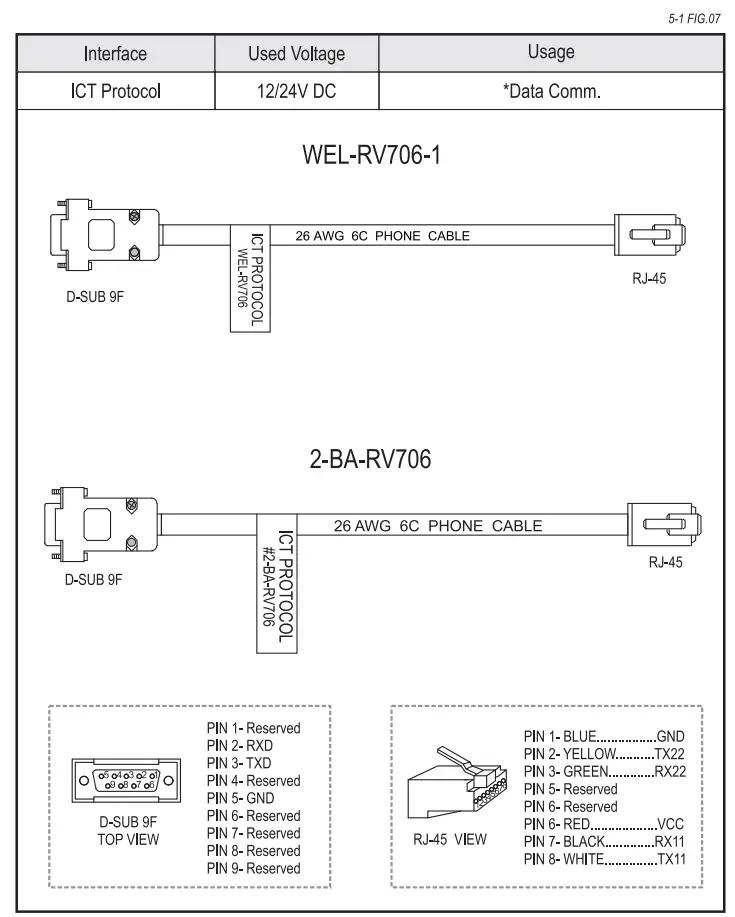
| *Data Comm. | WEL-RV706-1 or 2-BA-RV706 | 11 | ||
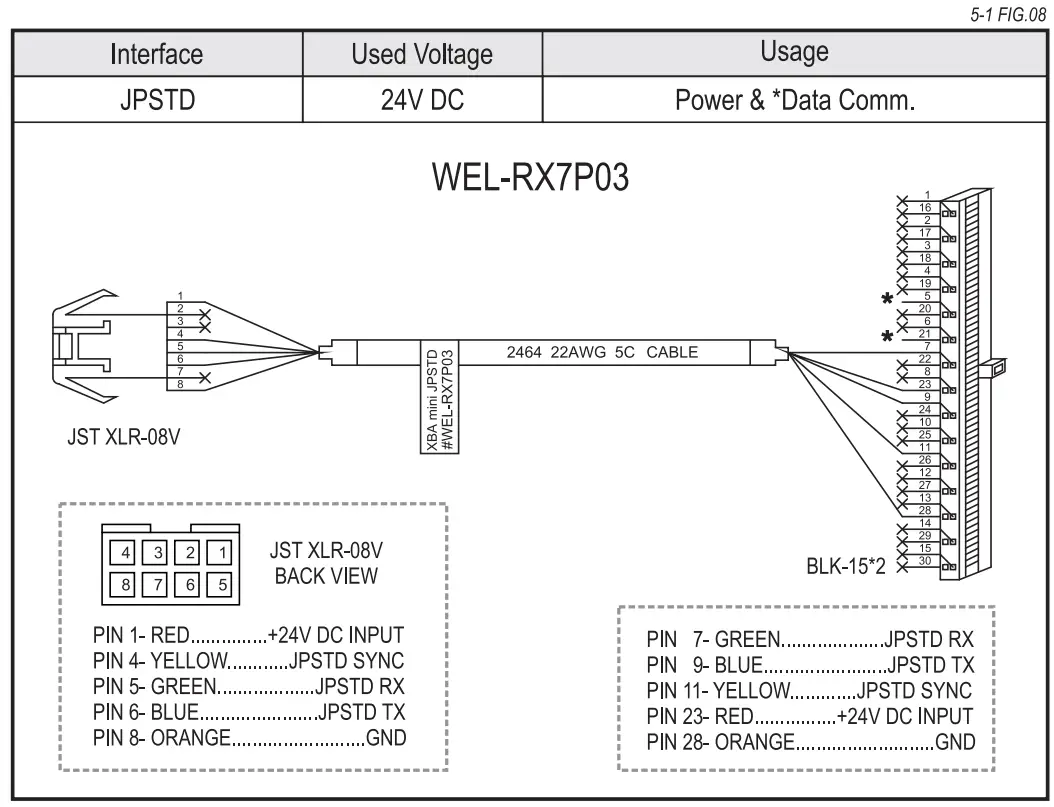
| JPSTD | 24VDC | Power & *Data Comm. | WEL-RX7P03 BE | 12
12 |
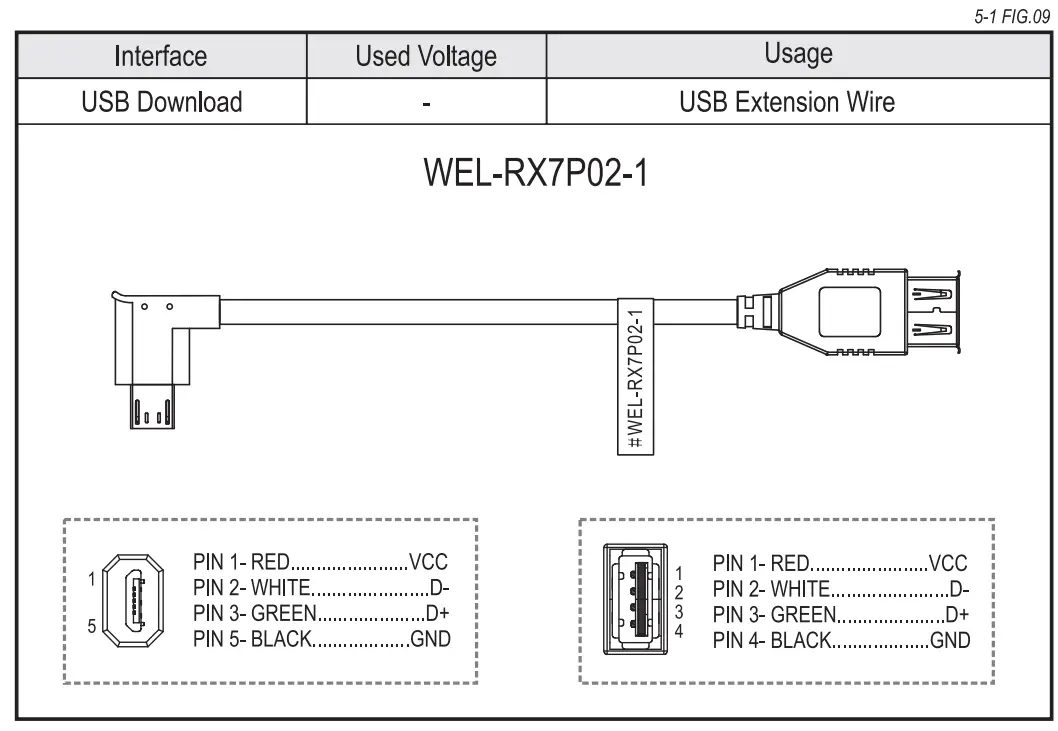
| USB Download | USB Extension Wire | WEL-RX7P02-1 |
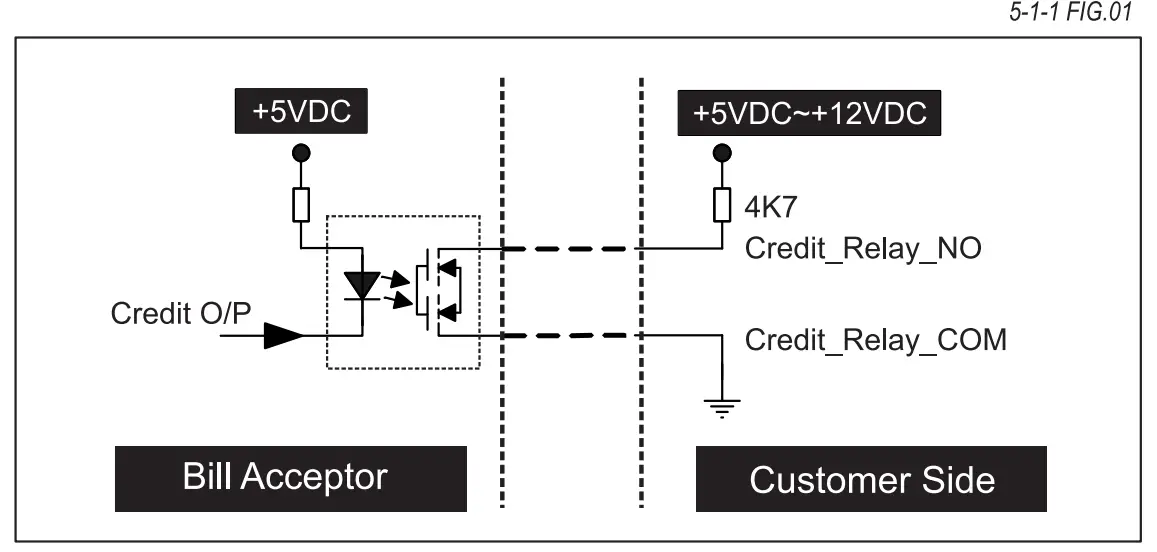
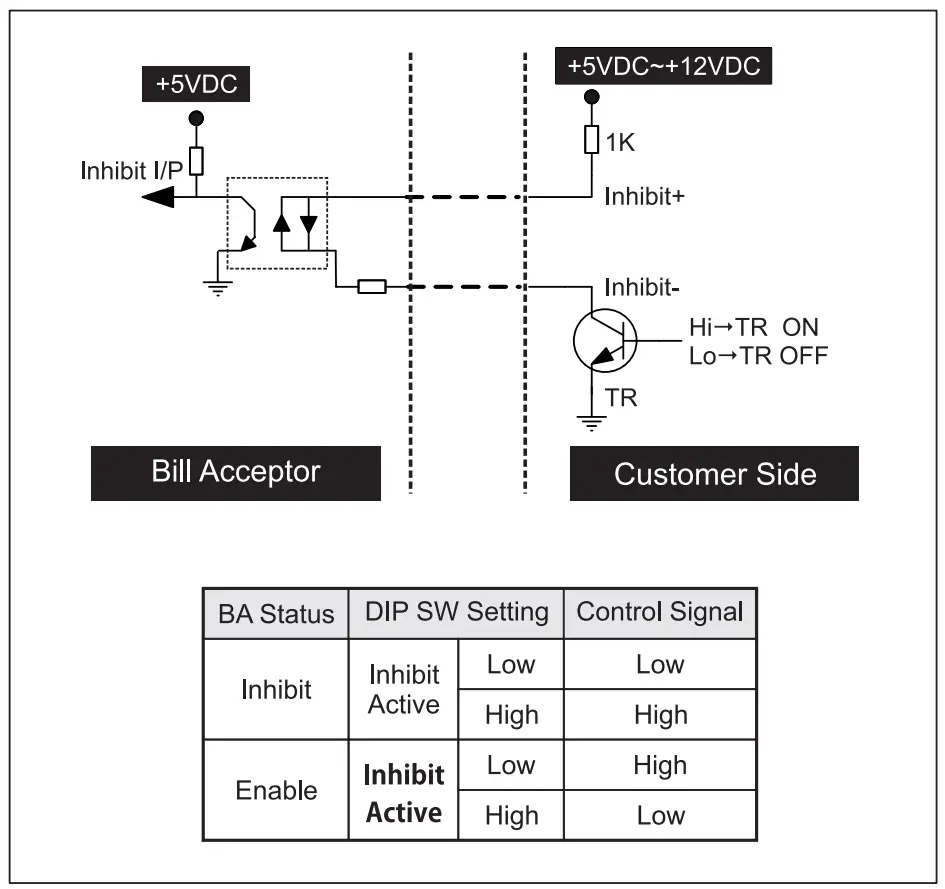
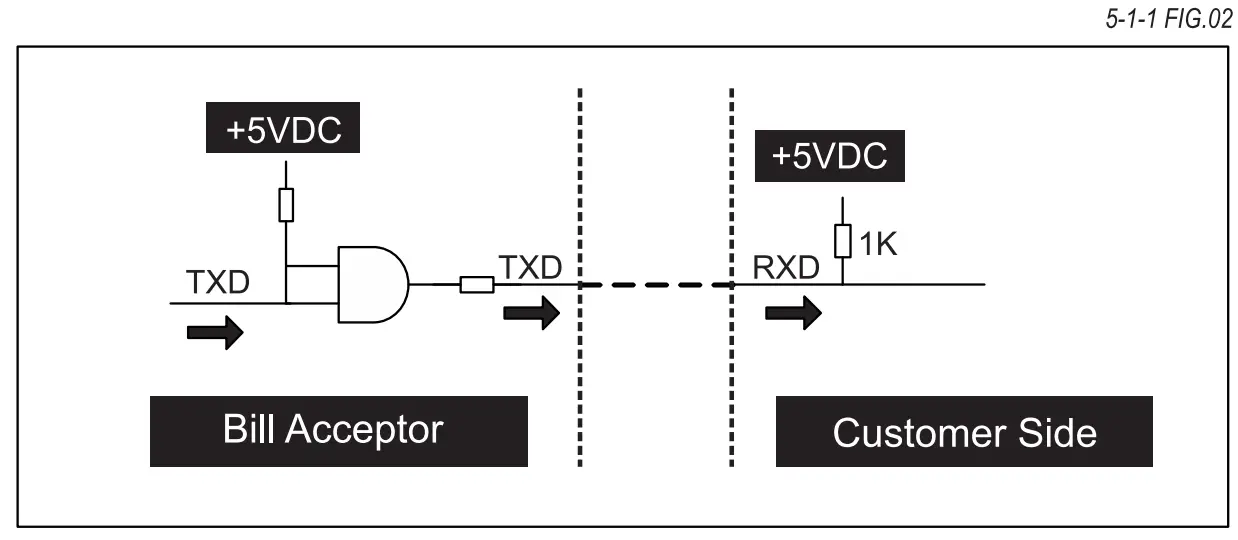
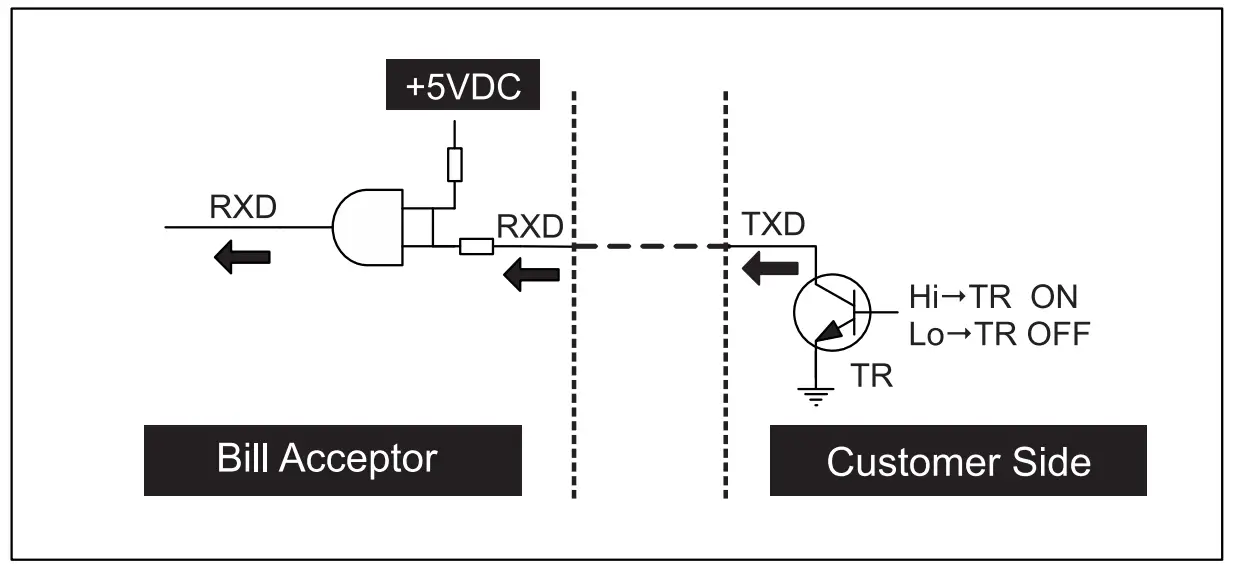
I/O Circuit
Pulse Interface.
ICT-Protocol Interface.
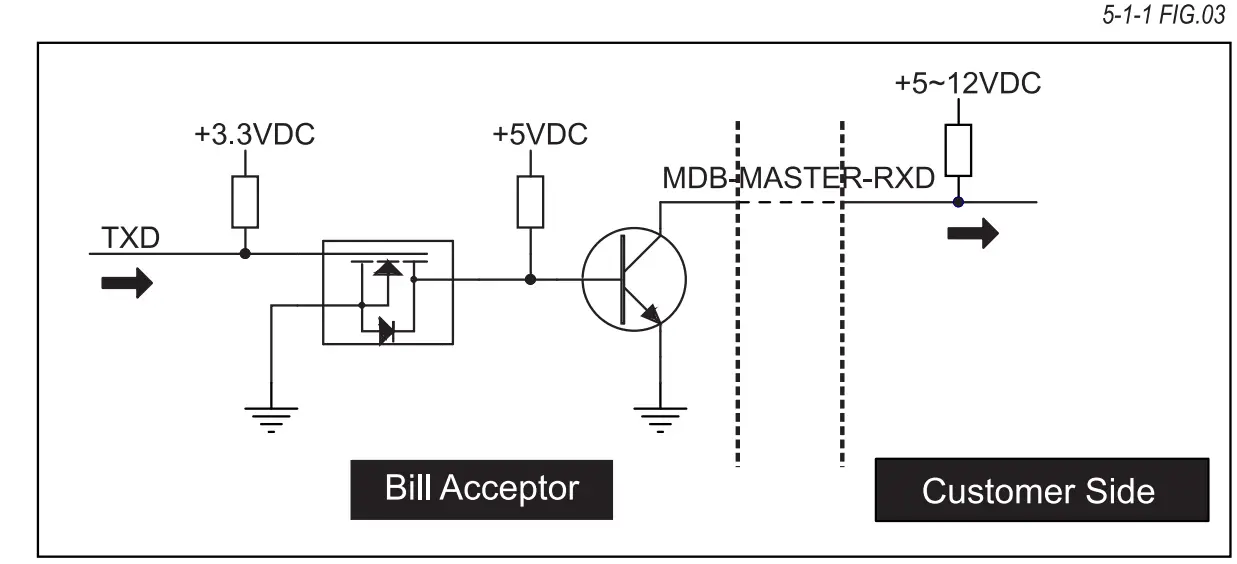
MDB Interface.

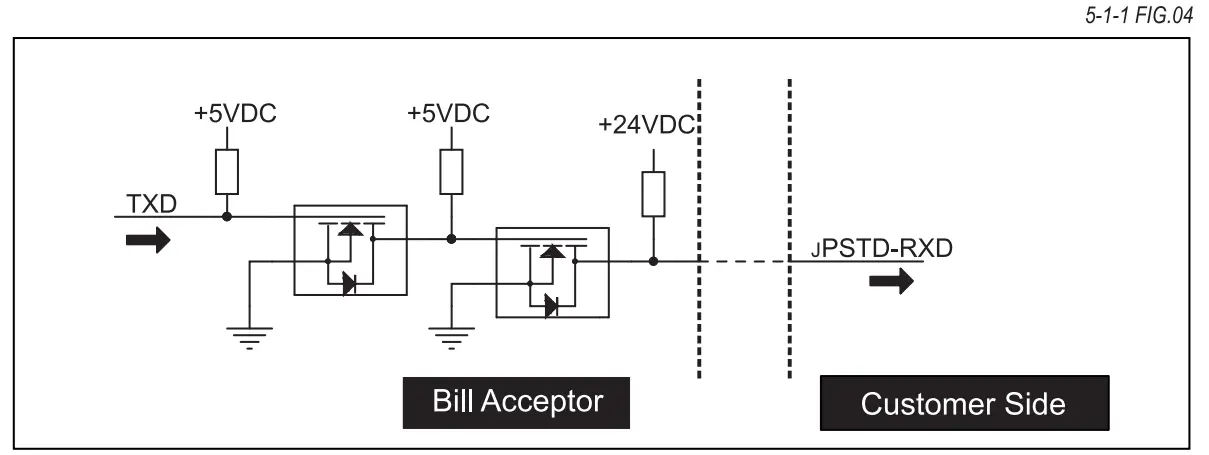
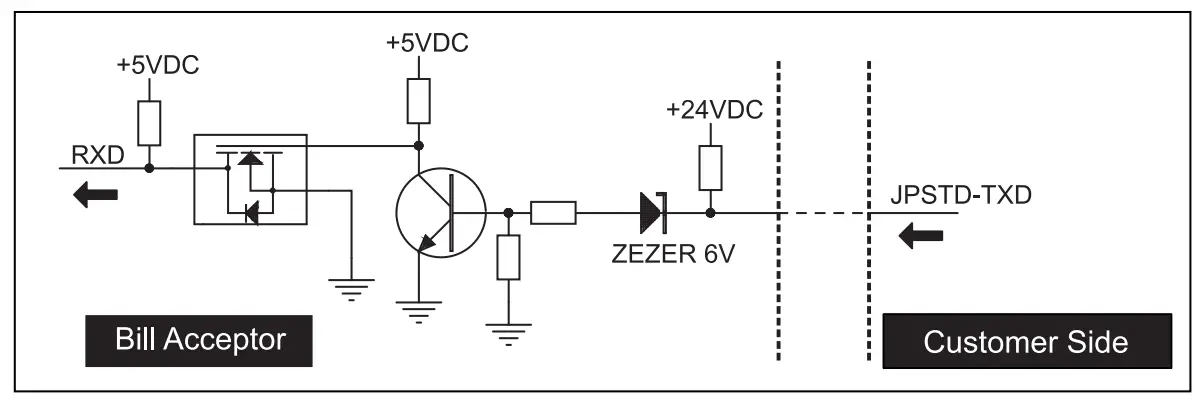
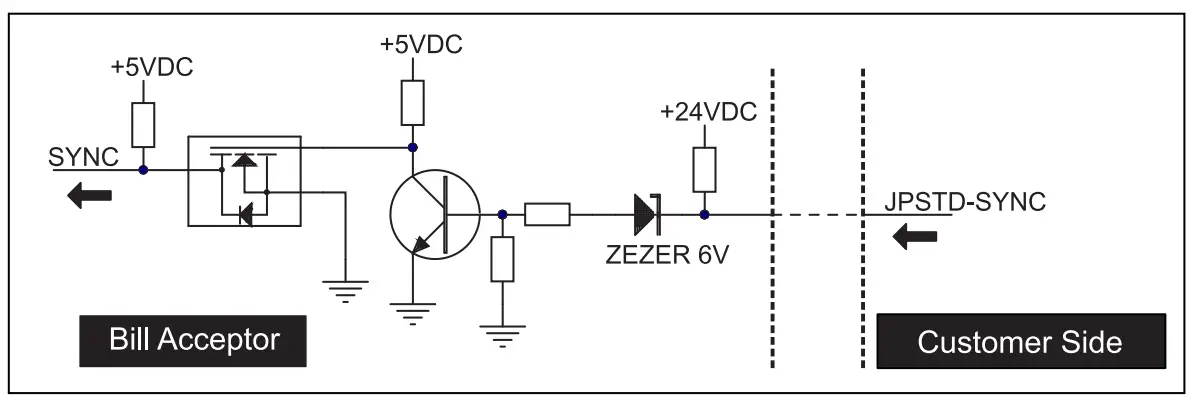
JPSTD Interface.
DIP Switch Setting
Two dip switches are located on as FIG.01 the CPU board, and as FIG.02 the sides of XBA-mini series.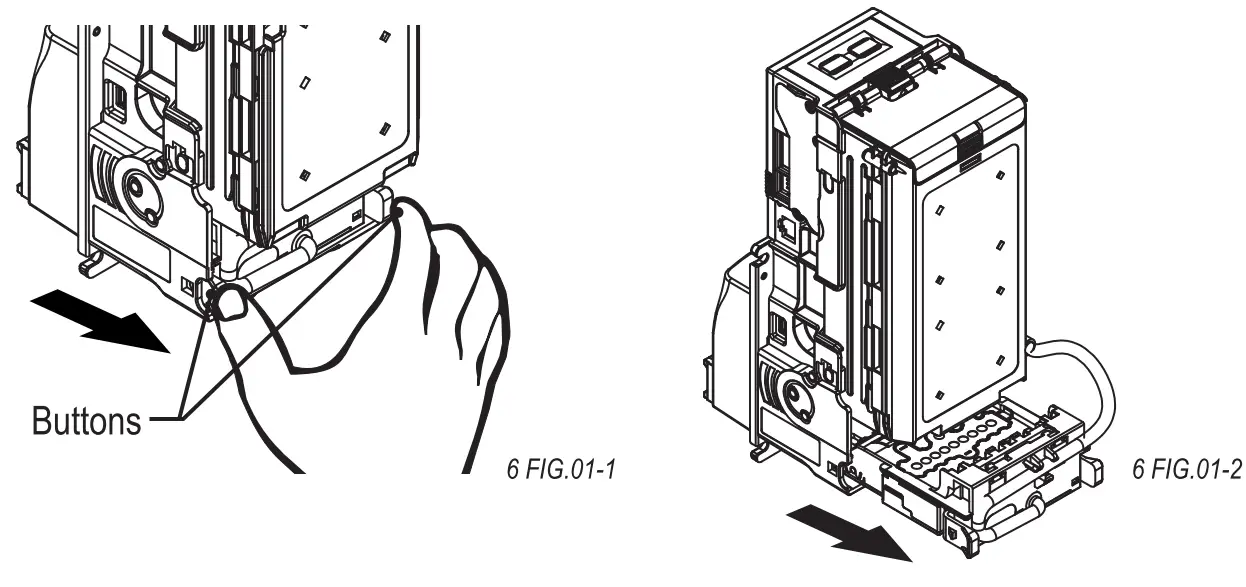
Firmware Download and Upgrade
Step 1. Put the “X?Exxx.bin” file into your USB Pen Drive.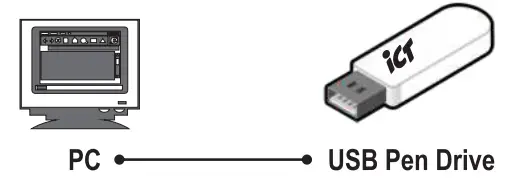
Step 2. Turn off XBA-mini, plug the USB Pen Drive into the USB connector on the XBA-mini and then turn on the XBA-mini.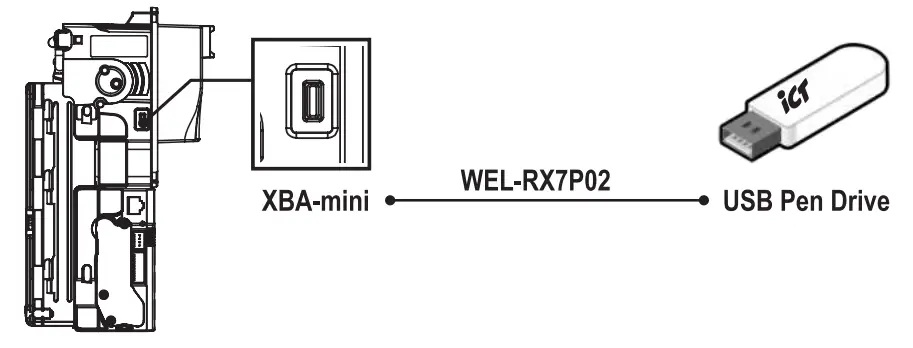
Step 3. The LED in the rear side of bill insertion module will flash twice, then remove the USB Pen Drive from XBA-mini.
Step 4. Wait for about 30sec., Then XBA-mini will automatically reset and standby for normal operation.
Maintenance
To make sure the bill acceptor always works smoothly, please clean the internal parts regularly.
To clean the internal parts:
- Press the buttons on the sides of bill path and pull the unit out.

- Use a soft, dry cloth or towel to clean the bill path and sensors.


Maintenance Notice | ||
 | Recommended | Mild, non-abrasive, soap water. |
| DO NOT USE | Organic solvent , Alcohol, Volatility liquid. | |
Troubleshooting
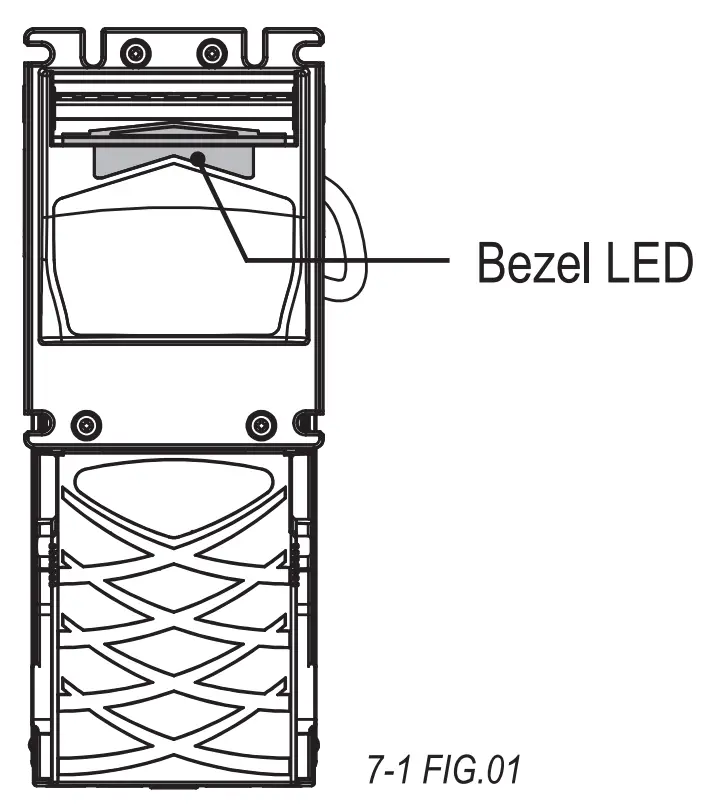
Bezel LED Errors
LED Flashes | Status | Corrective Actions | |
RED | GREEN | ||
| 1 | White Card Calibration | Please calibrate with ICT white calibration card. | |
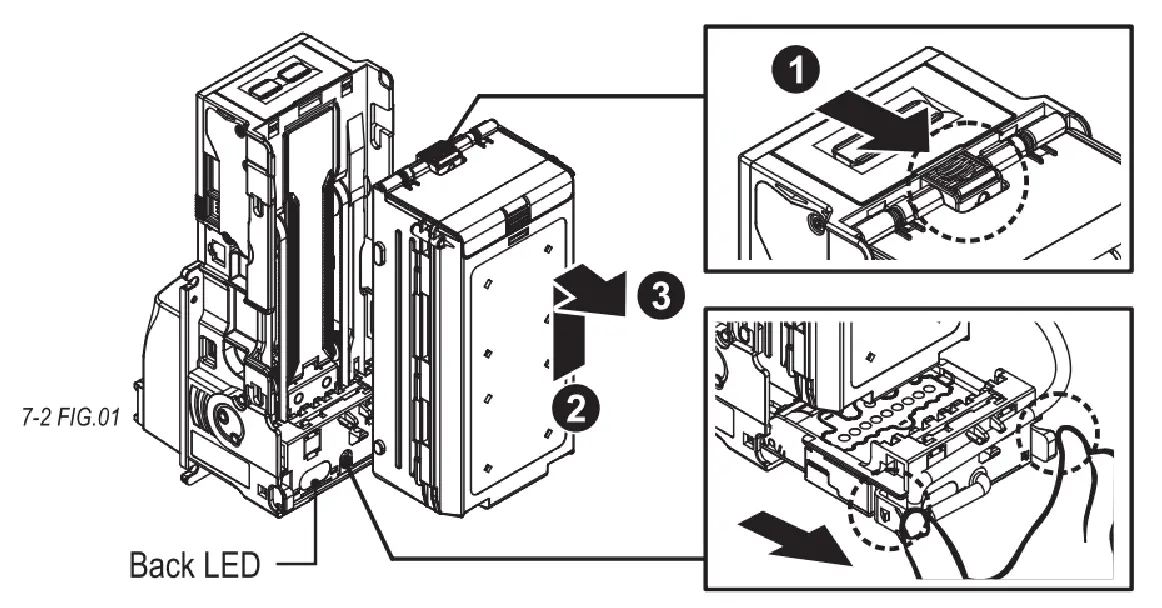
| 1 | Bill jammed. | Remove the bill box by sliding the top button and the bill path(as 7-2 FIG.01), and then remove the jammed bill. | |
| 2 | Disable. | Inspect the right DIP switch setting. | |
| 3 | Recognition sensor module error. | Inspect the foreign objects on sensor or bill path and clean. | |
| 3 | 1 | IR error. | Inspect the foreign objects on sensor or bill path and clean. |
| 3+2 | Hook sensor error. | Inspect the foreign objects on security hook and clean. | |
| 4 | Anti-string sensor error or a stringing attempt has detected. | Inspect the foreign objects on sensor or bill path and clean. | |
| 5 | Bill box has been removed. | Replace the bill box. | |
| 6 | Stacker error or stacker full. | Empty the bill box. | |
| 7 | Motor error. | Inspect the foreign objects on bill path and clean. | |
 | If the error can not be solved after corrective actions or happen again, please contact ICT for technical support. |
Back LED Errors
| LED Flashes | Status | Corrective Actions |
| RED | ||
| White Card Calibration | Please calibrate with ICT white calibration card. | |
| Bill jammed. | Remove the bill box by sliding the top button and the bill path(as 7-2 FIG.01), and then remove the jammed bill. | |
| 2 | Disable. | Inspect the right DIP switch setting. |
| 3 | Recognition sensor module error. | Inspect the foreign objects on sensor or bill path and clean. |
| 3+1 | IR error. | Inspect the foreign objects on sensor or bill path and clean. |
| 3+2 | Hook sensor error. | Inspect the foreign objects on security hook and clean. |
| 4 | Anti-string sensor error or a stringing attempt has detected. | Inspect the foreign objects on sensor or bill path and clean. |
| 5 | Bill box has been removed. | Replace the bill box. |
| 6 | Stacker error or stacker full. | Empty the bill box. |
| 7 | Motor error. | Inspect the foreign objects on bill path and clean. |
| If the error can not be solved after corrective actions or happen again, please contact ICT for technical support. |
 No.28, Ln. 15, Sec. 6, Minquan E. Rd., Neihu Dist., Taipei City 114, Taiwan
[email protected] (For Sales)
[email protected] (For Customer Service)
Website: www.ictgroup.com.tw