SelectBlinds 1 Inch Architect Aluminum Blinds

Product Information
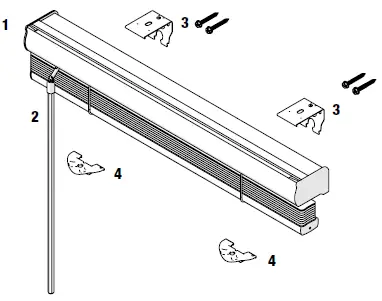
The product is a blind that can be installed on a level surface using brackets and screws. The blind comes with everything needed for installation, including brackets, screws, cordless handles, and optional hold-down brackets and side-mount brackets. The blind can be operated using a wand to tilt the slats open or closed and lift cords to raise or lower the blind. The blind also comes with optional extension brackets for wider windows.
Product Usage Instructions
- Ensure that you have all the necessary tools, including a 1/16 or 3/32 drill bit.
- Determine the number of brackets needed based on the headrail width of your blind. Refer to the bracket chart for guidance.
- Drill holes in the level surface where you want to mount the brackets.
- Install the brackets on the level surface and ensure that they are aligned from top to bottom and front to back.
- Place the blind on the brackets and snap it into place using the snap abrochar engager mechanism.
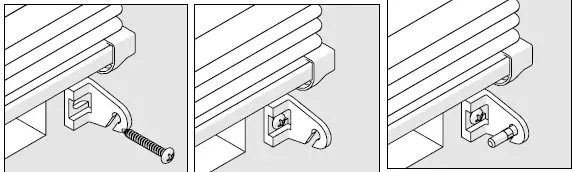
- If using optional hold-down brackets, install them at the bottom of the blind to secure it in place.
- Install cord cleats 6 to 12 inches apart at a height out of reach of children and wrap cords around them when not in use.
- If desired, attach the tilt wand to the blind using the wand connector clip.
- To raise or lower the blind, tilt the slats open and pull the lift cords straight down to raise it. Move cords toward the outside edge of the blind to engage the lock at the desired height. To lower it, pull lift cords towards the center of the blind to release the lock and feed the cords into the blind.
- To tilt the slats open or closed, pull the wand slightly into the room for easiest operation and rotate it to the desired position.
- Clean the blind using the recommended cleaning instructions.
HOW TO INSTALL
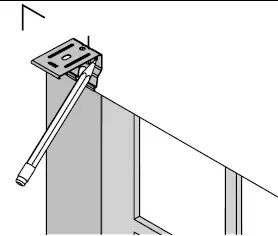
Inside-, outside-, or ceiling-mount aluminum blinds with hidden brackets
- Inside/Ceiling Mount
- Outside Mount

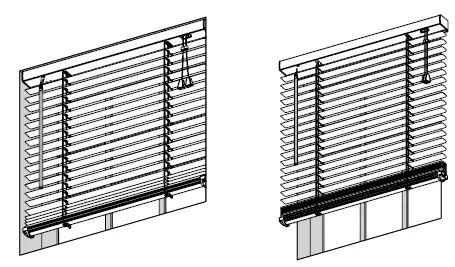
Everything needed to install your blind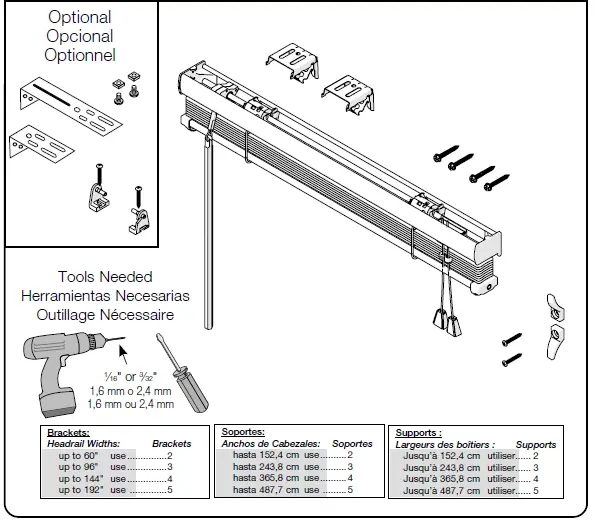 For blinds OVER 21″ wide with standard or reversed standard control positions.
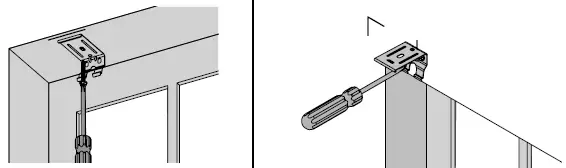
Mark screw location
Note: For ½” slat blinds under 12″ wide and for blinds under 137⁄8″ wide, and all same-side control blinds, brackets must be positioned directly over the blind’s internal tilting components.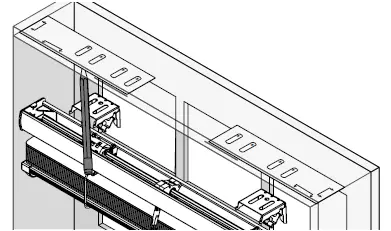
- Standard blind with standard or reversed controls
- Same-side controls and undersized blinds

Drill holes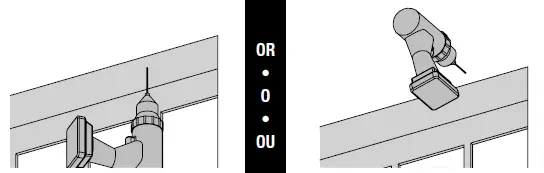 Screw in brackets
Brackets must be installed on a level surface and aligned from top to bottom and front to back.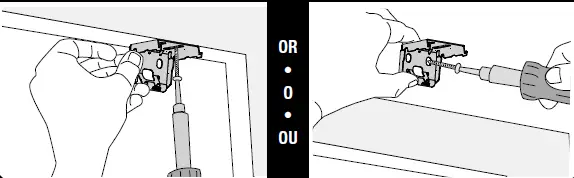 Optional projection brackets
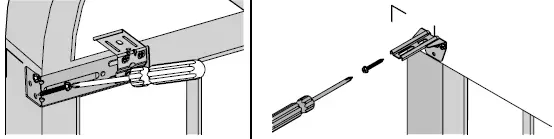
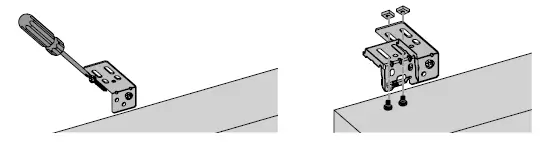 Mount blind on brackets
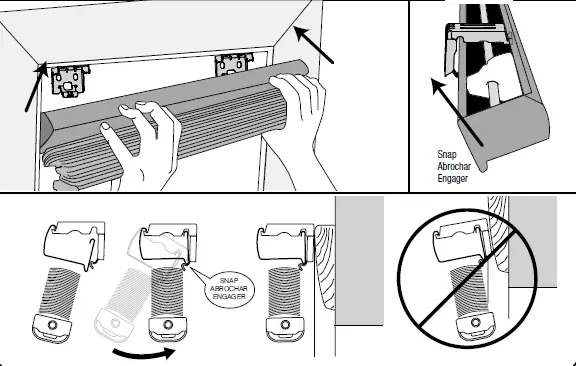 Optional hold-down brackets
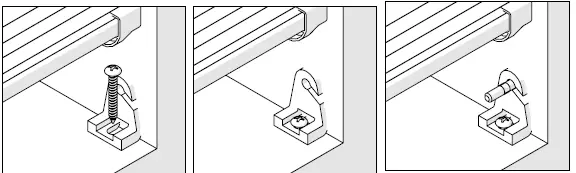
- Inside Mount
- Outside Mount
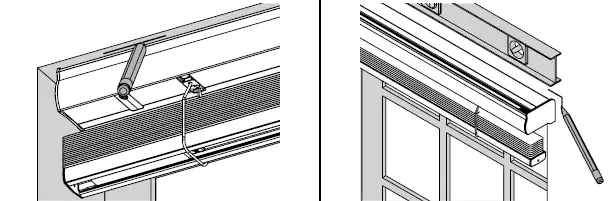
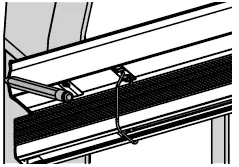
 Install cord cleat
Install cord cleats 6″ to 12″ apart at a height out of reach of children. Wrap cords around cleats when not in use.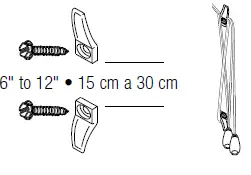 Optional attach tilt wand
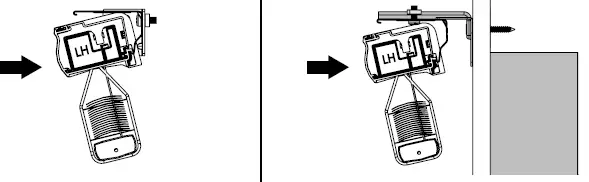
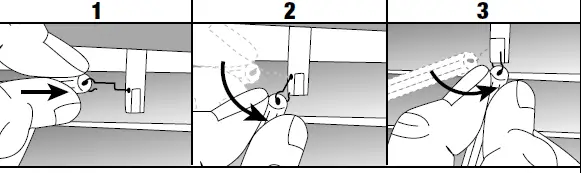 To connect the wand with the wand connector clip pull the end of the connector clip through the hole on the end of the wand. Locate the hole at the top of the long groove on the wand tilter stem and insert the wand connector clip. Pull the wand connector clip down and to the short side of the tilter stem and snap on.
Blind operation: Opening and closing the slats
Close the slats in the direction desired for light control and privacy. Pull wand into room slightly for easiest operation. Rotate wand to open or close slats.
- Wand tilt
 Cord lift blind operation: Raising and lowering
 - Raising the blind
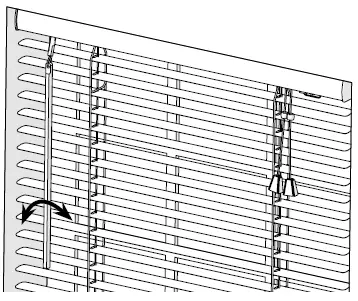
 Tilt open slats and pull lift cords straight down to raise the blind. At the desired height, move cords toward the outside edge of the blind then gently release the cords to engage the lock.
 Cord lift blind operation: Raising and lowering
 Tilt open slats and pull lift cords straight down to raise the blind. At the desired height, move cords toward the outside edge of the blind then gently release the cords to engage the lock.
Lowering the blind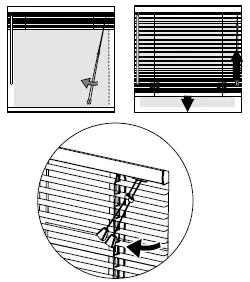 Open the slats a little if closed. Pull lift cords toward the center of the blind to release the lock. Feed the cords into the blind to lower.
Cleaning instructions Use warm water and mild non-abrasive liquid soap.
 Use warm water and mild non-abrasive liquid soap.
HOW TO INSTALL
Inside-, ceiling-, or outside-mount cordless aluminum blinds
- Inside/Ceiling Mount
- Outside Mount
Everything needed to install your blind
- Blind
- Wand
- Brackets/Screws
- Cordless Handle(s)
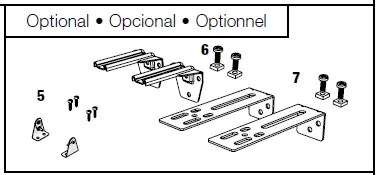
- Optional Hold-down Brackets
- Optional Extension Brackets
- Optional Side-mount Brackets
Bracket chart
Ordered width Bracket quantity.
Less than or equal to 42″ 7 cm 106.7 cm 2
Less than or equal to 72″ 182.9 cm 182.9 cm 3
Less than or equal to 102″ 259.1 cm 259.1 cm 4
Less than or equal to 132″ 335.3 cm 335.3 cm 5
Less than or equal to 144″ 365.9 cm 365.9 cm 6
Tools needed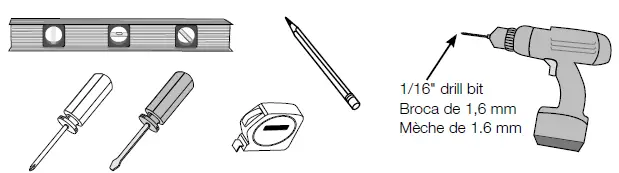 Determine inside/ceiling, outside or side mount Optional side mount for blinds 60″ or less: assemble brackets
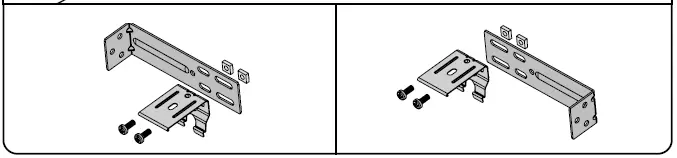 Place blind in desired location, mark corners*
- Inside/ceiling mount
- Outside mount
- Optional side mount
- Brackets and blinds must be installed on a flat and level surface.
Measure 3″ in from blind edge on both ends and mark
- Inside/ceiling mount
- Outside mount
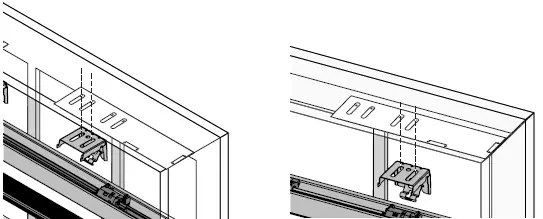
 Mark screw locations; center additional brackets across width of the blind, if applicable
- Inside/ceiling mount
- Outside mount
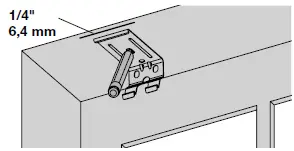 1/4″ to front of bracket for flush mount 6,4 mm
 Optional side mount
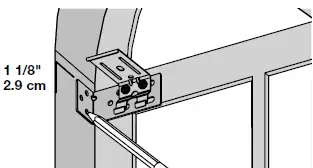 1 1/8″ to front of bracket for flush mount 2.9 cm
Optional extension bracket
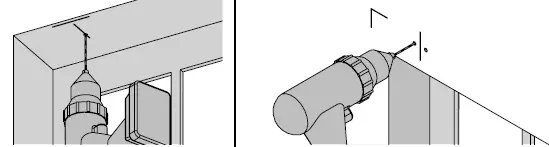
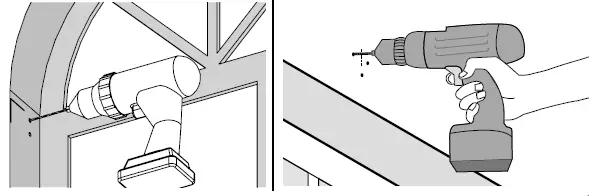
 Drill pilot holes
Use 11⁄1616″ drill bit for wood mounting surface. 33⁄3232″ drill bit for metal. For other mounting surfaces, use appropriate wall anchors and drill the correct size hole per the anchor instructions.
- Inside/ceiling mount
- Outside mount
- Optional side mount
- Optional extension bracket
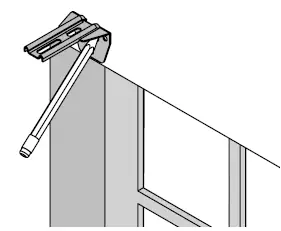
Screw brackets into place
Optional extension brackets: assemble brackets
Attach headrail brackets to extension brackets using screws and nuts.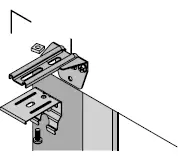 Mount blind into brackets
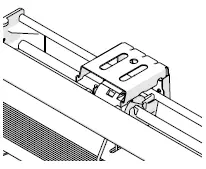
Hook the back lip on the headrail to the bottom of the bracket and then roll the headrail back into the bracket until you hear it snap into place.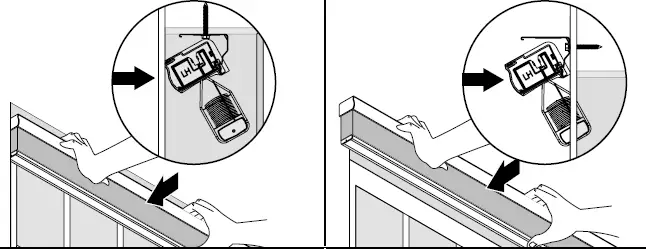
 Attach cordless handle(s)
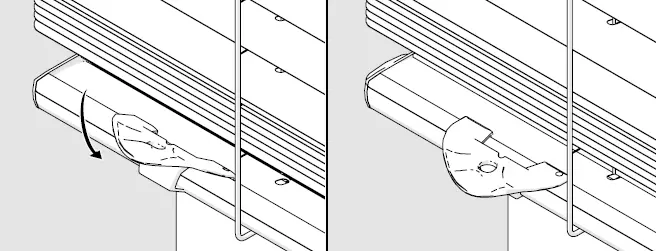 Clip handle to center of bottomrail. For blinds over 48″ wide, attach two handles, shoulder width apart at center.
Optional: mount hold-down brackets Blind operation: Opening and closing the slats
Close or open the slats by rotating the wand right or left for desired light control and privacy. Wand must be pulled out at an angle when rotating for smooth operation. If operating with the wand straight down, it will be difficult to rotate and you may hear clicking noises.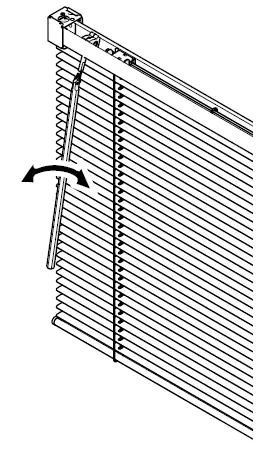 Rotate wand to open or close slats.
Blind operation: Raising and lowering
Always raise and lower with slats tilted open. To lower blind, simply pull down using the bottomrail handle. To raise the blind, simply guide the blind to the desired position by gently lifting the bottomrail. On inside mount blinds, the blind may need to be pulled away from the window slightly in order to fully lower the blind.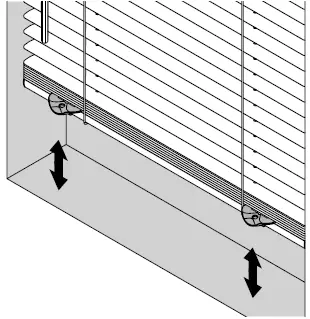
- Blind removal
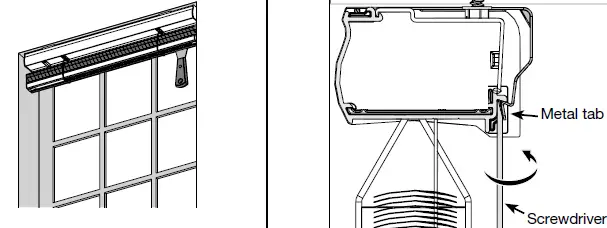 For blind removal insert a flat head screwdriver between the back of the headrail and the metal tab on the bottom of the mounting bracket. Rotate the screwdriver until the bracket disengages from the lip on the back of the headrail.
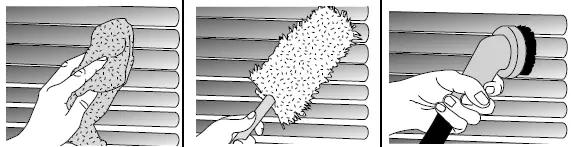
Cleaning instructions
- Use warm water and mild non-abrasive liquid soap to clean slats.

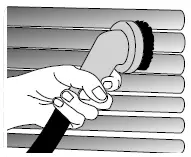
- Use a feather duster to remove dust from slats.

- Or, use the brush attachment of a vacuum to remove dust from slats.