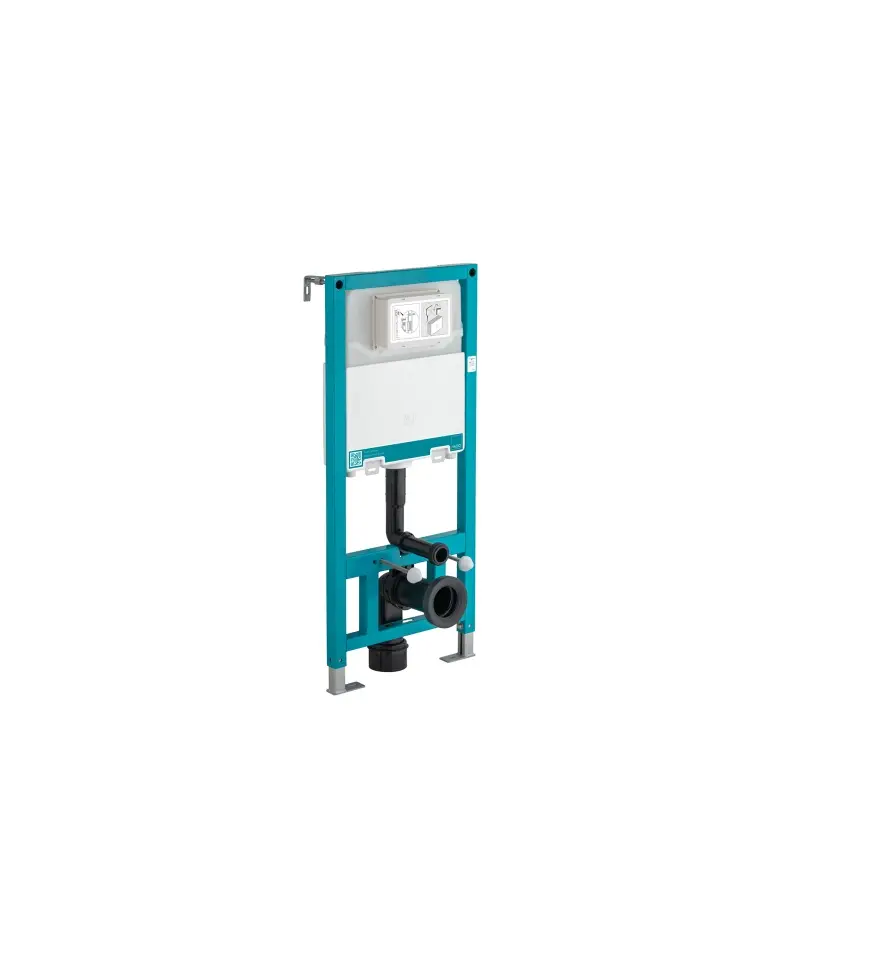
VADO WG-095-F-C Standard Toilet Frame and Cistern
WG-095-F/C
Important – please read
VADO reserves the right to make technical improvements and enhance the appearance of the products included in this instruction manual.
Please read these instructions carefully before starting installation and keep for future reference.
Remove all packaging and check the product for missing parts or damage before starting installation.
Any alterations made to this product and fittings may infringe water regulations and will invalidate the guarantee.
The installation must comply with all Local/National Water Supply Authority Regulations/Byelaws and Building and Plumbing Regulations.
To be installed in accordance with BS EN806.
We strongly recommend that you use a qualified and registered plumber.
General Care and Safety
When installing, screws must locate into suitably reinforced studs and noggins. If installed incorrectly this product can be dangerous. It is the installer’s responsibility to check that the fixings are suitable for the installation at hand.
Beware of hidden cables or pipes when drilling; the use of a residual current device (RCD) is recommended.
Do not add caustic chemical substances (containing chlorine compounds or similar) into the cistern, these may damage the valve components and in turn cause failure/ leaks.
Before enclosing the frame, the system must be first tested for leaks before 2nd fix commences. The pan will need to be held in place on the frame, the water supply turned on, and the product flushed.
When installed, the fitting must comply with the requirements of the Water Supply (Water Fittings) Regulations 1999 and Scottish Byelaws 2004.
For further information, contact the Water Regulations department of your local water supplier (see the WRAS website www.wras.co.uk for details) or the Water Regulations Advisory Scheme by email ([email protected]) or telephone: 01495848454.
Please take great care when installing this product not to damage its surface.
Please note if installing in an enclosed environment, access should be left for servicing and maintenance. No costs relating to inadequate access can be accepted.
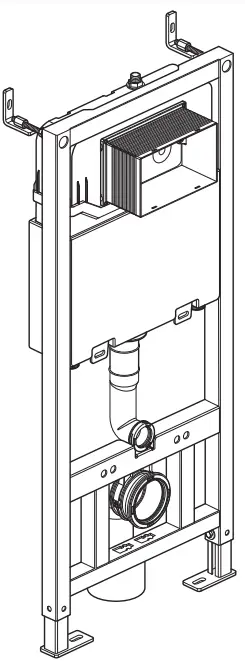
Contents of Packaging
- Installation & User guide
- Install box
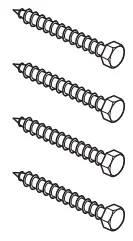
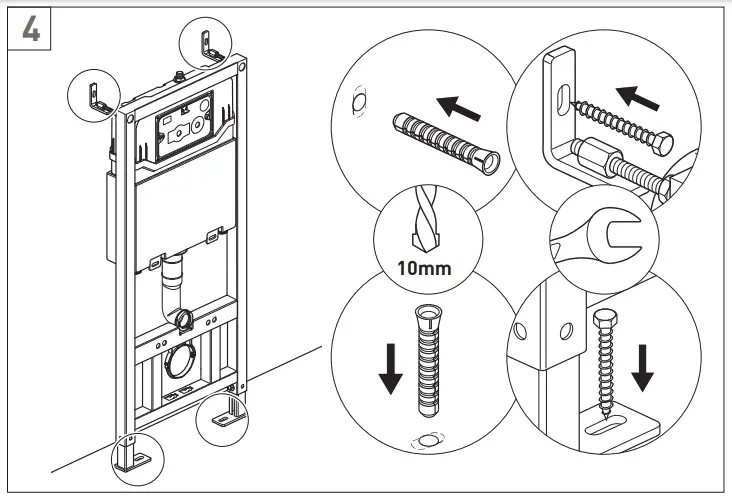
- Screws x 4

- Frame
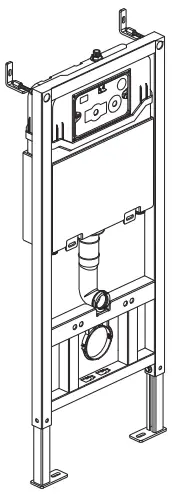
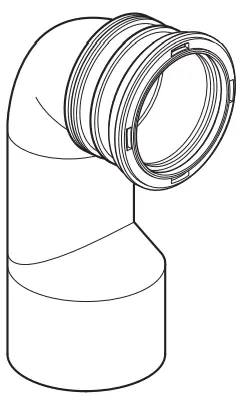
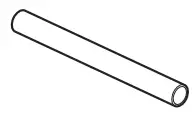
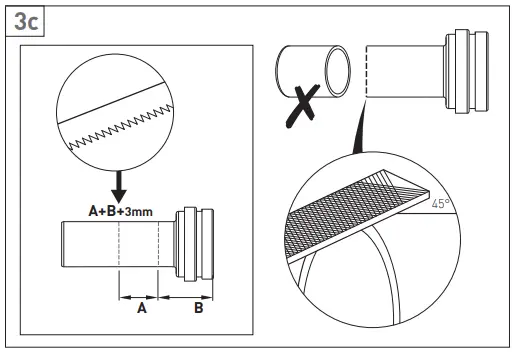
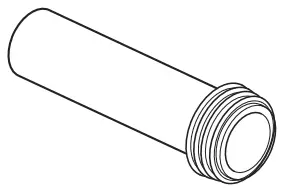
- Soil pipe
- Waste mortar guard
- Inlet mortar guard
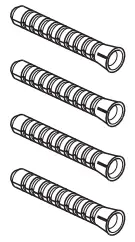
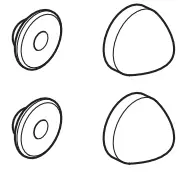
- Bolts x 2

- Bolt mortar guards x 2
Fixing Kit
- Wall plugs x 4
- Coach screws x 4
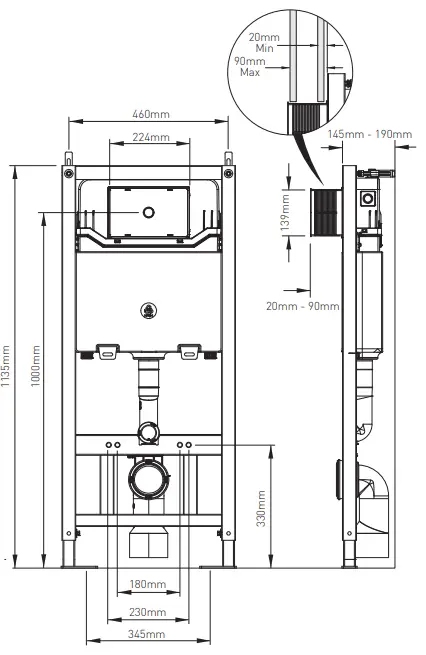
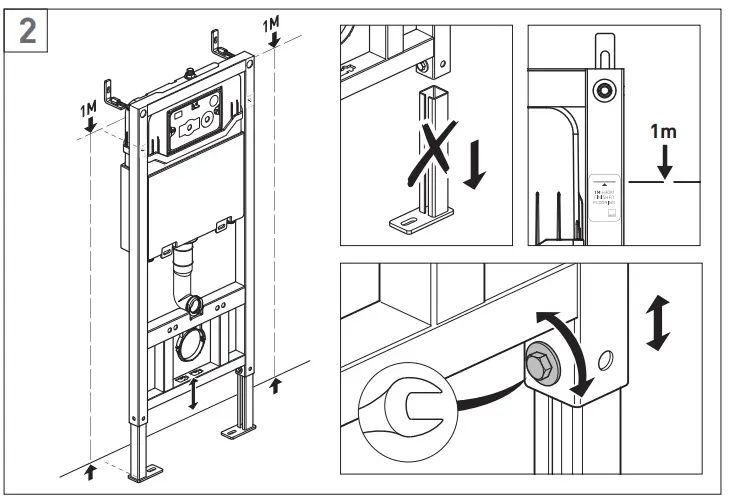
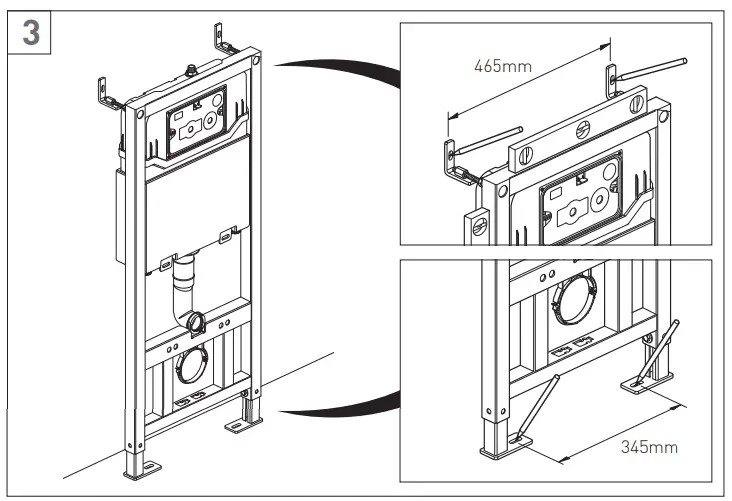
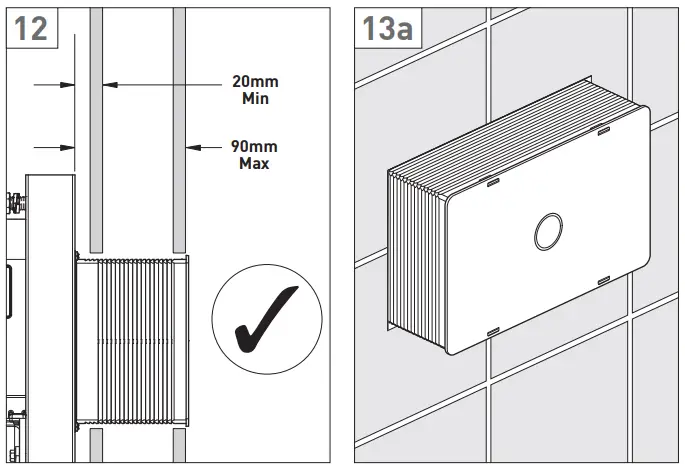
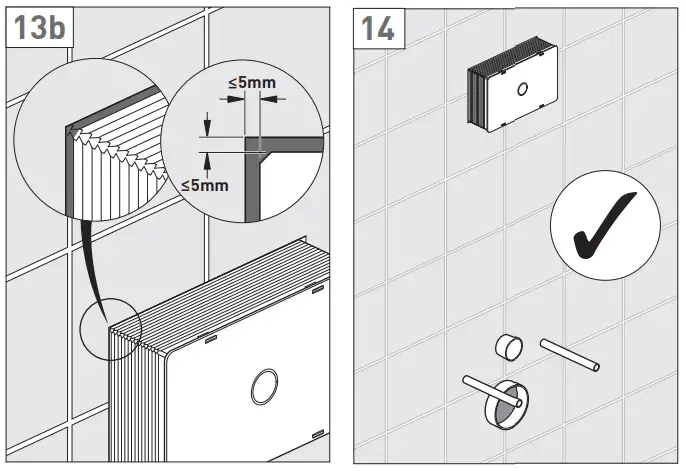
Dimensions
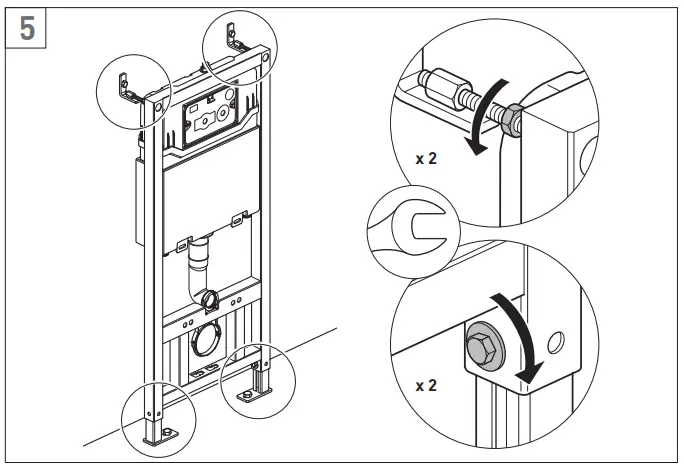
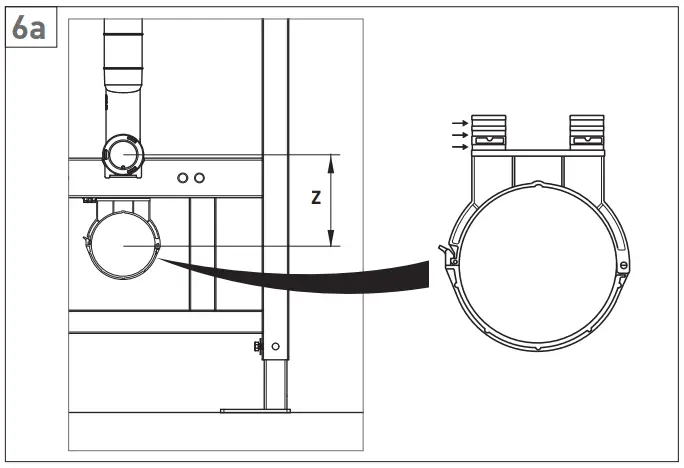
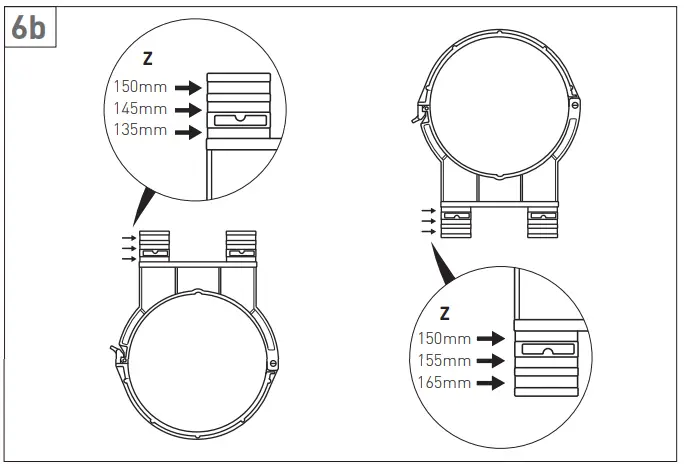
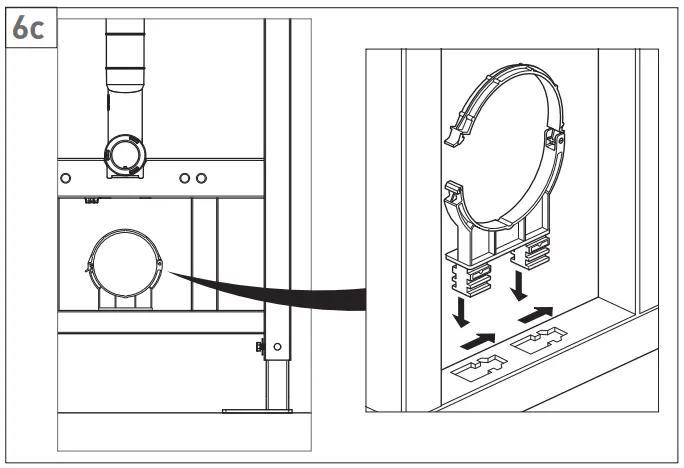
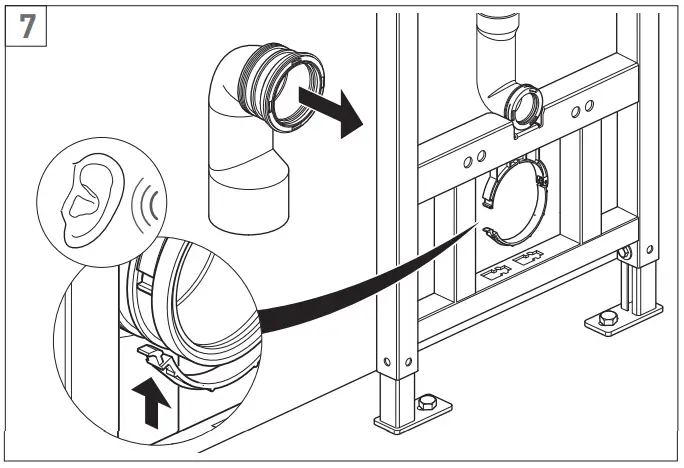
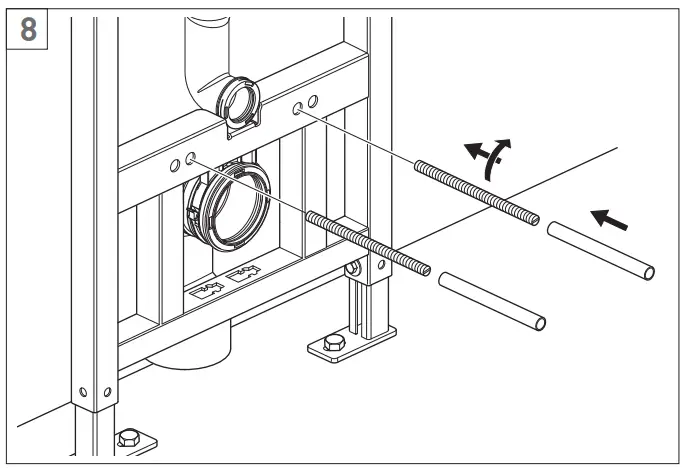
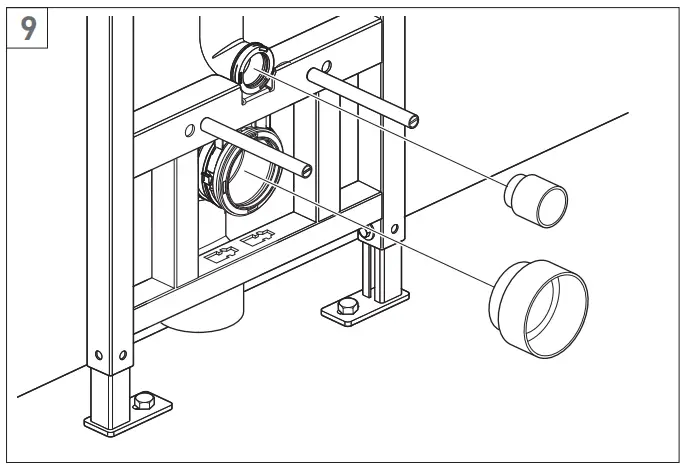
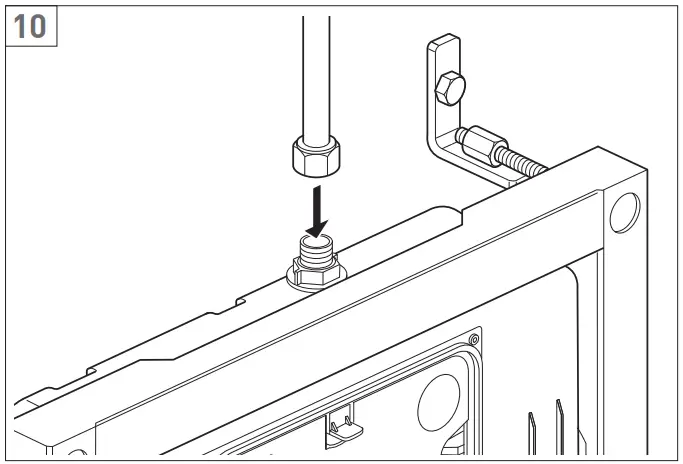
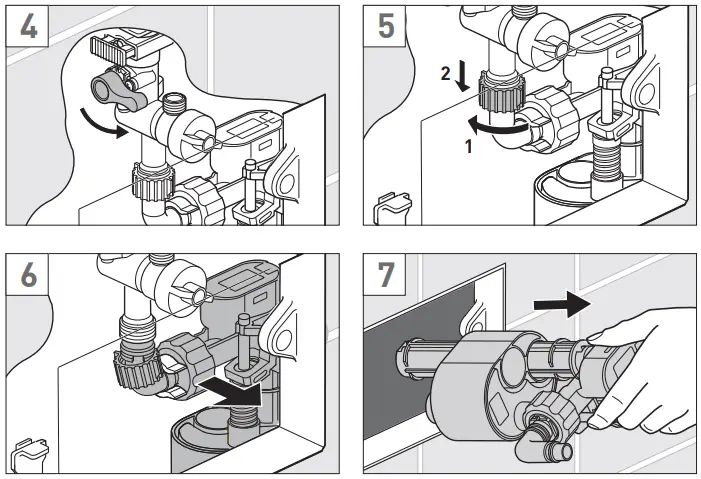
Installation

For instructions on how to side-mount the product, spares and guarantee information please visit our website at https://www.vado.com/sites/default/files/ëush-cisterns-install-instructions.pdf or by scanning the QR code:

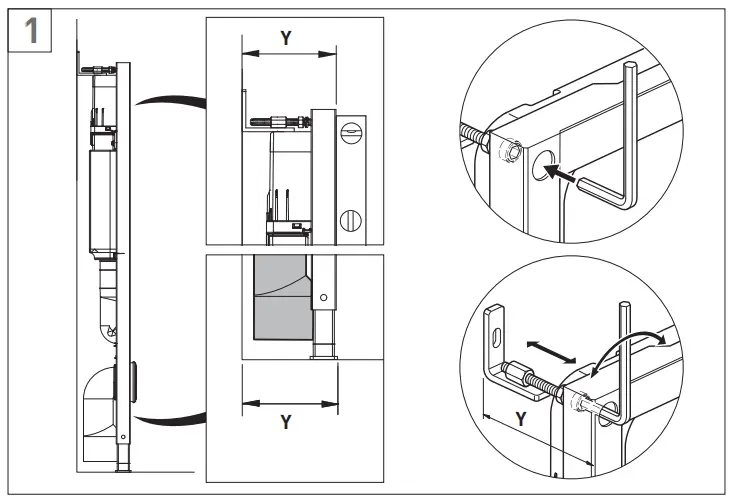
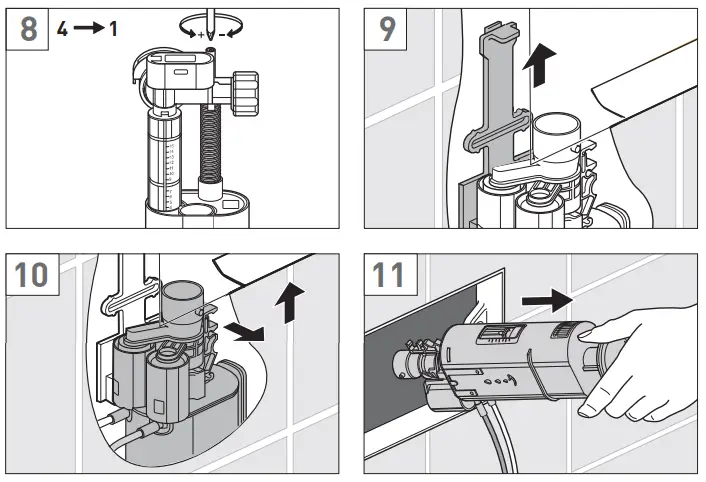
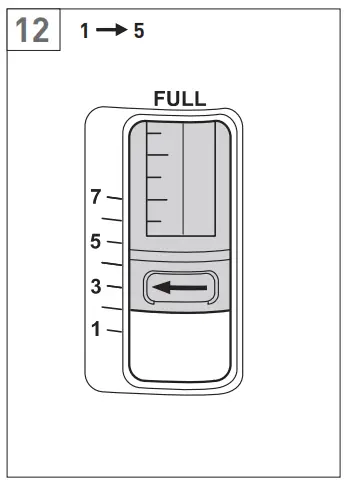
Flow Adjustment (6/3 Litres —> 4/2.6 Litres)
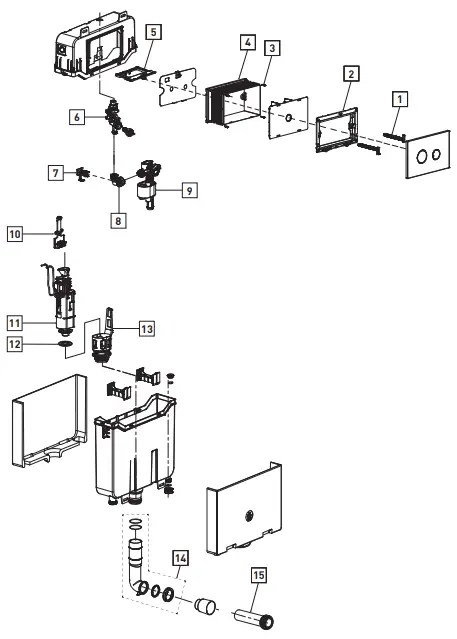
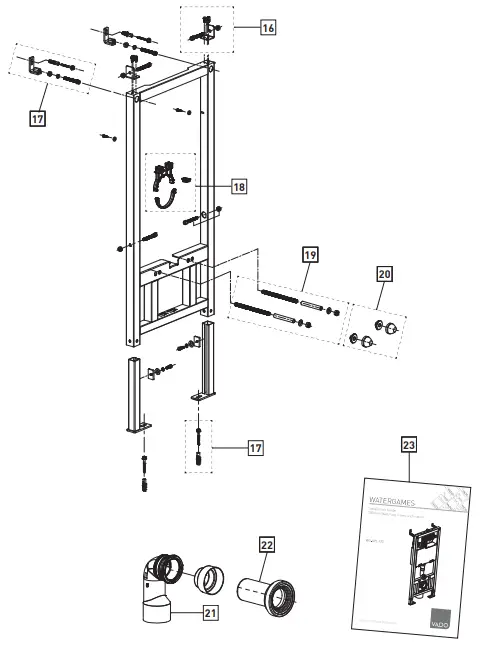
Parts List:
| Item | Part | Code | Qty |
| 1 | Plate connecting rods | WG-095-18 | 1 |
| 2 | Faceplate bracket | WG-095-02 | 1 |
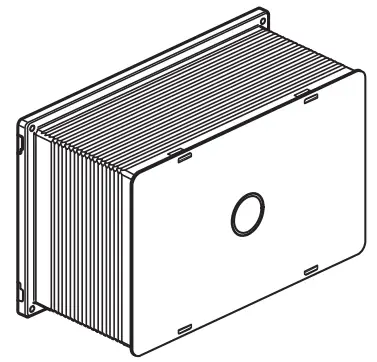
| 3 | Install box screw set | WG-095-08 | 1 |
| 4 | Standard access install box | WG-095-06 | 1 |
| 5 | Standard flush valve bracket 2 | WG-095-14 | 1 |
| 6 | Standard inlet connection with filter & ball valve | WG-095-16 | 1 |
| 7 | Standard inlet bracket | WG-095-25 | 1 |
| 8 | Standard inlet connection | WG-095-26 | 1 |
| 9 | Fill valve | WG-095-29 | 1 |
| 10 | Standard flush valve bracket 1 | WG-095-12 | 1 |
| 11 | Standard Flush valve | WG-095-21 | 1 |
| 12 | Standard Flush valve gasket | WG-095-23 | 1 |
| 13 | Standard Flush valve base | WG-095-19 | 1 |
| 14 | Standard flush bend pipe | WG-095-10 | 1 |
| 15 | Flush pipe | WG-095-09 | 1 |
| 16 | L bracket set | WG-095-32 | 1 |
| 17 | Wall and floor set | WG-095-31 | 1 |
| 18 | Retaining clip for outlet pipe | WG-095-30 | 1 |
| 19 | Threaded rod set | WG-095-04 | 1 |
| 20 | Decorative cap to suit threaded rods | WG-095-05 | 1 |
| 21 | Ø110mm outlet elbow | WG-095-01 | 1 |
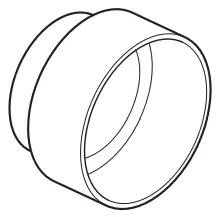
| 22 | Straight pipe | WG-095-03 | 1 |
| 23 | Manuals | Installation Guide & User Manual | 1 |
Parts
WG-095A-S-F/C
Important – please read
VADO reserves the right to make technical improvements and enhance the appearance of the products included in this instruction manual.
Please read these instructions carefully before starting installation and keep for future reference.
Remove all packaging and check the product for missing parts or damage before starting installation.
Any alterations made to this product and fittings may infringe water regulations and will invalidate the guarantee.
The installation must comply with all Local/National Water Supply Authority Regulations/Byelaws and Building and Plumbing Regulations.
To be installed in accordance with BS EN806.
We strongly recommend that you use a qualified and registered plumber.
General Care and Safety
When installing, screws must locate into suitably reinforced studs and noggins. If installed incorrectly this product can be dangerous. It is the installer’s responsibility to check that the fixings are suitable for the installation at hand.
Beware of hidden cables or pipes when drilling; the use of a residual current device (RCD) is recommended.
Do not add caustic chemical substances (containing chlorine compounds or similar) into the cistern, these may damage the valve components and in turn cause failure/ leaks.
Before enclosing the frame, the system must be first tested for leaks before 2nd fix commences. The pan will need to be held in place on the frame, the water supply turned on, and the product flushed.
When installed, the fitting must comply with the requirements of the Water Supply (Water Fittings) Regulations 1999 and Scottish Byelaws 2004.
For further information, contact the Water Regulations department of your local water supplier (see the WRAS website www.wras.co.uk for details) or the Water Regulations Advisory Scheme by email ([email protected]) or telephone: 01495848454.
Please take great care when installing this product not to damage its surface.
Please note if installing in an enclosed environment, access should be left for servicing and maintenance. No costs relating to inadequate access can be accepted.
Installation


Contents of Packaging
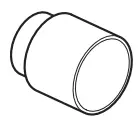
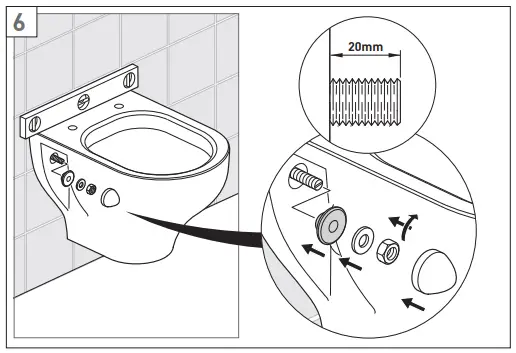
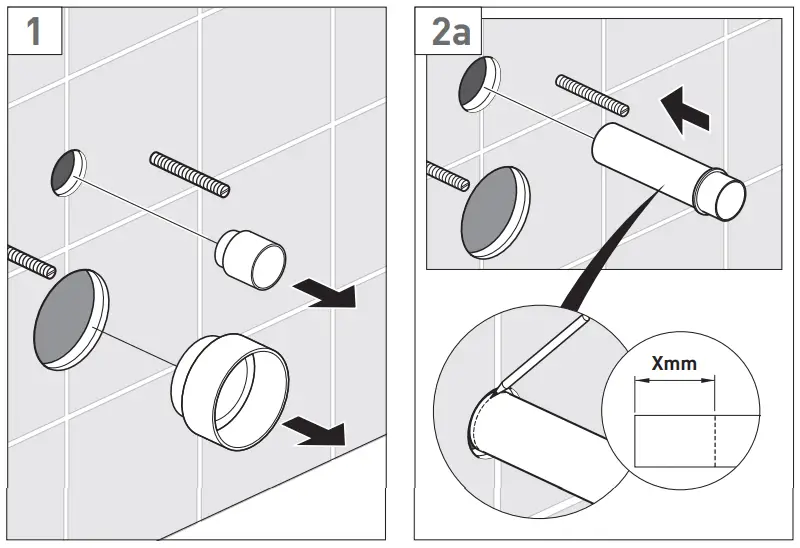
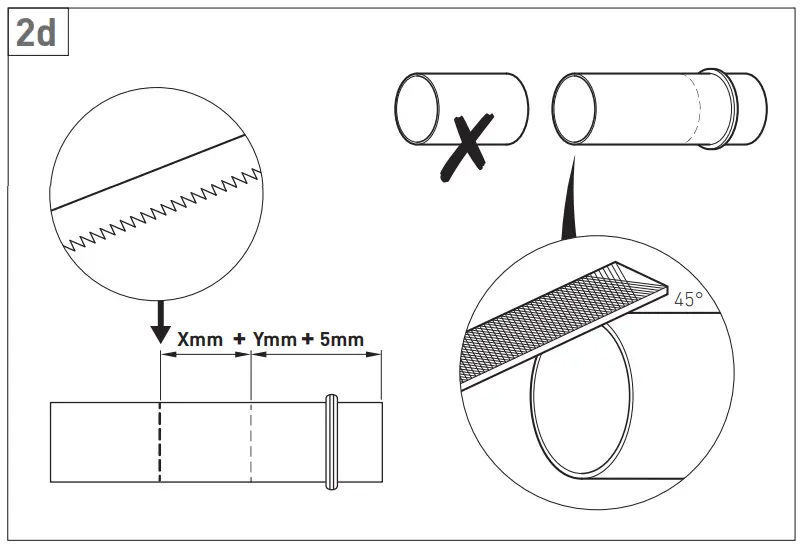
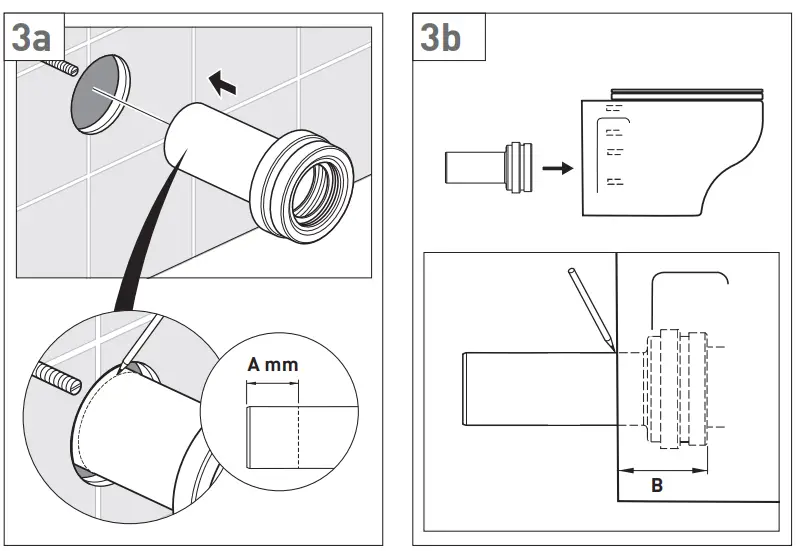
- Inlet pipe
- Waste extension pipe

- Metal Washers x 2

- Nuts x 2

- Cover kit x 2
- Lubricating Sponge
Installation

Keep for future reference
Vado
Wedmore Road, Cheddar, Somerset, England BS27 3EB
tel 01934 744466 fax 01934 744345


