
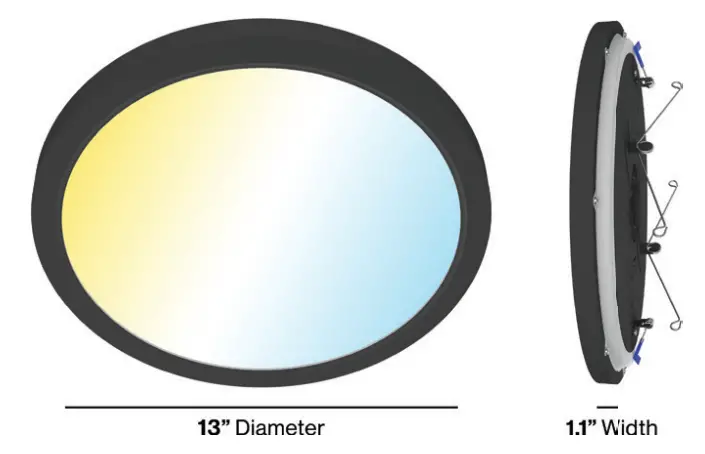
![]() 13” Ceiling Light
13” Ceiling Light
Installation Manual
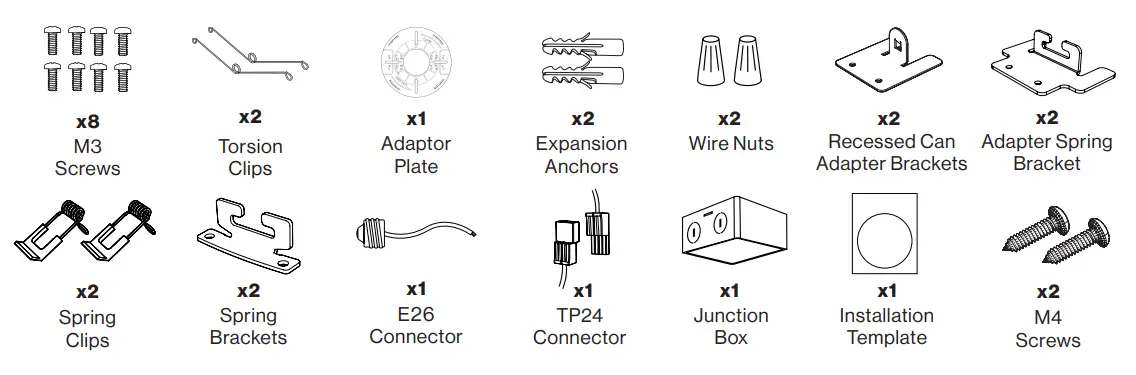
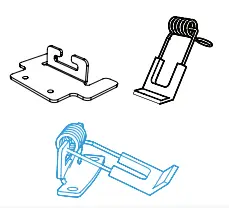
COMPONENTS
WARNING
To reduce the risk of fire, electric shock, or physical injury:
- Turn off circuit breaker before installing this fixture.
- This product should be installed by a person familiar with the construction and operation of the product and the hazards involved. Safety eyeglasses and gloves are recommended.
- Abide by related regional and local laws or regulations.
- Proper grounding is required to ensure safety.
- Do not cover the fixture with thermally insulating material.
- Check for shipping damage before installing. If the product is damaged, do not use it.
- Keep fixture away from corrosive substances.
- This fixture is damp rated. Suitable for indoor environments ranging from -4°F-122°F.
- Clean the fixture regularly to ensure proper operation. Do not clean with harsh solvents.
- Use safety precautions and abide by regional and local laws or regulations.
- This product is not compatible with 3rd party sensors.
SPECIFICATIONS
| Voltage | 110-130 VAC |
| Wattage | 24W |
| Moisture Rating | Damp |
| Housing Material | PC-V0 |
| Weight | 2.8 lbs |
| Warranty | 5 Years |
FCC Notes
- This device complies with part 15 of the FCC Rules. Operation is subject to the following two conditions: (1) This device may not cause harmful interference, and (2) this device must accept any interference received, including interference that may cause undesired operation.
- Note: This equipment has been tested and found to comply with the limits for a Class B digital device, pursuant to part 15 of the FCC Rules. These limits are designed to provide reasonable protection against harmful interference in a residential installation. This equipment generates, uses and can radiate radio frequency energy and, if not installed and used in accordance with the instructions, may cause harmful interference to radio communications. However, there is no guarantee that interference will not occur in a particular installation. If this equipment does cause harmful interference to radio or television reception, which can be determined by turning the equipment off and on, the user is encouraged to try to correct the interference by one or more of the following measures:
– Reorient or relocate the receiving antenna.
– Increase the separation between the equipment and receiver.
– Connect the equipment into an outlet on a circuit different from that to which the receiver is connected.
– Consult the dealer or an experienced radio/TV technician for help.
Please review all instructions before proceeding.
EASY INSTALLATION
Canless Recessed Mount
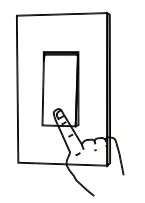
- Turn off circuit breaker before installation.
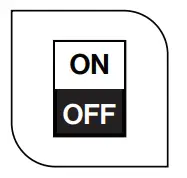
- Set preferred color temperature using CCT switch on back of fixture.

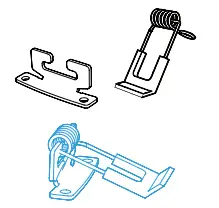
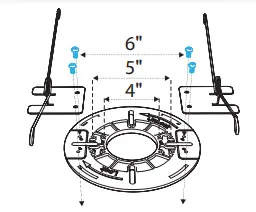
- Fit Spring Clips onto Spring Brackets.

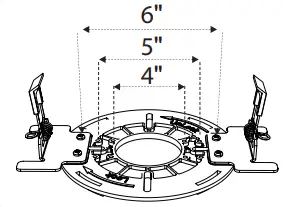
- Use M3 screws to tighten Spring Bracket onto fixture relative to hole size (choice of 4”, 5”, 6”).

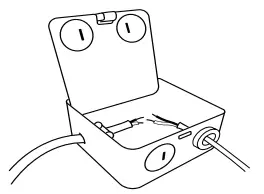
- Open junction box and remove knockout.

- Feed supply wires through knockout. Secure with Romex connector (not included).

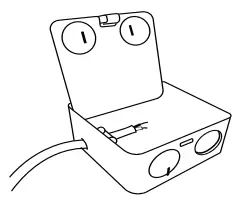
- Tuck connected wires inside junction box and close cover.
- Insert junction box through ceiling hole.

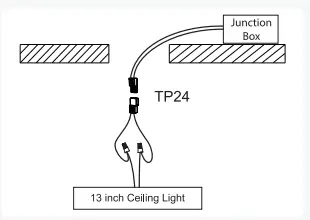
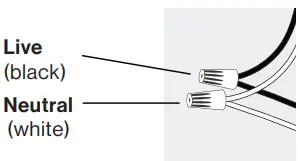
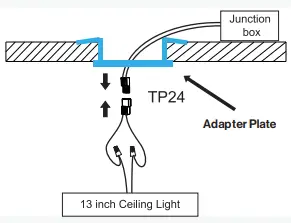
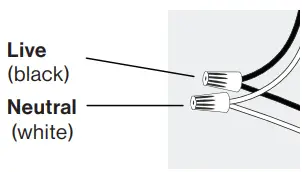
- Attach TP24 connector to fixture wires using wire nuts:
• Black to Black (Live)
• White to White (Neutral) - Attach junction and fixture wires using TP24 connector.

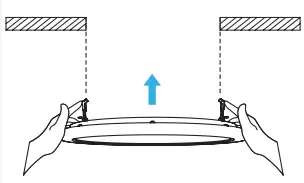
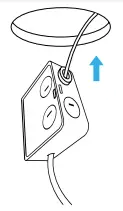
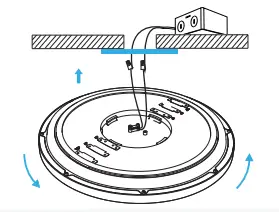
- Push up Spring Clips on fixture and insert into ceiling hole.

- Turn on circuit breaker and finalize preferred CCT selection.
CAUTION: Turn off circuit breaker when switching between CCTs.
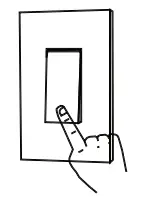
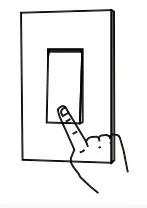
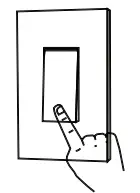
Note: To toggle between downlight and night light, turn wall switch off, wait 3 seconds, then switch on. To reset fixture, quickly turn light off/on 5 times within 1 second.
Canless Recessed Mount (With Adapter Plate)
- Turn off circuit breaker before installation.
- Set preferred color temperature using CCT switch on back of fixture.
- Fit Spring Clips onto Spring Brackets.

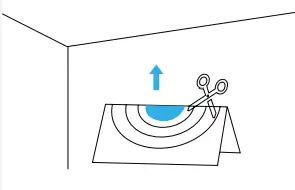
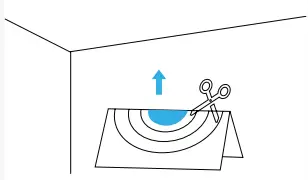
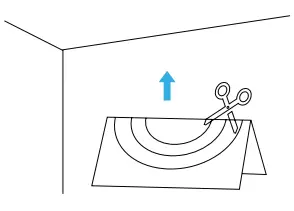
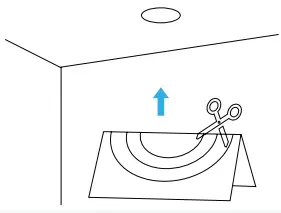
- Cut out Adapter Plate Guide on Installation Template, then tape onto desired ceiling location.

- Cut Installation Template to desired size (4.25”, 5.25,” 6.25”), then tape onto ceiling with Adapter Plate Guide in center.
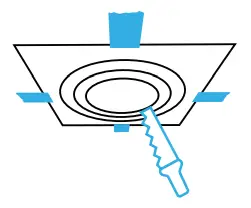
Remove Adapter Plate Guide when desired ceiling location is confirmed. - Using the Installation Template, cut ceiling hole either 4.25”, 5.25”, 6.25”” in diameter.

- Use M3 screws to tighten Spring Bracket onto Adapter Plate. (choice of 4”, 5”, 6”).

- Open junction box and remove knockout.

- Feed supply wires through knockout. Secure with Romex connector (not included).

- Attach supply and junction wires using wire nuts:
• Black to Black (Live)
• White to White (Neutral)
- Tuck connected wires inside junction box and close cover.
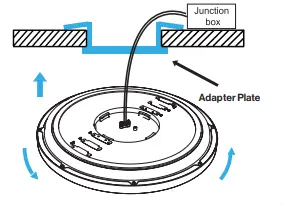
- Insert junction box through ceiling hole.

- Push up Spring Clips on Adapter Plate and insert into ceiling hole.
- Attach TP24 connector to fixture wires using wire nuts:
• Black to Black (Live)
• White to White (Neutral)
- Attach junction and fixture wires using TP24 connector.
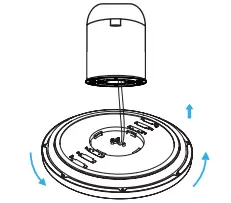
- Align fixture with Installation Template & Adapter Plate, push up, then turn clockwise to secure.

- Turn on circuit breaker and finalize preferred CCT selection.
CAUTION: Turn off circuit breaker when switching between CCTs.
Note: To toggle between downlight and night light, turn wall switch off, wait 3 seconds, then switch on. To reset fixture, quickly turn light off/ on 5 times within 1 second.
Surface Mount
- Turn off circuit breaker before installation.
- Set preferred color temperature using CCT switch on back of fixture.
- Cut out Adapter Plate Guide on Installation Template, then tape onto desired ceiling location. Cut out Installation Template.

- Cut ceiling hole no more than 1.7” in diameter.
• Remove Adapter Plate Guide.
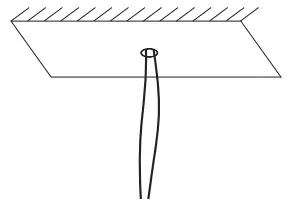
- Feed supply wires through ceiling hole.

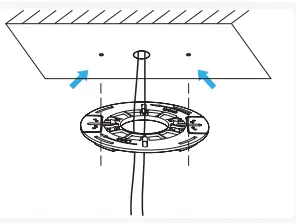
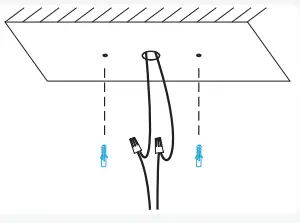
- Using Adapter Plate side slots as a reference, drill two 0.156” ceiling holes.

- Insert expansion anchors into 0.156” holes.

- Tighten two M4 screws into expansion anchors to secure Adapter Plate.

- Attach supply and fixture wires using wire nuts:
• Black to Black (Live)
• White to White (Neutral) - Tape Installation Guide around Adapter Plate.

- Align fixture with Installation Template & Adapter Plate, push up, then turn clockwise to secure.

- Turn on circuit breaker and finalize preferred CCT selection.
CAUTION: Turn off circuit breaker when switching between CCTs.
Note: To toggle between downlight and night light, turn wall switch off, wait 3 seconds, then switch on. To reset fixture, quickly turn light off/ on 5 times within 1 second.

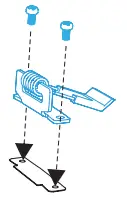
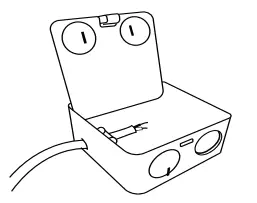
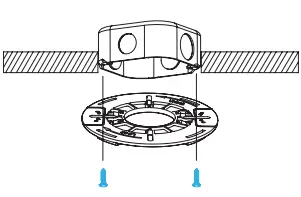
Ceiling Mounted Junction Box
- Turn off circuit breaker before installation.
- Set preferred color temperature using CCT switch on back of fixture.
- Cut out Installation Template and tape around junction box.

- Tighten two M4 screws (2.5”3.75” diameter) into junction box to secure Adapter Plate.

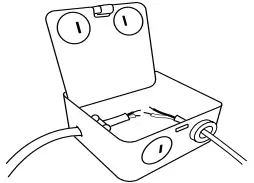
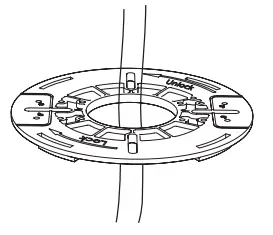
- Feed supply wires through Adapter Plate hole.

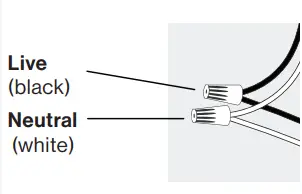
- Attach supply and fixture wiresusing wire nuts:
• Black to Black (Live)
• White to White (Neutral)
Tuck connected wires inside junction box.
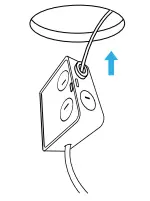
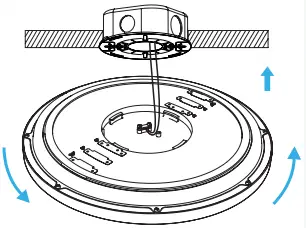
- Align fixture with Installation Template & Adapter Plate, push up, then turn clockwise to secure.

- Turn on circuit breaker and finalize preferred CCT selection.
CAUTION: Turn off circuit breaker when switching between CCTs.
Note: To toggle between downlight and night light, turn wall switch off, wait 3 seconds, then switch on. To reset fixture, quickly turn light off/ on 5 times within 1 second.
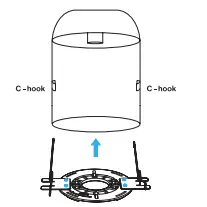
Retrofit Mount
- Turn off circuit breaker before installation.
- Set preferred color temperature using CCT switch on back of fixture.
- Locate recessed can in ceiling.
Remove any existing fixture.
CAUTION: Allow time for existing fixture to cool before removing.
Note: If using E26 base, connect into recessed can. - Cut Installation Template to 8.33”, then tape onto recessed can ceiling location.

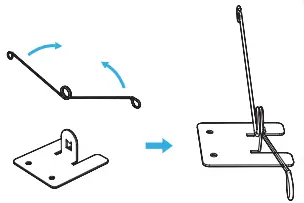
- Secure Torsion Springs onto Recessed Can Adapter Brackets.

- Tighten Recessed Can Adapter Brackets onto Adapter Plate using M3 screws.

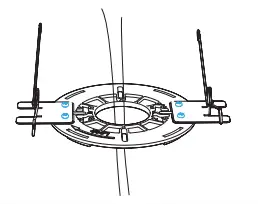
- Pinch Torsion Springs and insert Adapter Plate into ceiling and push up.
Insert Torsion Springs into C-hooks inside recessed can.
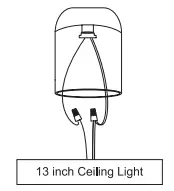
- Feed E26 or TP24 wires through Adapter Plate hole.

- a. If using E26 connector, attach fixture wires using wire nuts.
• Black to Black (Live)
• White to White (Neutral)
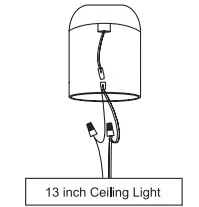
9b. If using TP24, attach connector to recessed can. Attach TP24 connector to fixture wires:
• Black to Black (Live)
• White to White (Neutral)
- Align fixture with Installation
Template & Adapter Plate, push up, then turn clockwise to secure.
- Turn on circuit breaker and finalize preferred CCT selection.
CAUTION: Turn off circuit breaker when switching between CCTs.
Note: To toggle between downlight and night light, turn wall switch off, wait 3 seconds, then switch on. To reset fixture, quickly turn light off/ on 5 times within 1 second.
Required Tools: Screwdriver, Ladder, Hole Saw, Tape, Romex Connector (If Using Junction Box)![]()


