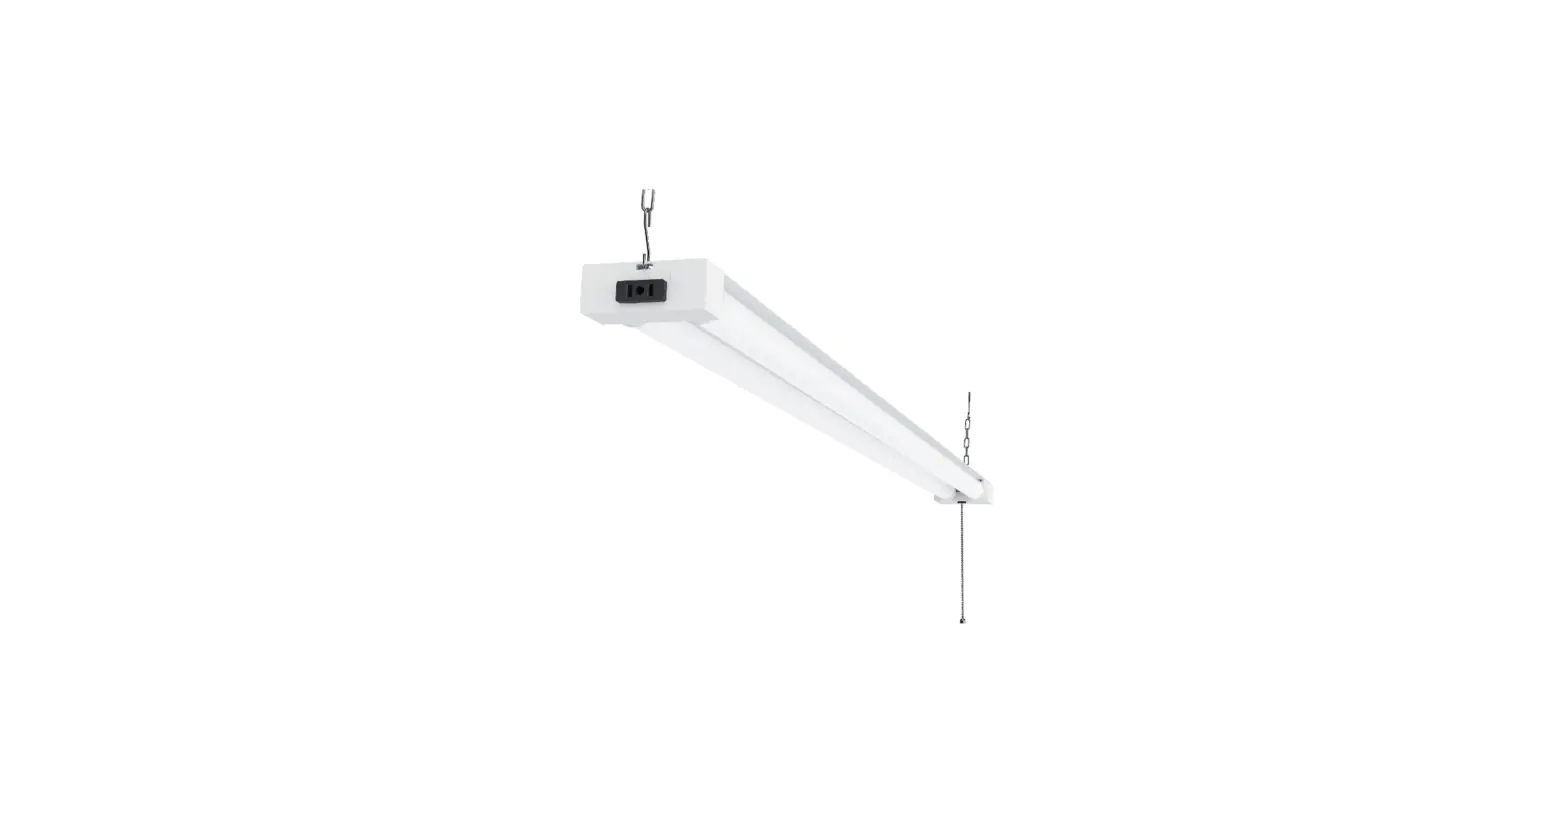
Sunco LED Utility Shop Lights
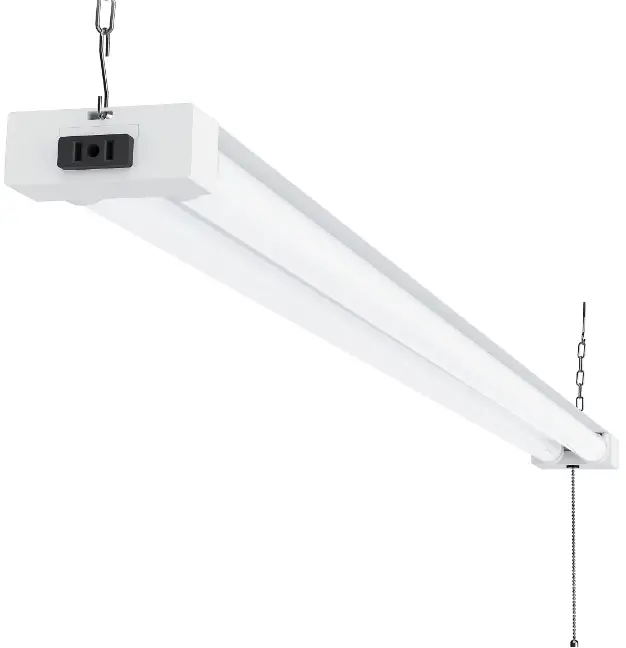
FLUSH MOUNT
COMPONENTS

IMPORTANT SAFETY INSTRUCTIONS
- This fixture is to be installed directly beneath a ceiling-mounted receptacle.
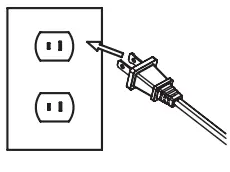
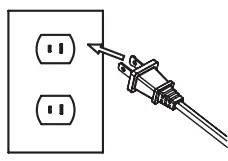
- This fixture has a polarized plug (one blade is wider than the other) as a feature to reduce the risk of electric shock. This plug will only fit a polarized outlet one way.
- If the plug does not fully fit the outlet, reverse the plug. If it still does not fit, contact a qualified electrician.
- Do not use with an extension cord unless plug can be fully inserted.
- Do not alter plug.
EASY INSTALLATION
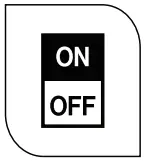
- Turn off circuit breaker before installation.

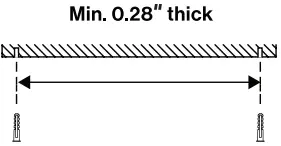
CAUTION: Mounting surface must be able to support weight of fixture. - Drill 2 pilot holes into ceiling. Holes should be 46.36 inches apart.

- Dry Wall: 7/32″ drill bit
- Wall Stud: 9/64″ drill bit
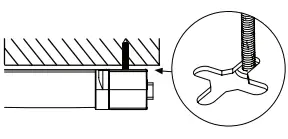
- Insert expansion anchors into pilot holes.

- Tighten screws into expansion anchors.
- Leave about 0.17″ gap between the screw heads and mounting surface.
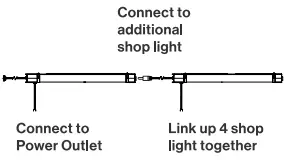
NOTE: Space fixture to suit your lighting plan and power chord length (60″).4 units maximum.
- Leave about 0.17″ gap between the screw heads and mounting surface.
- Align fixture to screws.

- When holes are aligned, push fixture up.
- Slide to secure.
- Plug in power cord to electrical outlet.

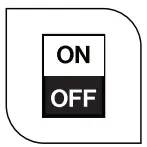
- Turn on circuit breaker and test light.
WARNING
To reduce the risk of fire, electric shock, or injury:
- Turn off circuit breaker before installing this fixture.
- This product should be installed by a person familiar with the construction and operation of the product and hazards involved. Safety eyeglasses and gloves are recommended.
- Abide by related regional and local laws or regulations.
- Proper grounding is required to ensure safety.
- This fixture was designed for daisy chains only. Using it for other purposes will void warranty.
- Check for shipping damage before installing. If the product is damaged, do not use it.
- Keep fixture away from corrosive substances.
- Suitable for damp locations at temperatures ranging from 40F to 1130F. Not for use where directly exposed to water.
- Clean fixture regularly to ensure proper operation. Do not clean with harsh solvents.
- Use safety precautions and abide by regional and local laws or regulations.
- This product is not compatible with 3rd party sensors or dimmers.
- This product is not compatible with photo controls.
- This product is not compatible with occupancy sensors.
- This product is not compatible with timing devices.
SPECIFICATIONS
- Voltage: 120V
- Wattage: 40W
- Moisture Rating: Damp
- Housing Material: Plastic
- Weight: 0.881bs
- Warranty: 7 years
HANGING MOUNT
COMPONENTS

IMPORTANT SAFETY INSTRUCTIONS
- This fixture is to be installed directly beneath a ceiling-mounted receptacle.
- This fixture has a polarized plug (one blade is wider than the other) as a feature to reduce the risk of electric shock. This plug will only fit a polarized outlet one way.
- If the plug does not fully fit the outlet, reverse the plug. If it still does not fit, contact a qualified electrician.
- Do not use with an extension cord unless plug can be fully inserted.
- Do not alter plug.
EASY INSTALLATION
- Turn off circuit breaker before installation.

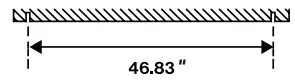
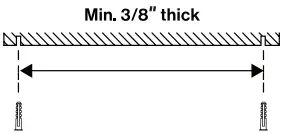
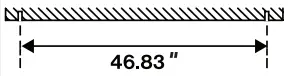
CAUTION: Mounting surface must be able to support weight of fixture. - Drill 2 pilot holes into ceiling. Holes should be 46.83 inches apart.

- Dry Wall: 7/32″ drill bit
- Wall Stud: 9/64″ drill bit
- Insert expansion anchors into pilot holes.

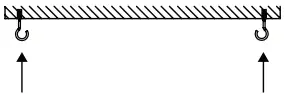
NOTE: Space fixture to suit your lighting plan and power chord length (60″).4 units maximum. - Tighten screw eye hooks into expansion anchors.

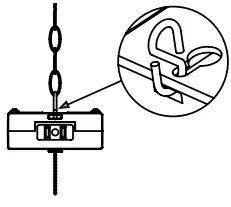
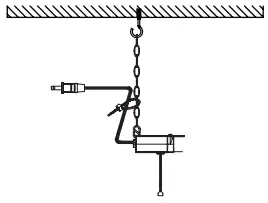
- Insert S-hook into each end of mounting chains.

- Loop other end of S-hooks into fixture’s keyhole slots.
- Crimp ends to secure
- Secure fixture to ceiling by hanging non-crimped portion of S-hooks onto eye hooks.

- Adjust chain length as needed.
- Secure fixture power cord to mounting chain using zip tie.
- Plug in power cord to electrical outlet.

- Turn on circuit breaker and test light.