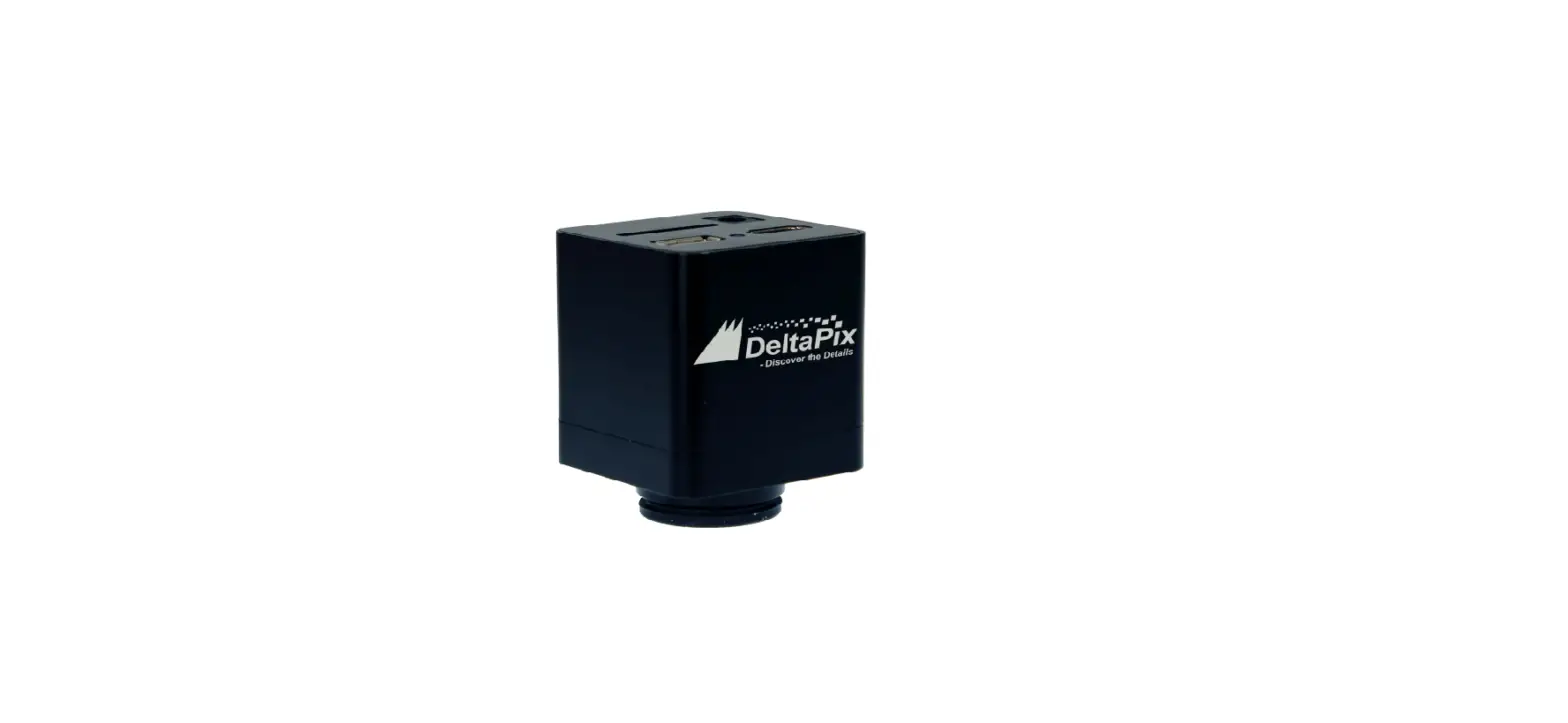
DeltaPix HDMI02DPX Microscope Camera

HDMI02DPX Camera Application Configurations
Camera Working Standalone with the Built-in Software
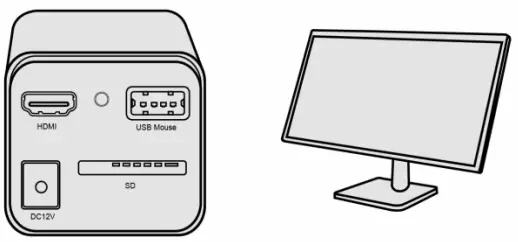
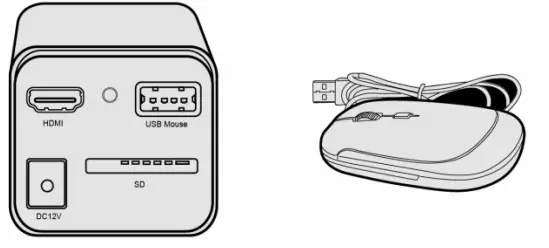
For this application, apart from the microscope, you only need an HDMI monitor, the supplied USB mouse and the camera-embedded software. The steps to start the camera are listed below: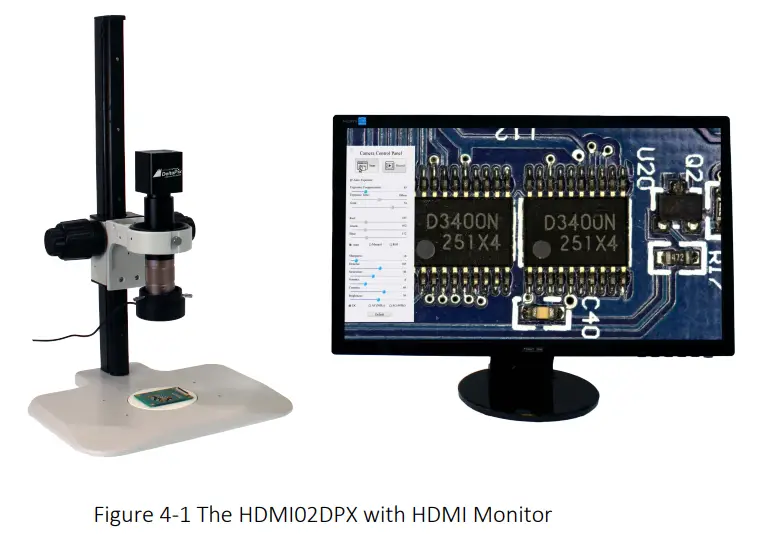
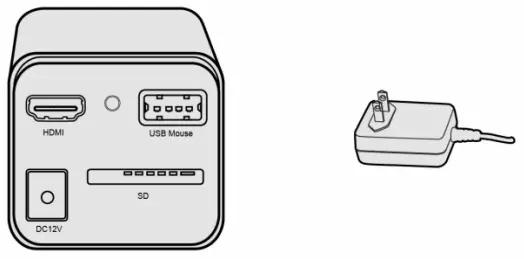
- Connect the camera to a HDMI monitor using the HDMI cable;

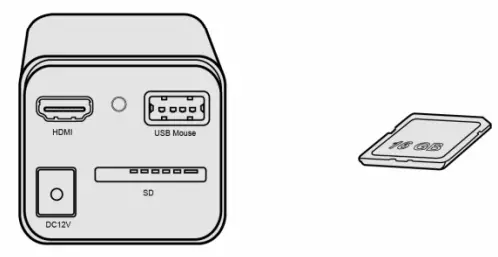
- Insert the supplied USB mouse to the camera’s USB port;

- Insert the supplied SD card into the HDMI camera SD card;

- Connect the camera to the power adapter and switch it on;

- Turn on the monitor and the video stream should appear on the screen. Move the mouse to the left, top,or bottom of the software UI, different control panels in the UI will pop up and the user can operate with the mouse.
Brief Introduction of HDMI02DPX Camera’s Ul and Its Functions
Software Ul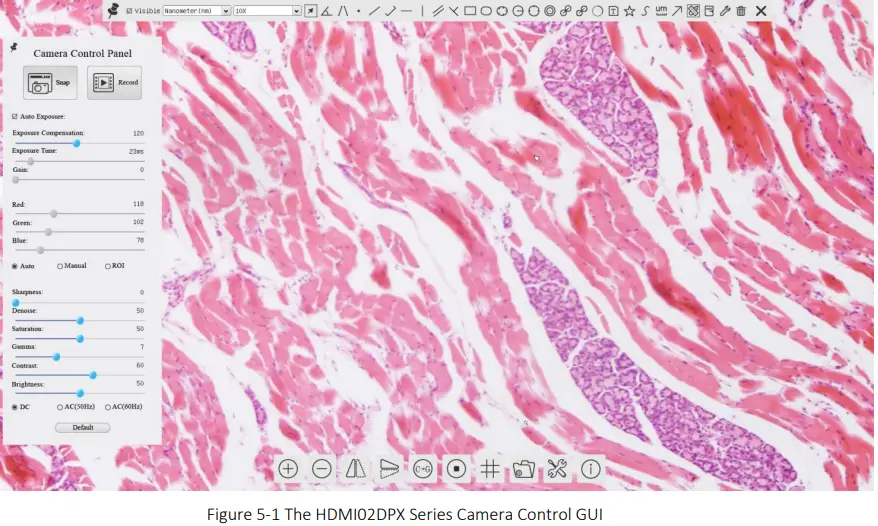
The HDMIO2DPX camera’s UI shown in Figure 5-1 includes a Camera Control Panel on the left of the vidco window, a Measurement Toolbar on the top of the video window and a Synthesis Camera Control Toolbar on the bottom of the video window.
| Notes | |
| 1 | To show the Camera Control Panel, move your mouse to the left of the video window. See Sec.5.2 for details |
|
2 | Move the mouse cursor to the top of the video window, a Measurement Toolbar will pop up for calibration and measurement operations. When user left-clicks the Float/Fixed button |
| 3 | When users move mouse cursor to the bottom of the video window, the Synthesis Camera Control Toolbar will pop up automatically.
|
The Camera Control Panel on the Left Side of the Video Window
The Camera Control Panel controls the camera to achieve the best video or image quality according to the specific applications; It will pop up automatically when the mouse cursor is moved to the left side of the video window. Left-clicking ![]() button to achieve the Display/Auto Hide switch of the Camera Control Panel.
button to achieve the Display/Auto Hide switch of the Camera Control Panel.
| Camera Control Panel | Function | Function Description |
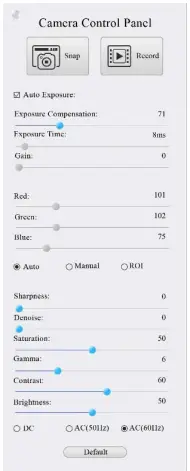
| Snap | Capture image and save it to the SD card |
| Record | Record video and save it to the SD card | |
| Auto Exposure | When Auto Exposure is checked, the system will automatically adjust exposure time and gain according to the value of exposure compensation | |
| Exposure Compensation | Available when Auto Exposure is checked. Slide to left or right to adjust Exposure Compensation according to the current video brightness to achieve proper brightness value | |
| Exposure Time | Available when Auto Exposure is not checked. Slide to left or right to reduce or increase exposure time, adjusting brightness of the video | |
| Gain | Adjust Gain to reduce or increase brightness of video. The Noise will be reduced or increased accordingly | |
| Red | Slide to left or right to decrease or increase the proportion of Red in RGB on video | |
| Green | Slide to left or right to decrease or increase the proportion of Green in RGB on video | |
| Blue | Slide to left or right to decrease or increase the proportion of Blue in RGB on the video | |
| Auto White Balance | White Balance adjustment according to the video continuously | |
| Manual White Balance | Adjust the Red or Blue item to set the video White Balance. | |
| ROI White Balance | White Balance could be adjusted when the ROI region is changed according to content inside the ROI region. | |
| Sharpness | Adjust Sharpness level of the video | |
| Denoise | Slide left or right to denoise the video | |
| Saturation | Adjust Saturation level of the video | |
| Gamma | Adjust Gamma level of the video. Slide to the right side to increase gamma and to the left to decrease gamma. | |
| Contrast | Adjust Contrast level of the video. Slide to the right side to increase contrast and to the left to decrease contrast. | |
| DC | For DC illumination, there will be no fluctuation in light source so no need for compensating light flickering | |
| AC(50HZ) | Check AC(50HZ) to eliminate flickering caused by 50Hz light source | |
| AC(60HZ) | Check AC(60HZ) to eliminate flickering caused by 60Hz light source | |
| Default | Restore all the settings in the Camera Control Panel to default values |
The Measurement Toolbar on top of the Video Window
The Measurement Toolbar will pop up when moving mouse cursor to any place near the upper edge of the video window. Here is the introduction of the various functions on the Measurement Toolbar:![]()
Icon/Function
 Float/ Fix switch of the Measurement Toolbar
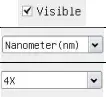
- Show / Hide Measurement Objects
- Select the desired Measurement Unit
- Select Magnification for Measurement after Calibration
![]()
- Object Select
- Angle
- 4 Points Angle
- Point
- Arbitrary Line
- 3 Points Line
- Horizontal Line
- Vertical Line
- 3 Points Vertical Line
- Parallel
- Rectangle
- Ellipse
- 5 Points Ellipse
- Circle
- 3 Points Circle
- Annulus
- Two Circles and its Center Distance
- 3 Points Two Circles and its Center Distance
- Arc
- Text
- Polygon
- Curve
![]()
- Scale Bar
- Arrow
- Exccute Calibration to determine the corresponding relation between magnitication and resolution, which will establish the corresponding relationship between measurement unit and the sensor
- pixel size. Calibration needs to be donc with the help of a micrometer.
- Export the Measurement information to CSV file(*.csv)
- Measurement Setup
- Delete all the measurement objects
- Exit from Measurement mode
 When the measurement ends, left-click on a single measuring object and the Object Location & Properties Control Bar will show up. User could move the object by dragging the object with the mouse. But more accurate movement could be done with the control bar. The icons on the control bar mean Move Left, Move Right, Move Up, Move Down, Color Adjustment and Delete.
Note
- When user left-clicks Display/Hide button on the Measurement Toolbar, the Measurement Toolbar will be fixed. In this case the Camera Control Panel will not pop up automatically even if moving the mouse cursor to the left edge of the video window. Only when user left-clicks the
 button on the Measurement Toolbar to exit from the measurement mode will they be able to doing other operations with the Camera Control Panel or the Synthesis Camera Control Toolbar?
 - When a specific Measurement Object is selected during the measurement process, the Object Location & AttributesControl Bar will appear for changing the object location and properties of the selected objects.
Icons and Functions of the Synthesis Camera Control Toolbar at the Bottom of the Video Window
![]()
Icon /Function
![]()
- Zoom In the Video Window
- Horizontal Flip
- Color Gray
- Display Cross Line
- Settings
![]()
- Zoom Out the Video Window
- Vertical Flip
- Video Freeze
- Browse Images and Videos in the SD Card
- Check the Version of software
The ![]() Setting is relatively more complicated than the other functions. Here is more information about it:
Setting is relatively more complicated than the other functions. Here is more information about it:
Setting>Measurement
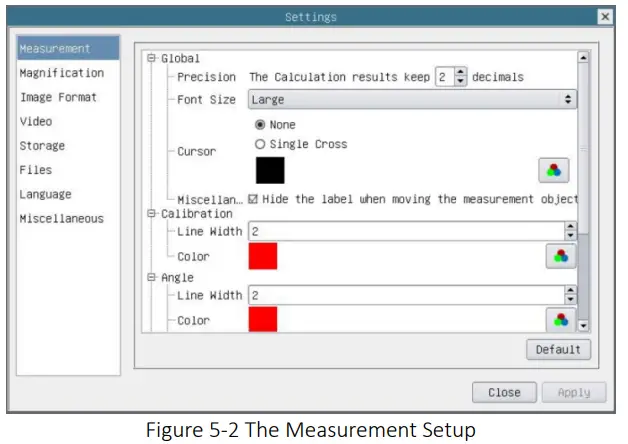
| Global | Precision | Used to set the number of digits after the decimal point of the measurement result |
| Calibration | Line Width | Used for defining width of the lines for calibration; |
| Color | Used for defining color of the lines for calibration; | |
| EndPoint | Type: Used for defining shape of the endpoints of lines for calibration: Null means no EndPoints, rectangle means rectangle type of endpoints. It makes alignment more easily; | |
| Point, Angle, Line, Horizontal Line, Vertical Line, Rectangle, Circle, Ellipse, Annulus, Two Circles, Polygon, Curve | ||
| Left-click the along with the Measurement command mentioned above will unfold the corresponding attribute settings to set the individual property of the Measurement Objects. | ||
Setting>Magnification
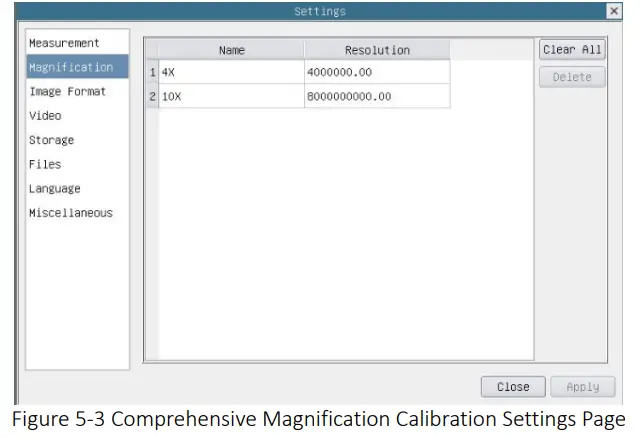
| Name | The name of the magnification, usually the magnification of the objective of the microscope is used as the magnification name when calibration, such as 4X, 10X, 100X, etc. Besides, other user-defined information could be added into the magnification name too, for example, microscope model, operator name, etc. |
| Resolution | Pixels per meter. Image device like microscopes have high resolution value; |
| Clear All | Click the Clear All button will clear the calibrated magnifications; |
| Delete | Click Delete to delete the selected magnification; |
Settings>Image Format
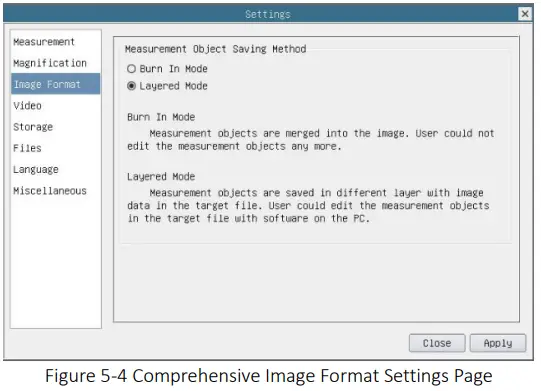
| Measurement Object Save Method | Burn in Mode: The measurement objects are merged into the current image. User could not edit the measurement objects anymore. This mode is not reversable. Layered Mode: The measurement objects are saved in different layer with current image data in the target file. User could edit the measurement objects in the target file with some software on the PC. This mode is reversable. |
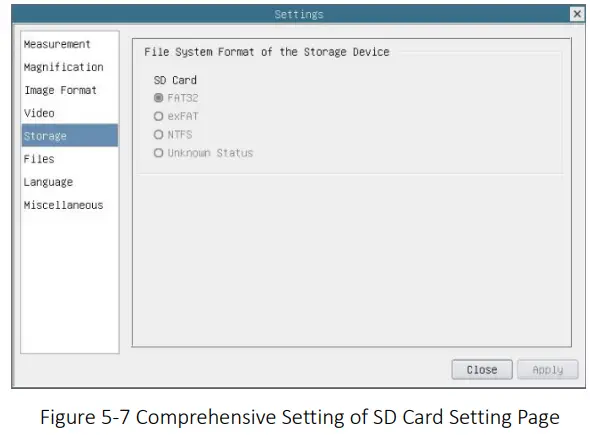
Settings>Video
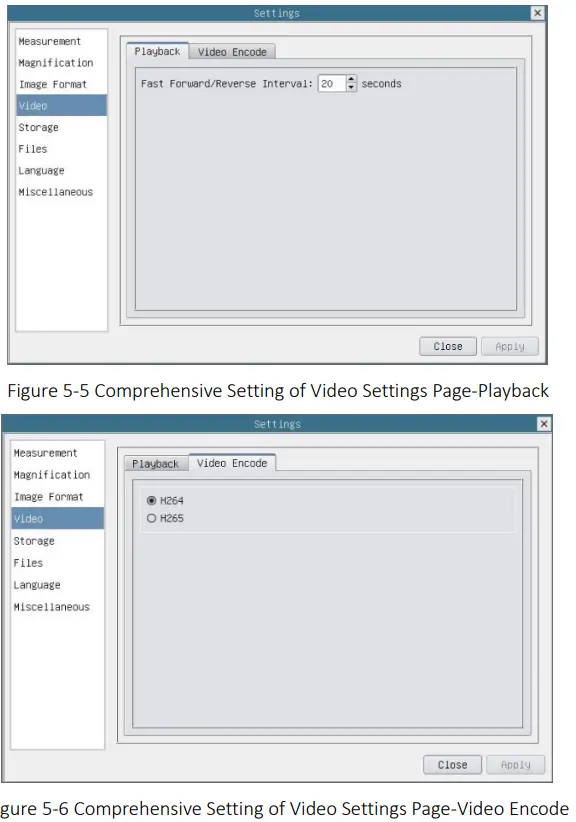
| Fast Forward/Reverse Interval | The time interval of the playback of video files. |
| Video Encode | H264: The encoding format of the video files is H264 format. H265: The encoding format of the video files is H265 format. |
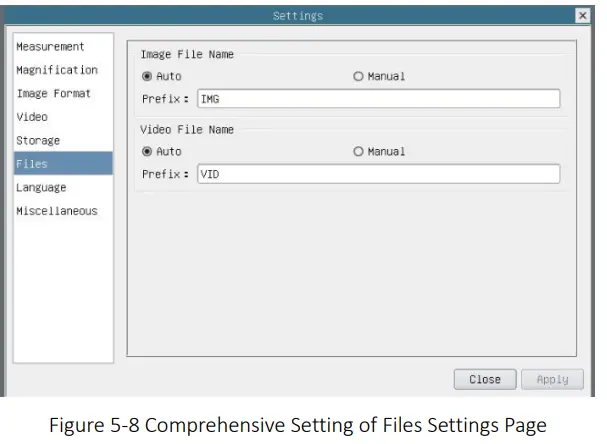
Setting>Storage
| Storage Device | SD Card: SD Card is only supported as the storage device. |
| File System Format of the Storage Device | List the file system format of the current storage device FAT32: The file system of SD card is FAT32. The maximum video file size of single file is 4G Bytes; exFAT: The file system of SD card is exFAT. The maximum video file size of single file is 4G Bytes; NTFS: The file system of SD card is NTFS. The maximum video file size of single file is 4G Bytes. Use PC to format the SD cards and switch between FAT32, exFAT and NTFS. Unknown Status: SD card not detected or the file system is not identified; |
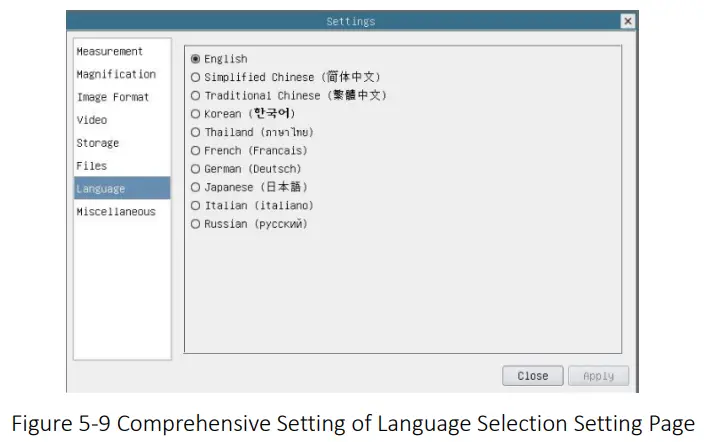
Setting>Files
| Image File Name | Auto: The image files will be saved automatically with the specified prefix. Manual: Users has to specify the file name before image saving. |
| Video File Name | Auto: The video file will be saved automatically with the specified prefix. Manual: Users has to specify the video file name before video recording. |
| Note: The maximum video file size is 4G Bytes. Multiple video files may be generated automatically during long time video recording. | |
Setting>Language
| English | Set language of the whole software into English; |
| Simplified Chinese | Set language of the whole software into Simplified Chinese; |
| Traditional Chinese | Set language of the whole software into Traditional Chinese; |
| Korean | Set language of the whole software into Korean; |
| Thailand | Set language of the whole software into Thailand; |
| French | Set language of the whole software into French |
| German | Set language of the whole software into German |
| Japanese | Set language of the whole software into Japanese |
| Italian | Set language of the whole software into Italian |
| Russian | Set language of the whole software into Russian |
Setting>Miscellaneous

| Auto Exposure | The maximum exposure time during auto exposure process could be specified. Setting this item to a lower value could guarantee a faster frame rate during auto exposure. |
| ROI Color | Choosing the ROI rectangle line color |
| Camera Parameters Import | Import the Camera Parameters from the SD card to use the previously exported Camera Parameters |
| Camera Parameters Export | Export the Camera Parameters to the SD card to use the previously exported Camera Parameters |
| Reset to factory defaults | Restore camera parameters to its factory status; |


