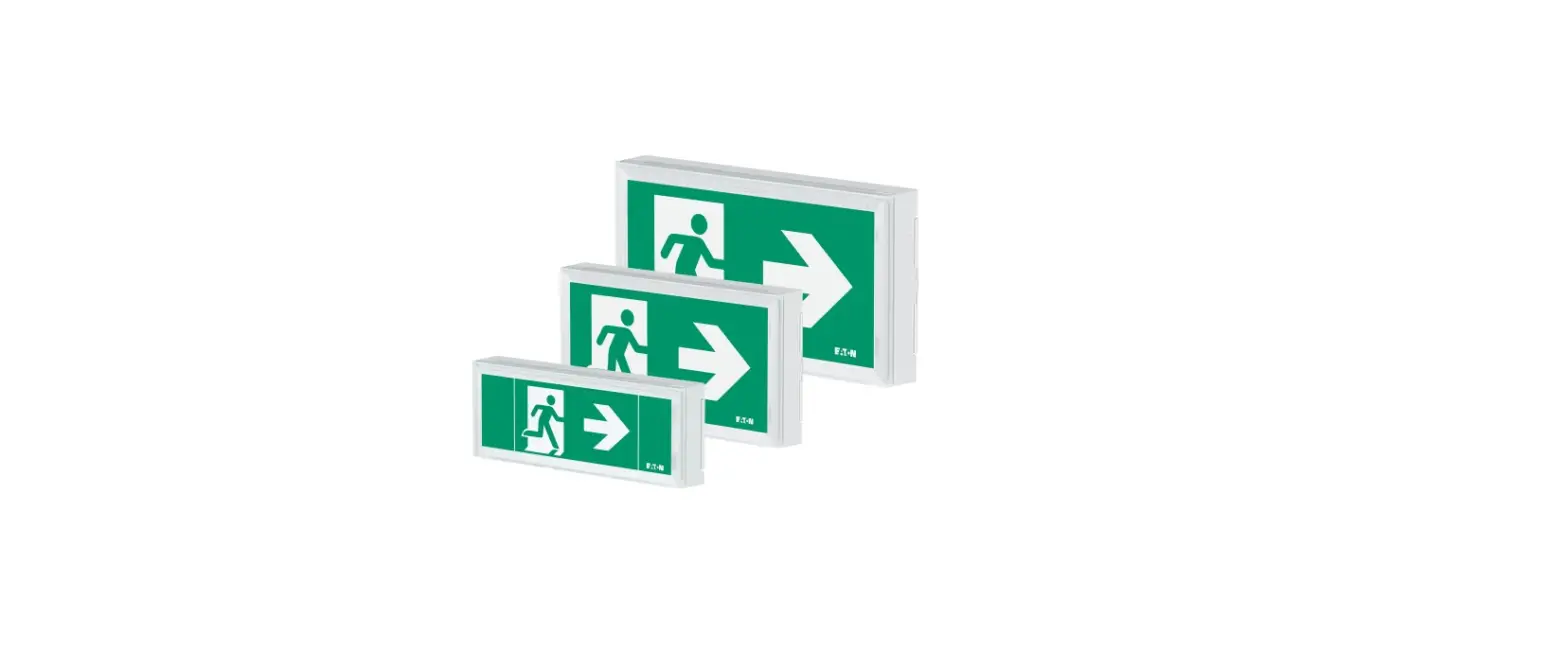
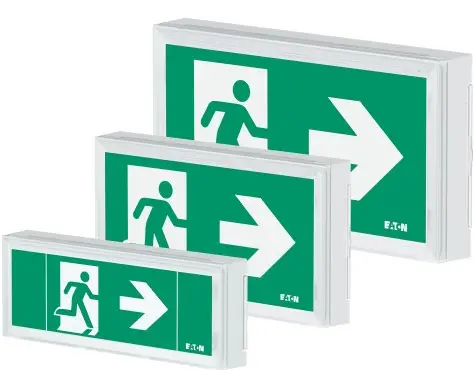
EATON FlexiTech Exit Wall 20M,30M CGLine plus
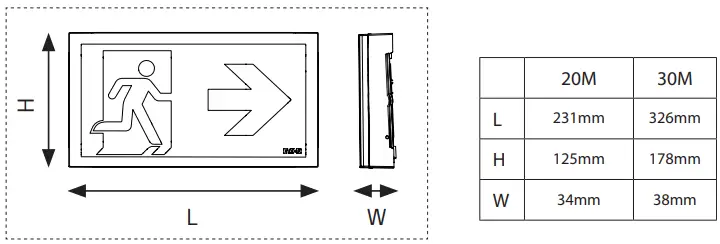
DIMENSION
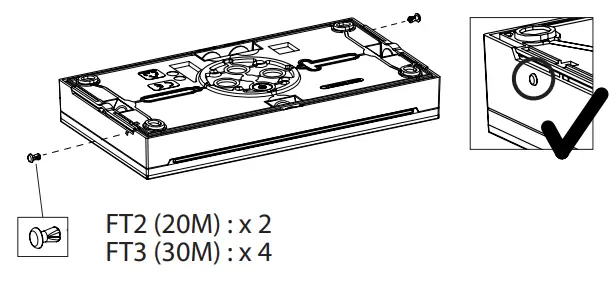
WHAT IN THE BOX
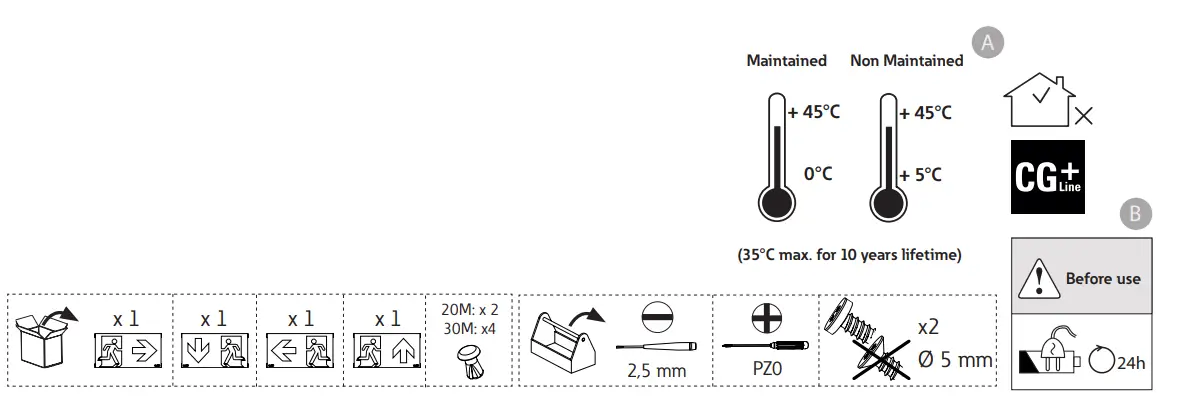
INSTALLATION
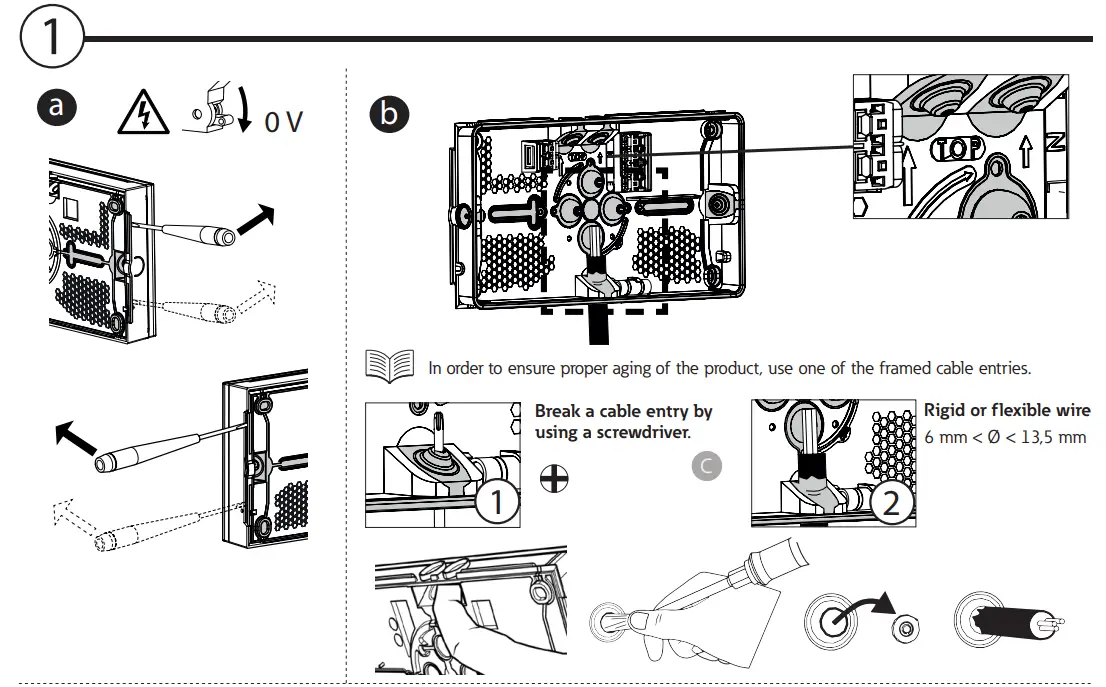
- Drill in the honeycomb zones (IP43) or in the 4 flexible material parts (IP66).
- For honeycombs, be careful to battery location.
- For corner fixing, use 4 screws.


- Disconnect the battery, wait for 10 seconds, and reconnect it if you decide to change configuration (b-c).


AUTOTEST
LED DESCRIPTION

- Disconnect the battery, wait for 10 seconds, and reconnect it if you decide to change Even/Odd configuration.
- See Controller CGLine+ user manual for duration test configuration
PICTOGRAM CONFIGURATION

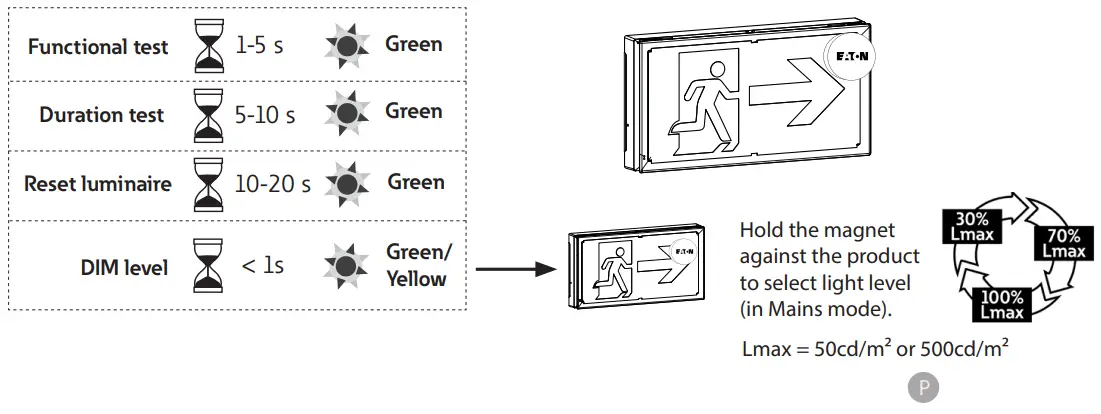
MAGNET TEST
MODEL
ZNO2054100 A- 04/2021 Eaton is a registered trademark. All trademarks are property of their respective owners.
Explanation Of Alphabets
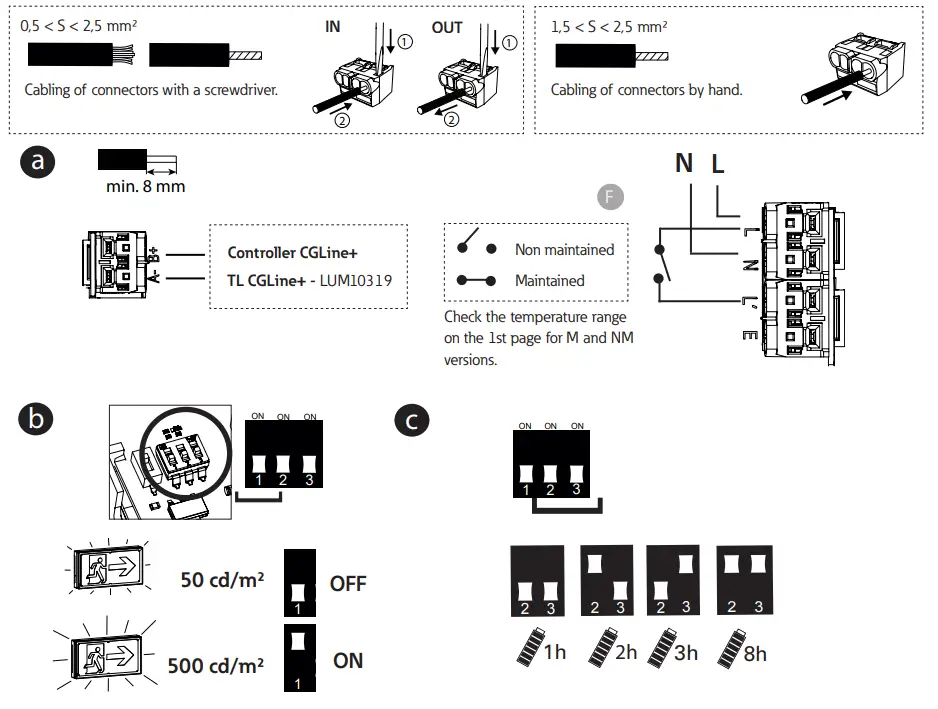
- A Maintained Non maintained
- B Before use
- C Break a cable entry by using a screwdriver. Rigid or flexible wire
- D Drill in the honeycomb zones or in the flexible material.For corner fixing, use 4 screws.
- E Use screwdriver to place and remove wire. No screwdriver required for connection
- F Non maintained Maintained Check the temperature range on the 1st page for M and NM versions.
- G Disconnect the battery, wait for 10 seconds, and reconnect it if you decide to change configuration (b-c).
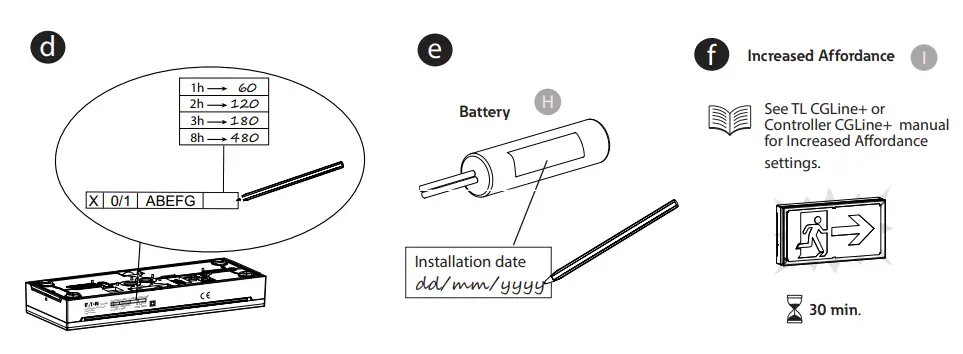
- H Battery Installation date
- I Increased Affordance See TL CGLine+ manual for Increased Affordance settings.
- Even/ Odd
- Duration Test Day D
- Duration Test Day postponed by 7 days
- Autotest
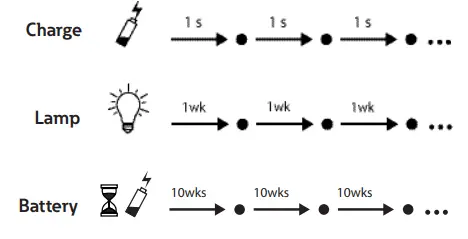
- Charge / Lamp / Battery
- 1wk / 10wks
- LED Description
- Green / Yellow
- Constant / Blinking
- M Disconnect the battery, wait for 10 seconds, and reconnect it if you decide to change Even/Odd configuration. See Controller CGLine+ user manual for duration test configuration.
- N Pictogram configuration
- O Magnet Test Functional Test Duration Test Reset luminaire DIM level Green / Yellow
- P Hold the magnet against the product to select light level (in Mains mode).
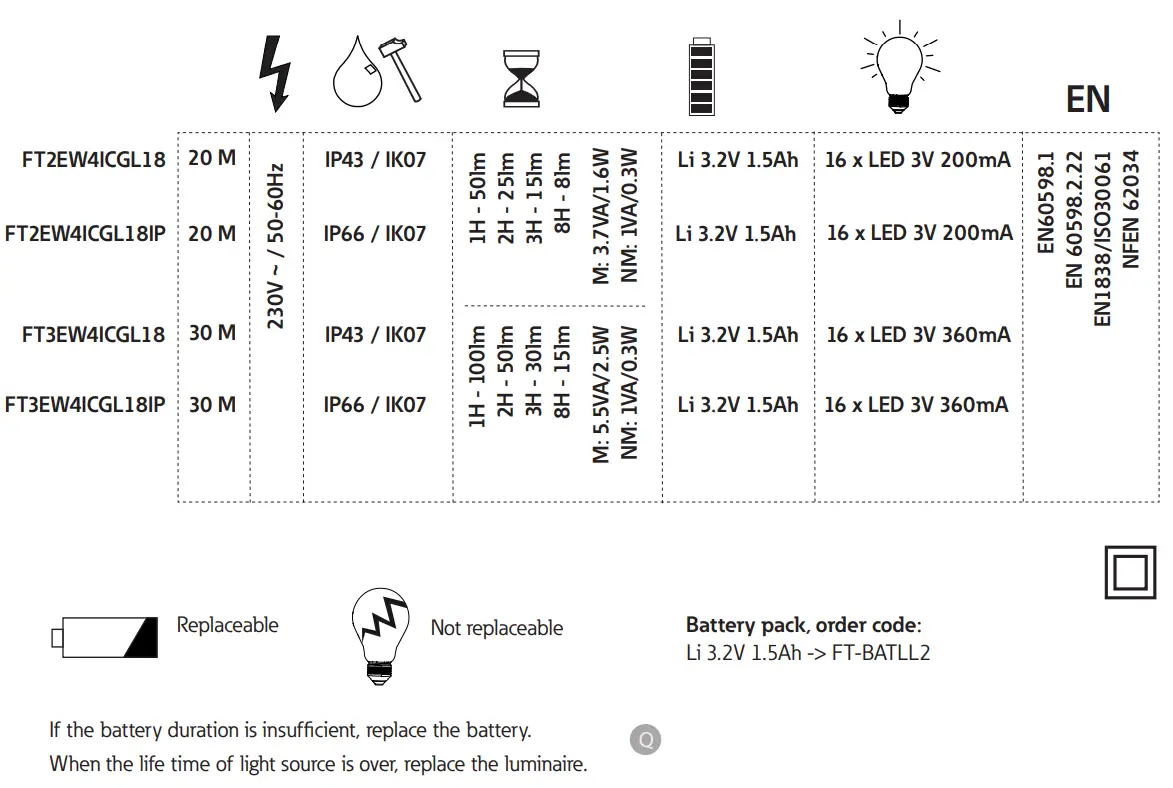
- Q Replaceable Not replaceable Battery pack, Order code If the battery duration is insufficient, replace the battery. When the life time of light source is over, replace the luminaire.


