![]()
ON-SDP01 thermal camera
Installation Guide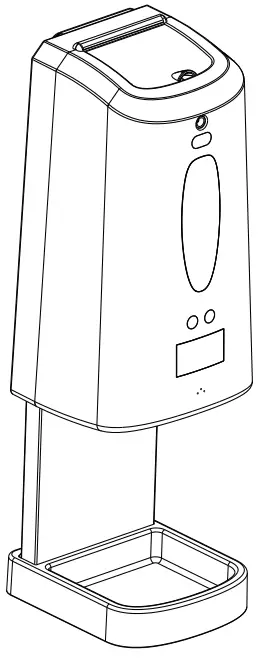 Thank you for choosing our company’s intelligent temperature measurement and disinfection products, please follow the instructions below to install and use this product.
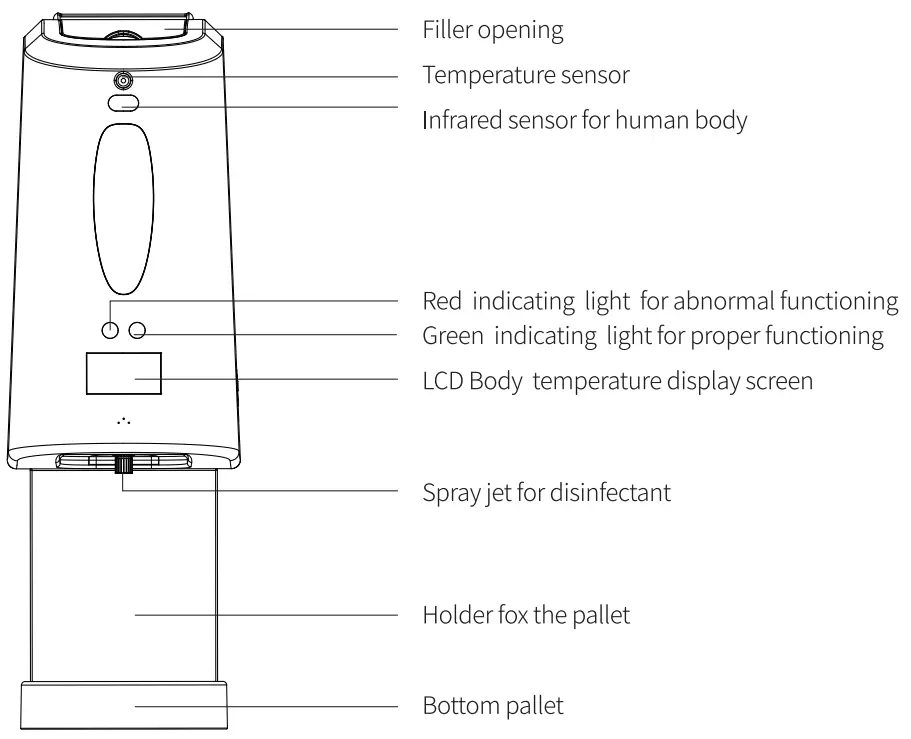
PRODUCT STRUCTURE DESCRIPTION:
INSTALLATION METHOD:
- The installation method for wall-mounted dispenser
 Open the front cap of the dispenser firstly, then use the backplane as a template to mark the location of the mounting hole at the installation location, and use appendant rubber plugs and screws to permanent the position.
 - The installation method for the standing dispenser
 The installation method for the standing dispenser: install and permanent the dispenser with round fasteners at the top of the standing cylindrical bracket.
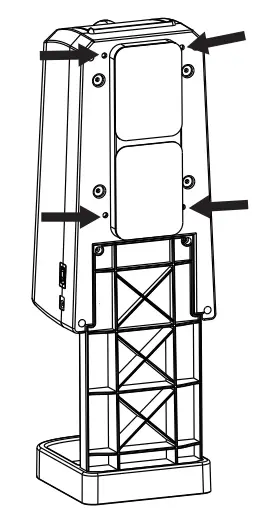 Open the front cap of the dispenser firstly, then use the backplane as a template to mark the location of the mounting hole at the installation location, and use appendant rubber plugs and screws to permanent the position.
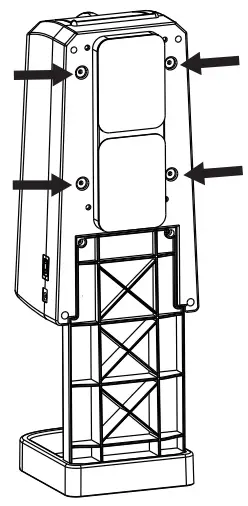 The installation method for the standing dispenser: install and permanent the dispenser with round fasteners at the top of the standing cylindrical bracket.
BATTERY INSTALLATION AND POWER SUPPLY MODE:
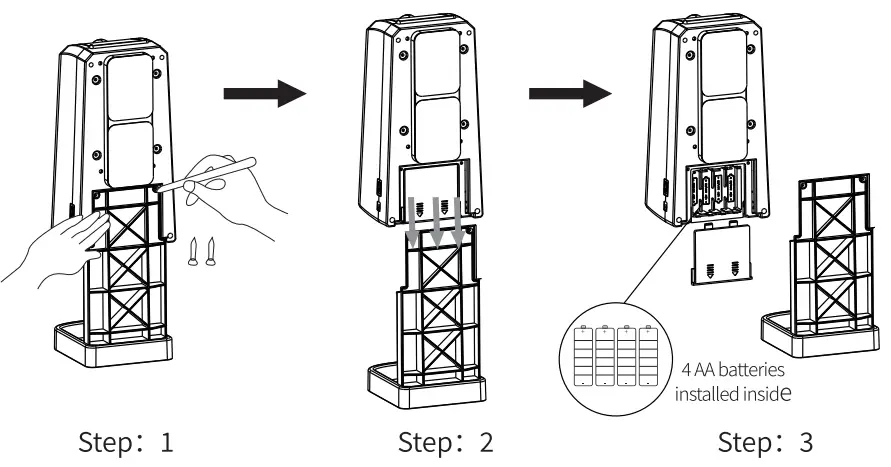
- Battery installation Take out the dispenser from the tray bracket, open the cell box on the back of the dispenser, and then put 4 AA batteries according to the positive and negative signs inside the cell box.
- Power supply mode 4 AA batteries installed inside or external 5V lA adapter.
TEMPERATURE MEASURING FUNCTION FOR HANDS
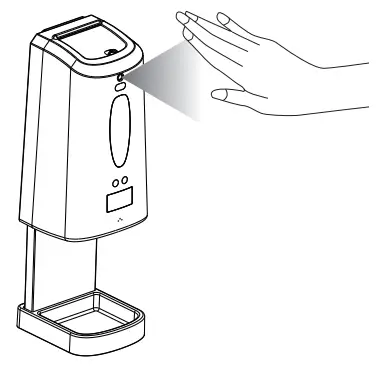
Put your hands within 3-5 CM of the sensor for 2 seconds before they are disinfected by the sanitizer, then the LCD screen will show the temperature of the tested human body.
FILLING THE DISINFECTANT:
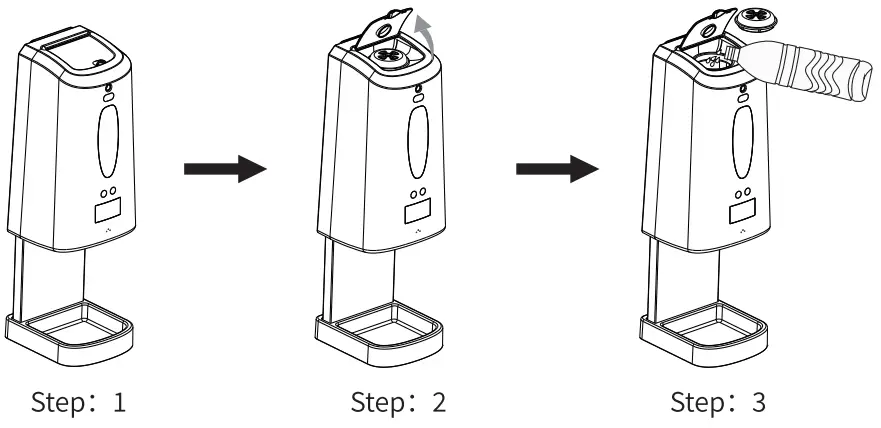 Methods of using 3 disinfectant dispensers Open the cap at the top of the dispenser and take out the directed air cover, then fill the liquid spray disinfectant, gel disposable hand sanitizer or foam disinfectant into the dispenser and restore the cap and directed air cover; Then supply power to the dispenser, put your hands in the detecting area of the dispenser sensor, and the dispenser will automatically spray disinfectant. The liquid output of the 3 dispensers are: for the spray pump, 0.5ml/time; for the drop pump, lml/time; for the foam pump, 0.8ml/time.
ATTENTION:
- Please keep your hands dry and clean before testing the temperature, and the temperature measurement error is ±0.2 °C. The color of the LCD screen will be green for normal temperature, orange for slightly higher body temperature, red for high body temperature.
- When the disinfectant in the dispenser is insufficient, the red light will flash continuously.
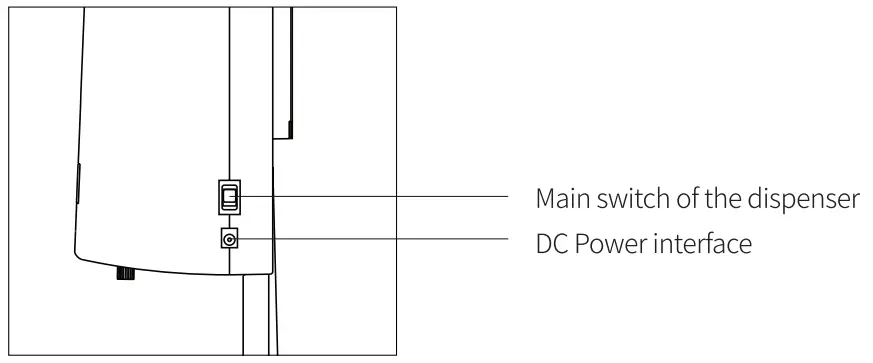
- The power supply mode adopts battery and external DC power supply: external 5V IA adapter or 4 M batteries installed inside.
- Please turn on the switch on the right side of the dispenser before use.
PRODUCT PARAMETER:
| Operating Voltage | DC5V±10% |
| Verification Mode | High precision infrared sensing test |
| Method of hand disinfection | Disinfectant spray, Gel disinfection, Bubble disinfection |
| Category | Spray type, gel type, froth type |
| Quantity of liquid | Gel: 1.2-1.5m1 Spray: 0.5ml Froth: 0.8m1 |
| LCD Hd Screen | Green (normal temperature) Yellow (high temperature) Red |
| Measuring range | 35.5°C-42°C (Non-medical product functions) |
| Accuracy | Accuracy: 0.5°C Face distance: 3CM-5CM |
| Trigger mode | Infrared induction, adjustable induction distance, Strong anti-interference, Not afraid of changes in light, not affected by skin color |
| Margin | Turn on red light when the residual amount of disinfectant |
| Capacity | 1300m1 Fillable inner bottle |
| Pump head | Service life more than 300,000 times |
| Power supply | 4 AA batteries or external 5V 1A adapters are installed internally |
| Size | 131mm (wide) x 399mm (high) x 138mm (thick) |
| Shell material | ABS materials |
| Installation | Wall-mounted, Desktop |


