USER MANUAL
![]()
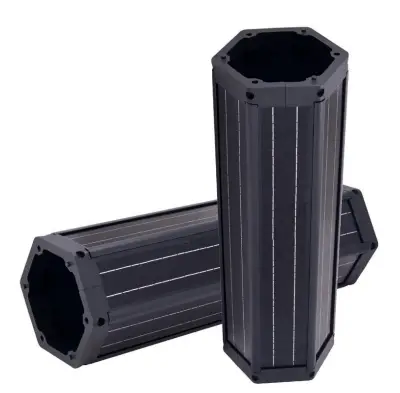

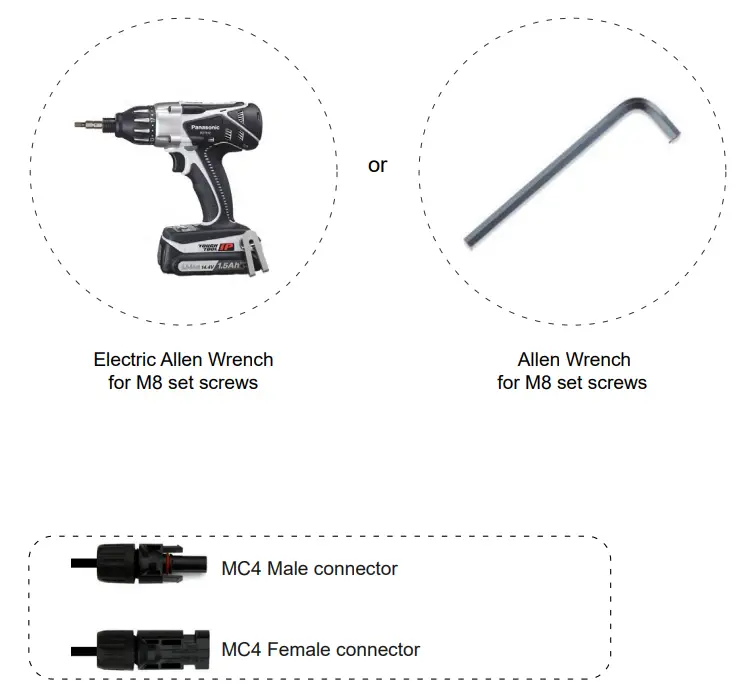
Materials in Package
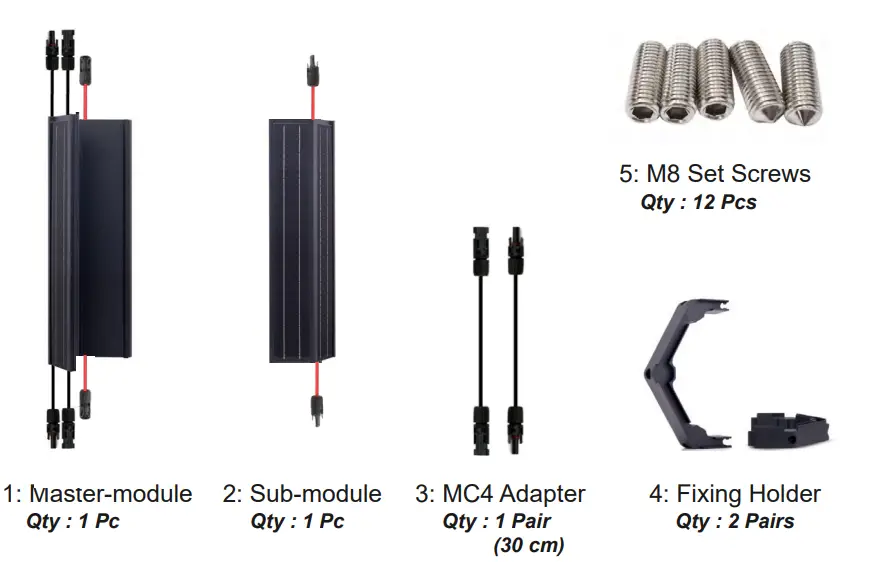
Remark:
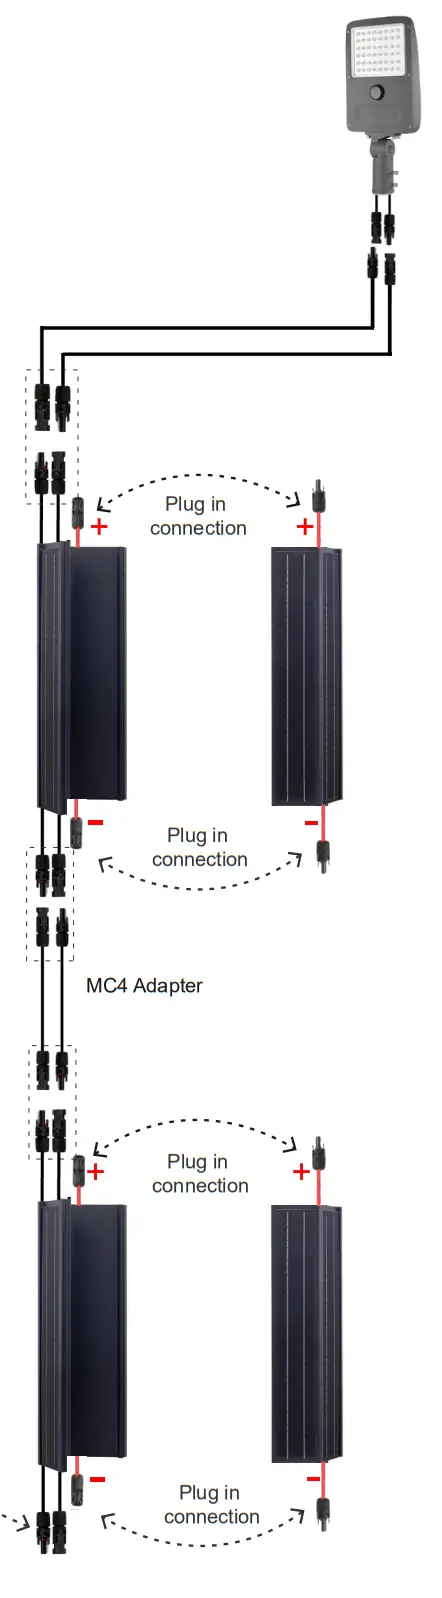
- All MC4 male connectors ( including master and sub-modules) are positive 18/36V+.
And all MC4 female connectors are negative 18/36V2 : - The type of MC4 connectors on the two sides of the MASTER MODULE are exactly the same.
That is to say: you can use either of two sides to connect to a solar light head or another device in the same way as using a regular solar panel. - MC4 adapters (30cm) must be used between two solar cylinders.
(VERY IMPORTANT) - The MC4 connectors with
RED cables are to connect master-module and sub-module - All the connections between the master module and sub-module should be connected to each other including the last module of system
- VERY IMPORTANT :
DO NOT CONNECT the MC4 male and female connector of the LAST MASTER MODULE.
Just leave them there or cut the connectors off.
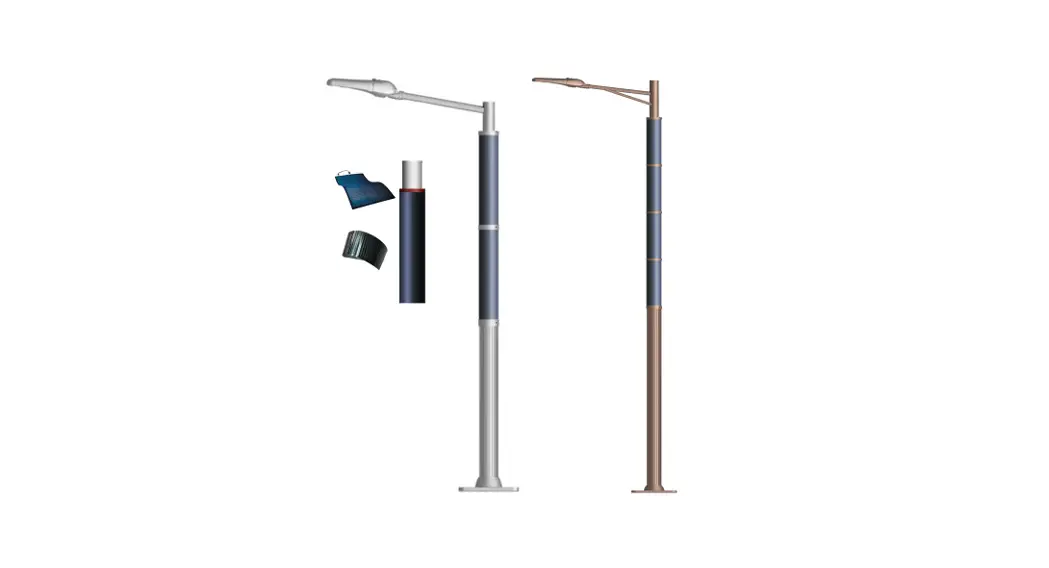
Connection of Vertical Solar Street Light
Required Tools
 | |||
| Use the screwdriver to adjust the screws to a proper position according to the diameter of the pole. | Buckle the modular brackets on the pole, and Lock the two parts as one unit, make sure the bracket is at horizontal height. (VERY IMPORTANT). | Connect the two parts of the bracket and make the junction area flat and without any tilt. This step is very important. otherwise, the solar module will be Inclined | Fasten the 6 pieces of screws with the driver, and make sure the pole is in the exact middle of the brackets. |
 | |||
| Make sure the brackets are mounted very tight and strong enough, it can hold 50KG. | Put the first master module on the brackets in the right position. | With another person’s help, slide the submodule along the track of the master module and hold it before it reaches the bottom about 20cm. | Connect the sub and master module by 2 pairs of red cable MC4 connectors at the bottom and top places. |
 | |||
| Put down the submodule to the bracket and adjust its position properly to match the bracket. | Take out the two MC4 cables from the master module carefully, Hold it and do not let it fall into the modules. | Put second brackets over the module in opposite direction to the bottom brackets. Install it in the same way as installing the first brackets. | Adjust the position of the bracket at the best position. Similarly, let the pole in the middle of the hexagon bracket. |
 | |||
| Fasten the 6 pieces screws with driver carefully. | Put the third bracket on the top bracket, ano take out the two MC4 cables of the first module through the third bracket. | Connect the 2pcs of MC4 adapter cable to the MC4 connectors of the first module. | Put the second master module on the bracket in the same way as Step 6 shows. |
 | |||
| Connect the second master module to the first module via the MC4 adapters (30cm) | Make sure all the PLUG-in connections are very tight and strong, well connected. | Install the sub-module of the second module in the same way as the step. | installation completed |
MC4 Adapter MUST BE ADOPTED between two up and down modules.
![]() The quality you can trust
The quality you can trust
AURORAS INNOTECH (GUANGDONG) CO., LTD![]() www.auroraslighting.com
www.auroraslighting.com![]() +86 0756 8530887
+86 0756 8530887 ![]() +86 0756 8500385
+86 0756 8500385![]() +86 180 2307 5361
+86 180 2307 5361![]() [email protected]
[email protected]![]() 2nd Building, 639# Huayu road, Zhuhai 519000, P.R.C
2nd Building, 639# Huayu road, Zhuhai 519000, P.R.C http://www.auroraslighting.com


