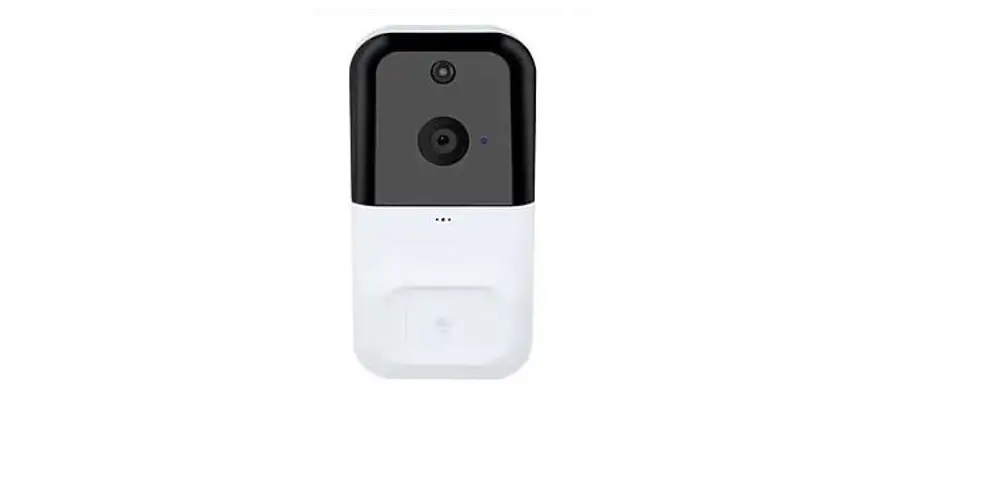
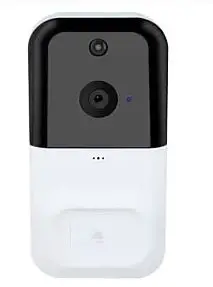
ONECAM D1 Video Doorbell
The Basics 

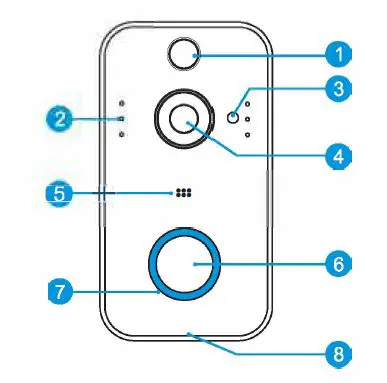
- Pl R Motion Sensor
- Infrared LED x 6
- Light Sensor
- 166° HD Camera
- Microphone
- Push Button
- LED Indicator
- Speaker
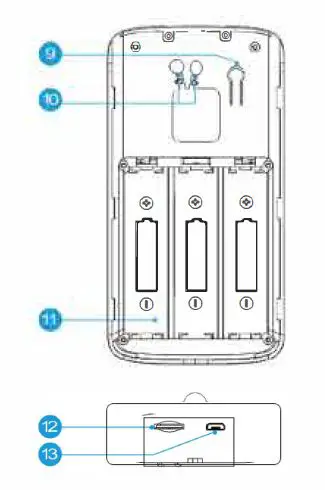
- Reset Button
- AC Input
- Battery Compartment
- TF card
- USB Interface
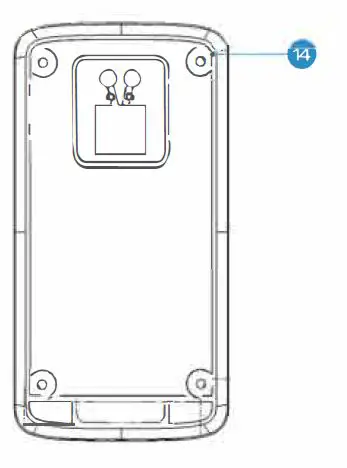
Mounting Bracket - Fixed Hole

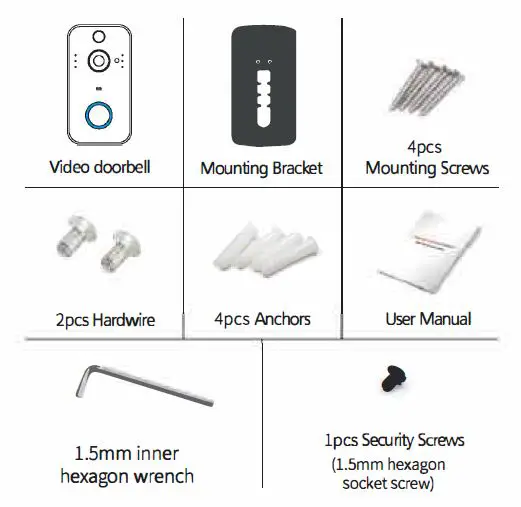
In The Box 
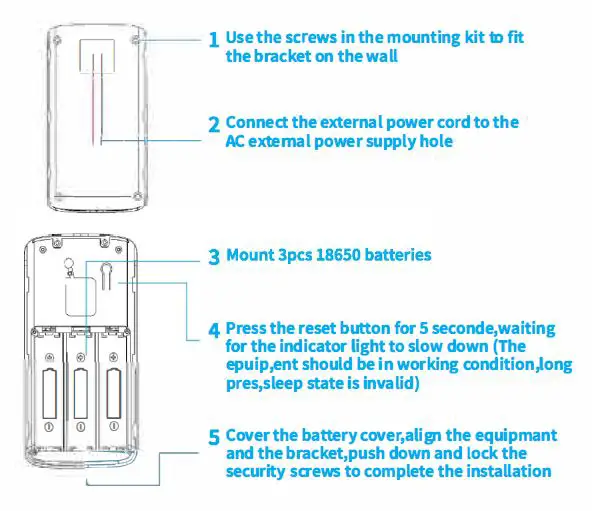
Installation Guide
As shown in the figure, take back 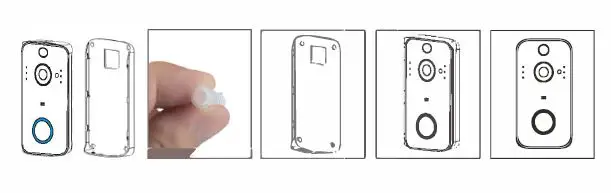
Setup Device
Thank you for choosing our products! Please follow the below instruction to setup and using your doorbell device.
DOWNLOAD APP
- Download “One cam”Via 11Google Play” “Apple store”QR Scan below QR code download” “One cam” APP
- Then register and login the app to receive notifications please allow all notification rights


iPhone users (operation steps) Allow “One cam” to send your notifications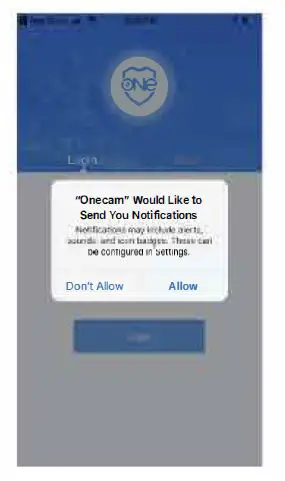
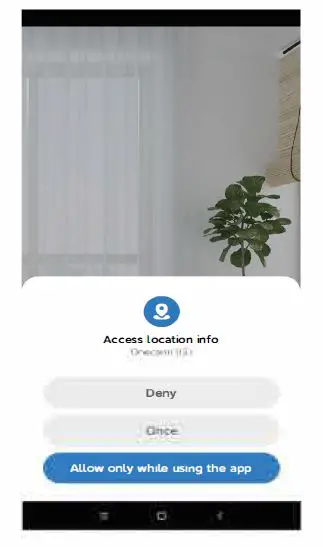
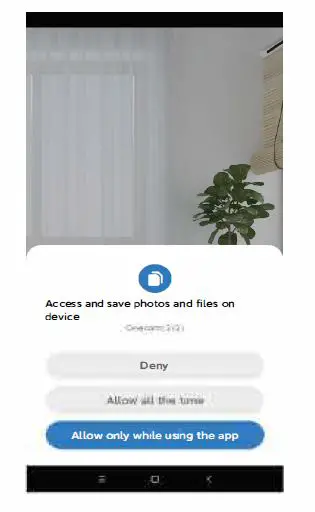
Android users (operation steps}
- Allow One cam to access the device’s location info

- Allow Onecam to access and save photos and files on device

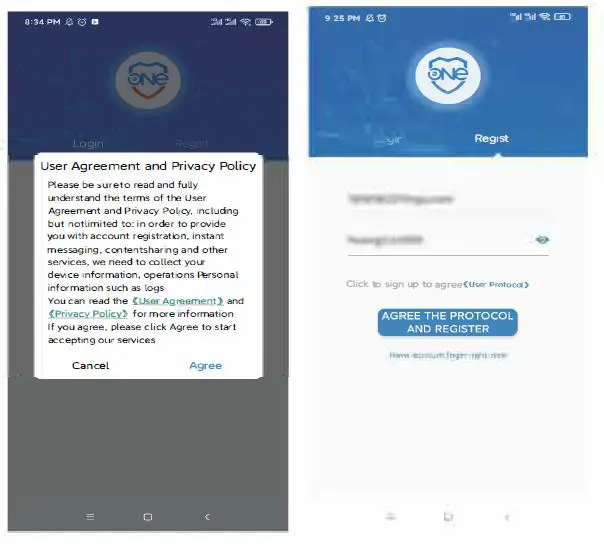
- Agree on User Agreement and Privacy Policy
- Agree on the protocol and register.
 SETUP DEVICE
 SETUP DEVICE
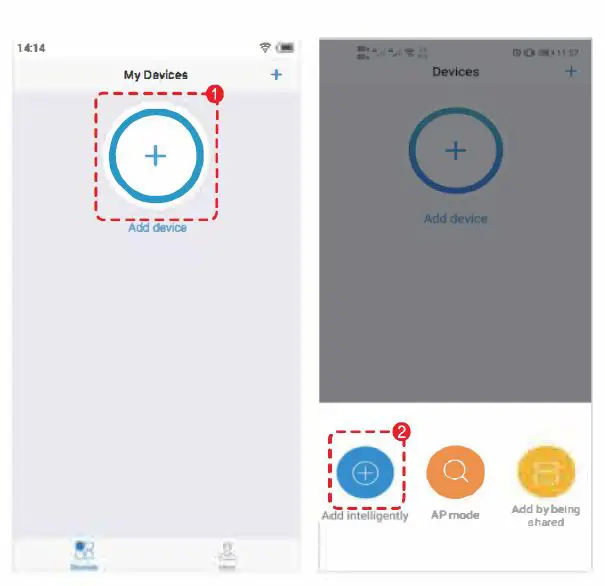
- Login to the app, click on the”+” of the app and select Add intelligently to proceed to the next step
- To RECEIVE ALL NOTIFICATIONS, PLEASE ALLOW ALL NOTIFICATION RIGHTS I-

- To RECEIVE ALL NOTIFICATIONS, PLEASE ALLOW ALL NOTIFICATION RIGHTS I-
The device is powered on. Wait for the device indicator to be steady red. (If the indicator is not steady red, please wake up the device by pressing the reset button. When the indicator is steady red, release the reset button.) Click “Next step”; follow the instructions of the APP until the status of the light changes to blue light flashing, indicating that the device is successfully connected to the network and can be used.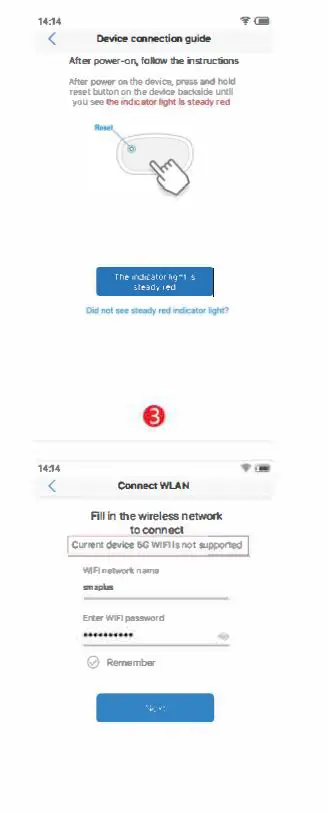
When the password is entered correctly ?
If the password is entered correctly,and a piece of music wi appear when the interface is bu fered, and the interface will also prompt that the connection is successful.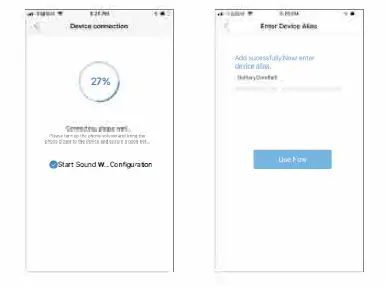
When the password is entered incorrectly?
If the password is entered incorrectly,and a piece of music wi not appe ar when the interface is buffered, and the interface will also prompt you check network is good and try again. 
VIDEO QUERY
Where can check whether App permissions are enabled?
Click the”File”icon to view the video in the card (Note: The device needs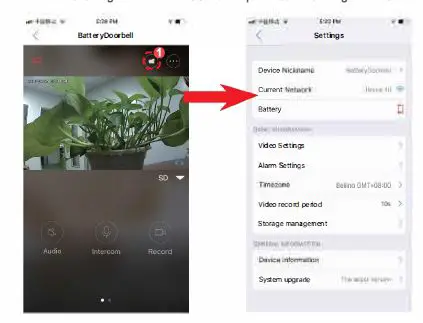 to insert the TF card. Tum on the alann detection and record the video before you can query the video file)
On the doorbell video display interface, there are three dots in the upper right corner.After clicking to enter interface is the permission setting interface of the App.
CLOUD STORAGE VIDEO
- Click the cloud storage feature icon on the devuce lise oage. Enter the cloud stirage cideo query and purchase page.
- • Cloud Service Package Type
General Cloud Service package type price:
7- Day video history for 1 month:$ 4.99€4.99 £ 3.99
7-Day video history for 1 year: $49.99€49.99 £ 39.99
30-Day video history for 1 month: $12.99€12.99 £ 9.99
30-Day video history for 1 year: $129.99€ 129.99 £ 99.99

DEVICE SHARING
Click the “Share”icon, enter “Share Management” , click the “Share” button, Your family members can click the”+” of the app to select ” Scan Add”to scan the QR code of the sharing device,then share your device

SPECIAL NOTES
- The device is equipped with a rechargeable lithium battery. The battery life will be affected by the device’s wake-up time and the number of wake-ups. Therefore, the PIR sensor alarm detection function is used in an environment with a lot of people. It is recommended to turn off or set the device to low sensitivity to reduce device wake-up and call times and extend battery life. When the battery is low, please charge the battery immediately.
- Keep the device in the range of your router. Make sure the device is placed close to the Wi-Fi router. If there have to be thick or insulated objects between the device and the Wi-Fi router, which may lead to a weak Wi-Fi signal, please make sure the Wi-Fi signal is in good level before you start using the device.
- It is a delicate device with a low power consumption design. Every time the device is awakened and will work for a few seconds. After that, the device will enter standby mode to save power. You can set the work time in the app settings.
- If the Android phone not receive the notifications, because the android system is blocked, its needs to open the app’s self-starting function in your phone to receive push messages.
- This device provides one month of free cloud storage and face recognition services. If you need to continue using value-added services after the trial period expires, you need to purchase them in the app.
Technical Specification
| Resolution | Full HD |
| Field of Angle View | 166° |
| IR LED | 6*850mm |
| Wi-Fi | IEEE 802 11 b/ g/ n |
| Audio | Two-way talk with noise cancellation |
| Recording | Device SD Card recording(20 seconds) |
| Storage | Cloud storage or 8G/16G/32G TF Card |
| Battery | 18650 specification batteries (Not Included) |
| Device Wakeup | Device Button, Motion Detection, Remote Live View |
| Power Consumption | 3 pcs 18650 lithium battery |
| Monitoring | Within 600ms |
| Notifications | Power Consumption Standby 200uA, Working 170mA |
| Waterproof level | IP54 |


