
INGENEXT Boost 50 and Bonus Harness For MCU Ryzen
Product Information: Boost 50 and Bonus for MCU Ryzen
The Boost 50 and Bonus for MCU Ryzen is a car accessory that allows for a fast and easy installation to enhance the performance of your vehicle. This product is compatible with most vehicles having an MCU Ryzen.
Features
- Easy installation process
- Enhanced vehicle performance
- Bonus features
In the Box
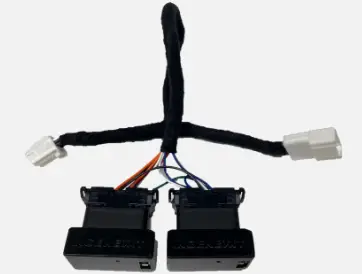
- Boost 50 and Bonus for MCU Ryzen module
- Installation sheet
Product Usage Instructions
Before starting the installation process, please read the installation sheet thoroughly and watch the video provided to ensure that you understand the process completely.
Installation Process
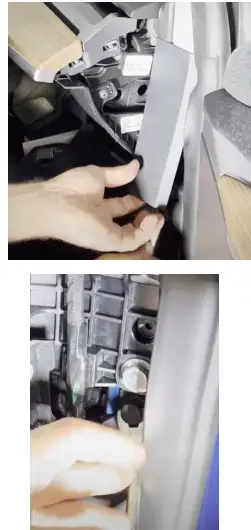
- Remove the glove box by following the steps outlined in the video provided.
- Plug the Boost 50 and Bonus for MCU Ryzen module into the vehicle by following the steps outlined in the video provided.
- Wait for two minutes before reassembling the dashboard to allow the central screen to come back on. Then, turn on the car and put it in DRIVE to check that there are no alerts.
- If everything is okay, connect to the Ingenext web application and activate the hard reset button.
- Reconnect the three connectors of the glove box and the USB plug directly to the MCU.
- Align the top and bottom guides to push the glove box into place and use a Torx T20 socket to screw in the screws (X2) that hold the glove box.
- Align the guides to push the airbag into place and use an external Torx E10 to screw bolts (X4) that attach the front passenger knee airbag to the instrument panel.
- Use a Torx T20 socket to screw in the screws (X2) that attach the front passenger knee airbag to the instrument panel.
- Reinstall the plastic clip that holds the vent duct.
- Use a Torx T20 socket to screw the four upper screws that hold the glove box.
Please note that during the installation process, it is important not to disconnect the airbag. Also, we recommend that you replace some of the vehicle harnesses to make some space while reconnecting the connectors.After following these instructions, your Boost 50 and Bonus for MCU Ryzen module will be ready for use with your vehicle. If you have any questions or concerns, please refer to the installation sheet or contact our customer support team for assistance.
INSTALLATION SHEET
BOOST 50 AND BONUS FOR MCU RYZEN 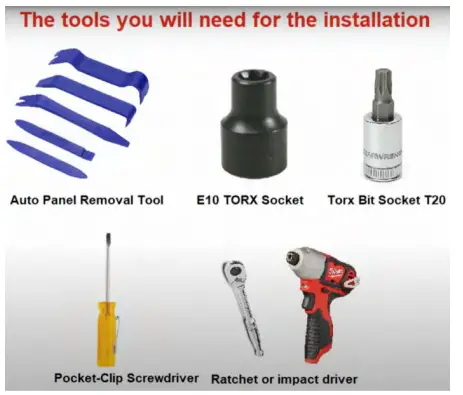 To help you with the installation, here’s a video which explains step by step how to install the product in your car:
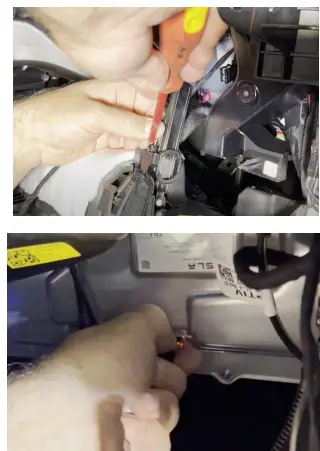
Step 1 – Remove the glove box 
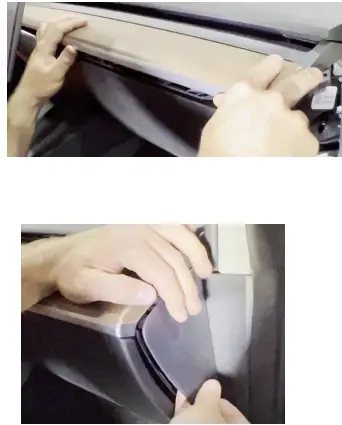
- Remove the instrument panel end cap
- Lift the upper decor trim

- Remove the upper trim of the A pillar
- Release the topmost clip on the LH lower A-pillar trim (You can use the Poket-clip screwdriver to help you)

- Pull the rearmost part of the LH lower lar trim upward to release the clips and tabs, and then pull the entire trim rearward to remove the trim from the vehicle

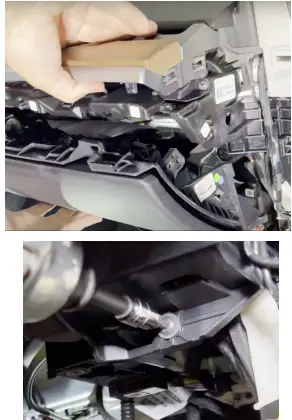
- Use a Torx T20 socket to unscrew the 4 upper screws that holds the glove box

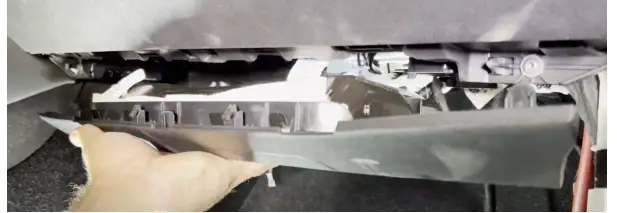
- Release the clips that attach the passenger footwell cover to the vehicle (see video at 1:35)
- Disconnect the electrical wiring harness connectors from the puddle light and emergency speaker

- Release the clip that attach the vent duct
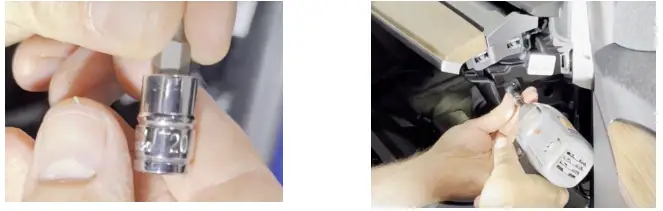
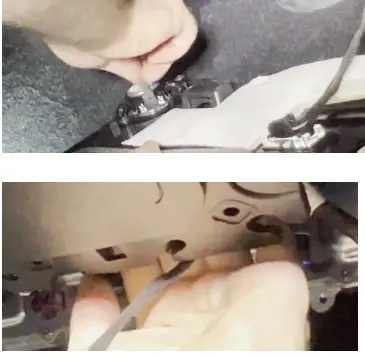
- Use a Torx T20 socket to unscrew the screws (X2) that attach the front passenger knee airbag to the instrument panel

- While supporting the front passenger knee airbag, use a external Torx E10 to remove the bolts (X4) that attach the front passenger knee airbag to the instrument panel

- Gently pull towards you to unclip the plastic (video 2:35) Do NOT disconnect the airbag.

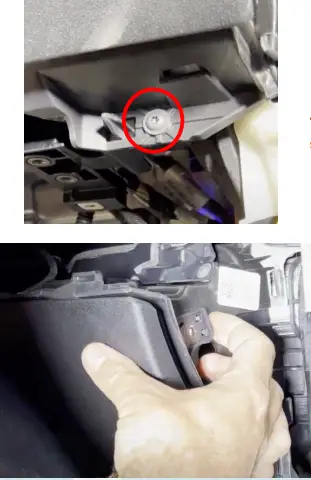
- Use a Torx T20 socket to unscrew the screws (X2) that hold the glove box
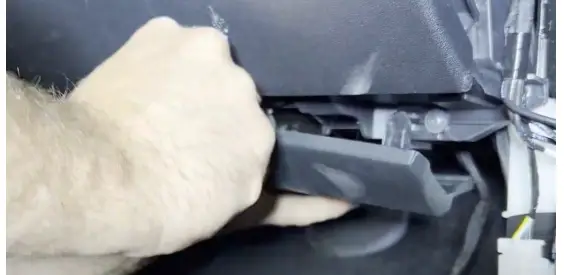
- Gently pull towards you to unclip the glove box

- Unplug the 3 connectors that are connected to the glove box. You can unplug the USB plug directly to the MCU (You can use the Poket-clip screwdriver to help you)
Step 2 – Plug the module into the vehicle
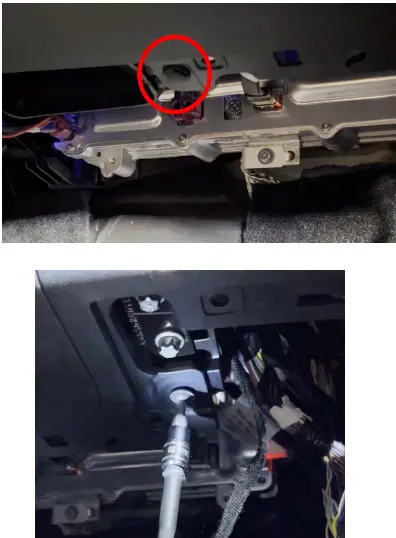
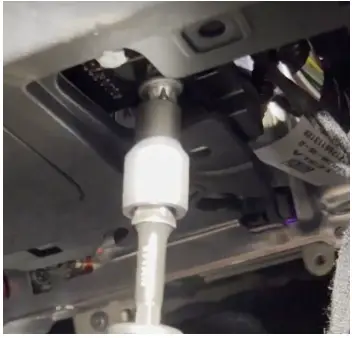
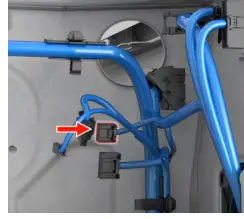
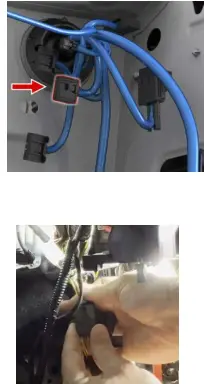
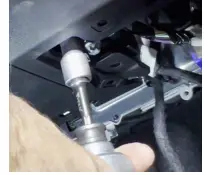
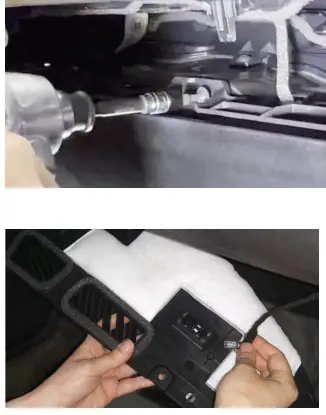
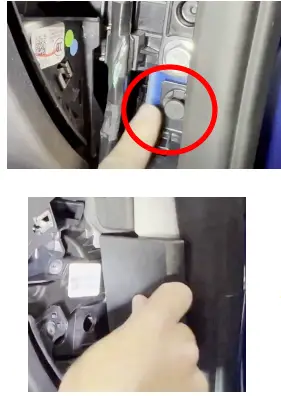
- Unplug the connector X175 from the MCU (You can use the Poket-clip screwdriver to help you) See video at 3:46

- Unplug the connector X170 from the MCU (You can use the Poket-clip screwdriver to help you)
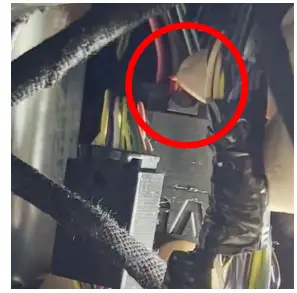
- You can connect the 2 connectors of the vehicle to the female connectors of the Ingenext module

- Push the red lock to lock the connector in place
- You can now plug the connector X170 and X175 of the Ingenext module in the MCU
Tip: To reconnect theses 2 connectors, we suggest you replace some of the vehicle harnesses to make some space. - Before reassembling the dashboard, wait 2 minutes for the central screen to come back on and turn on the car to put it in DRIVE and check that there is no alert.
Connect to the Ingenext web application and activate the hard reset button. If everything is ok, you can reassemble the dashboard See the user manual to help you connect
STEP – 3 Reassembling the glove box - Reconnect the 3 connectors of the glove box and the USB

- Align the top and bottom guides to push the glove box into place
- Use a Torx T20 socket to screw (X2) that hold the glove box

- Align the guides to push the airbag into place

- Use an external Torx E10 to screw bolts (X4) that attach the front passenger knee airbag to the instrument panel

- Use a Torx T20 socket to screw in the screws (X2) that attach the front passenger knee airbag to the instrument panel
- Reinstall the plastic clip that holds the vent duct

- Use a Torx T20 socket to screw the 4 upper screws that hold the glove box
- Reconnect the light wire to the panel. You will hear a click sound and the light will come back once properly plugged in

- Reconnect the emergency speaker
- Place the 2 modules above the airbag plastic

- Install the plastic cover on the passenger footwell aligning the guides and reinstall the clips that attach the passenger footwell cover to the vehicle

- Reinstall the LH lower lar trim and align the clips that insert into the body

- Replace the rubber lip over the plastic

- Reinstall the topmost clip on the LH lower A-pillar trim
- Reinstall the upper trim of the A Pillar

- Reinstall the upper décor trim
- Reinstall the instrument panel end cap and…GOOD JOB…you have completed the installation. Now have fun and drive safely!


** By connecting the 2 bypass supplied with the product in replacement of the 2 Ingenext modules, your vehicle will be back to stock **


