FSi LVDS Industry Standard Connection Interface
LVDS Troubleshooting
LVDS is an industry standard connection interface for many panel technologies. It is possible through excessive shock or vibration that an LVDS cable can come loose leading to a loss of image on screen. If an LVDS cable comes loose opening the monitor to reseat the connection can quickly resolve the issue without requiring you to send the monitor to FSI for service. However, before opening the monitor to check and potentially reseat this connector please first make sure that the issue you are experiencing could potentially be related to a loose LVDS connector. Please do not unnecessarily open the monitor to reseat the LVDS connector if the issue you are experiencing or behavior you can reproduce is not specifically listed in the table below as potentially related to a loose LVDS connection.
| Issue | Potentially Caused by Loose LVDS |
| No signal AND no access to the menu (if Fast Mode is Active please first deactivate it to verify if menu can be seen) | Yes |
| A vertical line on the panel that is visible both with and without a signal | Yes |
| Colorful static-like artifacts on screen | Yes |
| Signal drops, but menu is still accessible | No |
| Signal drops, but switching to another input brings the image back | No |
| Signal drops, but turning the monitor off and on again brings the image back | No |
| Signal drops, but switching to another signal source brings the image back | No |
| Removing any device, cable, or wireless transmitter from the signal chain brings the image back | No |
| The backlight of the LCD panel goes out/flickers | No |
| Dropped frames or black flashes visible in a repeating pattern | No |
| Video is freezing | No |
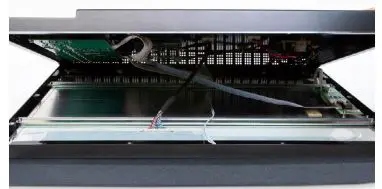
If you have confirmed that your monitor may possibly have a loose LVDS cable connection please follow the instructions below to open your monitor and reseat the connector(s). Carefully place the monitor face down with the top closest to you on a soft, clean surface. Make sure nothing can scratch or bend the panel.
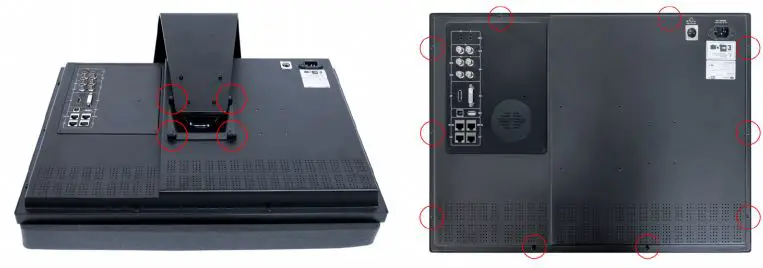
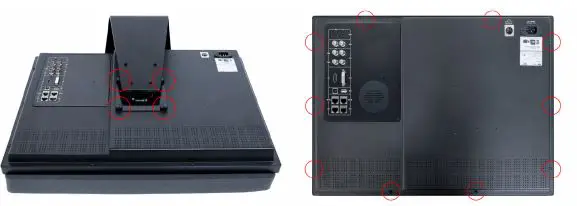
- Loosen the 4 hand driven screws to remove the L-Stand from the chassis.

- Remove the black phillips head screws at the edges of the chassis.

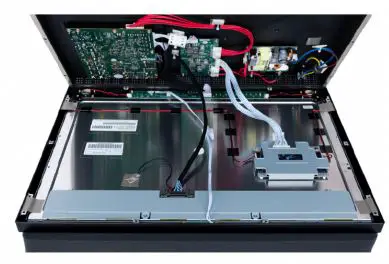
- Carefully separate the two halves of the chassis.
- Some of these cables are short and fragile so please use caution.

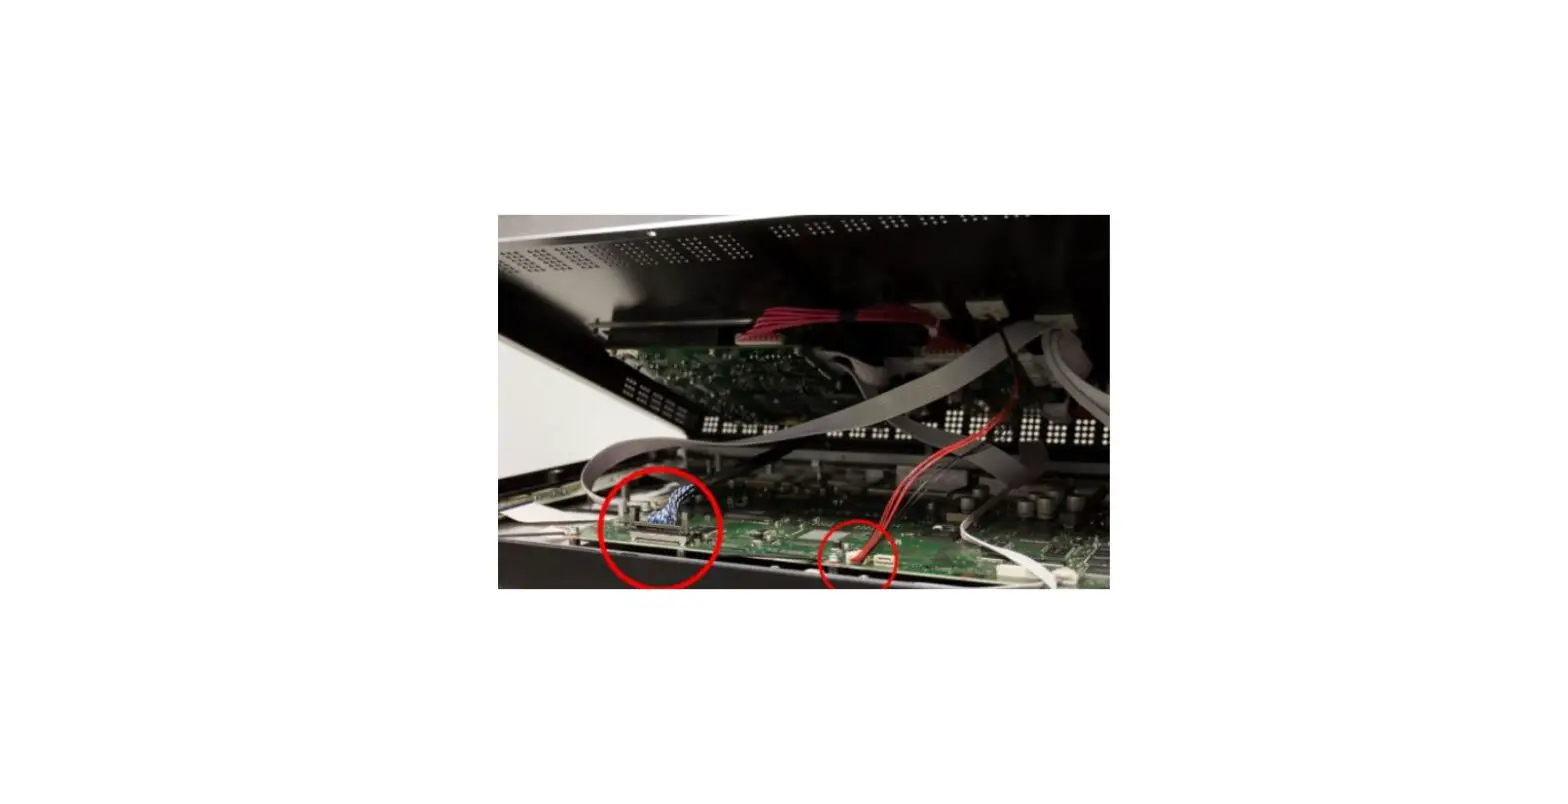
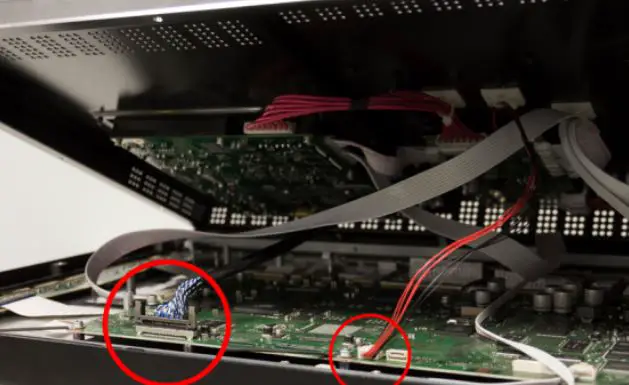
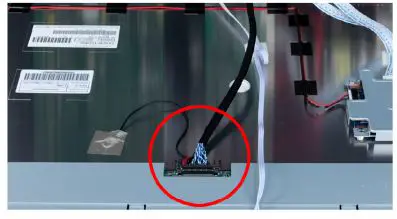
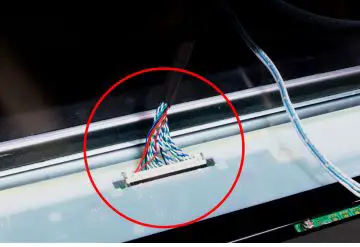
- Disconnect the LVDS cable by pinching the side clips inward and gently removing it.
- Gently reseat the LVDS cable, which will click when inserted.
If your monitor experiences repeated heavy vibrations or rough handling in transportation resulting in the LVDS cable frequently becoming loose, a small section of kapton tape can be placed over the connection in order to minimize the effect of the vibrations on that connection. Reverse the instructions to reassemble.
- Loosen the 4 hand driven screws to remove the L-Stand from the chassis.

- Remove the black phillips head screws at the edges of the chassis.
- Carefully separate the two halves of the chassis.

- Some of these cables are short and fragile so please use caution.
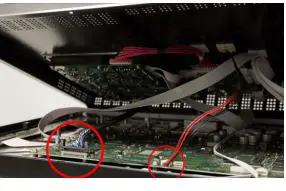
- Disconnect the LVDS cable by pinching the side clips inward and gently removing it.

- Gently reseat the LVDS cable, which will click when inserted.
- Disconnect and reseat the small square cable.

If your monitor experiences repeated heavy vibrations or rough handling in transportation resulting in the LVDS cable frequently becoming loose, a small section of kapton tape can be placed over the connection in order to minimize the effect of the vibrations on that connection. Reverse the instructions to reassemble.
If you have confirmed that your monitor may possibly have a loose LVDS cable connection please follow the instructions below to open your monitor and reseat the connector(s). Carefully place the monitor face down with the top closest to you on a soft, clean surface. Make sure nothing can scratch or bend the panel.
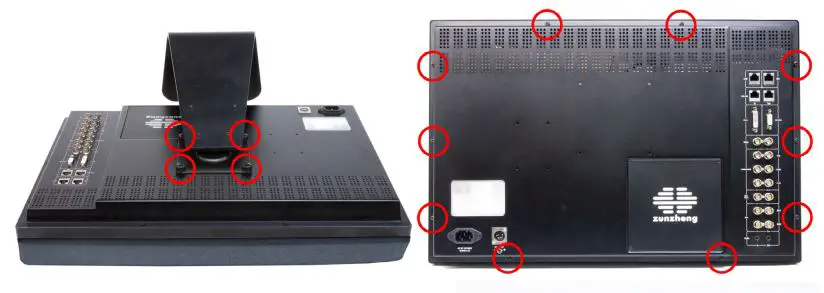
- Loosen the 4 hand driven screws to remove the L-Stand from the chassis.
- Remove the black phillips head screws at the edges of the chassis.

- Carefully separate the two halves of the chassis.

- Some of these cables are short and fragile so please use caution.

- Disconnect the LVDS cable by pinching the side clips inward and gently removing it. Note: On CM170 & CM171, LVDS clips spread outwards.
- Gently reseat the LVDS cable, which will click when inserted.
If your monitor experiences repeated heavy vibrations or rough handling in transportation resulting in the LVDS cable frequently becoming loose, a small section of kapton tape can be placed over the connection in order to minimize the effect of the vibrations on that connection. Reverse the instructions to reassemble.
Flanders Scientific, Inc.
- 6215 Shiloh Crossing Suite G Alpharetta, GA 30005
- Phone: +1.678.835.4934
- Fax: +1.678.804.1882
- E-mail: [email protected]
- www.FlandersScientific.com


