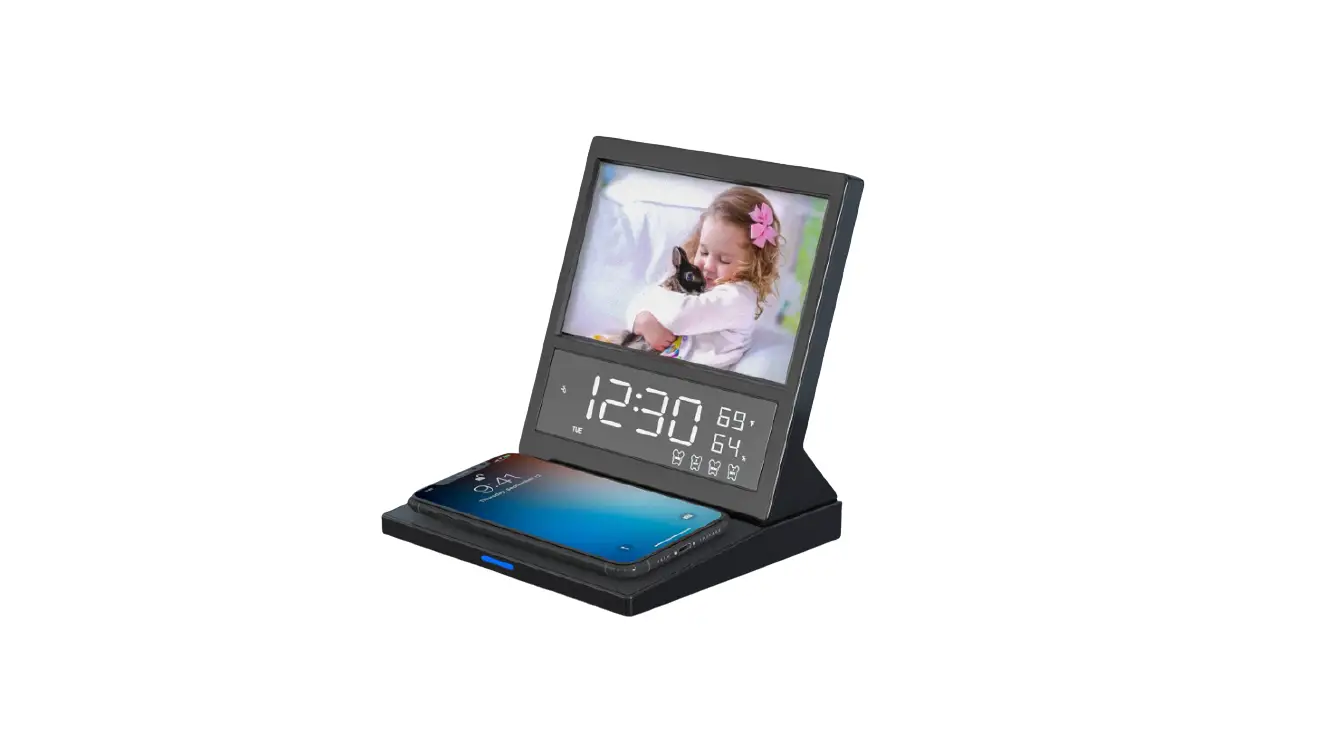
Pointuch SY-W0281 Dual Alarm Radio Photo Frame Qi Wireless Charger Instructions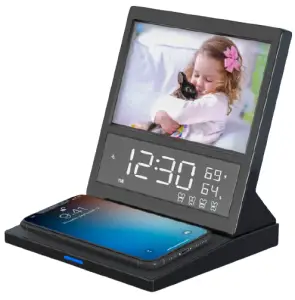
How to use
Step 1. Plug In
- Connect the power adapter to any wall outlet and plug it into the device using the included USB cable.
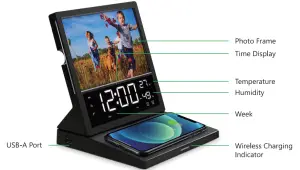
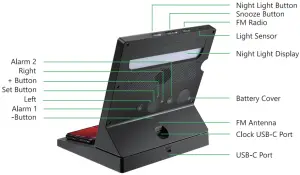
- The LED displays will turn on to indicate the product is powered and ready for use. There are 3 ways to use, as shown in the pictures below:
| Optional ways of use | Illustration | Input |
| Clock with Wireless Charging |  | 9V/2.5A, 12V/2A |
| Wireless Charging only | 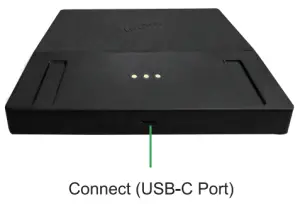 | 5V/2.1A, 9V/2.5A, 12V/2A |
| Clock only | 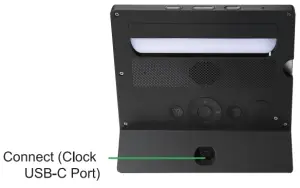 | 5V/2.1A |
Warning: Using power adapter with other specifications may damage the product or cause malfunction.
Attention: If connected by a 5V/2.1A power for using alarm clock & wireless charging together, some functions may fail or abnormal due to insu2icient power supply.
Step 2. Setting the Time
- Long press 3 seconds the “Set” button to enter hour setting, and adjust the hour by pressing +/-.
- Press the “Set” button once more to enter minute setting, and adjust the minute by pressing +/-.
- Press the “Set” button a third time to enter 12H/24H time system setting, and adjust by pressing +/-. “PM” will display while 12-hour time system is set.
- Press the “Set” button a fourth time to enter year setting, and adjust the year by pressing +/-.
- Press the “Set” button a fifth time to enter month setting, and adjust the month by pressing +/-.
- Press the “Set” button a sixth time to enter day setting, and adjust the day by pressing +/-.
- Press the “Set” button a seventh time to complete time setting
Note:
- During time setting process, if no operations for 30 seconds, the setting will be saved automatically.
- During stand-by mode, pressing “Set” button to view date, and it will automatically exit after 5 seconds.
- Double click the “Set” button to switch Celsius and Fahrenheit Temperature mode .
Time Operation Video Instruction
Step 3. Setting the Alarm
- Alarm Setting (EG: Alarm work1)
- Press
 button
 - Long press button, press button “+/- “adjust hour
- press button, pressing button “+/- ” adjust minute
- press to Sound, press button choose sound from(S01 S10)
- press to volume, press “+/- ” adjust volume
- press to brightness, press button “+/- ” switch brightness L00 L10
- press the to Wake-up light brightness, press button “+/- ” set time 0-60 minute (b00 b60)
- Press button is completed.
Note:
Setting (Alarm1-work,AIarm 1- rest, Alarm2-work, Alarm 2- rest, ), First press “Alarm” button, then Press ” Set ,+/-” button adjust step by step in turn accordingly. During alarm setting process, 30 seconds without operation, the setting will be saved automatically.
Alarm Operation Video Instruction
Step 4. Snooz
- The alarm sounds for 3 minutes when activated.
- Press any button (except “Snooze”) to turn alarm off.
- Press
 button to snooze the alarm. It will ring for 5 times after 5 minutes snooze.
Note:
The snooze indicator will display on the screen during the Snooze Mode. Touch any button except for ![]() button to cancel snooze.
button to cancel snooze.
Step 5. Setting the FM Radio
Note: Expand antenna in open field when listen to the radio.
- Press
 button to turn on FM Radio.
 - While FM Radio is on, long press 3seconds “+” or “-” button to search the stations automatically, station codes display on the screen and will be saved automatically. (About 5mins).
- Press button to select the radio stations.
- Press “+” and “-” button to set the volume.
- Long press 3 seconds button to turn off FM Radio.
FM Radio Operation Video Instruction
Step 6. Setting the Display Brightness
- In standby mode, Long press 3seconds button for 3 seconds to activate or deactivate light-sensitive mode.
- While light-sensitive mode is on, the machine can sense the light of the surrounding environment and adjust the display brightness automatically.
- While light-sensitive mode is off, press the button to adjust the screen brightness manually to 5 grades (Off /Min /Second /Third /Max).
Brightness Operation Video Instruction
Step 7. Setting Night light
- Night light can be set into 9 color modes: white, red, orange, yellows, green, cyan, blue, pink and RGB shade.
- Press the
 button once to turn on the night light with white color, another press shall allow you to set color in turn as specified above.
 - Long press 3 seconds button to turn off night light.
Note:
While white light on, press the << or >> button to adjust the brightness to 10 grades, and brightness code L00-L10 display on the screen.
Step 8. Change photos
- Pull out the transparent film from the photo frame, and stack photos and the film into the frame (note that the side of the frame is notched to the right).
- Up to 8 photos with 6in/4R spec can be stacked at a time. You can change the favorite photos as you like.
Step 9. Wireless Charging
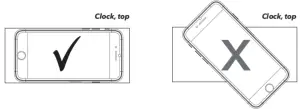
- Place your wireless charging-compatible device directly onto the charging pad.
Refer to the placement illustrations here as a guide.
The charging indicator in front of the charging pad turns blue while your device is charging. It turns off when your device has finished charging. Check your device’s screen to see the progress of charging. You can remove your device at any time during charging.
Important: If the charging indicator light starts blinking, there’s something interfering with the charging. Make sure there are no objects between your phone and the charging pad. You might need to remove your phone’s case to charge wirelessly.
Note: Indicator Display
- Power connection successful — blue light flashes twice
- Standby — light off
- Charging — solid blue light on
- Charged — light off
- FOD — blue light flashes continuously
Attention:
- Using uncertified or incompatible power supplies and adapters may cause fire, short circuit or other dangers.
- Do not squeeze or collide.
- Do not disassemble or put into the fire, water, to avoid short-circuit leakage.
- Do not use wireless chargers in severe high temperature, humidity or corrosive environments to avoid leakage of damaged circuits.
- Do not place too close to magnetic cards (ID cards, bank cards, etc.) with magnetic strips or chips to avoid magnetic card failure.
- Keep more than 20cm between the implanted medical device (pacemaker, implantable cochlea, etc.) and the wireless charger to avoid potential disruption to medical devices.
- Keep children from the product in case they play the wireless charger as a toy to avoid accidents.
- Keep the wireless charger and receiver device away from water and other liquids.
- To clean the charger, make sure the power supply is disconnected.
- Usage temperature: -10 C -40 C .
- Usage humidity: 20-90% (40 % )
Pictures in this manual are all illustration. Final product is subject to fact.
If you need to buy or use other adapters, please make sure to meet the QC3.0.
The product supports PD fast charging. If your mobile phone supports 15W wireless charging, please purchase a PD (30W) adapter with 3A charging cable, so you can get a better experience.
BATTERY BACKUP
Your clock has a pre-installed battery backup that will keep the time in case power is interrupted (like by a power outage, for example). If you notice that battery backup is no longer working, simply replace the CR2032 coin-cell battery in the battery compartment on the right side of the clock. Pull the compartment out to access the CR2032 battery.
Specification
- Input: 5V/2.1A, 9V/2.5A, 12V/2A
- Output: 5W/7.5W/10W/15W
- Charging efficiency: *75%
- Charging distance: 8mm
- Wireless charging frequency: 110-205KHz
- USB Output: 5V/1A(MAX)
- FM frequency: 76-108KHz
- Size: 170x154x180mm
Package: 1*clock charger
- 1*manual
- 1*charging cable
- 1*adapter(18W)
- 1*adhesive fixing clip for radio antenna
Applicable Devices
Products qualified with Qi standard. The specific applicable models are as follows:
| Apple | Samsung | LG | |
| iPhone 8/8 Plus | Galaxy S6/S6 Edge+ /S6 Active | G7/G7 ThinQ /G7+ ThinQ | Pixel 3 |
| iPhone X/XS/ XS Max/XR | Galaxy S7/S7 Edge+ /S7 Active | G8/G8 Thin Q | Pixel 3XL |
| iPhone SE | Galaxy S8/S8+ /S8 Active | G8 S /G8 S Thin Q | Pixel 4 |
| iPhone 11/11 Pro/ 11 Pro Max | Galaxy S9/S9+ | G8 X /G8 X Thin Q | Pixel 4XL |
| iPhone 12/12 Mini | Galaxy S10/S10+ /S10e | V30N30+ | Pixel 5L |
| iPhone 12 Pro/ 12 Pro Max | Galaxy S20/S20 /S20 Ultra | V30S Thin Q | |
| AirPods 1/2/Pro | Galaxy Note 8/8+ | V35/V35 Thin Q | |
| Galaxy Note 9/9+ | V40 Thin Q | ||
| Galaxy Note 10/10+ | V50/V50 Thin Q | ||
| Galaxy Note 20 /Note 20 Ultra | VSOS |
FQA
Q: I pick up the digital clock and it doesn’t display.
A: Please check the clock is connected USB port and power on.
If connect the bottom dock USB port, the clock has to stand on the dock correctly.
Press the “Snooze” button to check if the brightness is turned off.
Q: Why is it not charging my phone?
A: Please check your mobile model is compatible with our product.( Refer to Applicable Devices in manual )
Make sure you connect right USB port.
Thick or metal phone case.
Q: There is a little hot with my phone when charging.
A: When is battery of the cell phone is low less than 50% power, the phone will fast charge, at this time phone get hot because of large heat, thus the wireless pad maybe stop charge as for it’s over-hot protection. The indicator light flashes , but it won’t hurt your phone. It is normal situation.
Q: Why the wireless charging indicator flashes?
A: Mobile phone is not charging on wireless pad.
Over-hot protection and stop charging.
Voltage is not stable.
Q: I can’t switch to one station.
A:
- First press “FM” button
- Than long press 3seconds “+/- button to search the station automatically (About 5mins, don’t switch stations during this time. )
- After finished the channel searching, press “FM” button to choose a station and press “+/-” button to adjust volume.
- Long press 3seconds “FM” button to turn off.
Please contact us if you have any question, we offer 1 year warranty and for your service in 24 hours. We are sole designer and manufacturer, we can improve our product according to your ideas. Our aim is to make innovation & better shopping experience in alarm clock wireless charging filed. Please email us directly if you have any creative ideas, we will provide generous rewards once your ideas and suggestions are adopted. (Please scan our QR Code)
Customer Support
Customer Service: [email protected]
Official Website: www.pointuch.com
Facebook: www.facebook.com/pointcuh.shuoyu


