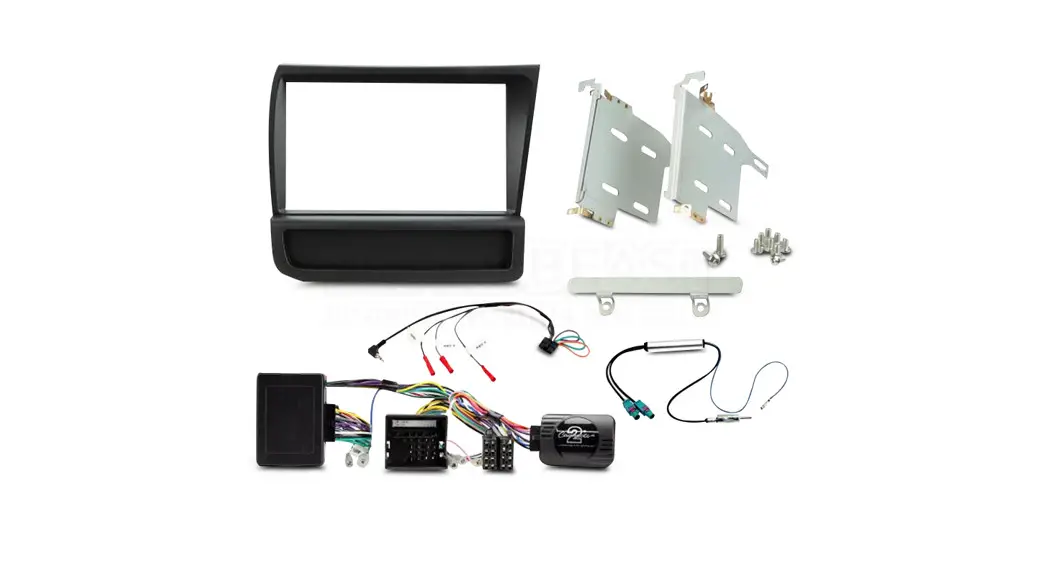
![]() FP8559K Double DIN Fitting Kit
FP8559K Double DIN Fitting Kit
Instruction Manual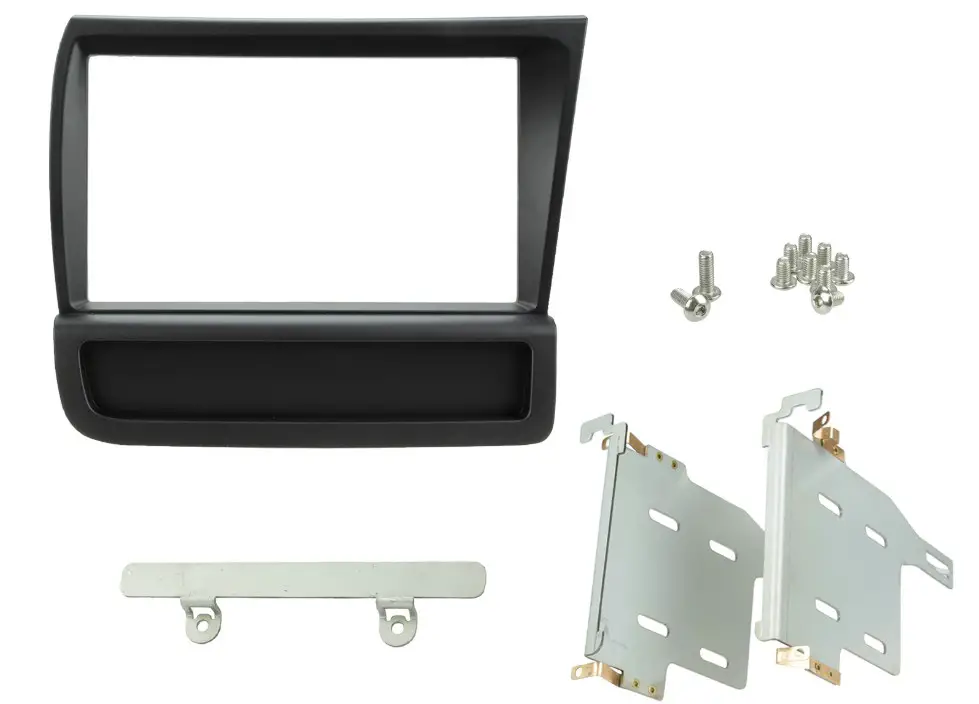
IN THE KIT
- Double DIN Fascia Panel*
- Brackets
- Lower Bracket
- Hex Screws (x8)
- Hex Bolts (x2)
APPLICATION
Note: Application data is subject to change at any time
Audi R8 (Type 42)
2007 – 2015
Note: the vehicle will need modification. Please familiarise yourself with the instructions before undertaking the installation.
FEATURES
- Allows for the installation of a double DIN aftermarket stereo
- Includes mounting brackets and fitting accessories
- Finished in matt black to match the vehicle dashboard
DISCLAIMER
The information provided in this document is subject to change without notice due to manufacturer changes and/or improvements to the product/s. This instruction manual is based on documented data and research. The manufacturer of this product cannot be held responsible for any changes made to the vehicle by the manufacturer or damages that may occur through the installation of this product in accordance with the steps outlined herein.
PRIOR TO INSTALLATION
Read the manual prior to installation. Technical knowledge is necessary for installation. The place of installation must be free of moisture and away from heat sources. Please ensure that the correct tools are used during the installation to avoid damage to the vehicle or product. Aerpro can not be held responsible for the installation of this product.
INSTALLATION GUIDE
INSTALLATION GUIDE
- Begin by using 4x radio release keys to release the main head unit. (release keys sold separately)
Once the head unit is out, carefully pull the whole unit out of the dashboard and disconnect all of the wiring.
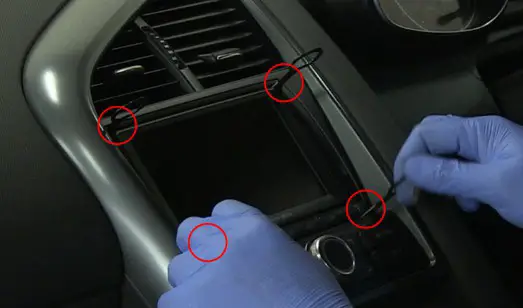
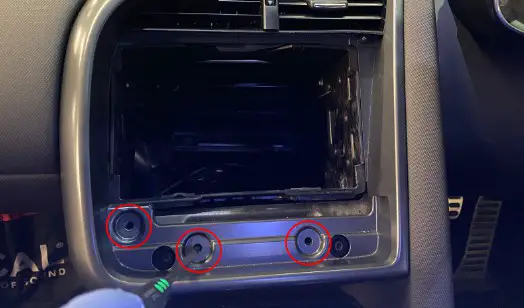
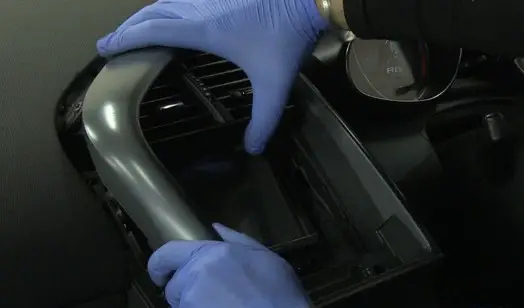
- With the main head unit out of the dashboard, undo the following three screws to release the main fascia.

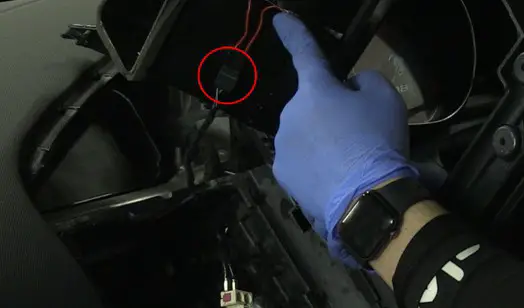
- Using a panel removal tool, remove the main fascia off the dashboard and disconnect the air vent LED connection in the process.BRACKET ASSEMBLY
- Attach the brackets to the new stereo using the screws within the kit.
These brackets need to be attached upright so that the metal tab is at the top (see image for correct orientation).DASH MODIFICATION
- At this point, you will need to modify the dashboard. Using a file or a cutting tool, begin to file away the inside lip of the four highlighted corners of the main dash cavity.
Take due care not to remove too much of the interior plastic. During this modification, it is best to test fit the unit (with brackets attached) in between cutting, to ensure the perfect fit.
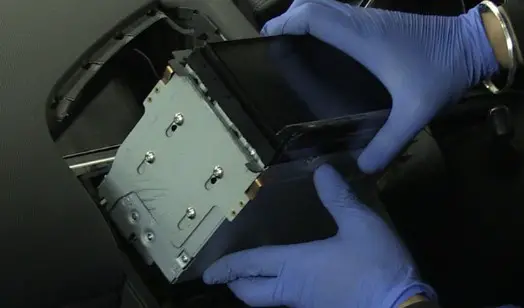
DASH ASSEMBLY - Once happy with the modification, connect any/all the stereo connections and stow the head unit into the dash cavity (see image for correct orientation).
- Once the head unit is flush with the dashboard, bring back the OEM fascia and install this over the new stereo (connecting the air vent LED connector in the process).
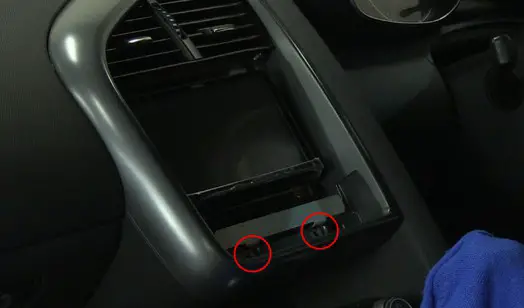
- Take the lower bracket and place it as seen in the image. This then needs to be screwed into place using the long bolts that come with the kit.

- Once the lower bracket has finally been installed, place the fascia over top. The magnets found on the rear will firmly hold it in place. This will then complete the installation.
 BRACKET ASSEMBLY
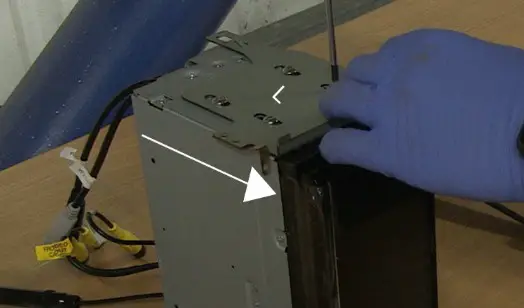 DASH MODIFICATION
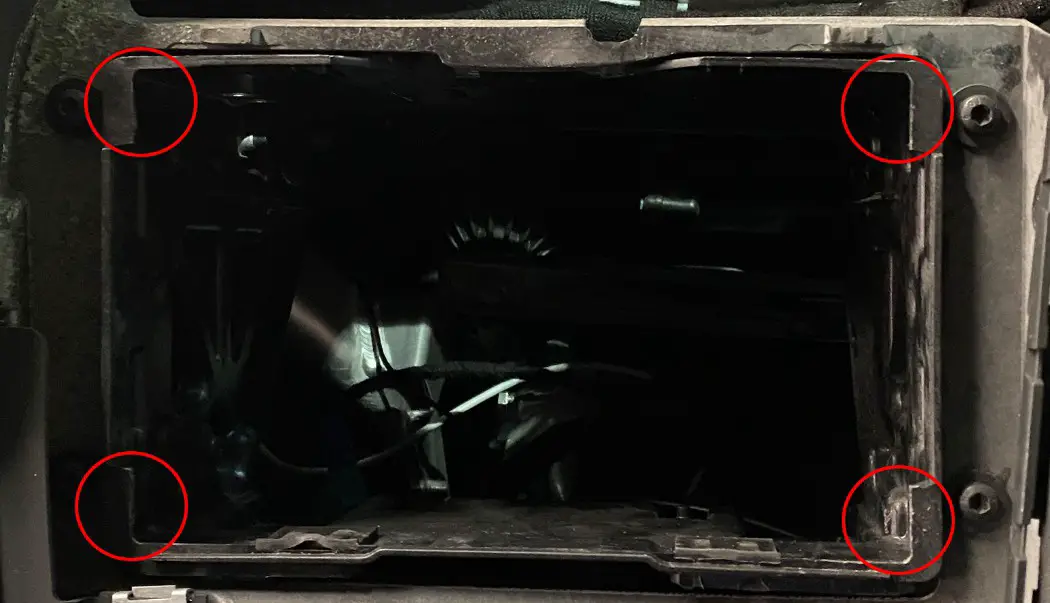
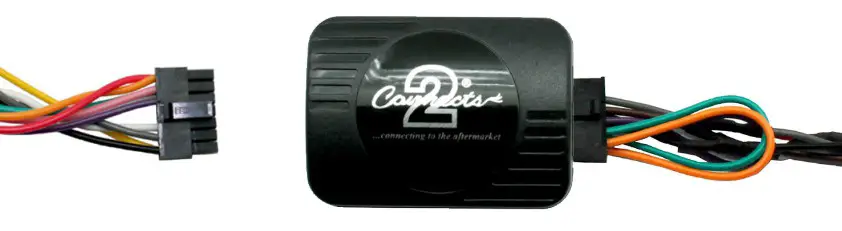
Audi Steering Wheel Control Interface
![]()
Vehicle Application
Audi A3 (8P) 2005 – 2012
Audi A4 (8E, B6, B7) 2000 – 2013
Audi TT (Mk2)* 2006 – 2014
Audi A6 2004 – 2011
*Excluding Vehicles with Digital Amplifier
Key Features
- Retains Steering Wheel Controls (if equipped)
- Retains OEM Phone Buttons (if equipped)
- Retains BOSE Amplified System (if equipped)
- Provides Speed Pulse, Park Brake, Reverse Gear, Amp Remote & Remote Output
![]()
The information provided in this document is subject to change without notice due to changes and/or improvements to the product/s.
ABOUT THIS PRODUCT
CAN-Bus Steering wheel control interfaces for Audi vehicles with Concert, Chorus, or Symphony original stereos and Quadlock connectors. Retains OEM phone buttons and BOSE amplified systems
WIRING COLOUR CODES
| Purple | Right Rear Speaker + | Yellow | Permanent 12V |
| Purple/Black | Right Rear Speaker – | Black | Ground |
| Green | Left Rear Speaker + | Red | Ignition 12V |
| Green/Black | Left Rear Speaker – | Orange | Illumination |
| Grey | Right Front Speaker + | Green | Park Brake |
| Grey/Black | Right Front Speaker – | Pink | Speed Pulse |
| White | Left Front Speaker + | Purple/White | Reverse Gear |
| White/Black | Left Front Speaker – | Blue | Amp Remote |
| Blue/Black | Remote Output |
PRIOR TO INSTALLATION
Read the manual prior to installation. Technical knowledge is necessary for installation. The place of installation must be free of moisture and away from heat sources. Please ensure that the correct tools are used during the installation to avoid damage to the vehicle or product. Aerpro can not be held responsible for the installation of this product.
TECHNICAL SUPPORT
Aerpro wants to provide a fast and suitable resolution to any problems encountered during the installation of this product. To get in touch with our dedicated technical support team, please fill in a ticket at aerpro.com/contact and provide as much information as possible.
FITTING GUIDE
- Remove and disconnect the original head unit.
- Connect the 12-way Molex connector of the head unit patch lead (supplied separately) to the interface.

- Connect the opposite end of the head unit patch leads to the head unit steering wheel control input on the back of the aftermarket head unit.
NB: This may be a 3.5mm jack plug or a wired input depending upon the head unit brand being fitted. Please see the head unit installation manual for further information on where to connect.
- Connect the 14 way Molex connector to the interface

- Connect the male power/speaker ISO harness to the female power/speaker ISO harness from the aftermarket head unit. For aftermarket head units without an ISO connector, please refer to “Wiring Colour Codes” on Pg. 2.
 FITTING GUIDE
 - Connect the amp retention interface to the loom via the Molex connector
- Connect the female vehicle-specific connectors on the harness to the male vehicle connector from the vehicle. Test head unit for correct operation.


 FITTING GUIDE
STEERING WHEEL CONTROL FUNCTIONALITY
| Original Button | Function |
| Up Arrow | Track + |
| Down Arrow | Track Volume – |
| Volume + | Volume Mute + |
| Volume Mute | Pick |
| Speech | Up (Short Press) |
| Speech | Hang Up (Long Press) |


