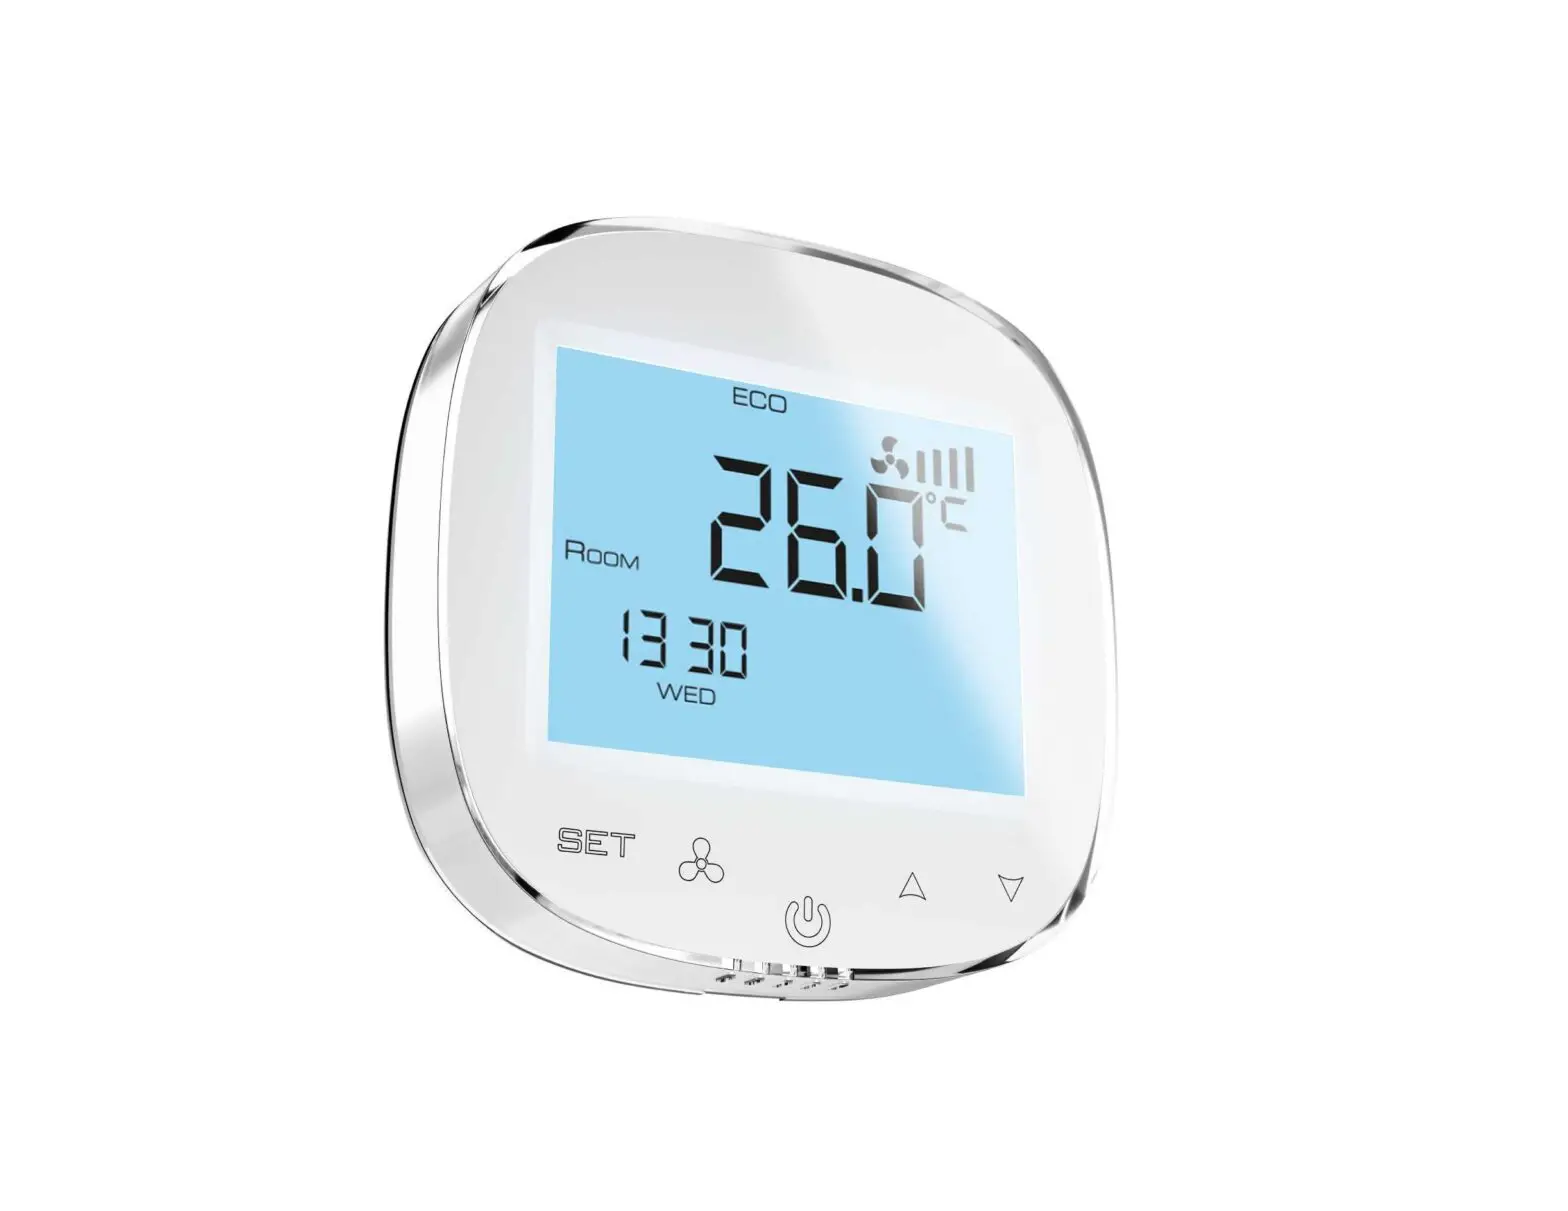
VTS HMI Basic 2 HY Air Handling Unit
HMI Basic 2 HY is a basic control panel, designed to operate VTS air handling units equipped with the uPC3 controller.
Panel functions
- AHU starting and stopping
- operating mode selection
- the ability to view and change the parameters of individual operating modes (temperature, humidity, CO2 level, speed of supply and exhaust fans)
- reading of leading, outside and room temperatures (built-in room temperature sensor)
- setting the AHU operation according to the schedule
- alarm handling (viewing, deleting)
Activating the panel in the settings of the AHU controller
The panel is designed for air handling units equipped with the uPC3 controller with software version 1.0.019 or higher. To enable its support, from the level of HMI Advanced (physical, connected to the pLAN port of the controller or virtual, which is part of the visualization application), go to the service menu and change the last digit of the application code on the I01 screen to 7.
The default Modbus address of the HMI Basic 2 HY is 16. It can be changed on the I05 HMI Advanced screen (HMI Basic 2 line).
If there is no communication between the AHU controller and HMI Basic 2 HY, only the room temperature will be displayed on the HMI screen and the controller will report an appropriate alarm (A1096).
Connections
The HMI is powered by 110-230V AC mains voltage. To ensure proper operation, use separate power and control cables, not exceeding the recommended length of 500m. The following types of cables are recommended:
- power supply: H05VV-F 2×1 mm2
- communication: FTP 3×0,22 mm2
red wire RS 485 A white wire RS 485 B L 110-230V AC L N 110-230V AC N O1 unused O2 unused X unused AO unused GND RS 485 GND IN unused IN unused
Keyboard
| button | function |
 | changing the operating mode / going to the settings menu / returning to the previous menu |
 | confirming the selection / going to the next setting of the parameters / returning to the general settings menu |
 | switching between displayed temperatures / returning to the home screen / turning the screen off |
 | changing parameter values |
Display
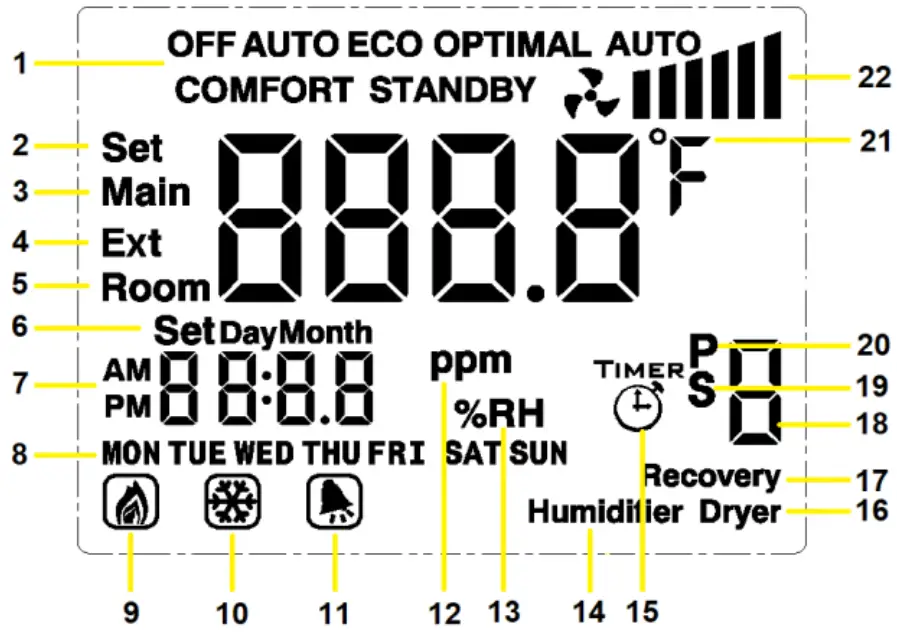
| 1 | current work mode | 12 | air quality |
| 2 | temperature setting | 13 | humidity |
| 3 | leading temperature | 14 | humidifying |
| 4 | external temperature | 15 | day schedule |
| 5 | room temperature | 16 | dehumidifying |
| 6 | date setting | 17 | recovery |
| 7 | clock | 18 | setting number |
| 8 | week day | 19 | special schedule |
| 9 | heating | 20 | periodic schedule |
| 10 | cooling | 21 | temperature unit |
| 11 | alarm | 22 | fans control level |
The visual indication of the fan operation level (point 22 on the display) is based on the current control point of the supply fans and is defined as follows:
| icon on the display | fans control level |
| 0% | |
| 0 < % ≤ 60 | |
| 60 < % < 80 | |
| 80 ≤ % ≤ 100 |
If there is no communication with the controller, HMI Basic 2 HY will only display the current room temperature.
Turning the panel on and off
To turn off the panel screen, hold down the ![]() button. Switching on is done by briefly pressing the same button. Turning off the HMI panel does not mean turning off the AHU – to turn off the unit, select the Off operating mode.
button. Switching on is done by briefly pressing the same button. Turning off the HMI panel does not mean turning off the AHU – to turn off the unit, select the Off operating mode.
The display backlight is turned off automatically after a user-defined time.
The backlight is activated by pressing any key. After activating the backlight, it is possible to perform further operations with the use of the panel.
Selecting the operating mode
On the main screen, press the![]() button to select the operating mode from among those visible in the upper part of the screen (Off / StandBy / Eco / Opti / Comfort / Auto).
button to select the operating mode from among those visible in the upper part of the screen (Off / StandBy / Eco / Opti / Comfort / Auto).
Preview of parameters set for the current operating mode
It is possible to check the chosen values for the selected operating mode:
- set temperature
- humidity
- CO2 level
- supply fan speed (S)
- exhaust fan speed (E)
To do this, press ![]() on the main screen.
on the main screen.
Changing the parameters of individual operating modes
On the main screen, hold down the![]() button, and then by pressing
button, and then by pressing![]() again, select the mode you are interested in (StandBy / Eco / Opti / Comfort) and confirm your selection with
again, select the mode you are interested in (StandBy / Eco / Opti / Comfort) and confirm your selection with ![]() . We now have the option to set the parameters values associated with a given mode:
. We now have the option to set the parameters values associated with a given mode:
- set temperature
- humidity
- CO2 level
- supply fan speed (S)
- exhaust fan speed (E)
Access to individual settings depends on the AHU configuration and its actual components.
Changes are done by means of ![]() , approval – the
, approval – the ![]() button. Exit to the main screen occurs automatically after a moment of inactivity or after pressing
button. Exit to the main screen occurs automatically after a moment of inactivity or after pressing ![]() .
.
Change of the temperature displayed on the main screen
HMI Basic 2 HY enables displaying the current value of one of the three temperatures on the main screen:
- leading, on the basis of which the AHU operation is carried out (Main)
- external (Ext)
- room (Room)
Switching between them is done by pressing successively on the main screen.
Setting the AHU work schedule
The HMI Basic 2 HY panel is equipped with the possibility of setting and modifying the AHU work schedule. Changes made from the panel level also affect the schedule available in HMI Advanced and the visualization – it does not constitute a separate schedule, but allows full access to the existing one.
On the main screen, hold down the ![]() button, and then with successive
button, and then with successive ![]() presses select the Auto submenu and confirm the selection with
presses select the Auto submenu and confirm the selection with ![]() button.
button.
Now select one of the schedules with the ![]() and confirm it with the
and confirm it with the ![]() button:
button:
- Timer – daily schedule that allows you to program up to 4 mode changes each day at a selected time, separately for each day of the week. We select respectively: the day of the week, activation (On / Off) of individual actions, the time at which the action is to be performed and the mode to be set. By confirming the next parameters, we proceed to the parameterization of the next action (digits 1-4 displayed on the right side of the screen determine which of them are currently being set).
- P – periodic schedule, enabling the selection of up to 3 periods of the year in which the AHU is to operate in the selected mode (this type of schedule has higher priority than the daily schedule). We select respectively: activation (On / Off) of individual periods, date of their end and beginning and the mode to be set. By confirming the next parameters, we proceed to the parameterization of the next period (digits 1-3 displayed on the right side of the screen determine which of them are currently being set).
- S – special schedule that allows to select up to 6 special days a year in which the AHU is to operate in the selected mode (this type of schedule has priority higher than the daily and periodic schedule). We select respectively: activation (On / Off) of a particular special day, its date and mode to be set. By confirming the next parameters, we proceed to the parameterization of the next special day (digits 1-6 displayed on the right side of the screen determine which of them are currently being set).
- T – unused
Changes are done by means of , approval –
 button. Return to the previous menu –
  . Exit to the main screen occurs automatically after a moment of inactivity or after pressing
  .
.
Alarm handling
HMI Basic 2 HY allows to view and delete active alarms. When an alarm is present, the bell symbol is displayed on the screen and the alarm number is displayed in place of the current time.
Deleting an alarm, after removing its causes, is done by holding down the ![]() button.
button.
Setting the clock and calendar of the uPC3 controller
On the main screen, hold down the ![]() button, and then confirm entering the Set Day submenu with
button, and then confirm entering the Set Day submenu with ![]() . This way we will go to the setting of, respectively: current time, day of the week, month, day and year.
. This way we will go to the setting of, respectively: current time, day of the week, month, day and year.
Changes are done by means of ![]() , approval – the
, approval – the![]() button. Exit to the main screen occurs automatically after a moment of inactivity or after pressing
button. Exit to the main screen occurs automatically after a moment of inactivity or after pressing ![]() .
.
Programming mode
When the display is turned off by holding down the ![]() button, hold down the
button, hold down the![]() button to enter the programming mode (change of advanced parameters).
button to enter the programming mode (change of advanced parameters).
Successive presses of the![]() button switch between parameters, and use of
button switch between parameters, and use of ![]() set their value. Exit from the menu occurs automatically after a moment of inactivity or by pressing
set their value. Exit from the menu occurs automatically after a moment of inactivity or by pressing ![]() .
.
| parameter | range | default value | description |
| IP | 1 – 255 | 16 | Modbus – address |
| A1 | 2400 / 4800 / 9600 | 9600 | Modbus – speed |
| A2 | 0 / 1 / 2 | 0 | Modbus – parity (0 = none, 1 = even, 2 = odd) |
| A3 | 12 / 24 | 24 | clock mode [h] |
| A4 | 00 / 01 | 00 | temperature units (00 = ⁰C, 01 = ⁰F) |
| A5 | 0 – 300 | 10 | backlight time [s] |
| A6 | -9,9 … 9,9 | 0 | built – in temperature sensor offset [⁰C] |
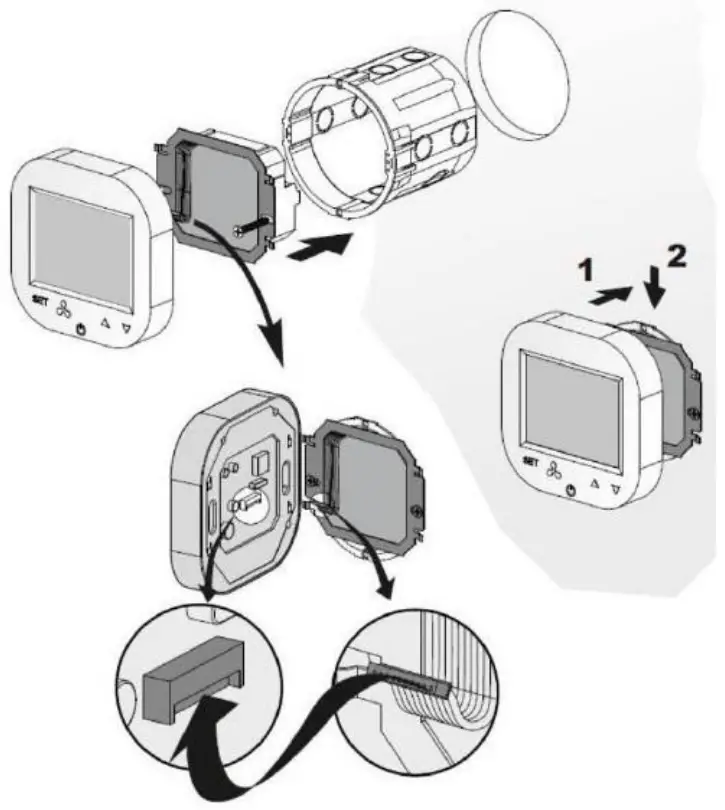
Assembly diagram
Specification
| device type | control panel; regulator |
| temperature measurement | 0⁰C … 70⁰C, 10k NTC |
| interface | membrane keyboard physical buttons |
| communication | Modbus RTU (2400 / 4800 / 9600 bps) |
| power | 110-230V AC |
| power consumption | 1,5 VA |
| display | backlit, graphic LCD |
| construction | ABS + polyester |
| size (W x H x D) | 86 x 86 x 17 mm |
| allowed working temperature | 0⁰C … 50⁰C |
| place of destination | for indoor installation (IP20) |
| assembly | in a standard Ø60 installation box on a mounting bracket |
| weight | 150g |