innuos ZENmini Mk3 Music Server
Thank you for buying our ZENmini Music Server.
This quick start guide will show you how to get started with your new Music Server.
For more detailed information please visit our website https://innuos.com/support/
Should you have problems please contact s[email protected] and we’ll be happy to assist you.
ZENmini Mk3 Rear Panel Diagram
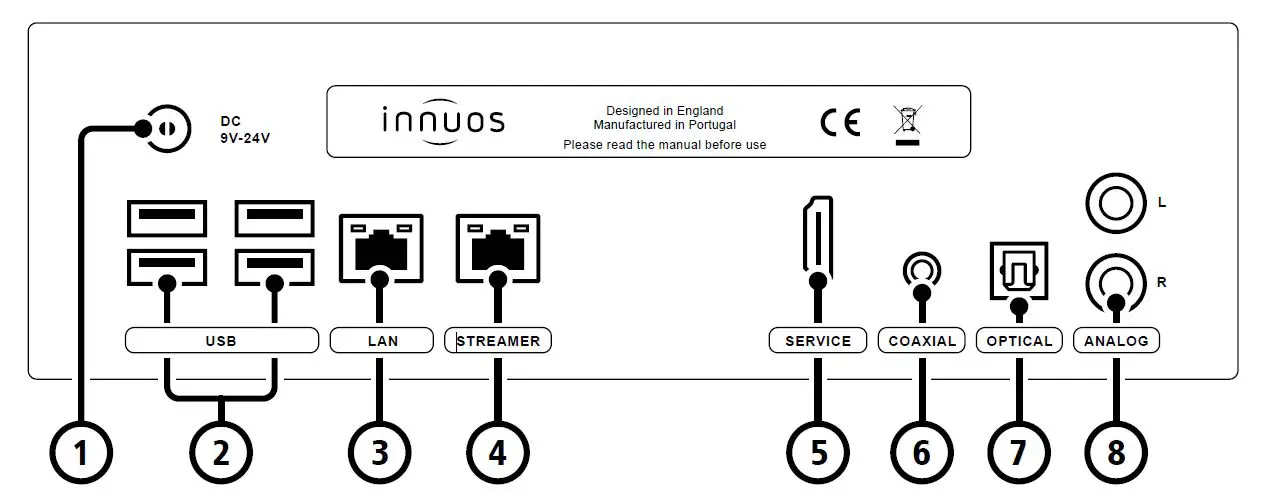
- DC Power Connector
- 4 x USB 3.0
- Ethernet Input from Router
- Ethernet Streamer Output
- HDMI Output (Service Only)
- Digital Coaxial Output
- Digital Optical Output
- Analog RCA Output
Box Contents
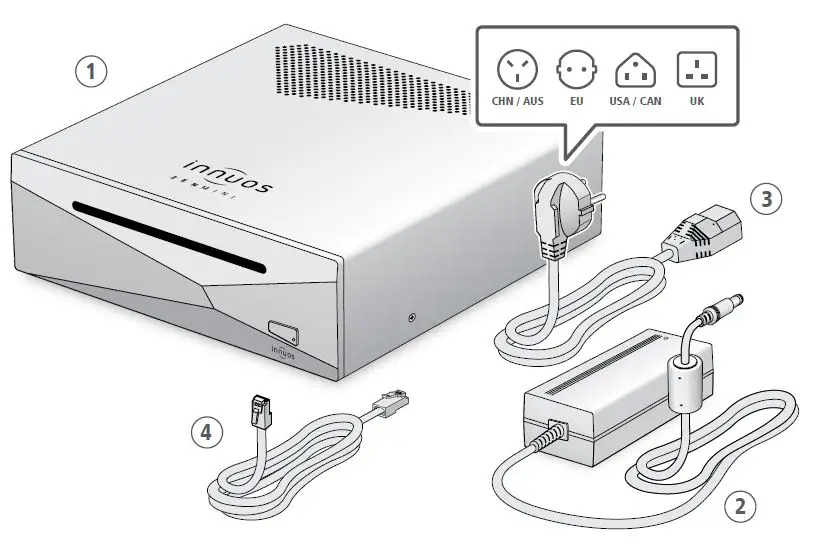
- Innuos ZENmini Mk3 Music Server
- AC/DC Power Adapter
- Mains Cable
- 2m Ethernet Cable
Connect your ZENmini to Mains Power

Connect your ZENmini to your Home Network
OPTION A Wired to the Internet Router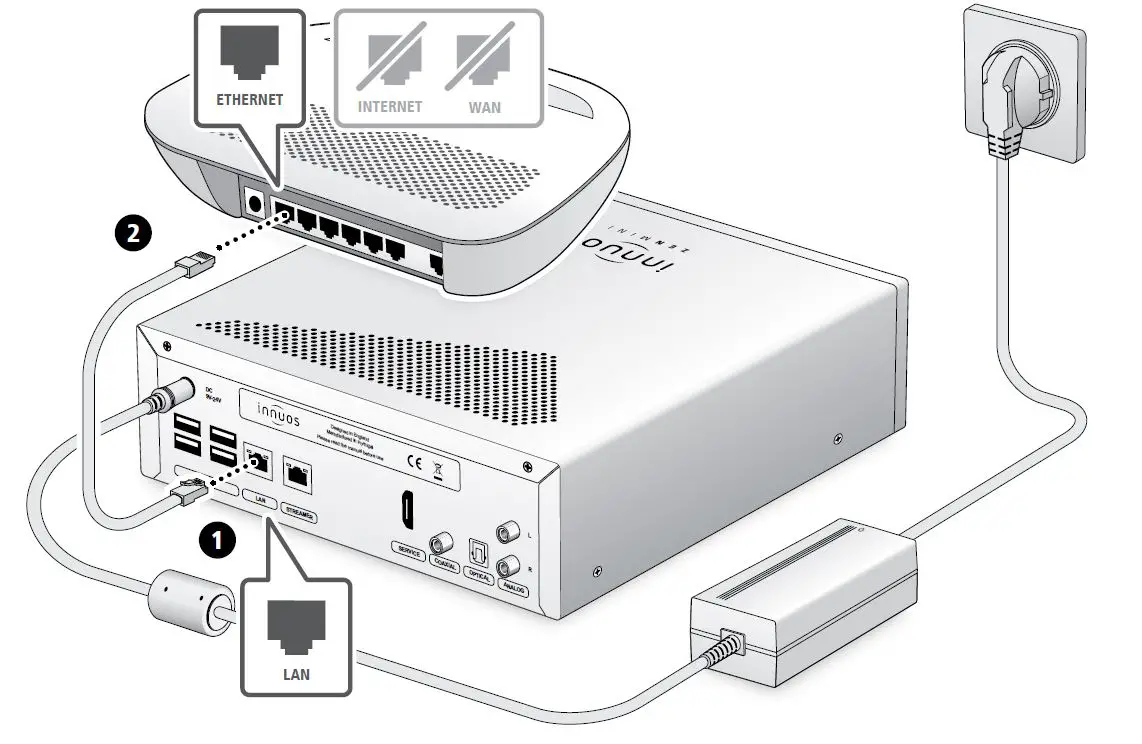
Connect Network Audio Device to Streamer Port
NOTE Optional – Not required for server operation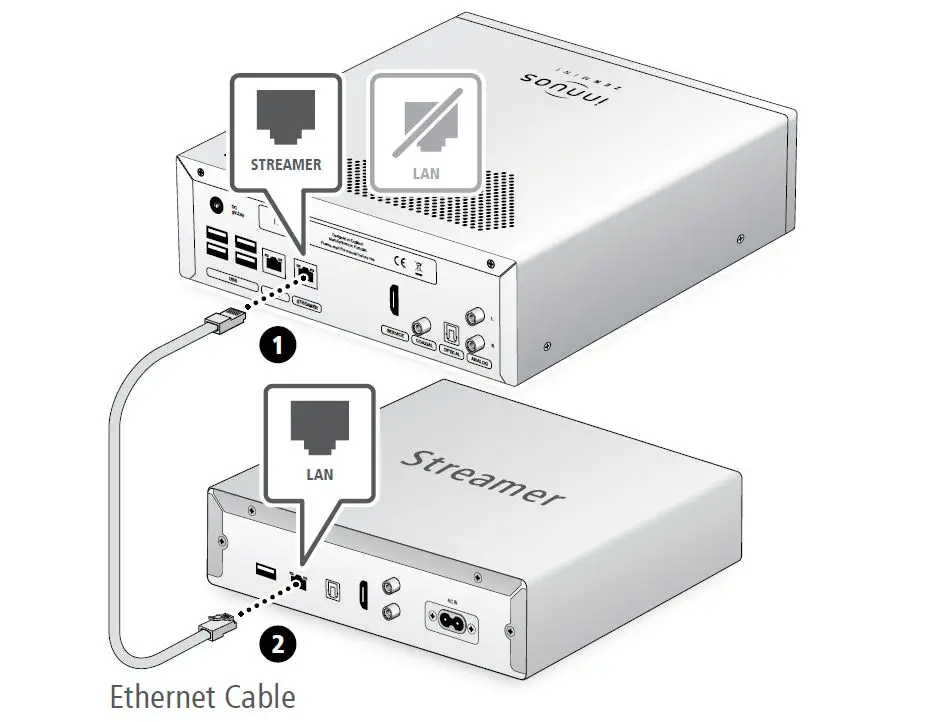 The Streamer Port provides a wired network connection for streamers, wireless speakers and other network audio products.
Using your ZENmini as a Player
SETUP A Connect to a DAC/Amplifier via USB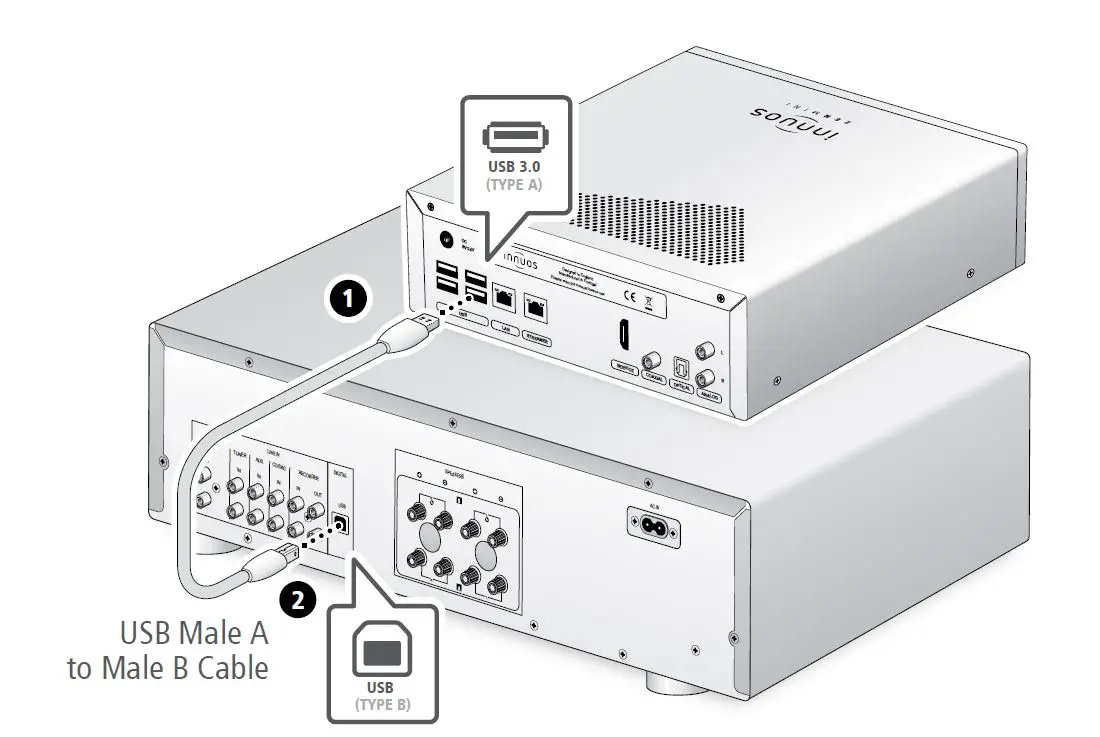 Note: USB Cable not included. Requires DAC compatible with USB Audio Class 2.
SETUP B Connect to a DAC/Amplifier via Coaxial Cable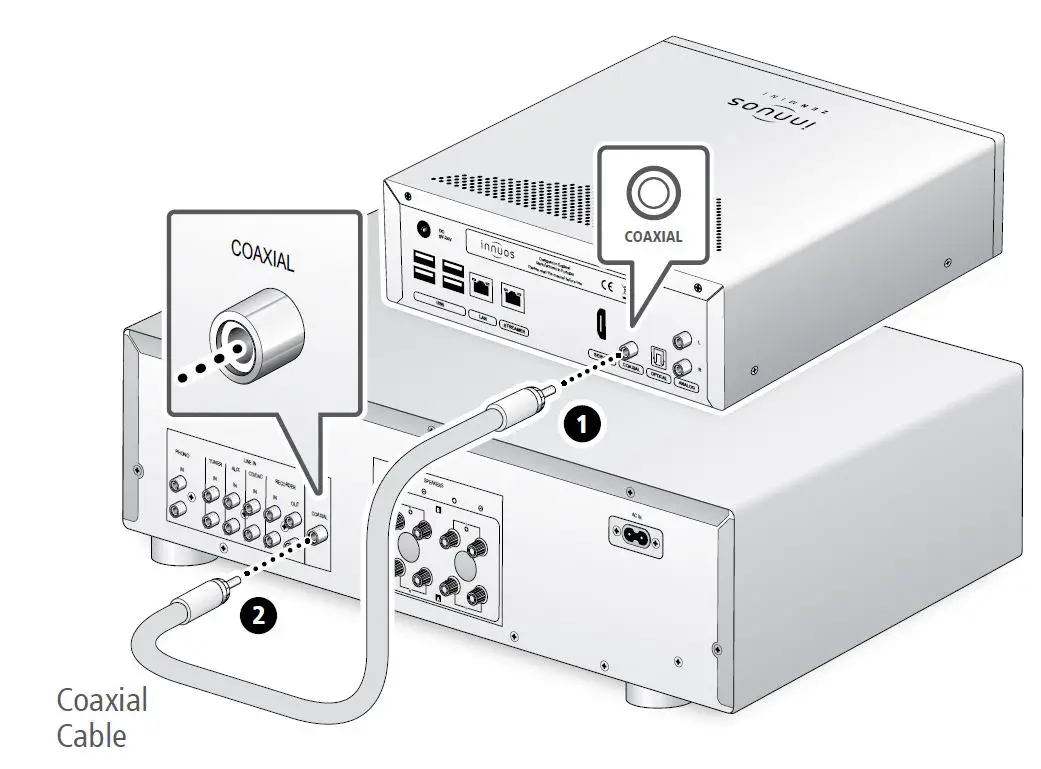 Note: Coaxial Cable not included.
SETUP C Connect to a DAC/Amplifier via Optical Cable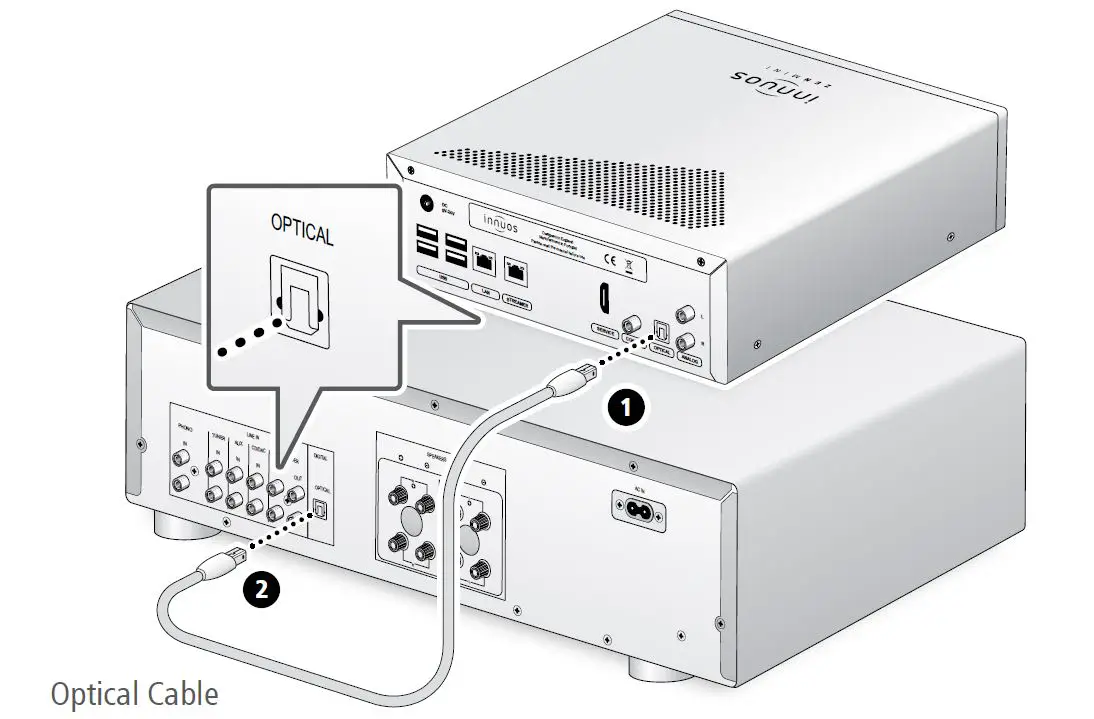 Note: Optical Cable not included.
SETUP D Connect to Amplifier via Analog Cable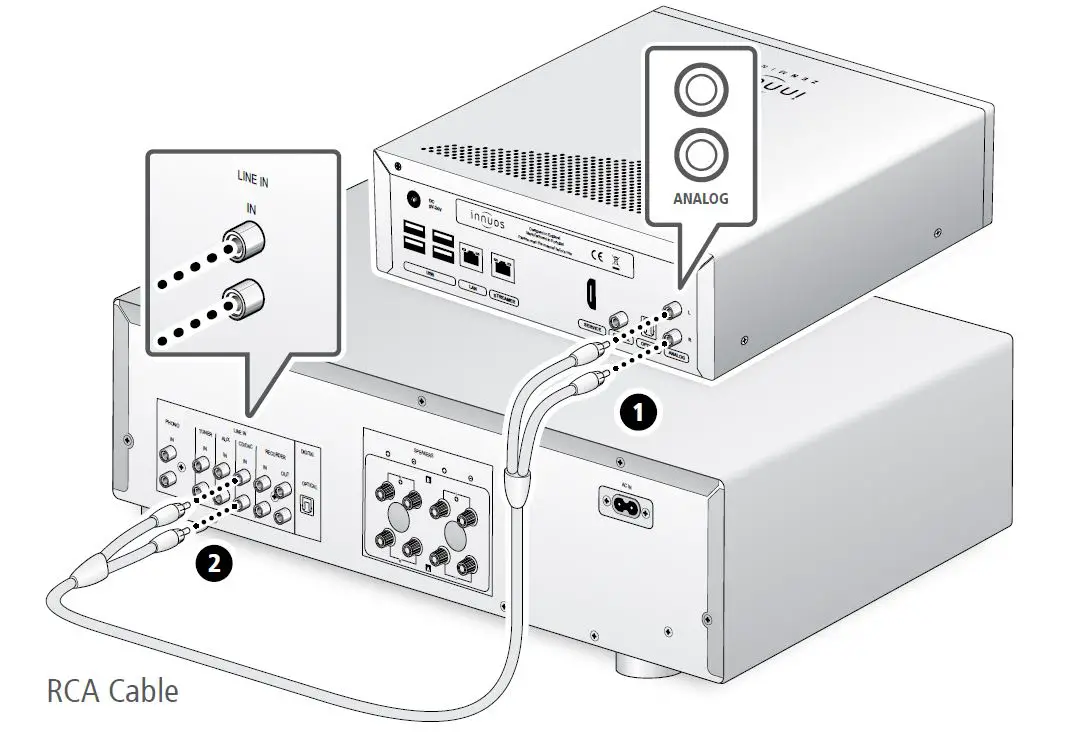 Note: RCA Analog Cable not included.
Turn on your ZENmini
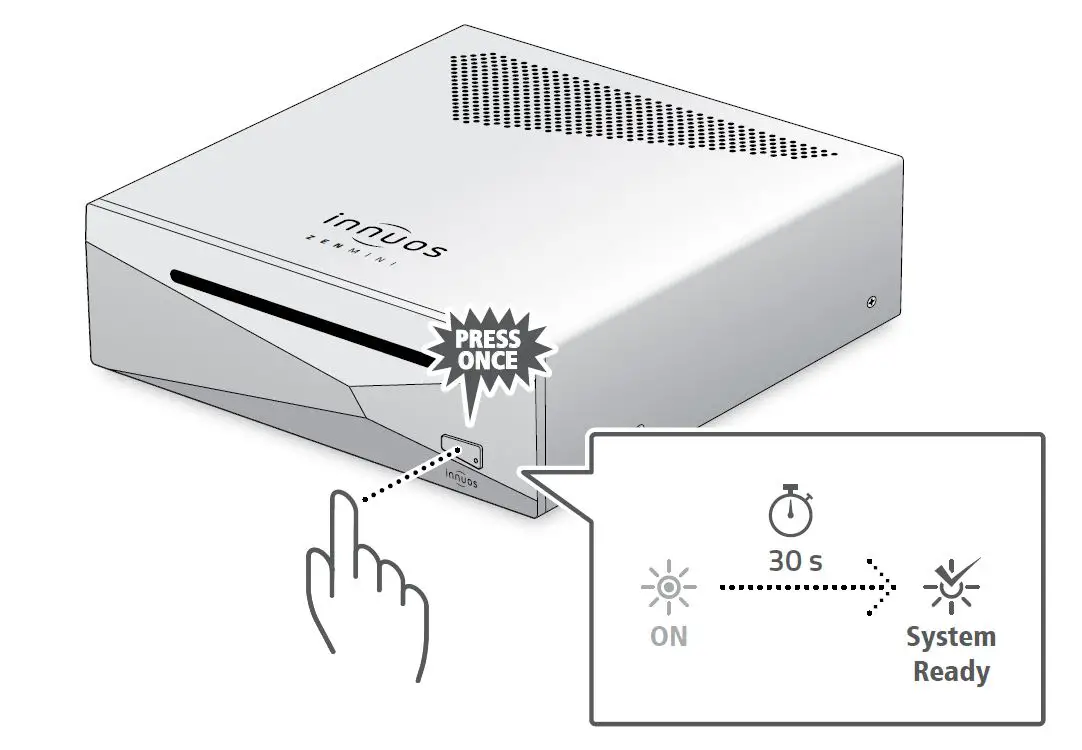 Please press and release. Do not hold the front power button down.
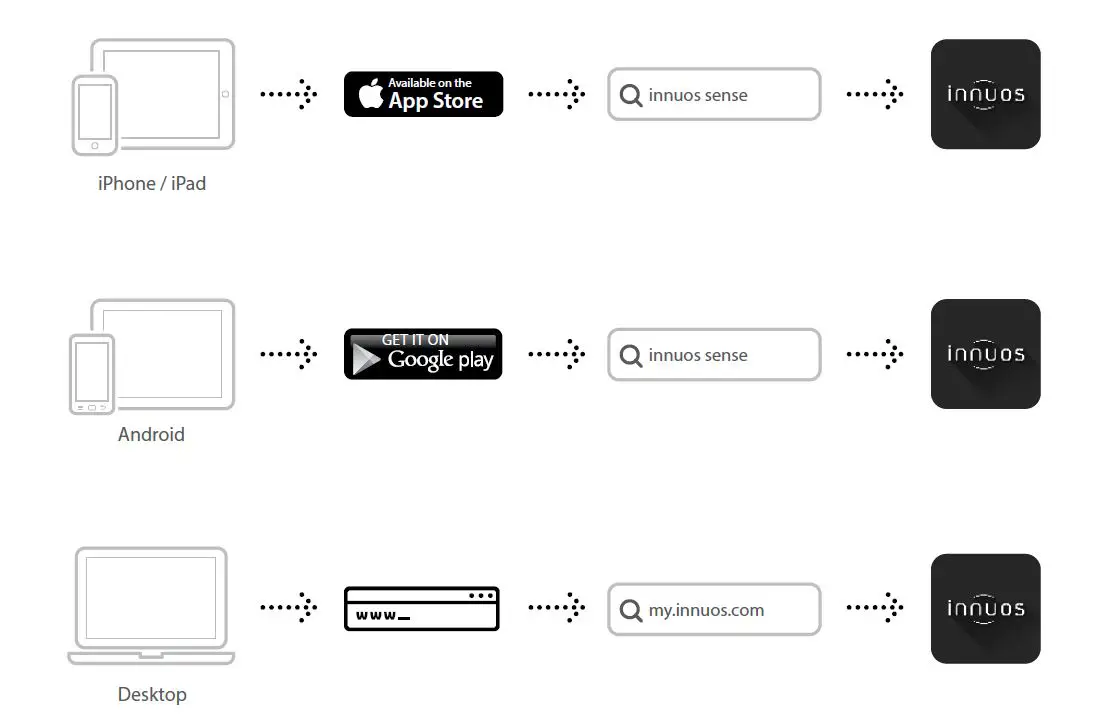
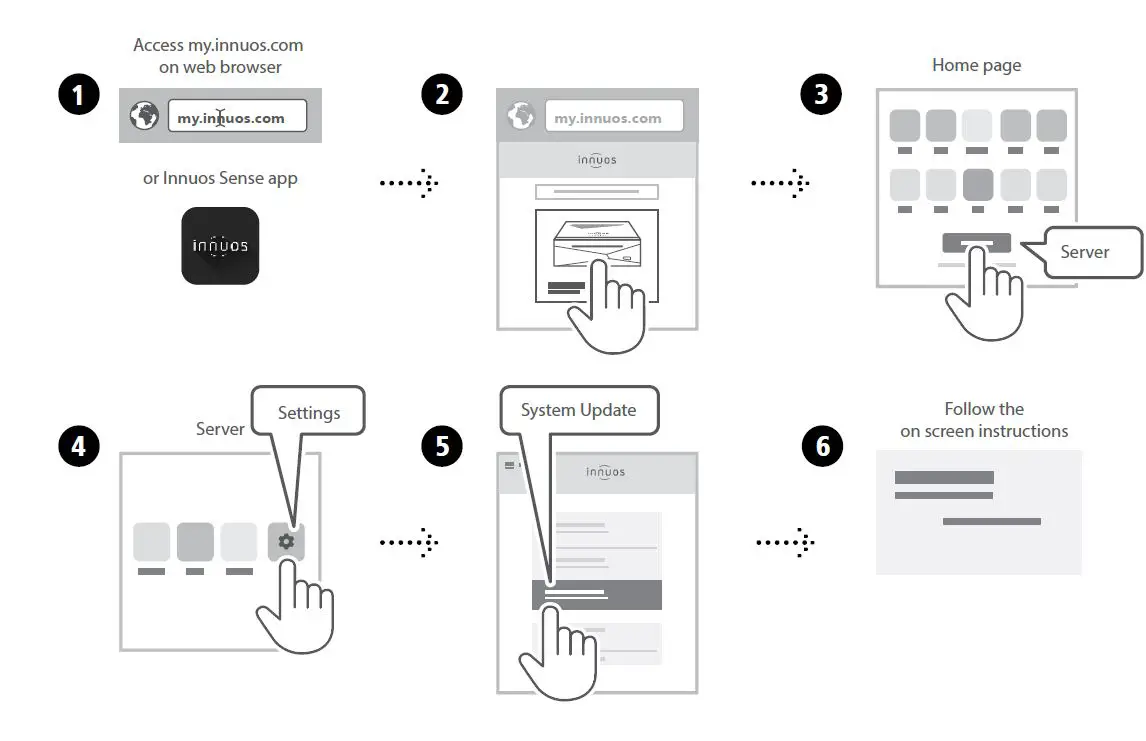
Accessing your Innuos Device
Update innuOS Software to the Latest Version
Adding Music to your ZENmini
OPTION A Rip CDs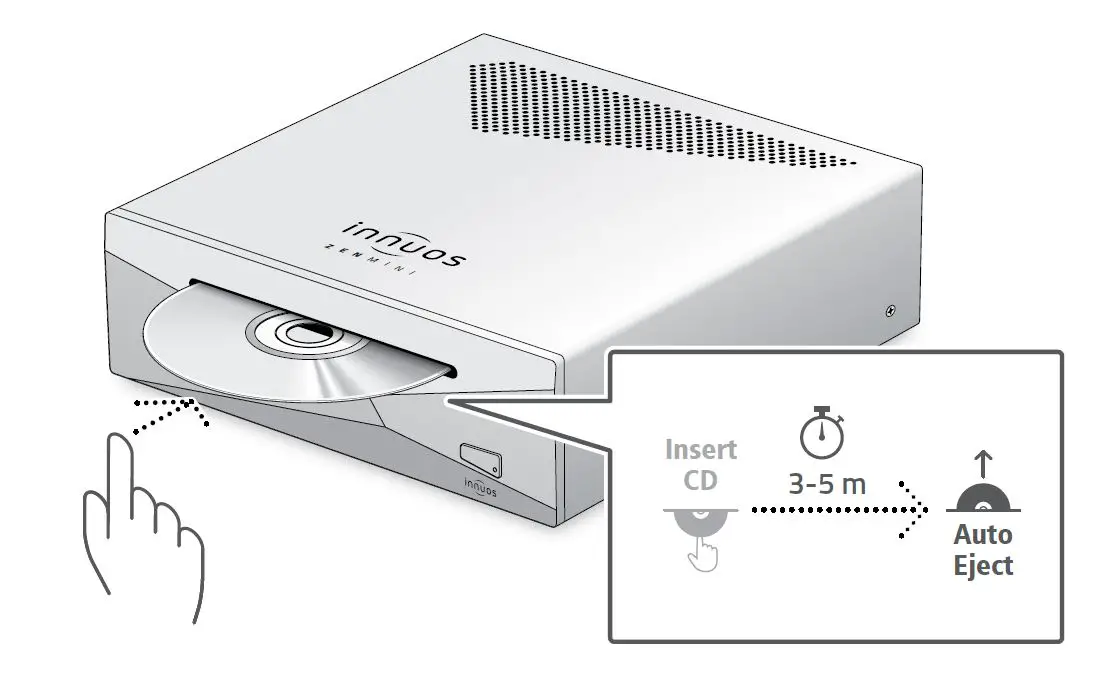 Do not push the CD while it is being drawn in as this may cause it to jam or damage the optical drive.
OPTION B Import Digital Music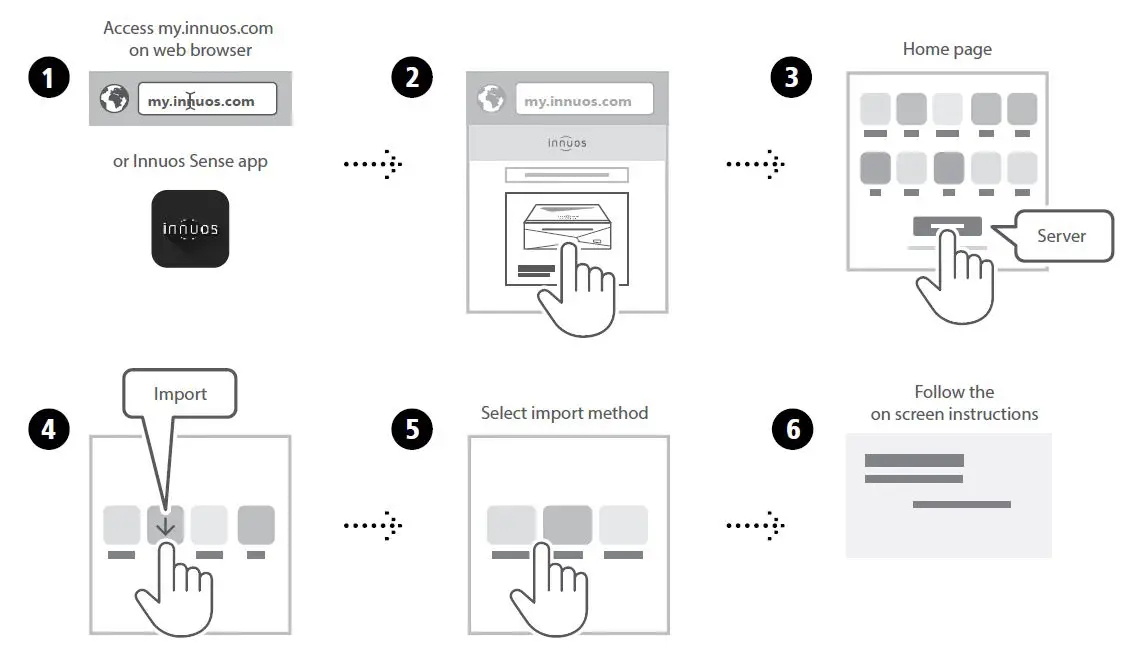
Streaming Services and Integrations

For more information and for the latest version of this quick start guide please visit: innuos.com/support


