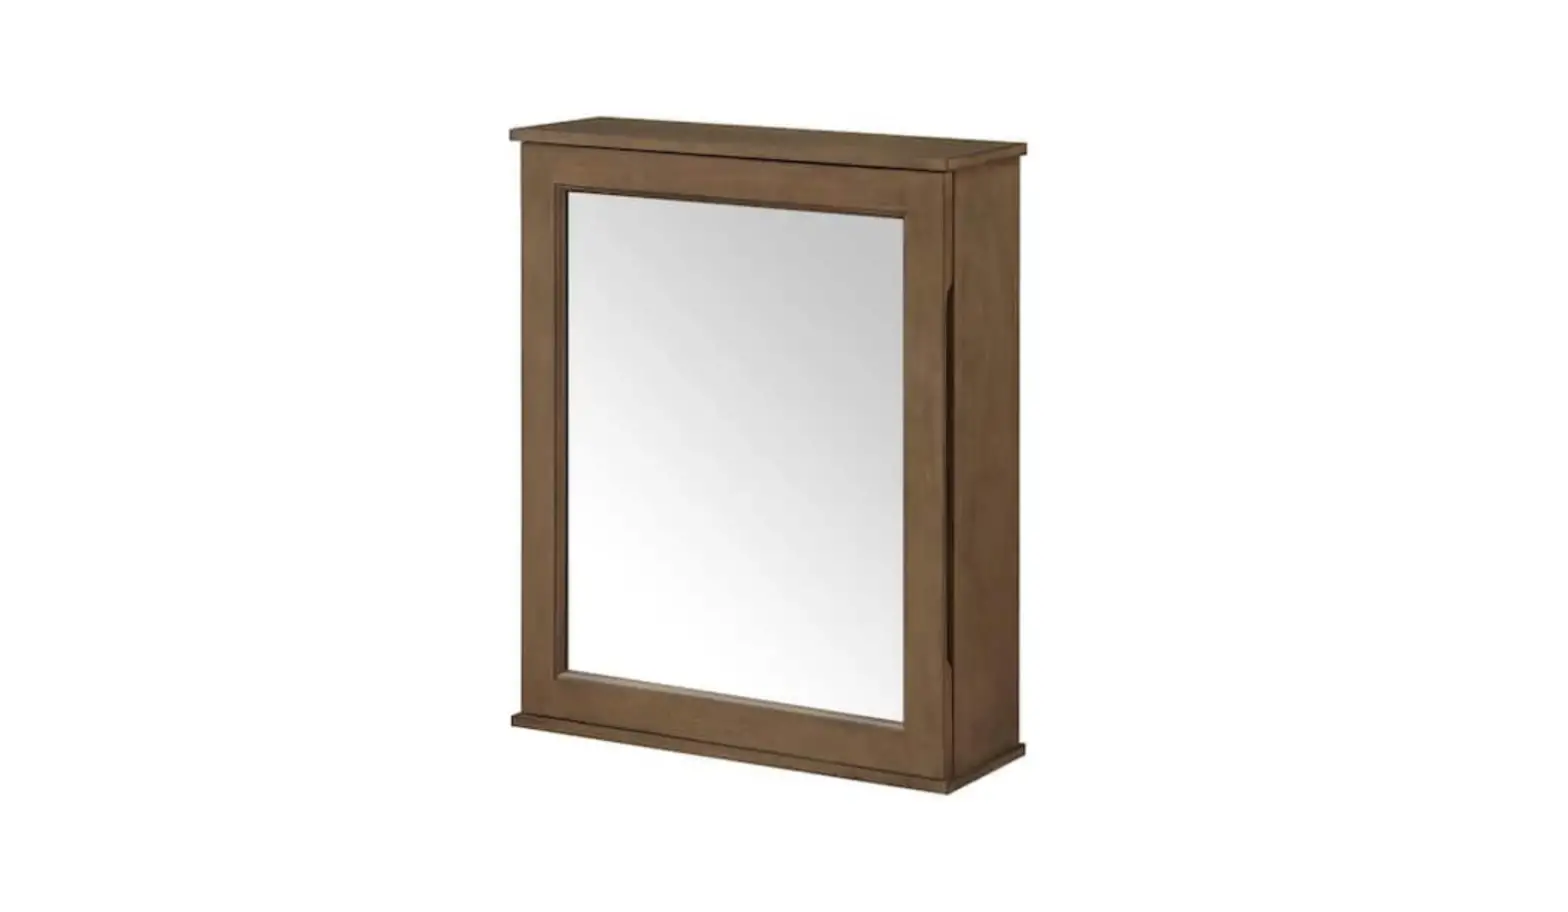
HOME DECORATORS Caville MC Caville Medicine Cabinet Instruction Manual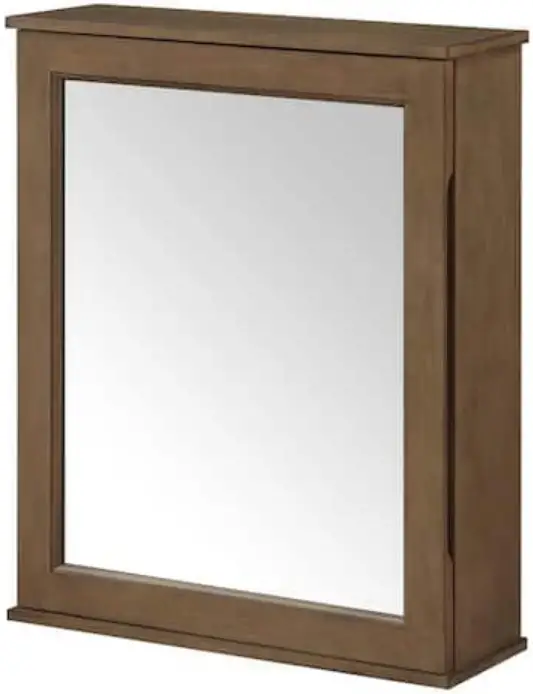
Safety Information
![]() DANGER
DANGER
- Keep small parts away from children during Installation.
- Failure to follow warnings and cautions could result in serious injury.
- DO NOT use harsh bathroom cleaners or grout cleaners on any natural stone.
![]() WARNING
WARNING
- Read these instructions carefully and keep in a safe place.
- Adult Installation required.
- Do not over tighten connectors (screws, bolts, etc.)
Over tightening can lead to product damage. - Small parts may present choking hazard prior to Installation.
- Do not stand, step or climb on unit.
Storage instructions
- The product should be stored safely in a box of adequate size and a piece of Styrofoam covering the entirety of the product should be placed on top and underneath the product.
- Store the unit in a dry and cool place, as humidity may damage the integrity of the electronics and other moisture sensitive components.
![]() Caution
Caution
- USE preventative cleaning measures to keep your stone pristine.
- USE sealers according to the product specific directions.
- Blot spills quickly, and wash with mild soap and warm water.
- Be sure to check all packing materials carefully for small parts that may have come loose inside the carton during shipment. If parts are missing, contact THE HOME DEPOT to obtain any missing parts.
- Using abrasive cleansers will damage the surface.
![]() NOTE: Please read and understand this entire manual before attempting to assemble, operate or install the product.
NOTE: Please read and understand this entire manual before attempting to assemble, operate or install the product.
- Handle the glass with caution! Improperly handling the glass can cause it to break.
- You will need at least two people to install this unit properly.
- The distributor is not responsible for any damage to the unit or personal property caused by improper installation.
- Carefully remove product from packaging and keep packaging until installation is complete.
- Inspect all parts for damage; if there is damage to the unit prior to installation, please contact customer service at the number provided in this guide.
- Install the product on a leveled surface.
Pre-assembly
PLANNING ASSEMBLY
Check the cabinet for damage before installation. If any part of the cabinet is missing or damaged, contact the Customer Service Team at 1-800-986-3460.
Ensure that the cabinet location is accessible to water supply and drain lines. It is suggested that you rough-in the water lines and drain before installing the cabinet.
![]() NOTE: A drain pipe and trap are not included with this cabinet.
NOTE: A drain pipe and trap are not included with this cabinet.
TOOLS REQUIRED
- Safety goggles

- Philips screwdriver

- Silicone

- Clean rag

- Level


INSTALLATION GUIDELINES
PACKAGE CONTENTS
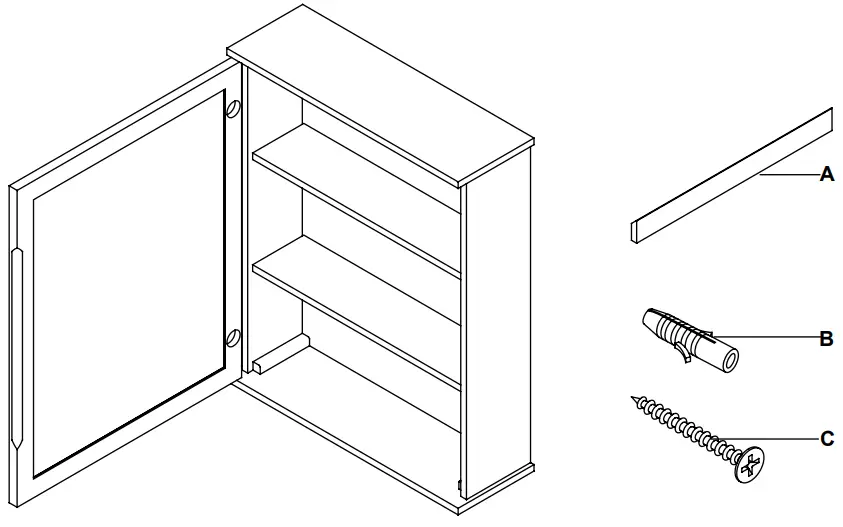
| Part | Description | Quantity |
| A | Support bar | 1 |
| B | Wall Anchor | 6 |
| C | Screw | 6 |
Assembly
Reversibility
- This cabinet is up and down reversible.


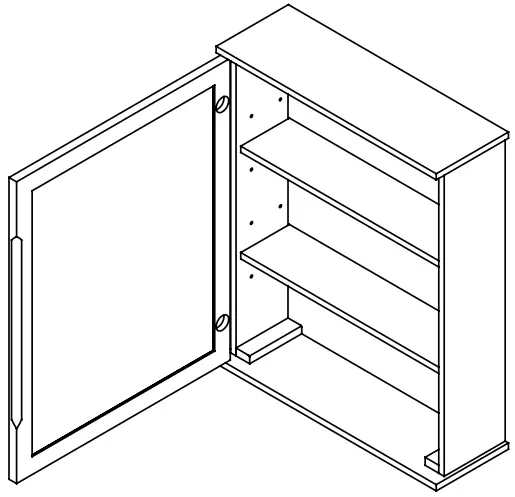
Reversibility
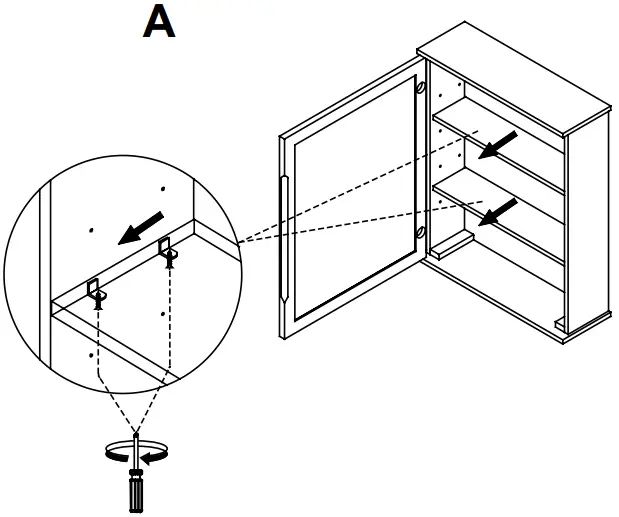
- This instruction is drawn up for a door opening from left to right (see illustration A).

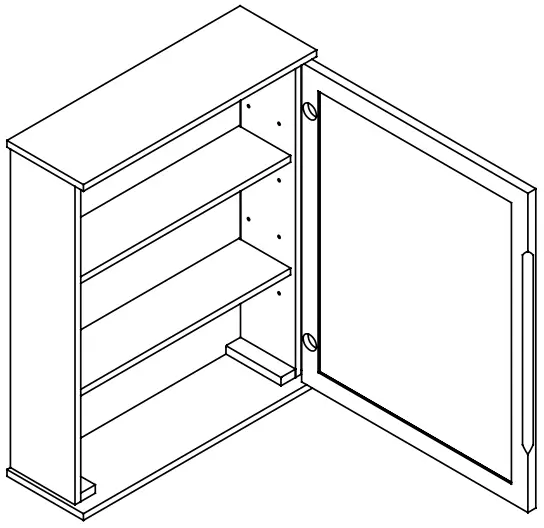
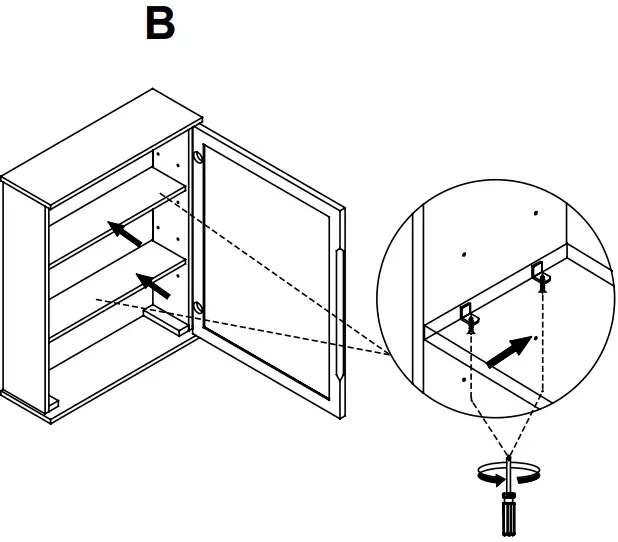
- For an installation for a door opening from right to left (see illustration B), Gently remove the shelves from the cabinet and reinstall them upside down.

Installing support bars
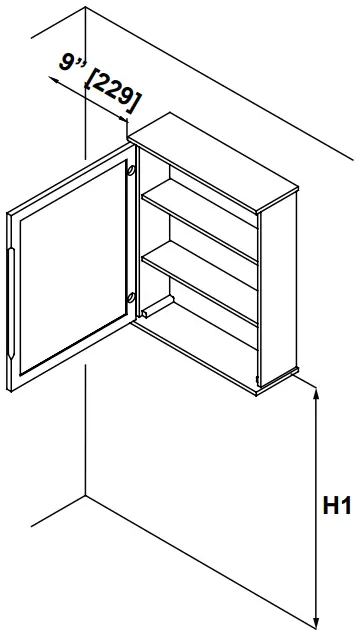
- Measure the height (H1) at where the cabinet will be located, as illustrated. It is recommended to leave at least 9’’ [229] clearance between the wall and the cabinet to ensure the full opening of the door.
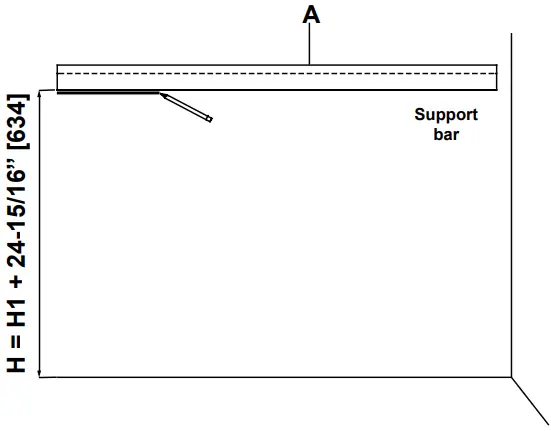
- Plus 24-15/16’’ [634] to the height (H1), this calculated measure is the distance of the bottom of the support bar to the floor, as illustrated below.
Mark the bottom position of the support bar on the wall.

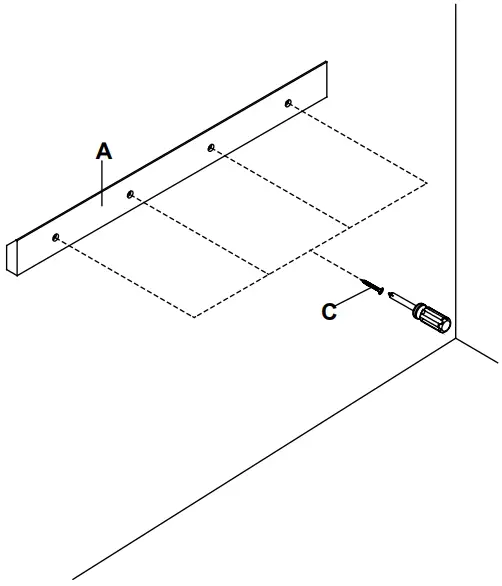
Installing support bars
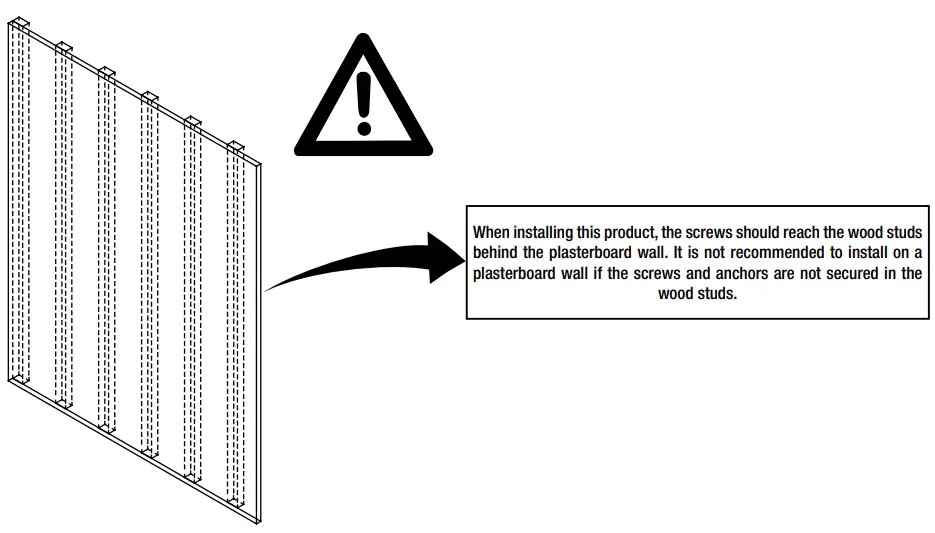
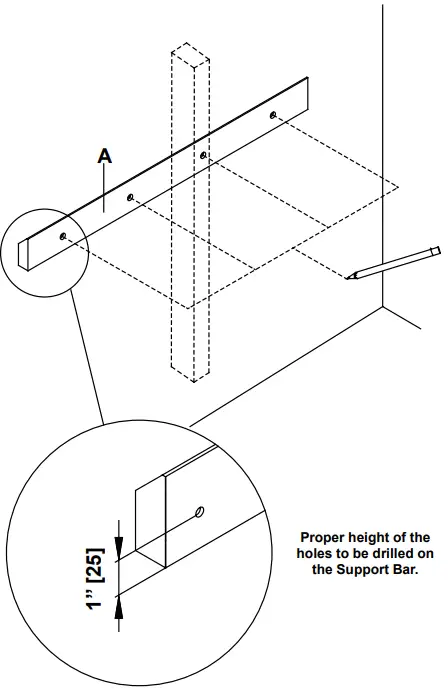
- Using a stud finder or equivalent tool, locate at least 1 wall stud and mark its positions on the wall for each support bar (A). While holding the support bar (A) in its position against the wall, check that it is level, then mark 4 positions for 4 holes as indicated. One of the holes must be right over the wall stud.

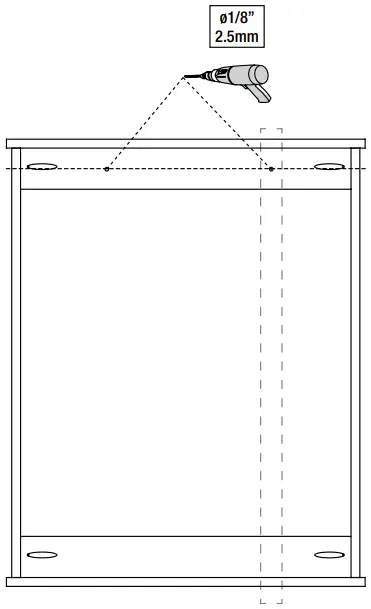
Installing support bars
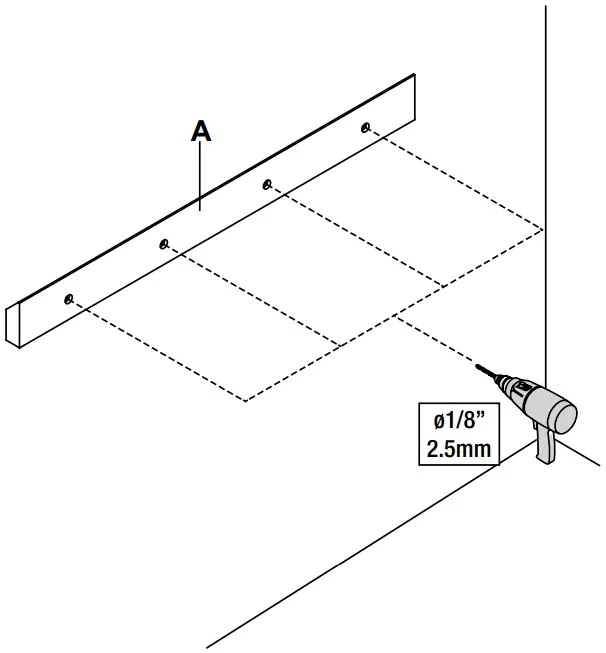
- Keep the support bars in the position, then drill pilot holes on the wall through the support bar (A) at the marked positions using ø1/8” (2.5mm) drill bit.

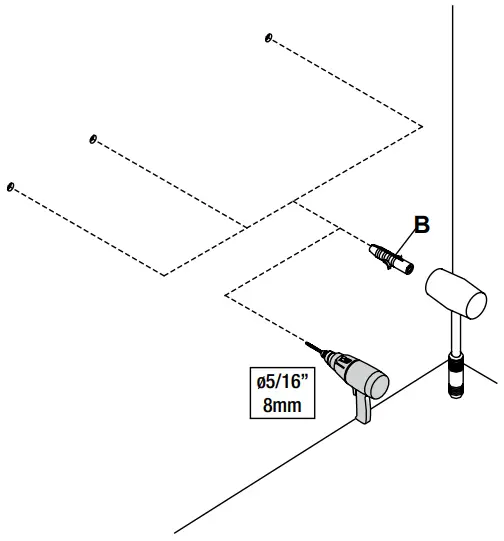
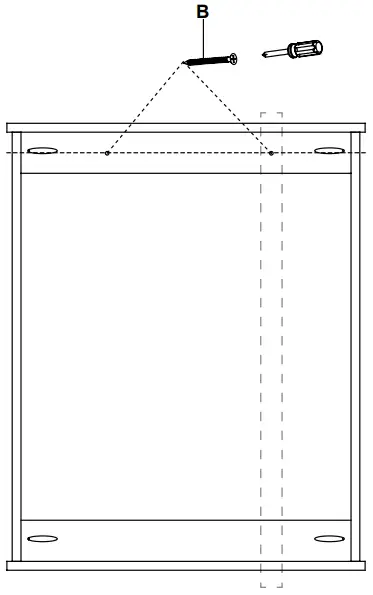
Installing support bars
- Except for the holes that are over the stud, drill in the existing holes on the wall using ø5/16” (8mm) drill bit and insert the wall anchors (B) into the holes using a rubber mallet until the wall anchors are flush with the wall.

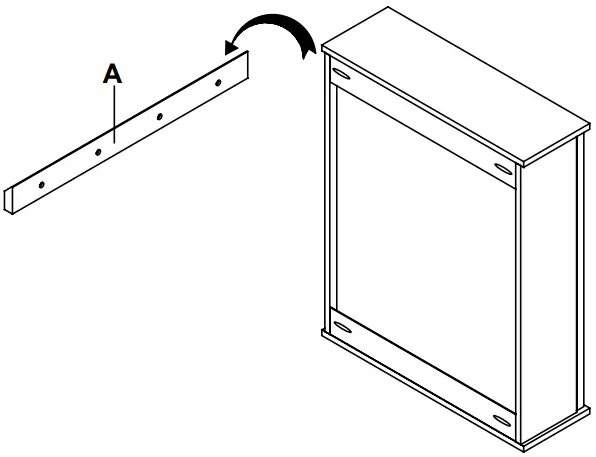
- Replace and secure the support bar (A) with screws (C).

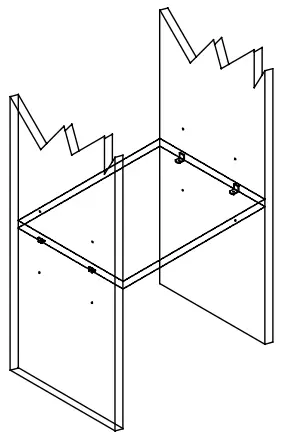
- Gently hang the cabinet on the support bar (A).

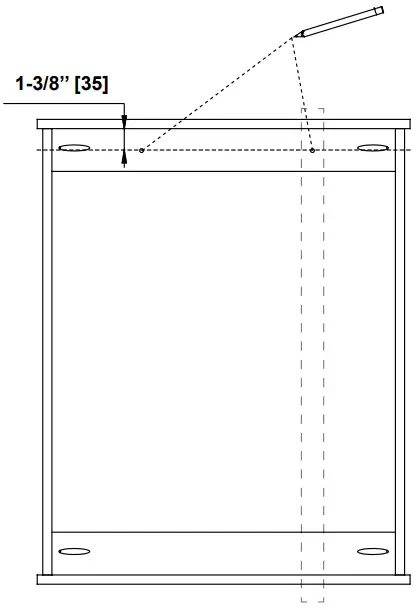
Securing the cabinet
- Open the door, measure and mark two holes, one of the holes must be right over the wall studs respectively from the back of the cabinet. Make sure the two holes avoid the existing screws behind the cabinet at the indicated locations as shown below.

- Drill pilot holes on the wall through the back of the cabinet as well as the support bar at the marked locations using ø1/8” (2.5mm) drill bit.

- Replace and secure the cabinet with screws (C) through the pilot holes.

How to remove / install shelves
REMOVE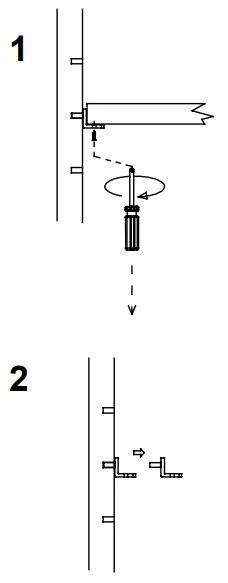
INSTALL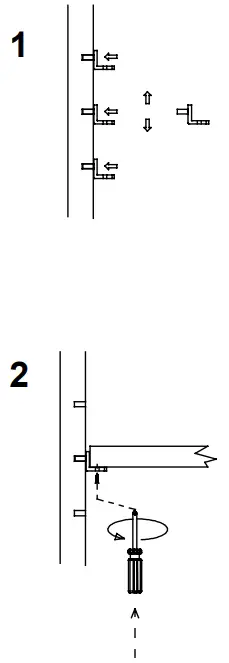
Warranty
LIMITED LIFETIME WARRANTY
- This warranty extends only to the original owner user for personal household use only. For commercial uses, additional limitations may apply.
- Home Decorators Collection warrants your satisfaction with each mirror. Should any mirror not meet your satisfaction due to a visual defect, simply return it to your retailer with the original packaging, PRIOR TO INSTALLATION, for a replacement.
- Home Decorators Collection warrants mirrors to be free from defects in workmanship and materials under normal use and service for a period of one (1) year.
- Home Decorators Collection will, at its election, repair, replace, or make appropriate adjustment where Home Decorators Collection optional inspection discloses any such defects occurring in normal usage within the warranty periods.
- Please note that Home Decorators Collection is not responsible for installation or removal costs.
- Modification of any mirror’s components may void the warranty. This warranty does not cover any claim arising from abuse, misuse, negligence, accident, improper installation or operation on the part of the purchaser. This warranty is void if Home Decorators Collection’s product is subject to alterations, or if repairs were done to the mirror unit.
- This warranty does not extend to any components installed by dealers, installers or by any party other than Home Decorators Collection.
- Implied warranties, including that of merchant ability or fitness for a particular purpose, are expressly limited in duration to the duration of this warranty.
- Home Decorators Collection disclaims any liability for special, incidental or consequential damages.
WHAT IS COVERED
Home Decorators Collection products are manufactured with superior quality standards and workmanship and are backed by our limited lifetime warranty. Home Decorators Collection products are warranted to the original consumer purchaser to be free of defects in materials or workmanship. We will replace FREE OF CHARGE any product or parts that proves defective. Simply, return the product / part to any of The Home Depot retail locations or call 1-800-998-7021 to receive the replacement item. Proof of purchase (original sales receipt) from the original consumer purchaser must be made available for all Home Decorators Collection warranty claims.
WHAT IS NOT COVERED
This warranty excludes incidental/consequential damages and failures due to misuse, abuse or normal wear and tear. This warranty excludes all industrial, commercial & business usage, whose purchasers are hereby extended a one-year limited warranty from the date of purchase, with all other terms of this warranty applying except the duration of warranty. Some states and provinces do not allow the exclusion or limitation of incidental or consequential damages, so the above limitations may not apply to you. This warranty gives you specific legal rights and you may also have other rights that vary from state to state and province to province. Please see a store or contact 1-800-998-7021 for more details.
Consumer Responsibilities
- Home Decorators Collection’s mirrors products will remain beautiful for many years if you properly care for them.
- Home Decorators Collection does not recommend the use of harsh abrasive cleansers on any of its products. Harsh cleansers will damage the finish of your mirror
Maintenance
- For daily maintenance, use a wet cloth and a soft liquid cleaner.
- Never use abrasive cleaners or strong bleach, scrapers, metallic brushes, or other objects or any products which can graze or tarnish surfaces
Troubleshooting
| Problem | Possible Cause | Correction |
| Doors are not properly aligned | Door hinges not adjusted properly. | Adjust the door hinges. |
Support
Questions, problems, missing parts? Before returning to the store, call
Home Decorators Collection Customer Service.
8 a.m. – 7 p.m., EST, Monday – Friday, 9a.m. – 6 p.m., EST, Saturday
1-800-986-3460
HOMEDEPOT.COM/HOMEDEPOT.CA/HOMEDECORATORS
Retain this manual for future use.


 Instruction Manual")


