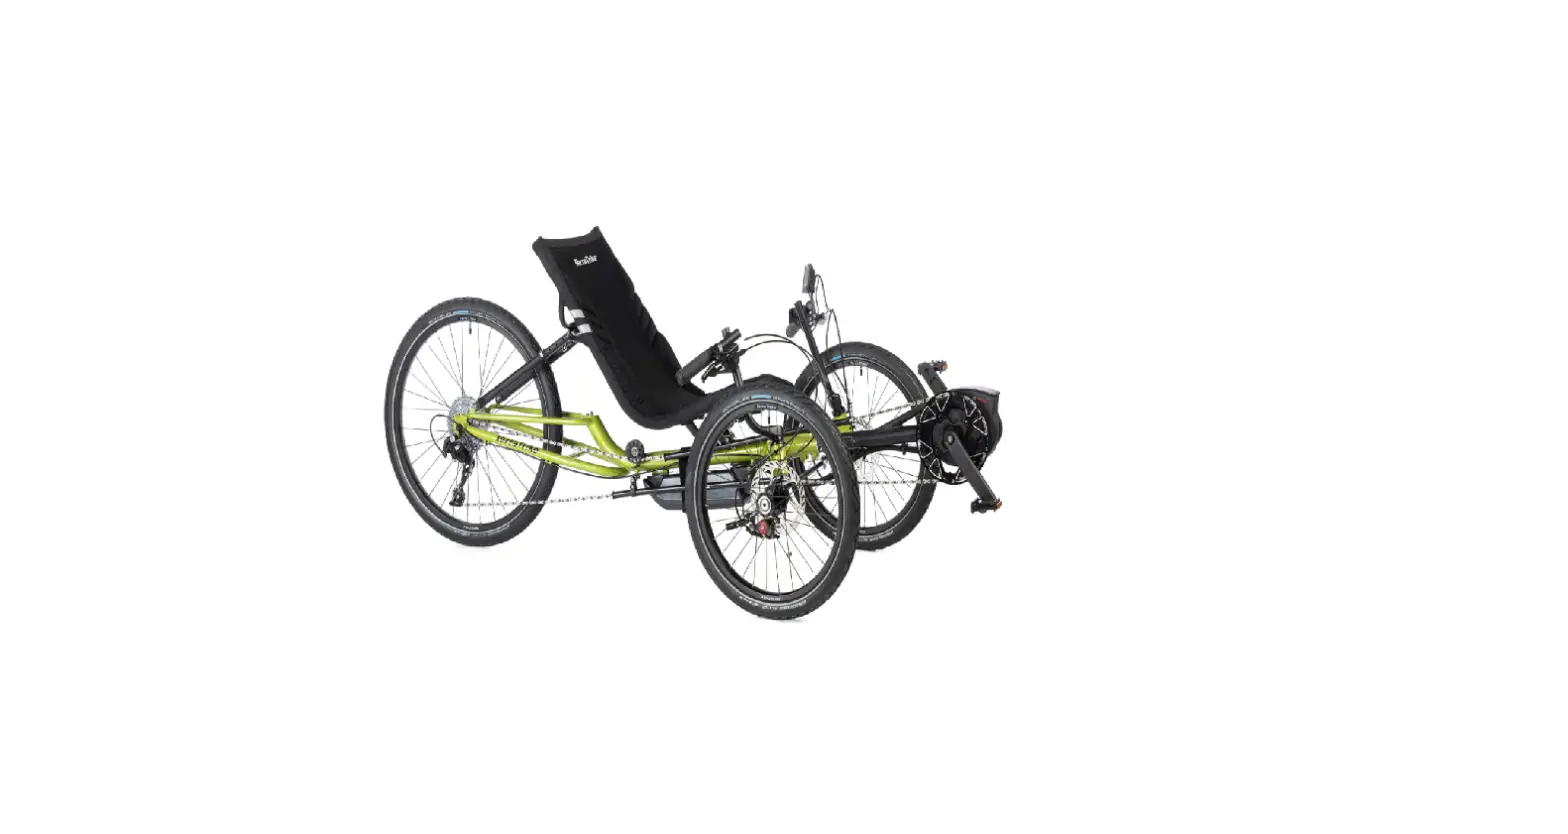
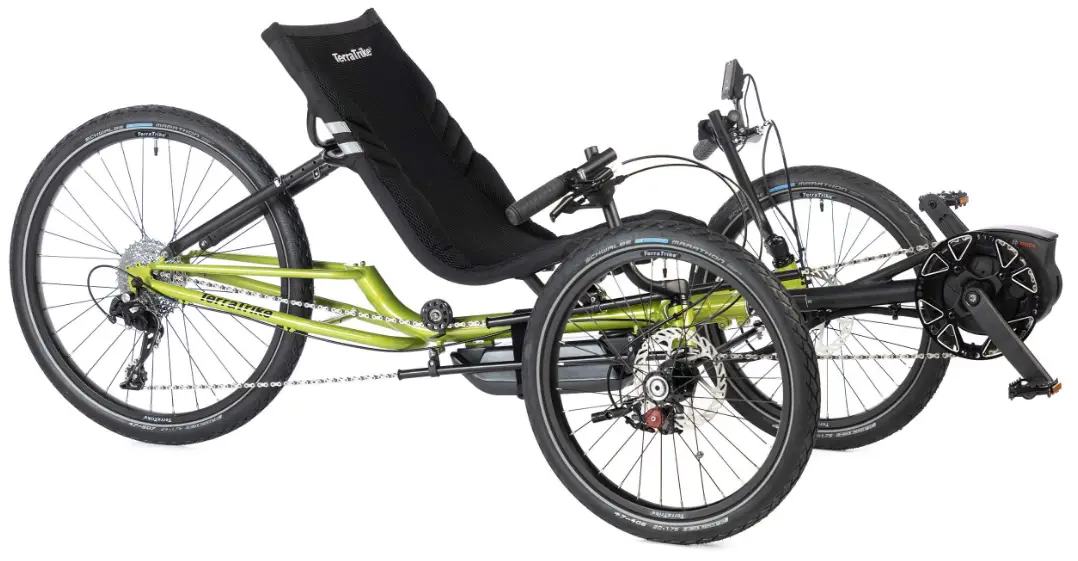
TerraTrike GT EVO Electric Assist
Product Information
The product is a TerraTrike, which is a three-wheeled recumbent bike. The user manual provides instructions for building and setting up the bike. The manual includes information on the parts included in the small parts box, the Hybrid Steering Stack Assembly, and the E.V.O. alignment measurement.
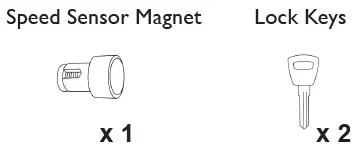
Product Small Parts Box
- Speed Sensor Magnet x 1
- Lock Keys x 2
- Speed Sensor Bracket
- Kiox Display
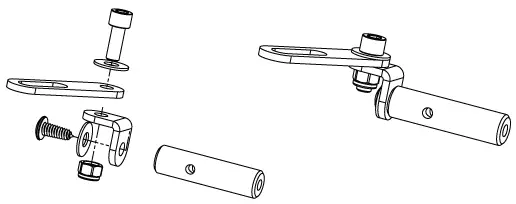
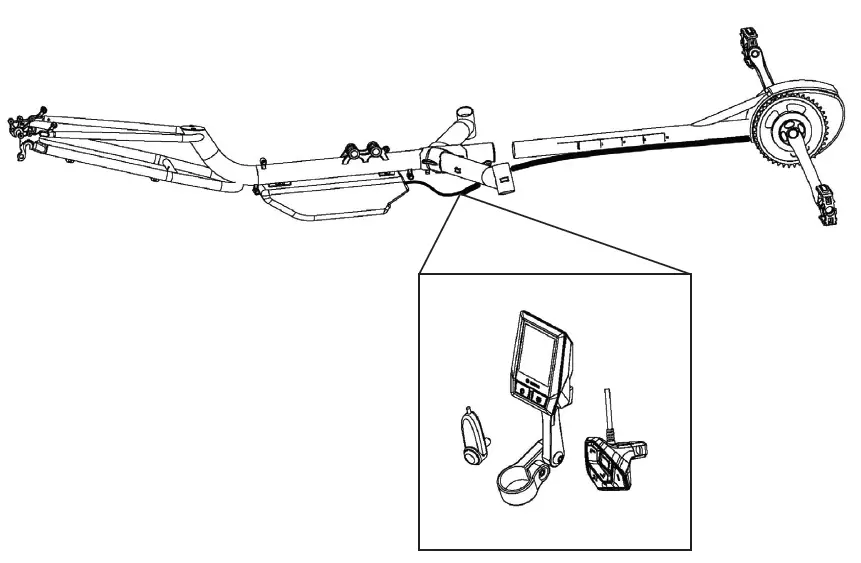
Product Hybrid Steering Stack Assembly
The Hybrid Steering Stack Assembly includes a Hybrid Top Cap, Trigger Handlebar, M6x30 Bolt, and Hybrid Headset Spacer. The assembly is greased before inserting into the head tube, and excess grease should be removed before installing the handlebar. The axle should also be greased before installing the wheel, and torqued to 23-25Nm.
E.V.O. Alignment Measurement
The E.V.O. alignment measurement is approximately 295/8 inches (center tread to center tread), though slight variance is possible. It is important to ensure that the alignment remains neutral with a rider seated in the trike.
Product Usage Instructions
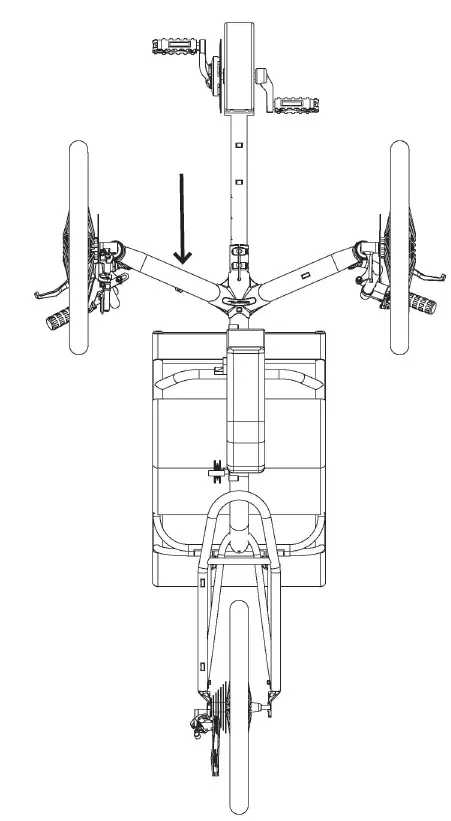
- Insert the boom to the desired length and secure it with the pinch bolts, being careful not to stress the wires. The Speed Sensor, Kiox Display, and Controller will be hanging loose.
- Apply the cable guide to the bottom side of the right outrigger.
- Install the computer sensor bracket and mount the speed sensor on it. Install the magnet on the spoke and align it with the marking on the speed sensor. Ensure that the speed sensor wire is clear of the brake rotor and any steering parts that could cause damage.
- Attach the computer mount to the left handlebar and mount the Kiox Display, securing it in place.
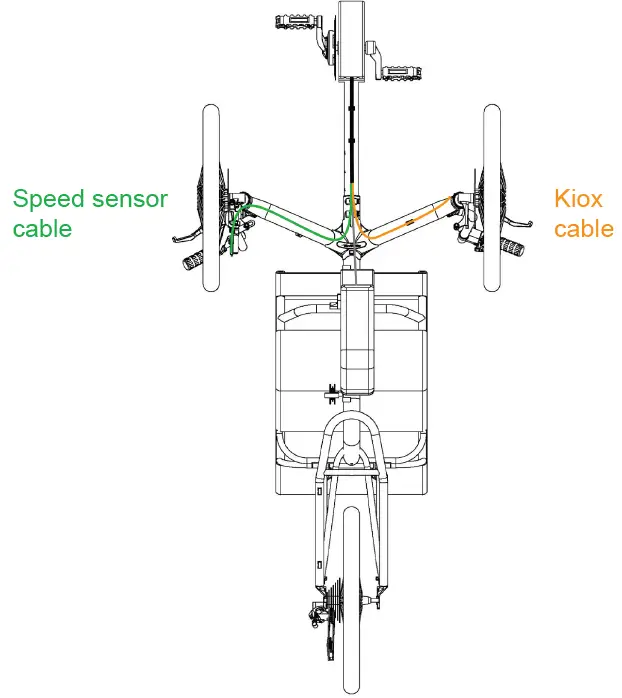
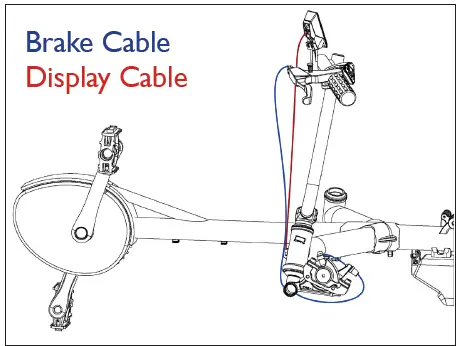
- Route the wires according to the diagram on the underside of the trike frame. The Kiox cable should follow the brake cable routing. Use the cable housing guide under the center lug of the frame to secure excess wires with a ziptie.
- To perform alignment, inflate the tires before measuring. The E.V.O. alignment measurement is approximately 295/8 inches (center tread to center tread), though slight variance is possible. Ensure that the alignment remains neutral with a rider seated in the trike.
Caution: Boom and main frame are connected by the battery wire. Move both pieces together so the battery wire does not get damaged.
Look through entire setup guide before beginning.
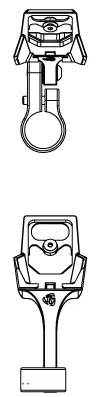
Small parts box
Speed Sensor Bracket
Kiox Display
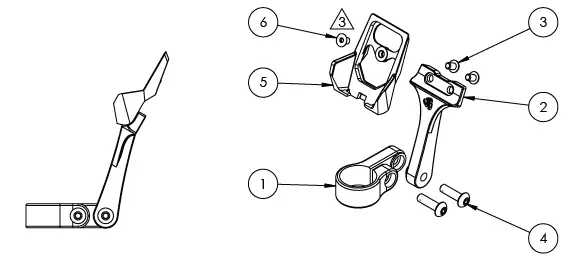
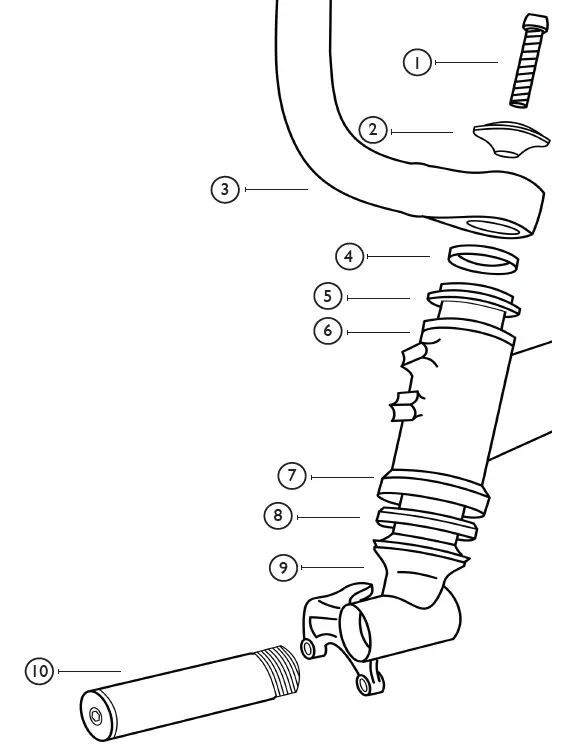
| ITEM NO. | PART NUMBER | DESCRIPTION | QTY. |
| 1 | TT000854 | CLAMP, ACCESSORY MOUNT 7/8″ | 1 |
| 2 | TT000851 | EVO DISPLAY MOUNT RISER | 1 |
| 3 | WH000006 | M4x.7 X 6mm SBHCS SS | 2 |
| 4 | WH000002 | M5x.8 X 18mm SBHCS SS | 2 |
| 5 | TT000906 | BOSCH, KIOX DISPLAY BRACKET | 1 |
| 6 | WH000059 | M4x0.7x6mm Flat Head SS | 1 |
Installation Instructions
- Using caution to not stress wires, insert boom to desired length and snug boom pinch bolts to secure boom. Speed Sensor, Kiox Display and Controller will be hanging loose.

- Apply cable guide to bottom side of right outrigger.

- Install computer sensor bracket.
- Mount speed sensor on computer sensor bracket.
- Refer to Step 6 for proper wire routing.
- Install magnet on spoke.
- Align magnet and marking on speed sensor.
- Warning: Ensure speed sensor wire is clear of brake rotor and any steering parts that could cause damage.

- Attach computer mount to left handlebar.
- Refer to Step 5 for proper wire routing.
- Mount Kiox Display and secure.

- Route wires according to diagram (underside of trike frame).
- Kiox cable should follow brake cable routing.
- Use the cable housing guide under the center lug of the frame to secure excess wires with ziptie.

Alignment

Inflate tires before performing alignment. The E.V.O. alignment measurement is approximately 295/8 inches (center tread to center tread), though slight variance is possible. Most importantly, make sure the alignment remains neutral with a rider seated in the trike.
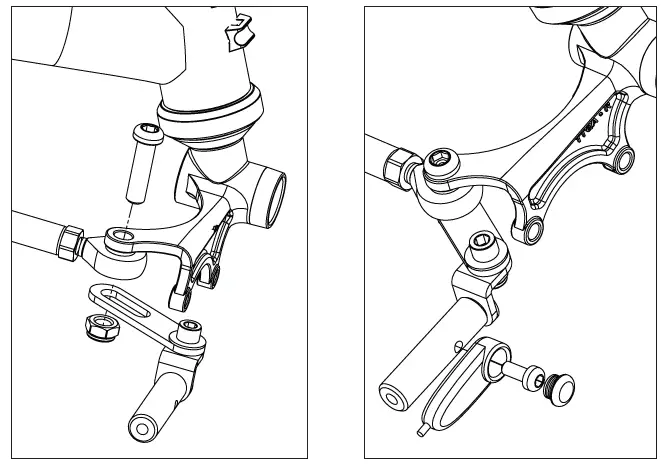
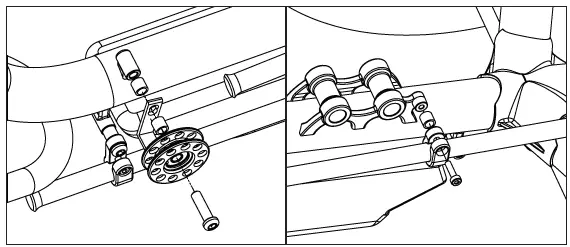
Hybrid Steering Stack Assembly
- Assemble the steering stack as shown. Grease the steerer tube before inserting into head tube. Remove any excess grease from steerer tube before installing handlebar. Grease axle before installing wheel. Torque axle to 23-25Nm.
- Right Hand assembly depicted. Some components can be purchased individually as well as in pairs, see parts list below.
Parts List
| 1 | M6x30 Bolt | TT000576 |
| 2 | Hybrid Top Cap | TT000506 |
| 3 | Trigger Handlebar – RH | TT000649 |
| Trigger Handlebar – LH | TT000650 | |
| Trigger Handlebar – Pair | TT000514 | |
| M5x20 Bolt – 2qty (not pictured) | TT000301 | |
| 4 | Hybrid Headset Spacer | TT000520 |
| 5 | Hyrbid Headset Cap | TT000505 |
| 6 | Bushing (pre-installed) | TT000809 |
| 7 | Hybrid Headset Cup (pre-installed) | TT000602 |
| 8 | Hybrid Headset Bearing | TT000600 |
| 9 | Rapid Axle Hubmount – RH | TT000713 |
| Rapid Axle Hubmount – LH | TT000714 | |
| Rapid Axle Hubmount – Pair | TT000516 | |
| 10 | Rapid Axle – RH | TT000717 |
| Rapid Axle – LH | TT000718 | |
| Rapid Axle – Pair | TT000563 | |
| 11 | Axle Spacer | TT000568 |
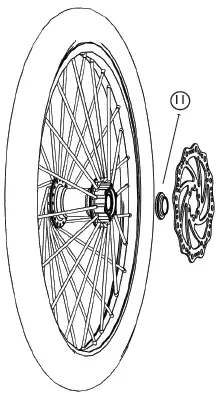
- Install Axle Spacer (11) between brake rotor and hub.
Lower Chain Tube Setup
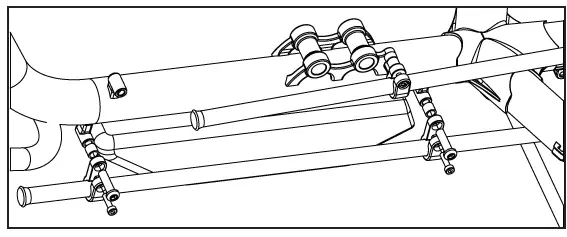
Idler Setup /Upper Chain Tube Setup
Parts List
| Upper Assy. | Chain Tube, 56 LDPE | TT000548 | 1 |
| Chain Tube Clamp, GT | TT000697 | 1 | |
| Spacer, GT Chain Tube | TT000700 | 1 | |
| M5x35 SHSCS SS | TT000436 | 1 | |
| Lower Assy. | Chain Tube, 56 LDPE | TT000548 | 1 |
| Chain Tube, Clamp,Traveler | TT000422 | 2 | |
| Idler Wheel Spacer | TT000262 | 2 | |
| M8x30mm BHCS SS | TT000280 | 2 | |
| M5x18mm PHSS | N/A | 2 | |
| Idler Assy. | Idler, 10t Deluxe | TT000261 | 1 |
| Idler “L” Bracket | TT000263 | 1 | |
| Idler Wheel Spacer | TT000262 | 2 | |
| M8x35mm BHSCS SS | TT000279 | 1 |
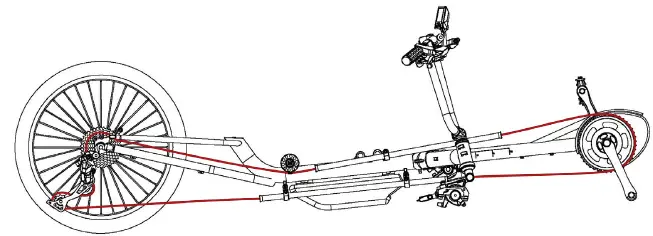
Product Routing
Chain Routing
Cable Routing RH
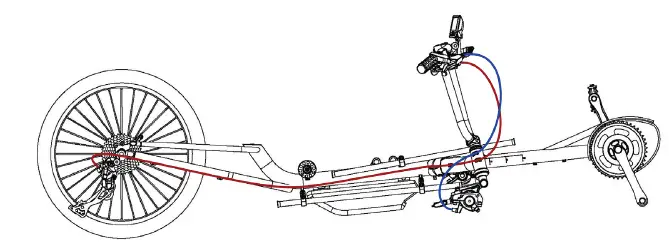
- Brake Cable
- Shift Cable
Cable Routing LH
- Charge the battery pack completely.
Instructions for charging are located on TerraTrike’s website at: https://www.terratrike.com/resources/manuals/ Scroll down to locate the battery manual.
- Complete the trike assembly.
- Secure the battery with the additional safety strap.
- Remember to double-check your work.
- Test ride the finished product.
- Final step: Watch your customers smile with excitement as they test the intuitive power of the Bosch E.V.O.
Contact
- 800.945.9910
- www.TerraTrike.com
- 4460 40th St. SE
- Grand Rapids, MI 49512 USA