![]()
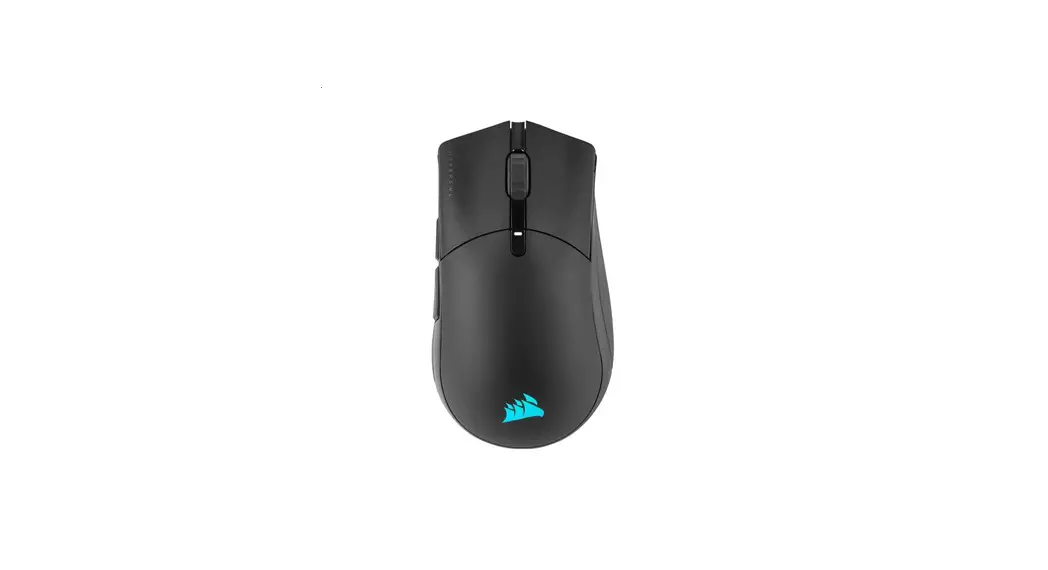
CORSAIR NIGHTSABRE
Wireless FPS Gaming Mouse
User Guide
CHARGING THE MOUSE
IMPORTANT: The NIGHTSABRE mouse must be fully charged before its first use. Connect the mouse to an available USB 2.0 or 3.0 port on your PC with the USB CHARGING / DATA CABLE (S). The MULTI-PURPOSE LED INDICATOR (J) on the mouse will begin pulsing green to denote battery charging and will turn solid when charging is complete.
GETTING TO KNOW YOUR MOUSE
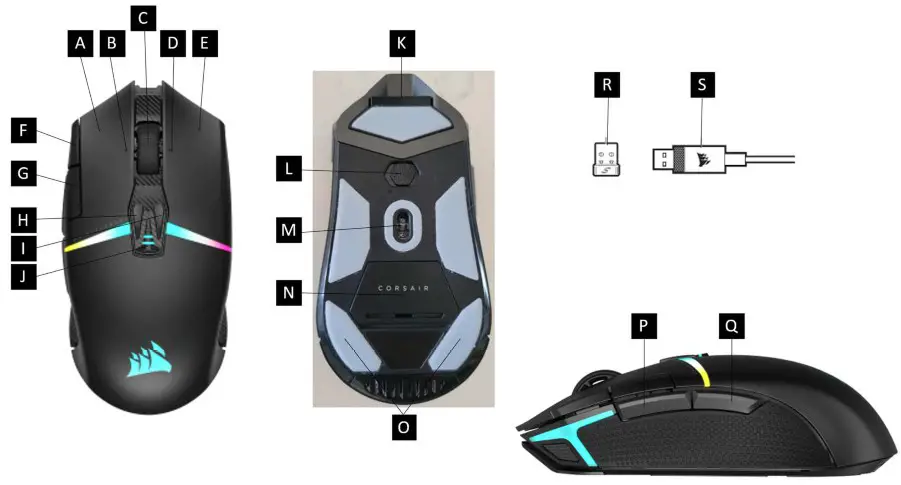
| A | LEFT MOUSE BUTTON | K | USB CHARGING/DATA PORT |
| B | SCROLL WHEEL TILT LEFT CLICK | L | POWER / WIRELESS MODE SWITCH |
| C | MIDDLE CLICK / SCROLL WHEEL | M | OPTICAL SENSOR |
| D | SCROLL WHEEL TILT RIGHT CLICK | N | USB WIRELESS RECEIVER /DONGLE STORAGE |
| E | RIGHT MOUSE BUTTON | O | VIRGIN GRADE PTFE MOUSE FEET |
| F | DPI UP BUTTON | P | FORWARD BUTTON |
| G | DPI DOWN BUTTON | Q | BACK BUTTON |
| H | PROFILE UP BUTTON | R | USB WIRELESS RECEIVER |
| I | PROFILE DOWN BUTTON | S | USB CHARGING / DATA CABLE |
| J | MULTI-PURPOSE LED INDICATOR |
SETTING UP 2.4GHz SLIPSTREAM WIRELESS
Hyper-fast sub-1ms wireless connection is designed for no-compromise gaming grade performance.
- Toggle the POWER / WIRELESS MODE SWITCH (L) to “2.4GHz” position to turn on your mouse.
- Connect the USB WIRELESS RECEIVER (R) to an available USB 2.0 or 3.x port located on the front panel of your PC or nearby USB port. (e.g. on CORSAIR MM700, MM800, MM1000 mousepads).
- The MULTI-PURPOSE LED INDICATOR (J) will turn solid white when connected.
- Download the iCUE software from www.corsair.com/downloads.
- Run the installer program and follow instructions for installation.
If reconnection is required, initiate USB wireless receiver pairing via the ice software settings menu.
SETTING UP BLUETOOTH WIRELESS
Bluetooth wireless is best for everyday computing tasks, productivity, and office applications.
- Initiate Bluetooth pairing on your Bluetooth 4.0 or higher enabled device.
- Press and hold DPI UP BUTTON (F).
- Toggle POWER / WIRELESS MODE SWITCH (L) to “BT” position to turn on your mouse.
- Follow the instructions provided to successfully connect your device.
- The MULTI-PURPOSE LED INDICATOR (J) will turn solid blue when connected.
ON-THE-FLY DPI TUNING
This mouse has a unique feature where you can adjust the current onboard DPI stage setting in 50 DPI increments without the software, so you can jump right into the action while you find the perfect sensitivity setting.
| Function | Shortcut | Multi-Purpose LED Indicator |
| Increase DPI by 50 | Hold DPI UP BUTTON (F) and press FORWARD BUTTON (P) | Blinks green |
| Decrease DPI by 50 | Hold DPI UP BUTTON (F) and press BACK BUTTON (Q) | Blinked red |
| Reset DPI Stage | Hold DPI UP BUTTON (F) then both FORWARD (P) and BACK (Q) buttons for 2 seconds | Blinks yellow |
On-the-fly DPI changes are saved to the onboard memory and can be further adjusted in granular 1 DPI steps in ice software. If ice is running, then changes are saved to the software profile directly.
MOUSE STATUS, DPI SETTINGS, AND INDICATIONS
Wireless connection and battery status are communicated through the MULTIPURPOSE LED INDICATOR (J). The mouse comes preloaded with common competitive DPI settings which can be selected by pressing the DPI UP BUTTON (F) or DPI DOWN BUTTON (G) with the MULTI-PURPOSE LED INDICATOR (j) backlighting to reflect the current stage.
| BATTERY STATUS | MULTI-PURPOSE LED INDICATOR |
| Battery charging | Pulsing green |
| Battery critical, recharge required | Pulsing red |
| Battery low, recharge soon | Blinking red |
| Battery Medium | Blinking amber |
| Battery high | Blinking green |
| Battery charged | Green |
| WIRELESS STATUS | MULTI-PURPOSE LED INDICATOR |
| 2.4GHz wireless mode — pairing | Blinking white |
| 2.4GHz wireless mode — paired | White |
| 2.4GHz wireless mode — pairing failed | Pulsing white |
| BT wireless mode — pairing | Blinking blue |
| BT wireless mode — paired | Blue |
| BT wireless mode — pairing failed | Pulsing blue |
| DPI STAGE STATUS | MULTI-PURPOSE LED INDICATOR |
| Stage #1— 400 DPI | (Image, bottom only capri) |
| Stage #2 — 800 DPI | (Image, middle and bottom capri) |
| Stage #3 — 1200 DPI | (Image, middle only capri) |
| Stage #4 — 1600 DPI | (Image, top and middle light capri) |
| Stage #5 — 3200 DPI | (Image, top light only capri) |
| DPI STAGE STATUS | MULTI-PURPOSE LED INDICATOR |
| Profile #1 | (Image, bottom red) |
| Profile #2 | (Image, middle and bottom green) |
| Profile #3 | (Image, middle blue) |
BATTERY REMOVAL INFORMATION
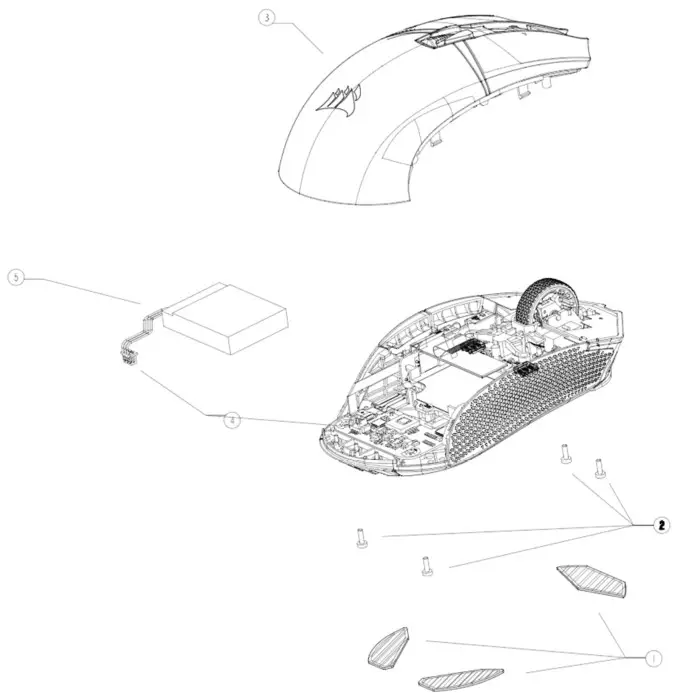
IMAGE FPO
- REMOVED TEFLON FEET 3 PCS
- REMOVED 4 SCREWS
- REMOVED TOP CASE SUB-ASSY/ BEWARE NOT TO DAMAGE FFC OF TOP PCB
- REMOVED BATTERY CONNECTOR FROM PCB
- REMOVED BATTERY
This product uses a rechargeable battery and safety guidelines must be followed in the event that the product is disabled for disposal and recycling. To safely remove the battery for disposal and recycling, follow the numbered steps with the below diagrams.
CORSAIR MEMORY, Inc. encourages customers to recycle used electronic hardware and rechargeable batteries in accordance with local laws and regulations.
FCC ID: 2AAFMRGP0129 (Mouse)
FCC ID: 2AAFMRGP0119 (Dongle)
IC: 10954A-RGP0129 (Mouse)
IC: 10954A-RGP0119 (Dongle)


