![]()
Automatic Pet Feeder
4L
User Manual
Specification
Programming: up to 5 meals per day, portable in 5g increments, max. filling 200g.
Product Weight: 1.5kg (without batteries and food)
Product Size: L206mm x W341mm x H321mm
Capacity: 4L (dry food pellets between 2-15mm only )
Dual Power Supply: Output DC power adapter, 5V – 1A // 3 x D battery.
Setting Memory: After a power outage, only the clock needs to be reset, the feeding times have been saved automatically from before.![]() On battery supply only, the feeder works up to 3 months.
On battery supply only, the feeder works up to 3 months.![]() To prevent food jams, the grain size should not exceed 15mm.
To prevent food jams, the grain size should not exceed 15mm.![]() Batteries are not included.
Batteries are not included.
Product Features
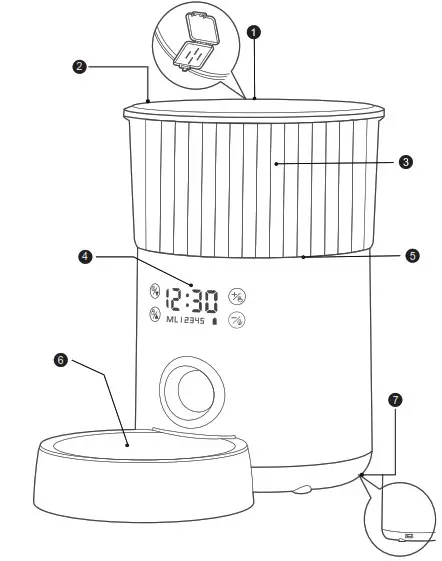
- Desiccant valve keeps kibble dry and fresh.
- Top lid to protect kibble from pet access.
- Transparent food canister to check filling status.
- Intuitive touch panel.
- Detachable body for easy maintenance
- Separate 304 stainless steel food bowl
- Dual power supply, always remain functional
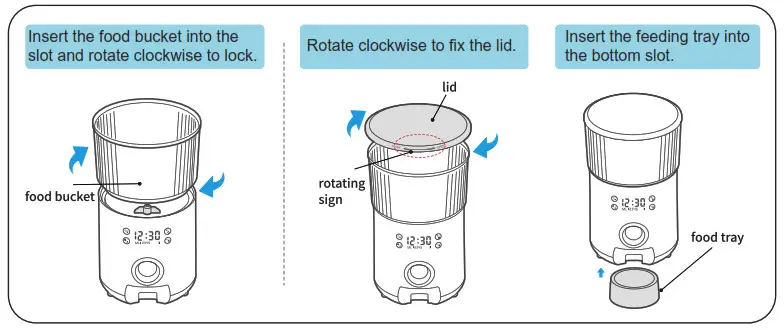
Setting up the Feeder
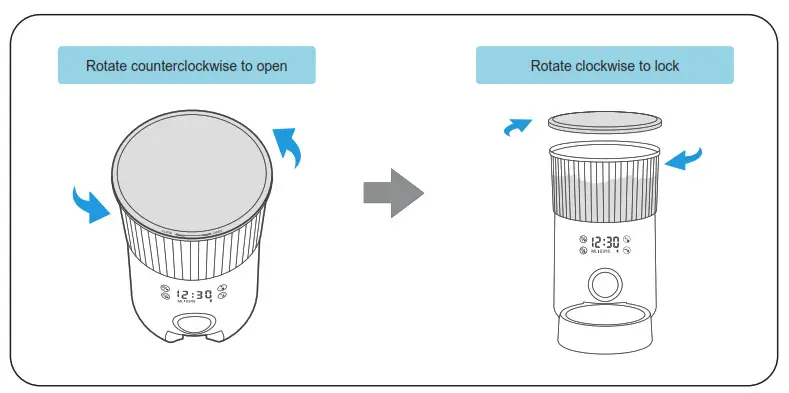
- Assemble the food bucket, lid, and food trays as shown below pictures.

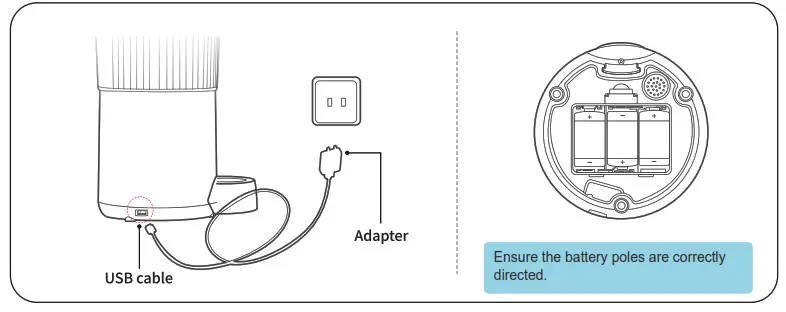
- Dual power mode: Connect the USB cable to the machine and plug in the power adapter. If you do not wish to use the power adapter for the power supply, install 3 D-type batteries on the bottom of the machine. A dual power supply is recommended.

- Open the lid as shown below and lock after food is added.

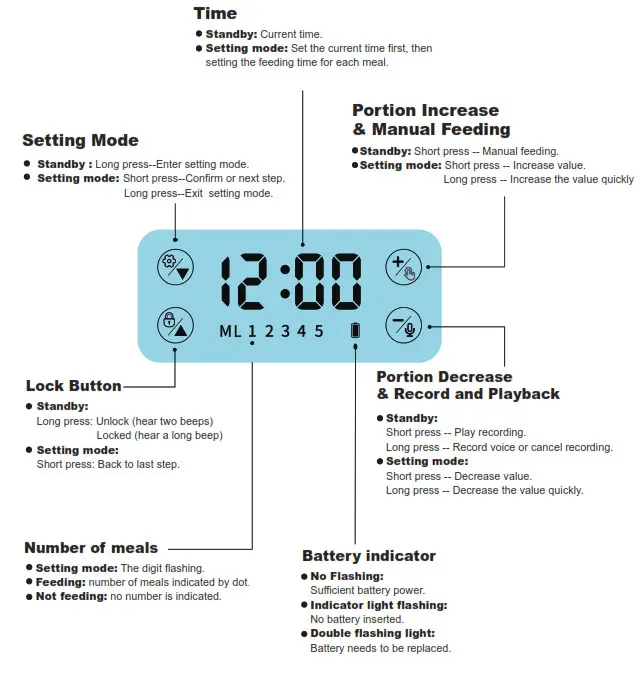
Operating the Touch Panel
Note: To clear all settings, restore the factory settings:
While the screen is unlocked, press the “![]() ” and “
” and “![]() ” buttons at the same time for 2 seconds, after hearing the “beep”.
” buttons at the same time for 2 seconds, after hearing the “beep”.
The screen will be locked automatically after 3 minutes without operating.
The LED screen will light up but stay locked when you touch any button. Long press the “![]() ” to unlock buttons.
” to unlock buttons.
Quick Programming Guide
First, ensure the panel is unlocked — press the “ ” until you hear two beeps.
- Before use
Ensure the feeder is normally powered.
Short Press the ” “, the feeder instantly releases one portion. Repeat this step for 3 times to make sure the feeder work normally.
 - Setting time
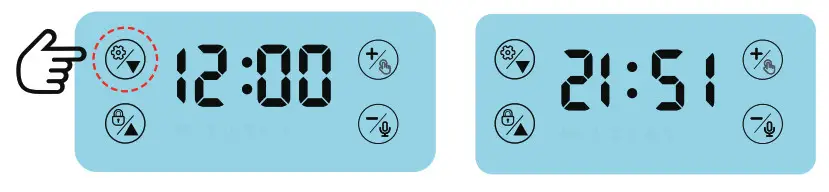
Long press “ ” until the digits start flashing. Press ” ” or ”
  ” to set the correct hour and then short press ” ” to save. Repeat to set the minutes.
Example: set the current time to 21:51.
- Mealtime setting
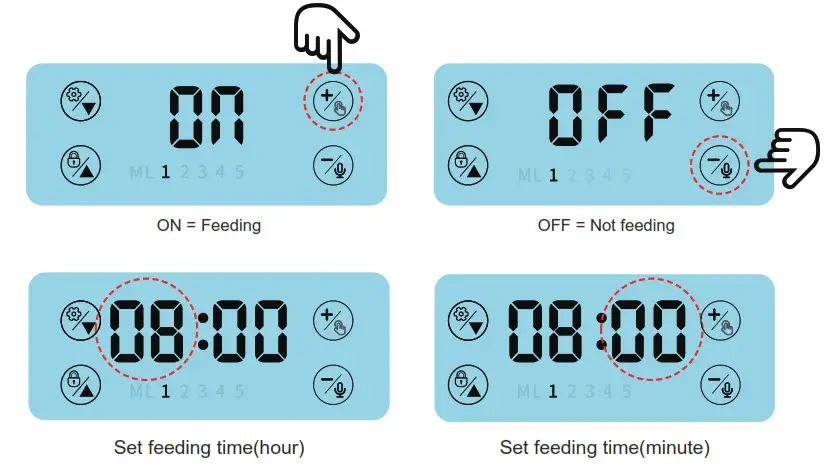
Once the time is set, the feeder will switch to a mealtime setting. When “1” starts flashing, press “ ” or ” ” to choose “ON” or “OFF”, “ON” means feeding; “OFF” means no feeding.
Once you set “ON” for 1st meal, short press set button and repeat step 2) above to set the feeding time.
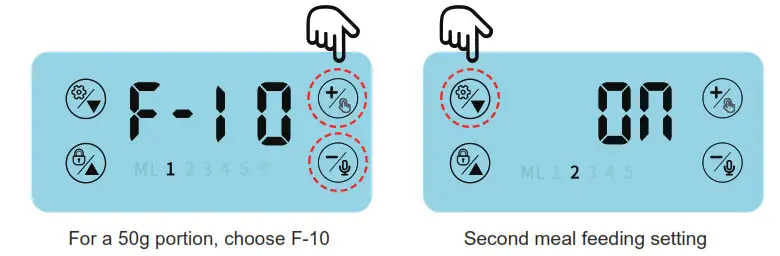
Once feeding time is set and saved, the feeder will switch to portion mode. The screen will display “F-XX” (XX for the number of 5g increments), ex. For a 50g portion, choose F-10. Then press ”” and “ ” to set the portions and then press “” again to save. Repeat for meals 2 through 5. Long press ” ” to save once you set all meals.
- Voice recording and playback:
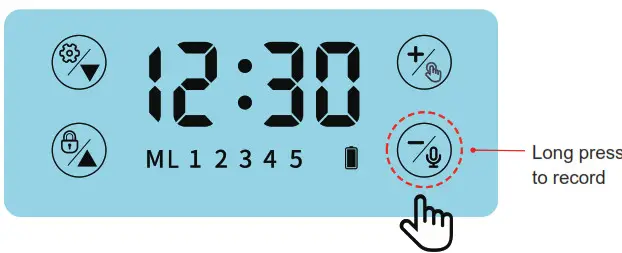
Start recording
In standby, press and hold “ ” until you hear a “beep” and continue to hold while recording up to 30 seconds. Release the button when you hear a beep to finish the recording. Your recorded message will play for review.
Play the recording
In standby, press ”” to hear the recorded message.
Cancel recording
In standby, long press ”” until you hear a “beep” sound and release immediately to cancel the recording.
- Lock and unlock button
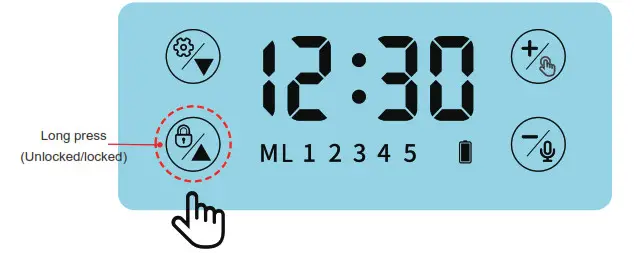
In standby, long-press the” ” button, hear the long “beep” to lock the screen. Long press the “ ” button again and hear two “beeps” to unlock the screen.
Important Notes
( 1 ) Cleaning and maintenance
Turn off the power and unplug the adapter before cleaning.
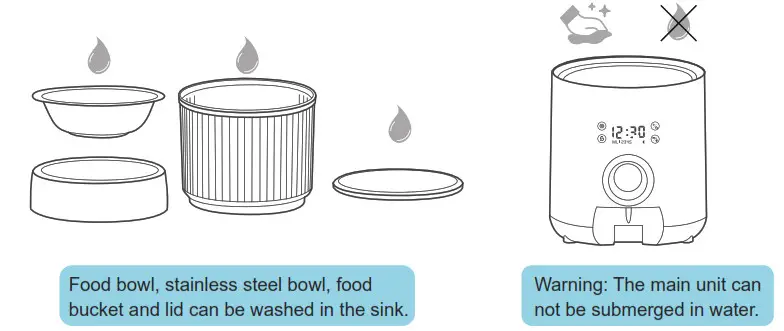
The food tray, food buckets, and lid can be removed for washing with a soft cloth.
Avoid submerging the main unit in water, simply clean with a damp cloth.
Warning
Do not submerge the main unit in water as this will damage the electronic components and void the warranty.
( 2 ) FAQs
- Battery indicator
Indicator permanently lit when no batteries are inserted.
Indicator flashing in intervals means low-level battery.
Indicator flashing twice means batteries need replacing. - Abnormal conditions
The screen shows E-01: the feeder is jammed and the food outlet needs cleaning.
The screen shows E-02: the motor doesn’t work normally. Please check if the motor is running. - Automatic LED screen off
The screen will turn off automatically after 3 minutes without operating. The LED screen will light up but stay locked when you press any button. Long press ”” to unlock the buttons.
Warning
- Do not put your fingers into the food outlet or try to touch the rotor.
- This product requires 3 D-type batteries.
Note: Batteries should be removed from the device if it’s not used for an extended period of time to avoid damage through the leakage. - This unit is made for dry food only.
- In order to prevent food jams, the pellet size should not exceed 15mm.
- If the device is powered by batteries only, the batteries will last up to 3 months under normal usage.
- Batteries are not included in the package.


