![]()
ProVisionaire Edge Setup
ProVisionaire Professional Audio Software
Thank you for downloading ProVisionaire Edge. This document describes how to set up ProVisionaire Edge after installation. For the latest information on system requirements and compatible devices, please visit the download page.
Initial Configuration of ProVisionaire Edge
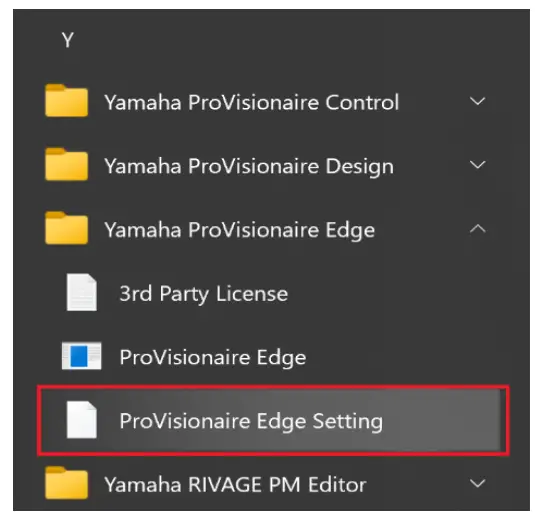
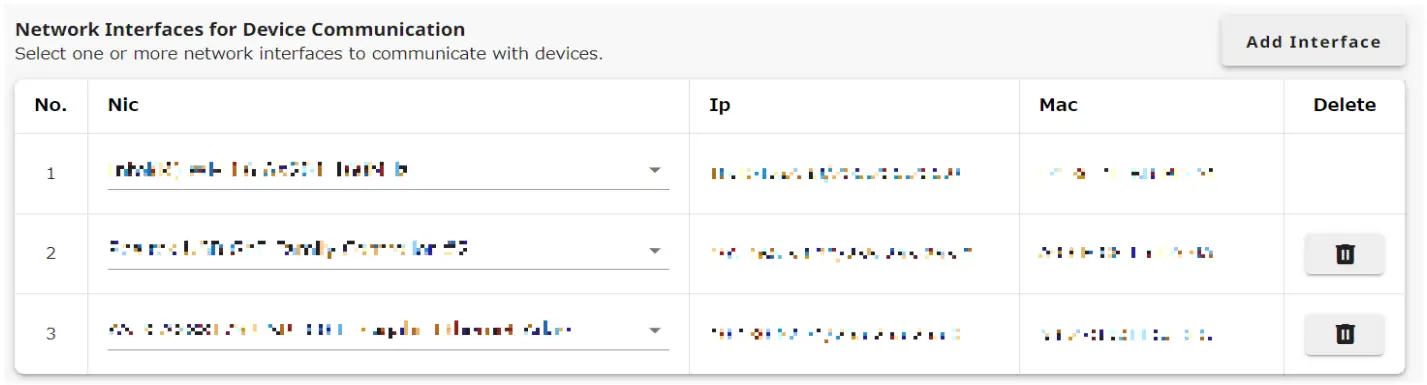
After installing ProVisionaire Edge, launch “ProVisionaire Edge Setting” from the Windows menu and select the network interfaces to be used.
![]() Note 1 – IP address allocation for network interfaces
Note 1 – IP address allocation for network interfaces
Only one IP address should be assigned to each network interface on ProVisionaire Edge. If you want to assign multiple IP addresses to monitor several subnets, you will need to add additional network interfaces on your PC: one interface for each IP address.
![]() Note 2 – Number of PCs running ProVisionaire Edge
Note 2 – Number of PCs running ProVisionaire Edge
ProVisionaire Edge can run on one PC within a single subnet. If ProVisionaire Edge is running on more than one PC, communication between other ProVisionaire applications and devices may be disrupted. Also, it cannot be used in conjunction with ProVisionaire Monitoring Service: use ProVisionaire Edge instead of ProVisionaire
Monitoring Service.
Connections and IP addresses of compatible devices
Once you have set the IP addresses of the PC and the devices to be monitored, connect them to the network(s) – ProVisionaire Edge automatically detects the compatible devices and registers them for monitoring.
For the latest supported devices and supported firmware versions, see the download page.
| Device | Connector | IP Address | IP Address Setting |
| RIVAGE PM series (console, DSP) *1 | NETWORK [PC] connector | 192.168.53.xxx (fixed) | Cannot be changed. |
| CL/QL series *2 | NETWORK connector | Any | SETUP -> NETWORK -> FOR MIXER CONTROL |
| Rio-D2 series | Dante Primacy connector | Any | SETUP -> IP ADDRESS |
| NETWORK*2 | connector | Any | Settings -> IP Settings -> DME Control Port |
| MRX7-D, MTXS-D | Dante Primary connector | Any | Set by UNIT ID and DIP switches to 192.168.0.xxx, or by MTX-MRX Editor to any address. |
| MTX 3 *2 | NETWORK connector | Any | Set by UNIT ID and DIP switches to 192.168.0.xxx, or by MTX-MRX Editor to any address. |
| PC-D series | NETWORK connector | Any | NETWORK -> CONTROL |
| X MV series *2 | NETWORK connector | Any | Set by UNIT ID and DIP switches to 192.168.0.xxx, or by Amp Editor to any address. |
| XMV-D series | Dante Primary connector | Any | Set by UNIT ID and DIP switches to 192.168.0.xxx, or by Amp Editor to any address. |
| Nexo NXAMPmk11 series *3 | Expansion slot connector | Any | REMOTE CONTROL SETTINGS |
| DZR/DXS-D series | Dante Primacy connector | Any | UTILITY -> NETWORK |
*1 – It is recommended to us e a dedicated network interface connected to the Network [PC] terminal of RIVAGE PM s eries for the bes t s ys tem performance. Other devices should be connected via different network interfaces.
*2 – In order to reduce communication load on device NETWORK control terminals , it is recommended that devices connected via NETWORK control terminals use different network interfaces from the Dante network.
*3 – For monitoring Nexo NXAMPmkII s eries amplifiers , us e the NXRM 104 or NXAE 104 cards only.


