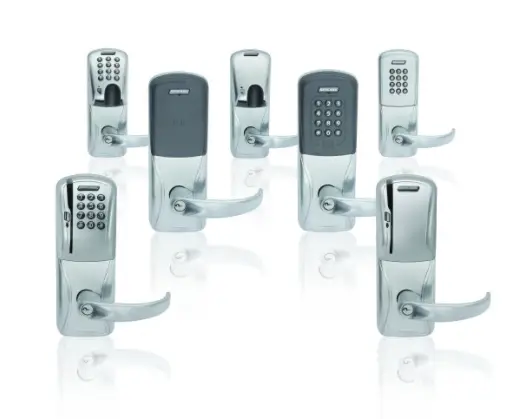
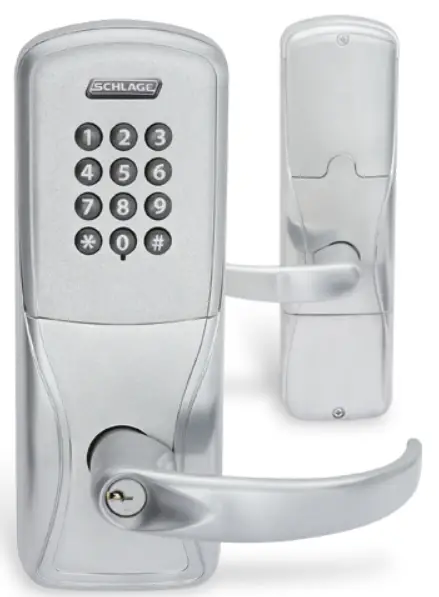
SCHLAGE AD-200 Offline Commercial Keypad Lock
Installation Instructions

- Prepare door.
IMPORTANT! See template. Additional door preparation may be required. - Identify model of lock.
AD-200 Printed on box label. Choose steps to perform by models listed in corner.
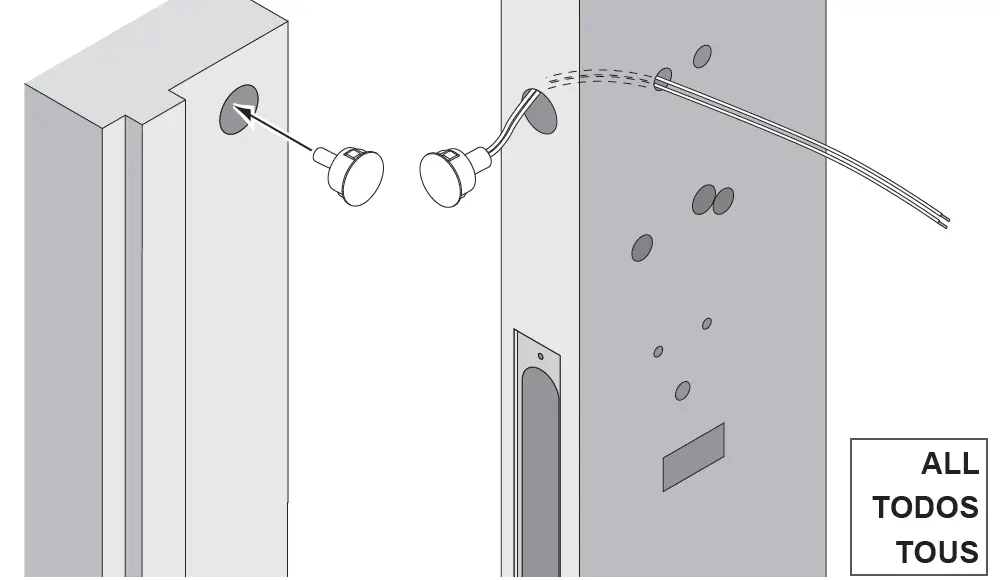
- Install door position switch (DPS).
Ensure alignment on door and jamb.
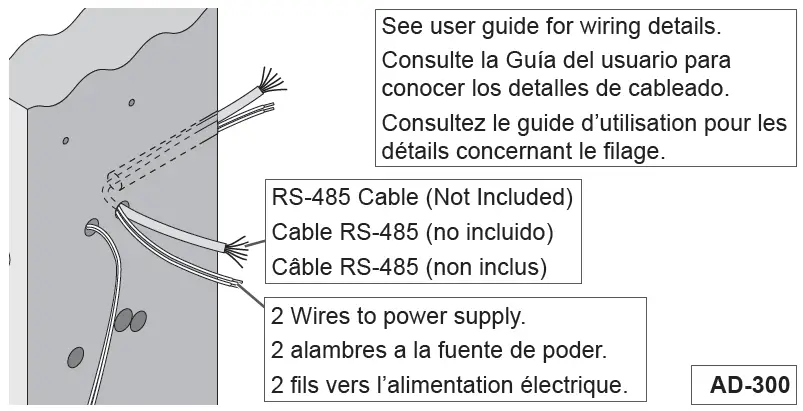
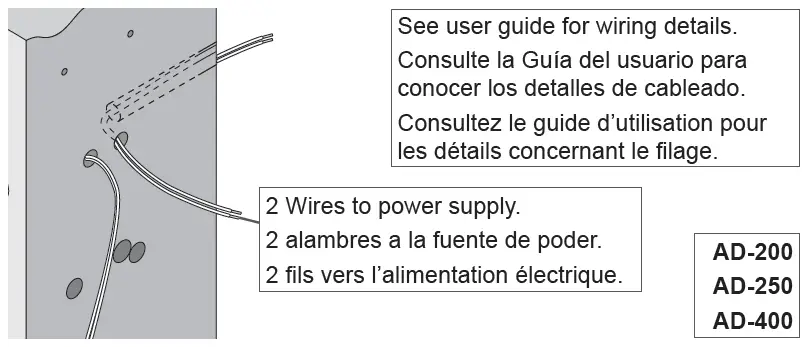
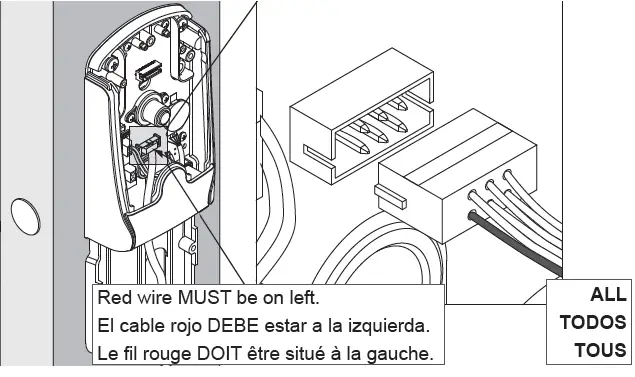
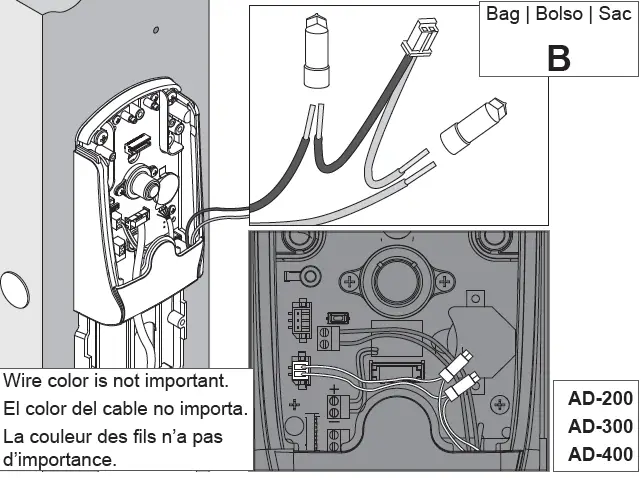
- Route RS-485 cable and power wires.

- If not using batteries (standard option), route power wires.

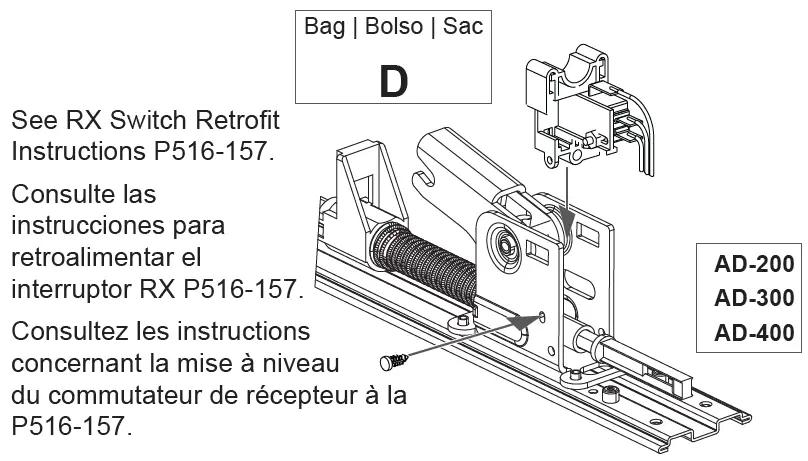
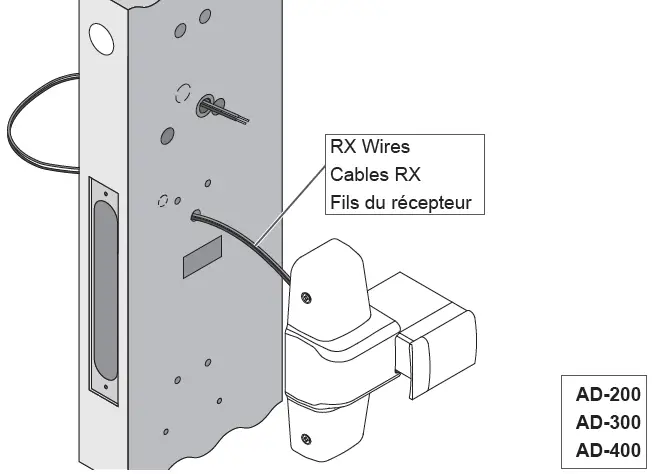
- When retrofitting, install RX switch. Install in existing 98/99 exit device.

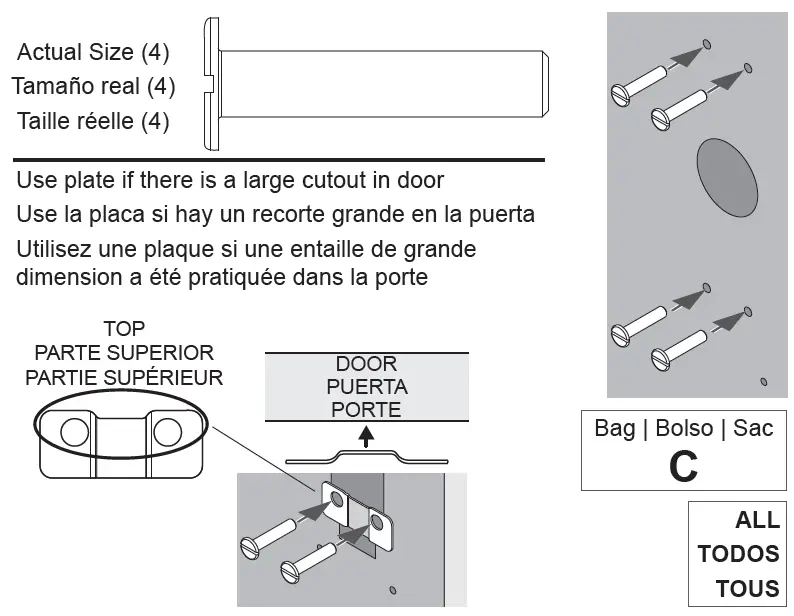
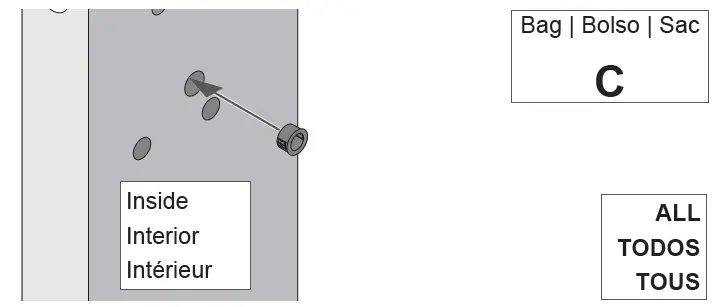
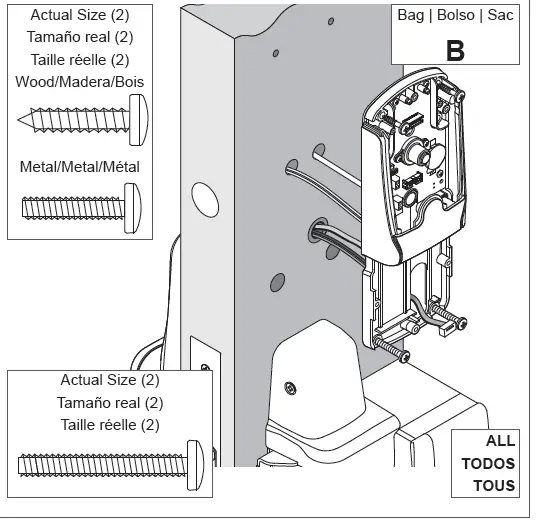
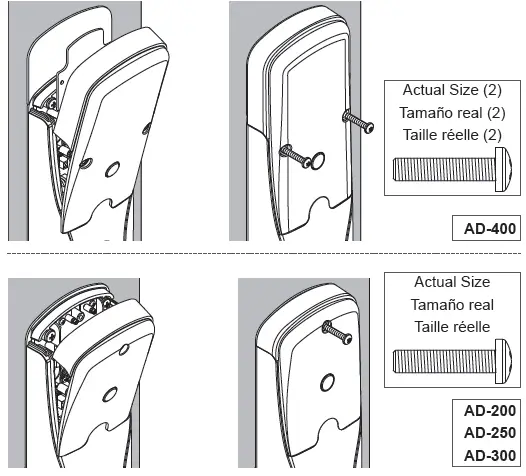
- Install sex bolts to secure device.

- Install grommet.

- Route RX wires.

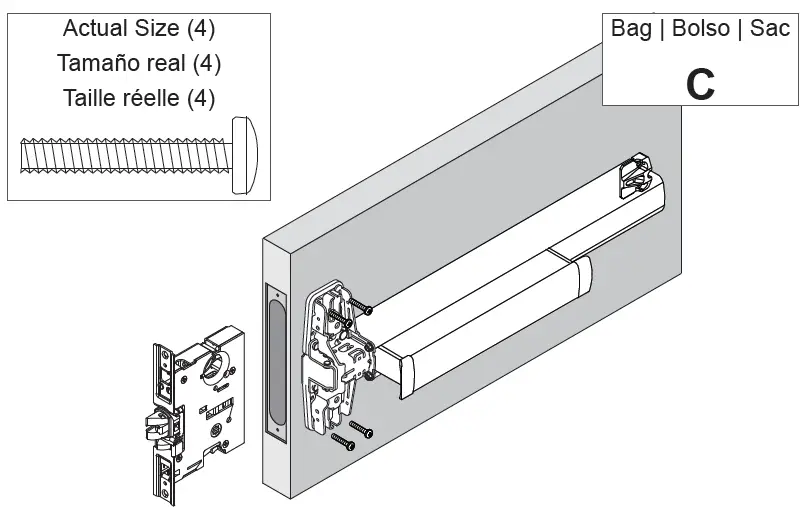
- Install device per manufacturer instructions.

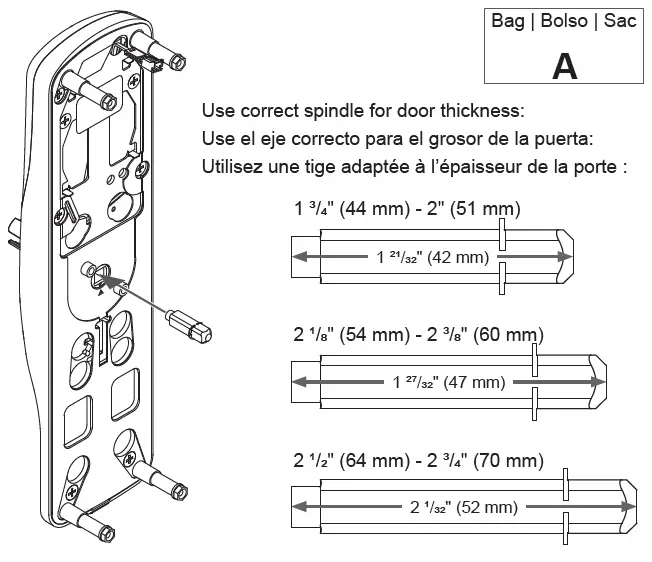
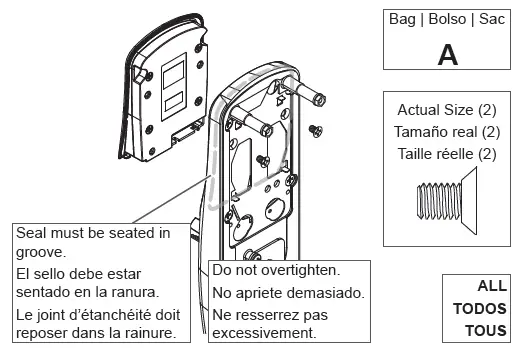
For proper function, cam must be in down position. - Install spindle into assembly

- Install reader.

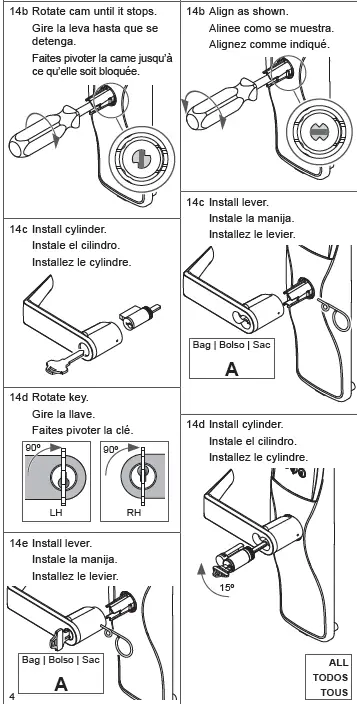
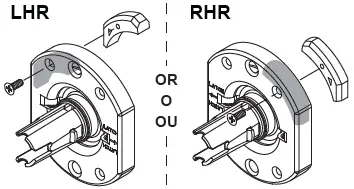
- Check lever handing.

- Install cylinder and lever.
Verify tailpiece is horizontal.
Keyed Lever
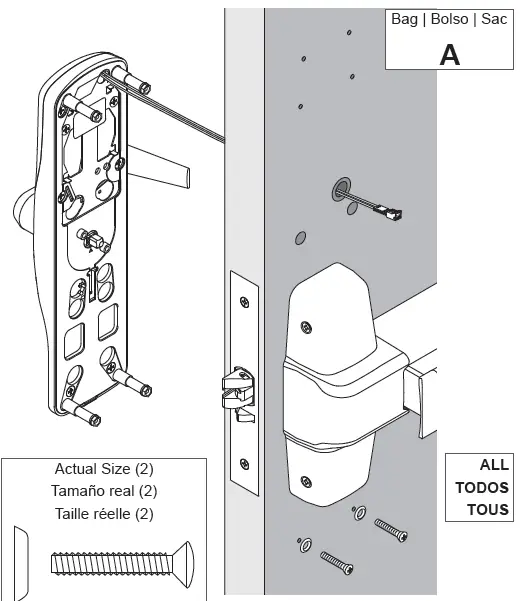
- Install outside assembly.

- Install inside assembly.

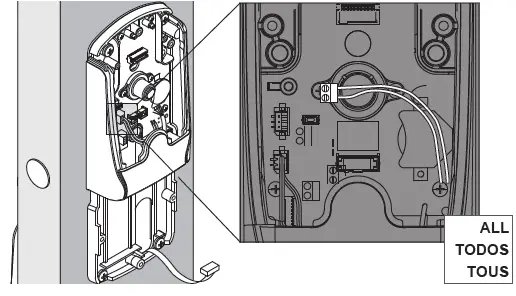
- Connect white DPS wires.

- Connect ribbon cable.

- If RX, insert plug.

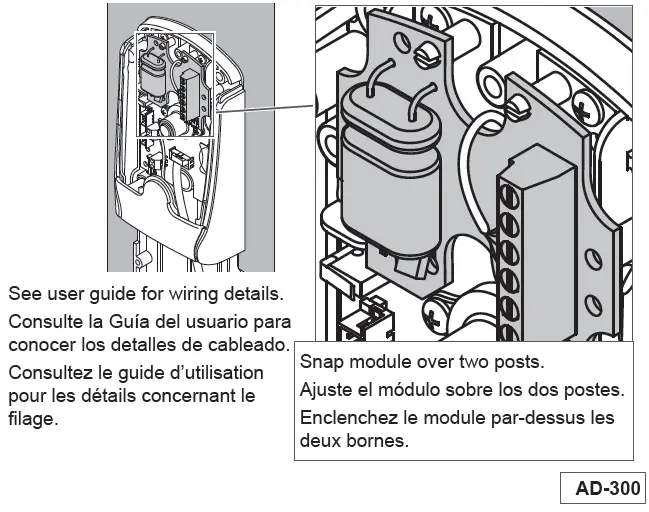
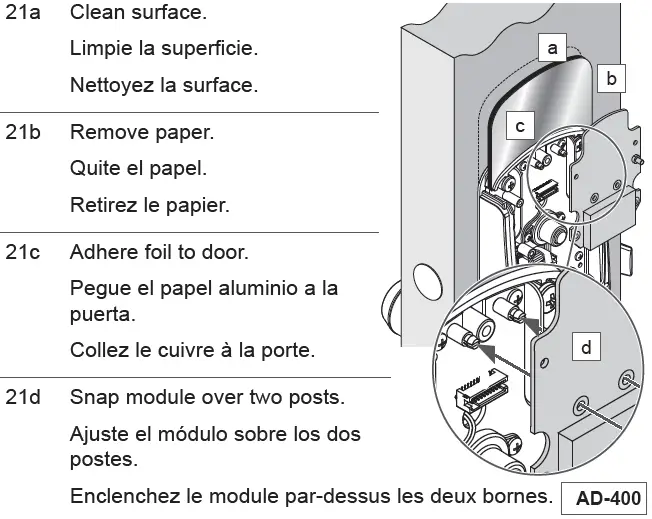
- Install RS-485 communication module.

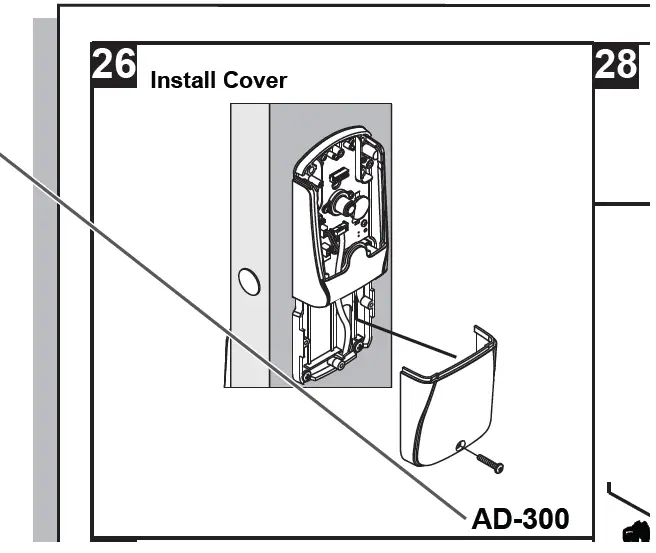
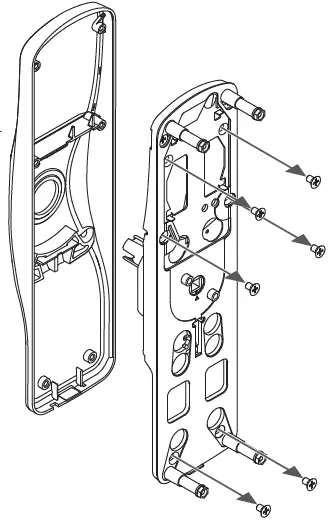
Install lower cover.
- Install wireless communication module.

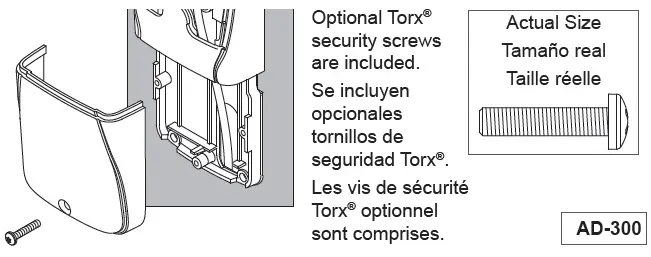
- Apply power, AD-200/250/400 only. Optional Torx® security screws are included.

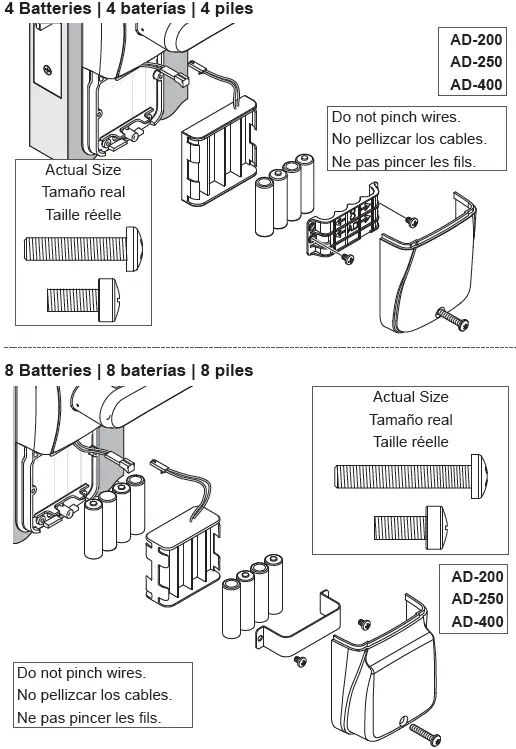
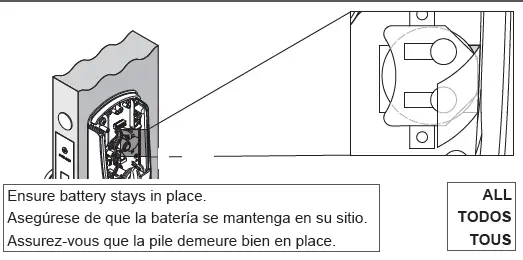
Hardwired option: See user guide for wiring details. - Carefully remove insulator strip from battery.

- Install cover and screws.

- Set up lock. After installing the lock, see the user guide for setup and operation.
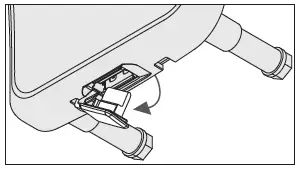
Lever removal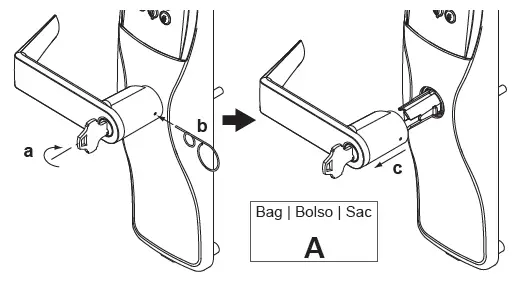
Changing the cylinder’s tailpiece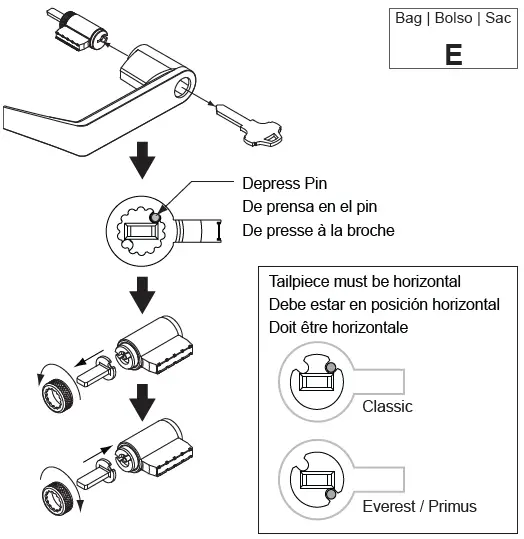
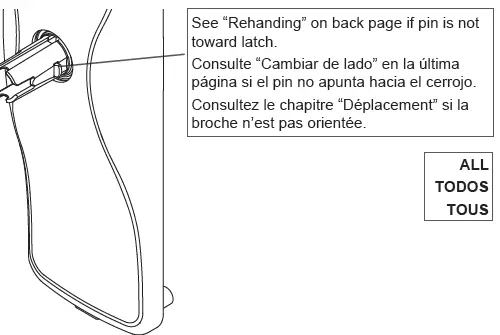
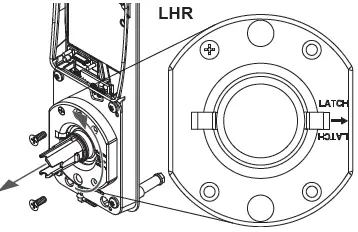
Rehanding
- Remove USB plug.

- Remove cover from baseplate.
NOTE: on keypad only applications, reader is not removable!
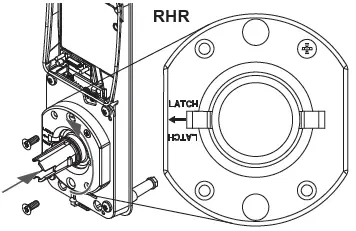
- Remove spring cage.

- Move lever stop to opposite side − Align arrow with latch.

- Reinstall springcage.
IMPORTANT: Verify that the correct size screw is used.
- Reassemble cover, baseplate, and mounting plate.
IMPORTANT: Do not pinch the ribbon cable during reassembly.


![Schlage Keypad Lock [fe575] User Manual](https://static-data1.manualsee.com/1/img/167/20295/2020/12/Schlage-Keypad-Lock.png "Schlage Keypad Lock [fe575] User Manual")


