![]() SP96RGL
SP96RGL
ASP96RGLX![]()
ASP96RGLX Ultimate Universal Resettable Combination Lock
| Combo Cable Lock | 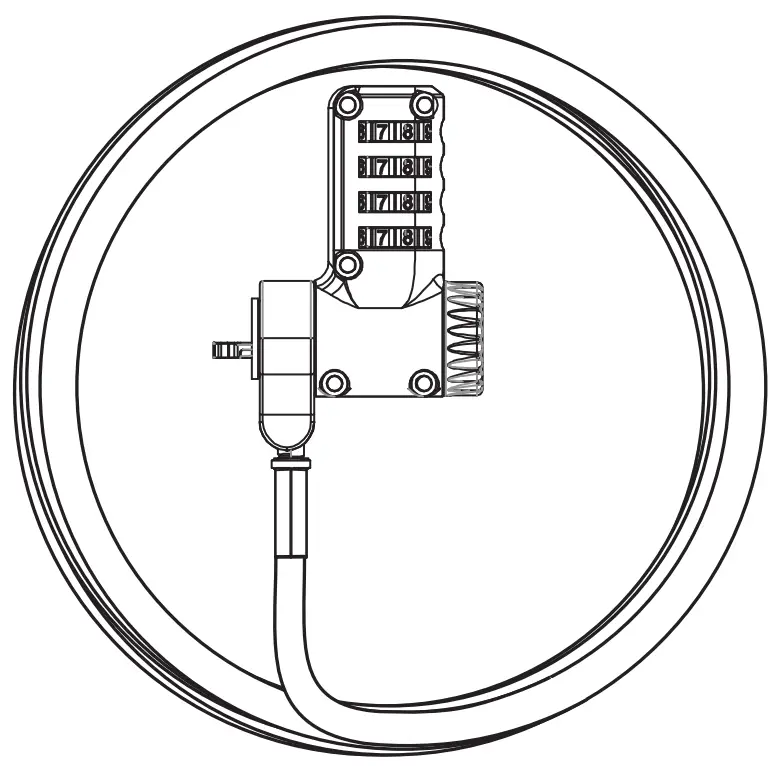 |
| User Guide |  |
Lock Diagram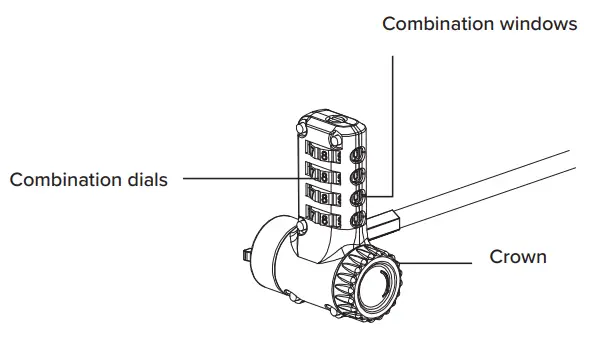
- Set the Combination
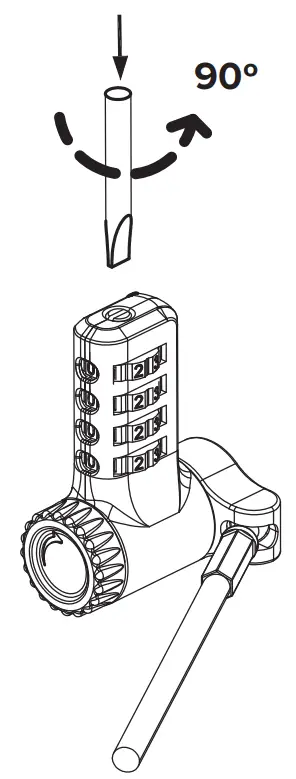
 To reset combination from 0-0-0-0. 1. Press the reset screw and turn 90° anticlockwise. 2. Select your new code (and record it somewhere safe). 3. Press the reset screw and turn 90° clockwise.
 - Record Your Combination

- Attach the Foam Spacer

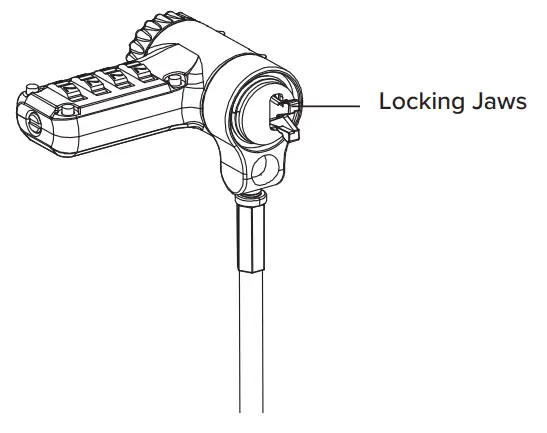
- Lock the Device
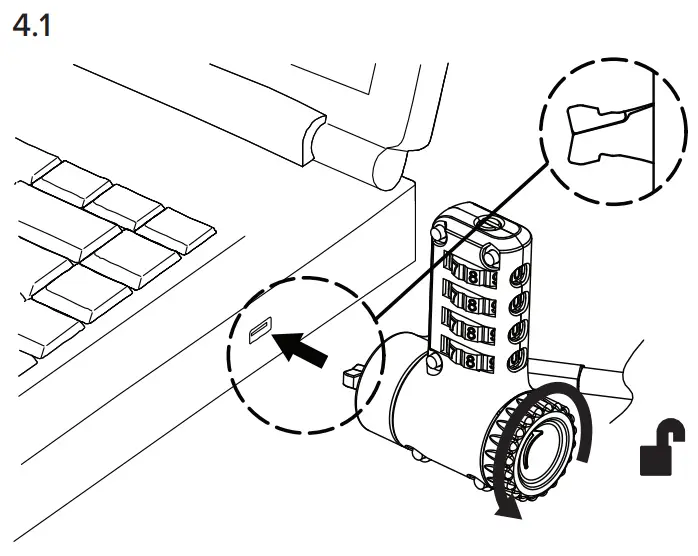
 Before any operation, ensure crown is dialled fully anti-clockwise. Insert the locking tip into the slot.
 Turn the crown clockwise to its limit to make sure the tips are fully expanded.
 Scramble the dials to lock the device.
 - Unlock the Device
 Turn the dials to the correct combination.
 Rotate the crown anti-clockwise to its limit.
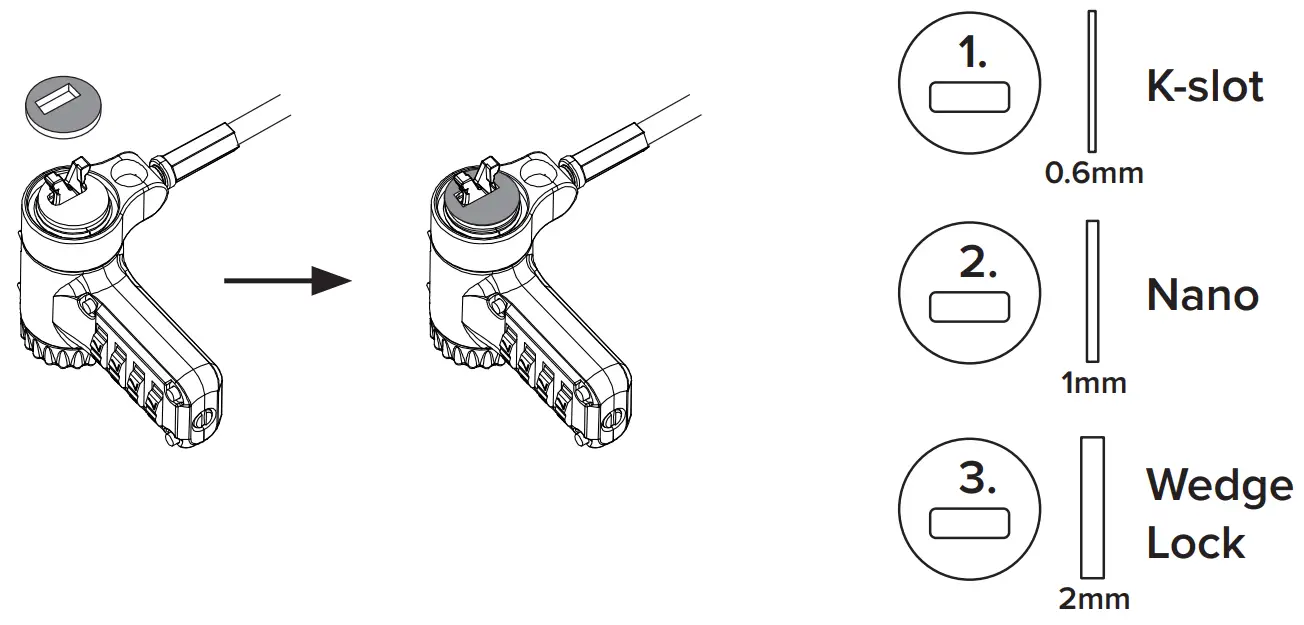
 - DEFCON Security BasePlate – PA400P (Sold Separately)
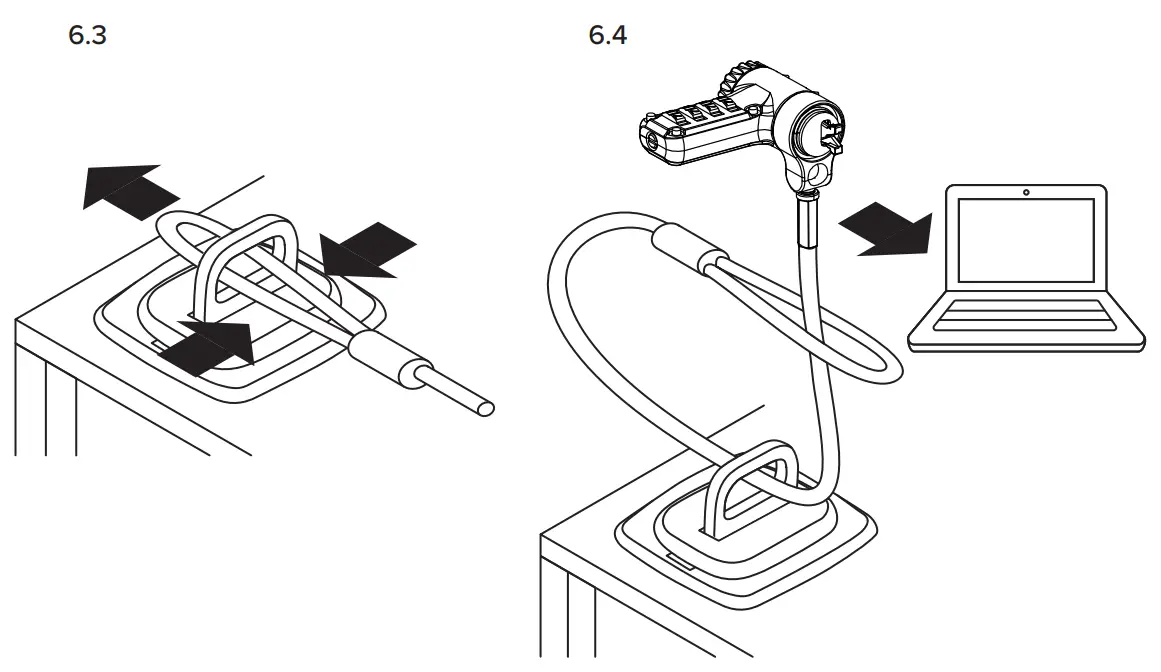
 6.1 OPTION A: Secure with the Anchor (Sold Separately)


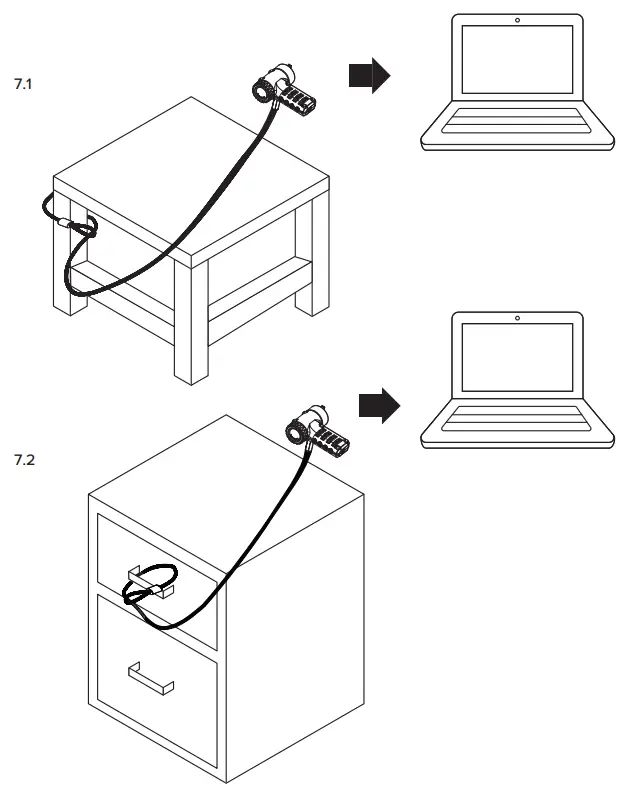
- OPTION B: Securing Without Anchor

 To reset combination from 0-0-0-0. 1. Press the reset screw and turn 90° anticlockwise. 2. Select your new code (and record it somewhere safe). 3. Press the reset screw and turn 90° clockwise.
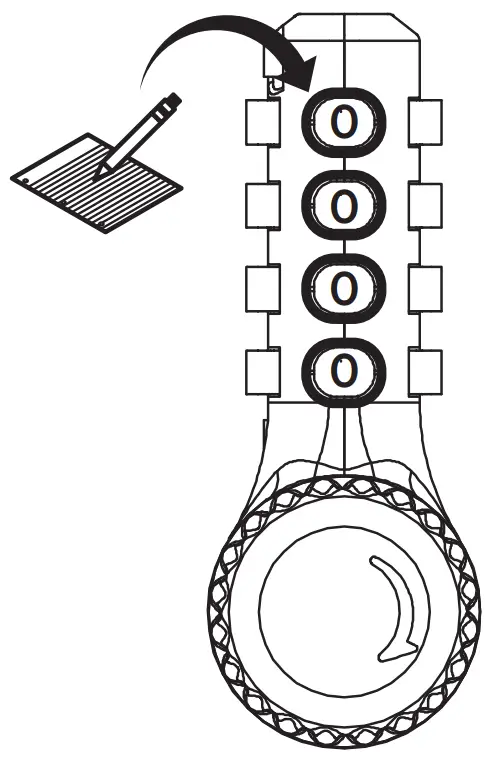
 Before any operation, ensure crown is dialled fully anti-clockwise. Insert the locking tip into the slot.
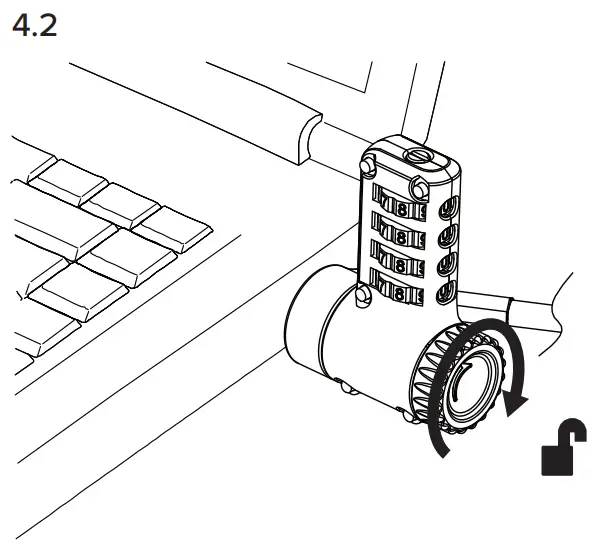 Turn the crown clockwise to its limit to make sure the tips are fully expanded.
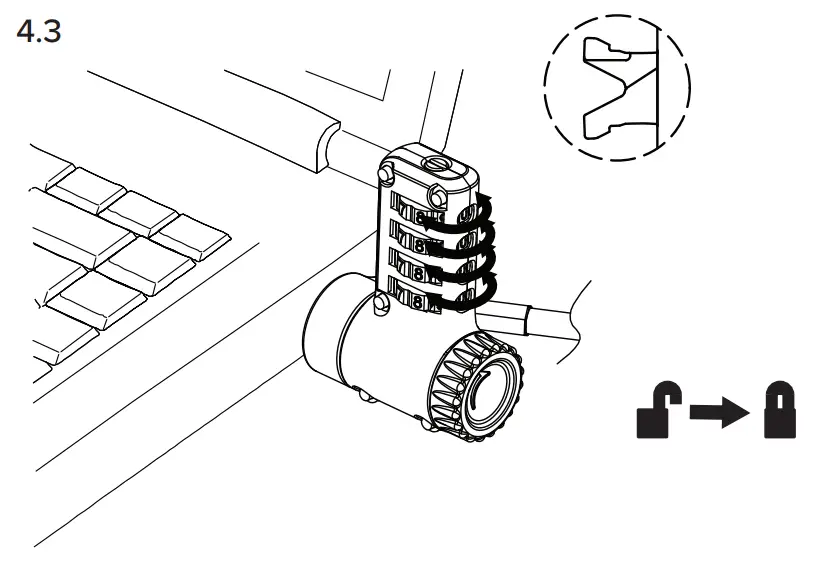 Scramble the dials to lock the device.
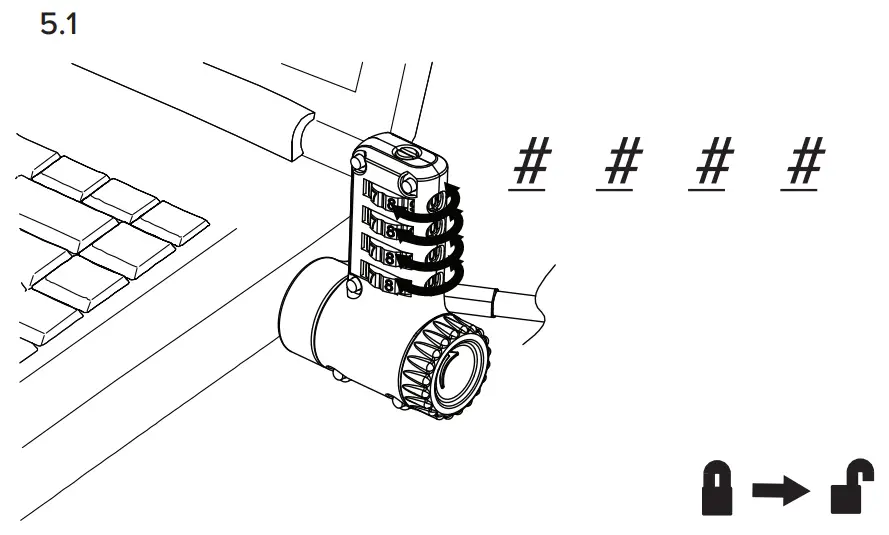 Turn the dials to the correct combination.
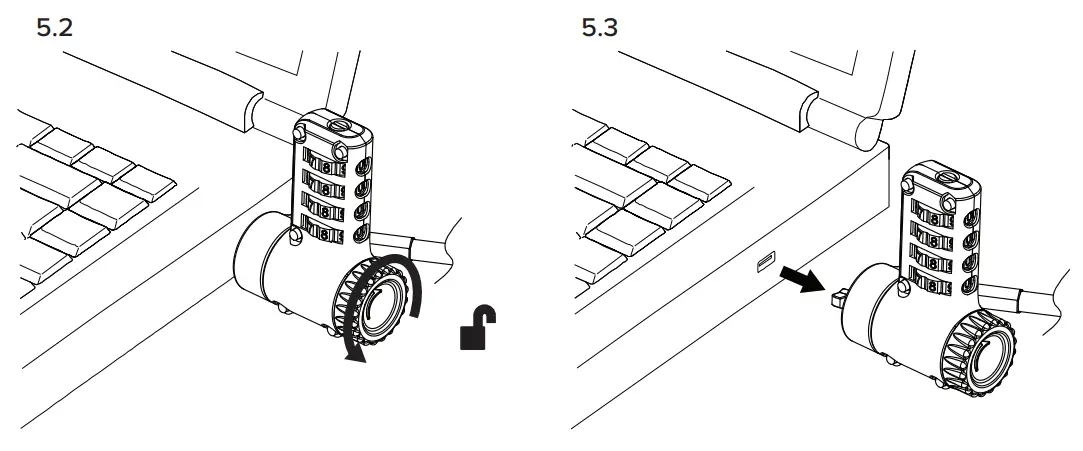 Rotate the crown anti-clockwise to its limit.
 6.1 OPTION A: Secure with the Anchor (Sold Separately)
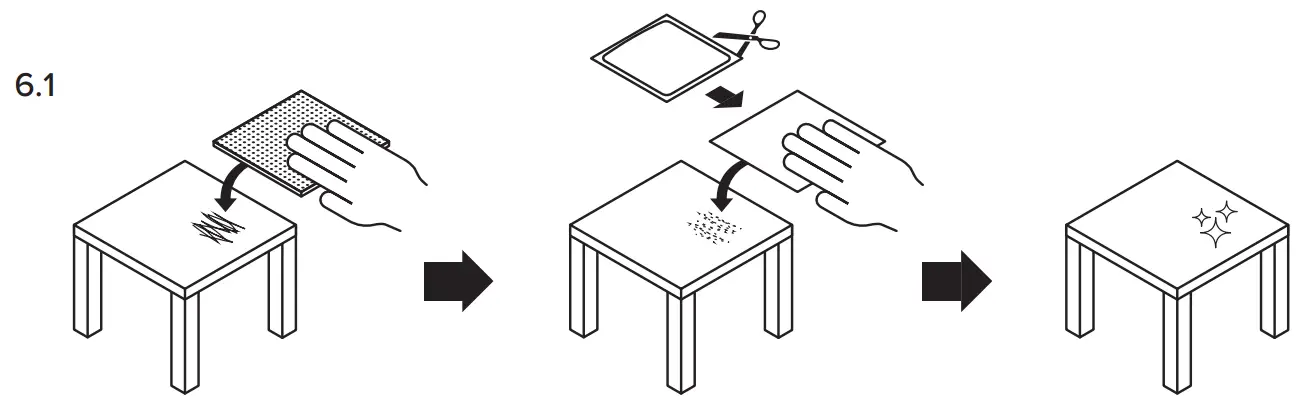

Thank You For Choosing Targus
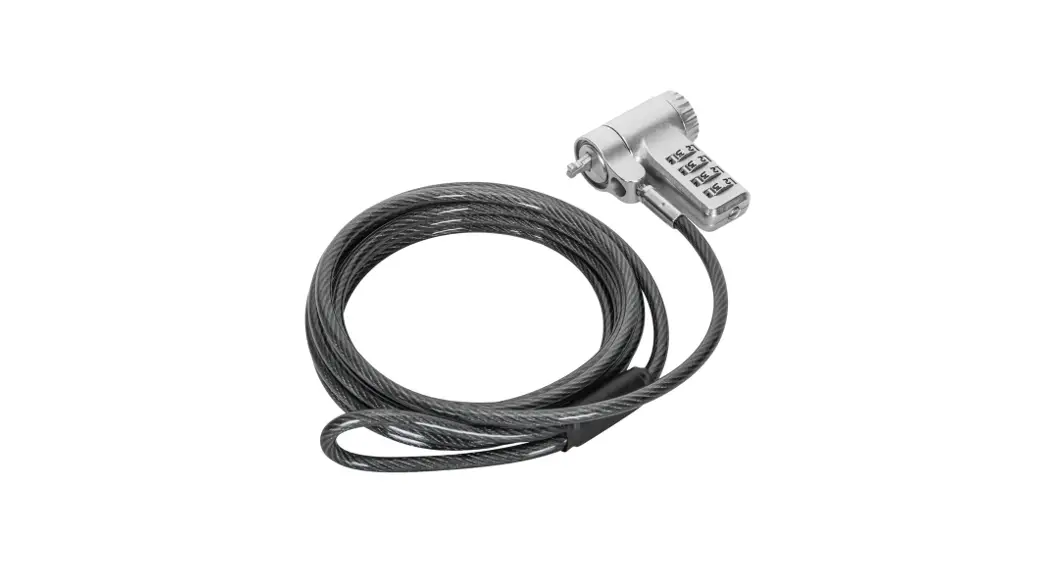
Thank you for purchasing the Targus ASP96RGL/ASP96RGLX Combo Cable Lock. The ASP96RGL/ASP96RGLX helps protect your valuable device from theft using a resettable four-digit combination lock. The resettable combination lock eliminates the need for keys and enables you to change your combination periodically for increased security.
Warranty
2 YEAR LIMITED WARRANTY: We pride ourselves on the quality of our products. For complete warranty details and a list of our worldwide offices, please visit www.targus.com.
Targus product warranty does not cover any device or product that is not manufactured by Targus (including, but not limited to, laptops, smartphones, devices, or any other product that may be used in connection with the Targus product). Targus and Defcon are trademarks of Targus International LLC, registered in the US and in certain other countries. All logos and registered trademarks are the property of their respective owners. ©2021 Targus International LLC, 1211 North Miller St., Anaheim, CA 92806. All rights reserved.
WARNING
DO NOT ATTEMPT TO REMOVE THE COMBINATION CABLE LOCK WITHOUT USING THE COMBINATION. TO DO SO WILL PHYSICALLY DAMAGE YOUR NOTEBOOK
COMPUTER.
- Using the dials, enter the correct combination.
- The combination appears in the windows.
- Press and hold the locking button to realign the locking teeth.
- Remove the Combination Cable Lock from your notebook computer’s lock slot.
Product Registration
Targus recommends that you register your Targus accessory shortly after purchasing it. Go to targus.com/us/product_registration
You will need to provide your full name, email address, country of residence and product information.
Technical Support
For technical questions, please visit:
| US targus.com/us/support 1.800.283.6325 | Australia targus.com/au/support 1800.641.645 (NZ 0800.633.222) |
| CAN Internet: targus.com/ca/support | Latin America [email protected] |
EMEA
targus.com/UK/support
+44 (0)20-7744-0330
AUSTRALIAN AND NEW ZEALAND CONSUMERS ONLY
Thank you for your purchase. Targus warrants to the original purchaser that its products are free from defects in materials and workmanship, during the specified warranty period, and lasts as long as the original purchaser owns the product. The warranty period is stated on the packaging or in the documentation provided with this Targus product. Targus’ Limited Product Warranty excludes damage caused by accident, neglect, abuse, misuse, improper care, normal wear and tear, ownership transfer, or alteration. The limited warranty also excludes any product that is not manufactured by Targus (including, without limitation, laptops, smartphones, devices, tablets, or any other non-Targus item) that is used in connection with the Targus product.
In the event that the Targus product has a defect in materials or workmanship Targus will, after receiving a warranty claim and inspecting the product, at its discretion, do one
of the following: repair, replace, or refund with the same or a similar product (or part) of no lesser quality and ship it to the original purchaser at Targus’ expense. As part of this inspection, proof of purchase will be required. There is no charge for inspection. To make a warranty claim, please contact Targus Australia or New Zealand (see details below), or return the product to the place of purchase. The original purchaser must bear the cost of the delivery to Targus.
Under Australian and/or New Zealand Consumer Laws, in addition to any warranty Targus gives, our products come with guarantees that cannot be excluded. You are entitled to a replacement or refund for a major failure and compensation for any other reasonably foreseeable loss or damage. You are entitled to have the products repaired or replaced if they fail to be of acceptable quality and the failure does not amount to a major failure.
For any warranty question, contact Targus Australia Pty. Ltd. (i) by mail at Suite 2, Level 8, 5 Rider Boulevard, Rhodes NSW 2138, by phone AUS 1800 641 645 or NZ 0800 633 222 or by Email: [email protected]. For additional information, check out our website at targus.com/au/warranty.ailure.
![]() targus.com
targus.com
Patent, see targus.com/patents
Le brevet, voient targus.com/patents![]() 410-4213-001A
410-4213-001A
References
 Computer Accessories, Backpacks, and More | Targus US
-
Customer Support – Targus Australia
-
Laptop Bags | Find Backpacks, Docking Stations and More at Targus – Targus Australia
-
Customer Support | Targus – Targus CA
-
Kundensupport | Beantworten Sie Ihre Fragen online | Bestellen Sie noch heute! - Targus Europa
-
Bolsas y fundas para portátiles | Proteja sus dispositivos en Targus - Targus Europa
-
Support clientèle | Répondez à vos questions en ligne | Commandez dès aujourd'hui ! - Targus Europe
-
Patents: Targus – Targus US
-
Customer Support | Answer Your Questions Online | Targus – Targus UK
-
Product Registration | Targus – Targus US
-
Customer Support | Targus – Targus US
-
Computer Accessories, Backpacks, and More | Targus US


