![]()
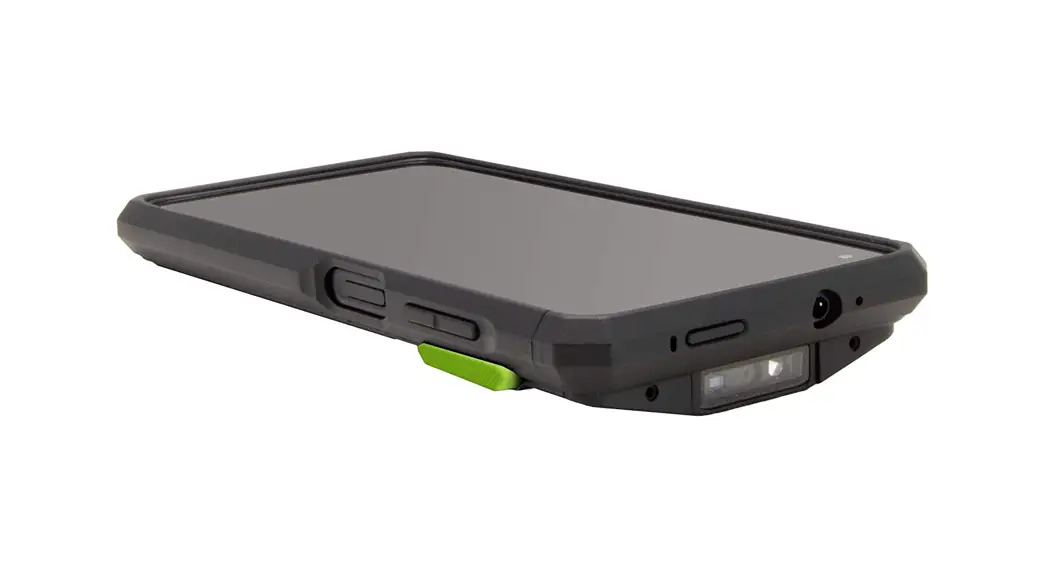
SKXPro
Assembly Manual
‘PHO screwdriver is necessary to complete assembly/dis-assembly.
Assembly Instructions
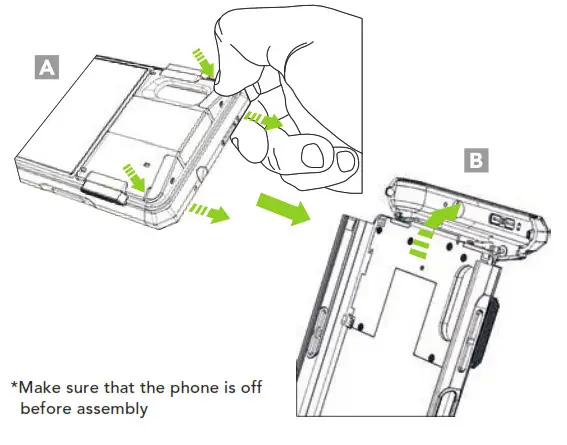
- Place your finger in the grooves on both sides of the SKXPro rear top cover and pull the top cover away from the SKXPro. (A) Then, flip the top cover back as shown as below. (B)

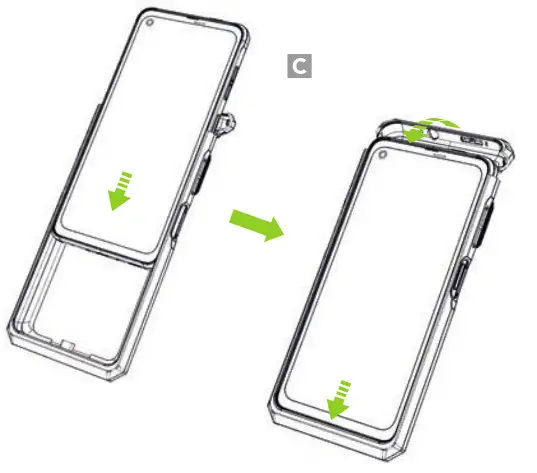
- Slide the XCover Pro into the SKXPro and flip the top cover forward as shown. (C)

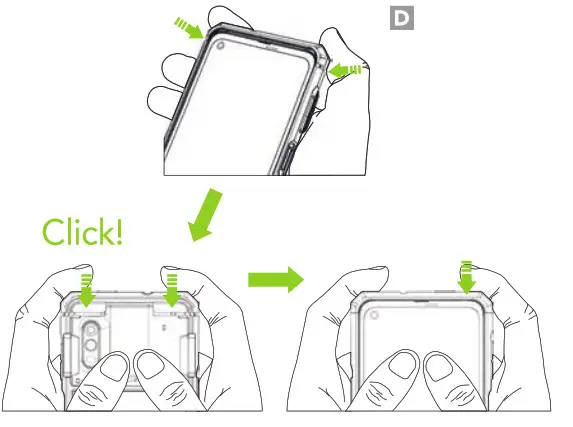
- Align the top cover with the body of the SKXPro and close it by pressing both sides from the back until you hear a click. Press both sides of the top cover once again from the front. (ID)

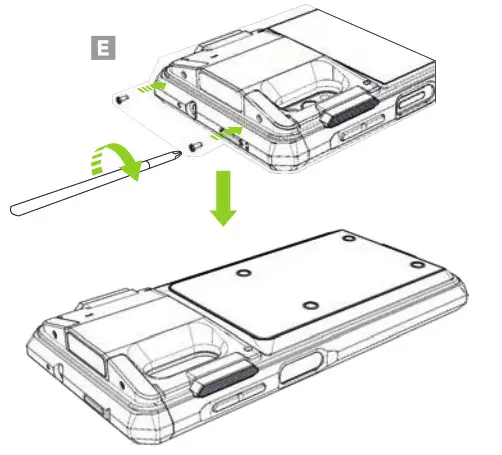
- Using the provided screws, tighten the top cover via the screw holes on both sides of the scanner. (E)

Removing the XCover Pro
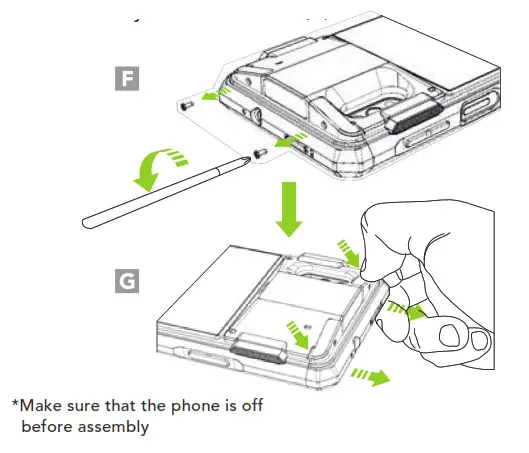
- Remove the screws on both sides of the scanner. (F) Next, remove the top cover by pressing the grooves on both sides of the SKXPro with your finger and pull the top cover away from the SKXPro. (G)

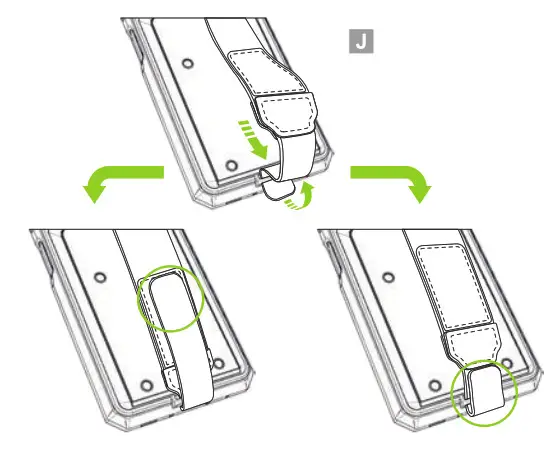
- Loop the hand strap band through the slot on the bottom of SKXPro and attach the hook and loop band to itself. (J)

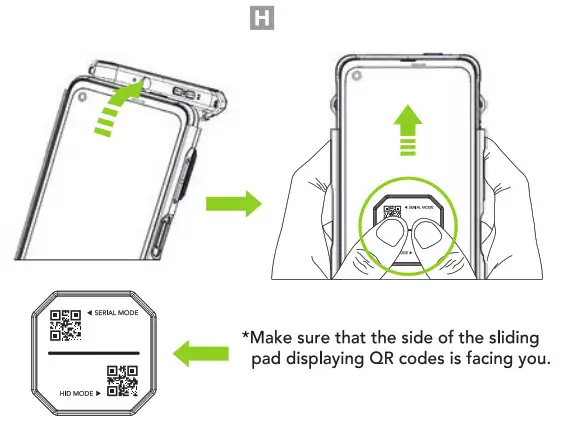
Flip the top cover back. After placing the sliding pad on the XCover Pro screen as shown in the figure, remove the XCover Pro by pushing up the sliding pad with both fingers. (H)
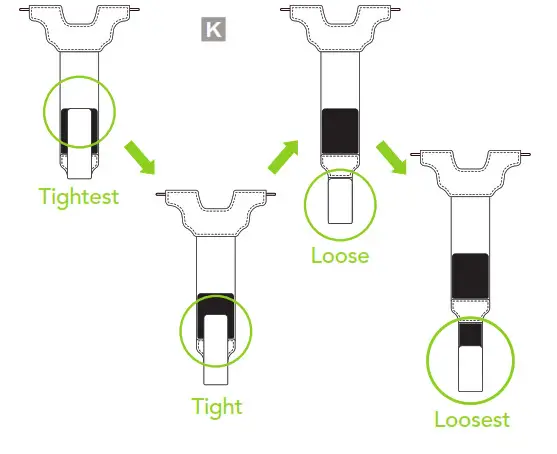
- By adjusting the lower hook and loop section of the hand strap, the length of the hand strap can be tailored four ways to better suit the user. (K)

Hand Strap Assembly Instructions
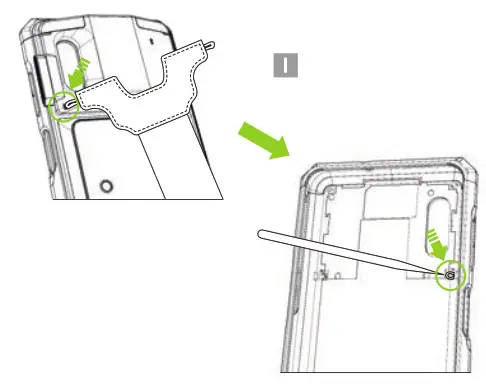
- Slide the hand strap’s left elastic band through the left strap hole of the SKXPro. Use pin or sharp tool to fasten the left elastic band to the plastic tab inside the SKXPro. (I) Repeat the process with the hand strap’s right elastic band.

Protective Boot Assembly Instructions
Push the lower part of the SKXPro into the lower part of the Protective Boot as shown below, and then insert the upper part of the SKXPro into the upper part of the Protective Boot. (L)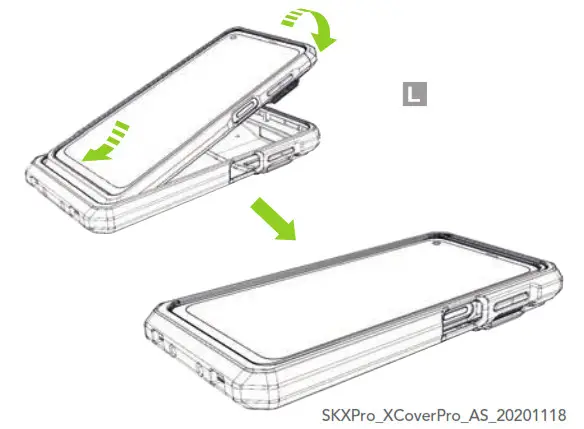
Additional Accessories
- 0.5W UHF Reader Companion
- 1.0W UHF Reader Companion
- 2000mAh Extended Battery Companion
- Pistol Grip Companion (battery optional)
- SKXPro 1-Slot Charging Cradle
- SKXPro 5-Slot Charging Cradle
- SKXPro Pistol Grip 1-Slot Charging Cradle
- $KXPro Pistol Grip 5-Slot Charging Cradle
![]() 116 Village Blvd, Ste 305, Princeton, NJ 08540
116 Village Blvd, Ste 305, Princeton, NJ 08540
+1 609-2564700 | +1 609-228-4373
[email protected] | www.koamtac.com


