![]()
iMac Intel 21.5″ EMC 2308 Hard Drive
Replacement
Replace the hard drive in your iMac Intel 21.5"…
Written By: Andrew Bookholt
This document was generated on 2022-12-01 01:27:13 PM (MST).
INTRODUCTION
Replace the hard drive in your iMac Intel 21.5″.
This guide also includes steps to upgrade your iMac’s hard drive with a SSD. It describes how to install the SSD’s temperature sensor so that the Mac’s fans will operate at the correct speed. Before beginning any work on your iMac: Unplug the computer and press and hold the power button for ten seconds to discharge the power supply’s capacitors. Be very careful not to touch the capacitor leads or any exposed solder joints on the back of the power supply.
![]() TOOLS:
TOOLS:
- Phillips #1 Screwdriver (1)
- Heavy-Duty Suction Cups (Pair) (1)
- Spudger (1)
- TR10 Torx Security Screwdriver (1)
- TR8 Torx Security Screwdriver (1)
![]() PARTS:
PARTS:
- iMac Intel 21.5″ and 27″ Late 2009-Mid 2010 SSD Upgrade Kit (1)
- SATA Universal Drive Adapter (1)
- 1 TB 7200 RPM 3.5″ Hard Drive (1)
- 2 TB SATA Desktop Hard Drive (1)
- 3 TB SATA Desktop Hard Drive (1)
- 4 TB 3.5″ Hard Drive (1)
- 2 TB SSD Hybrid 3.5″ Hard Drive (1)
- 1 TB SSD Hybrid 3.5″ Hard Drive (1)
- 4 TB SSD Hybrid 3.5″ Hard Drive (1)
- iMac Intel 21.5″ and 27″ (Late 2009-Mid 2010) SSD Temperature Sensor (1)
- iFixit 2.5″ to 3.5″ SSD HDD Adapter (1)
Step 1 — Glass Panel
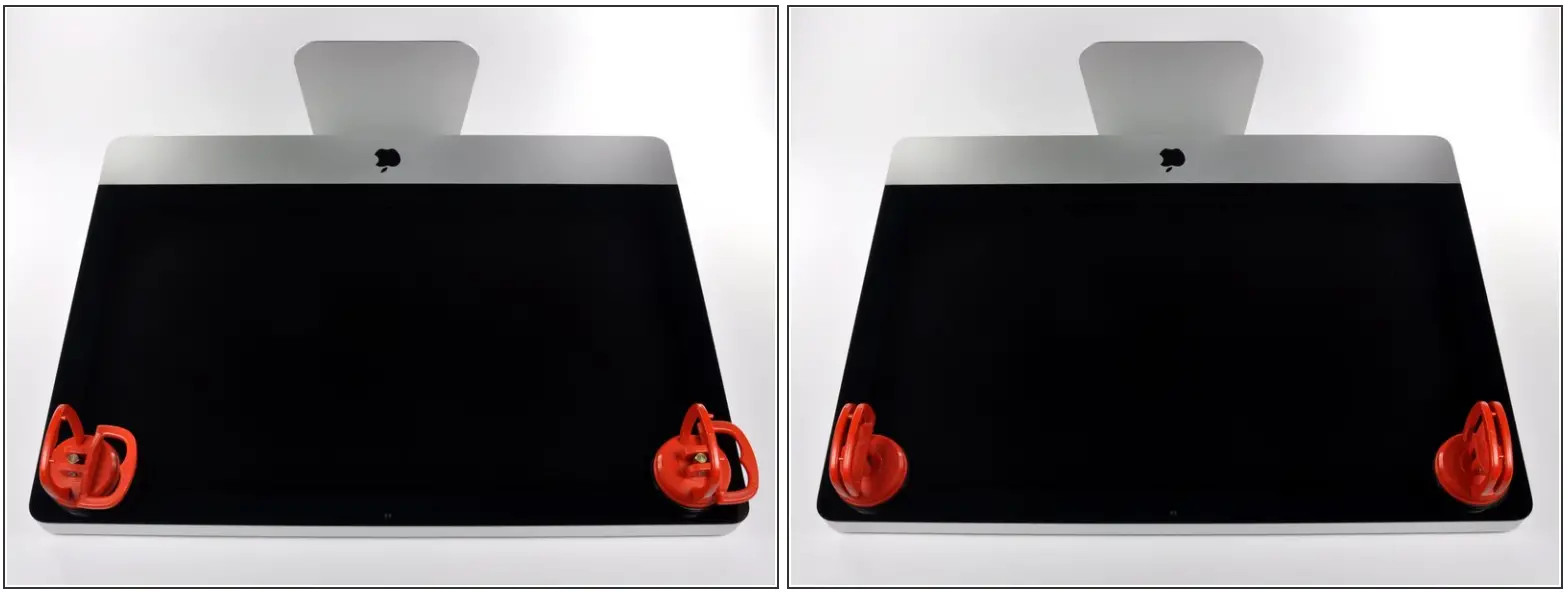
![]() Before beginning, unplug your iMac and lay it on a soft surface as shown.
Before beginning, unplug your iMac and lay it on a soft surface as shown.
• Stick a suction cup near each of the two top corners of the glass panel.![]() To attach the suction cups we sell, first position the suction cup with the movable handle parallel to the face of the glass panel. While lightly holding the suction cup against the glass, raise the movable handle until it is parallel with the other handle.
To attach the suction cups we sell, first position the suction cup with the movable handle parallel to the face of the glass panel. While lightly holding the suction cup against the glass, raise the movable handle until it is parallel with the other handle.
• If your suction cups refuse to stick, try cleaning both the glass panel and the suction cup with a mild solvent.
Step 2
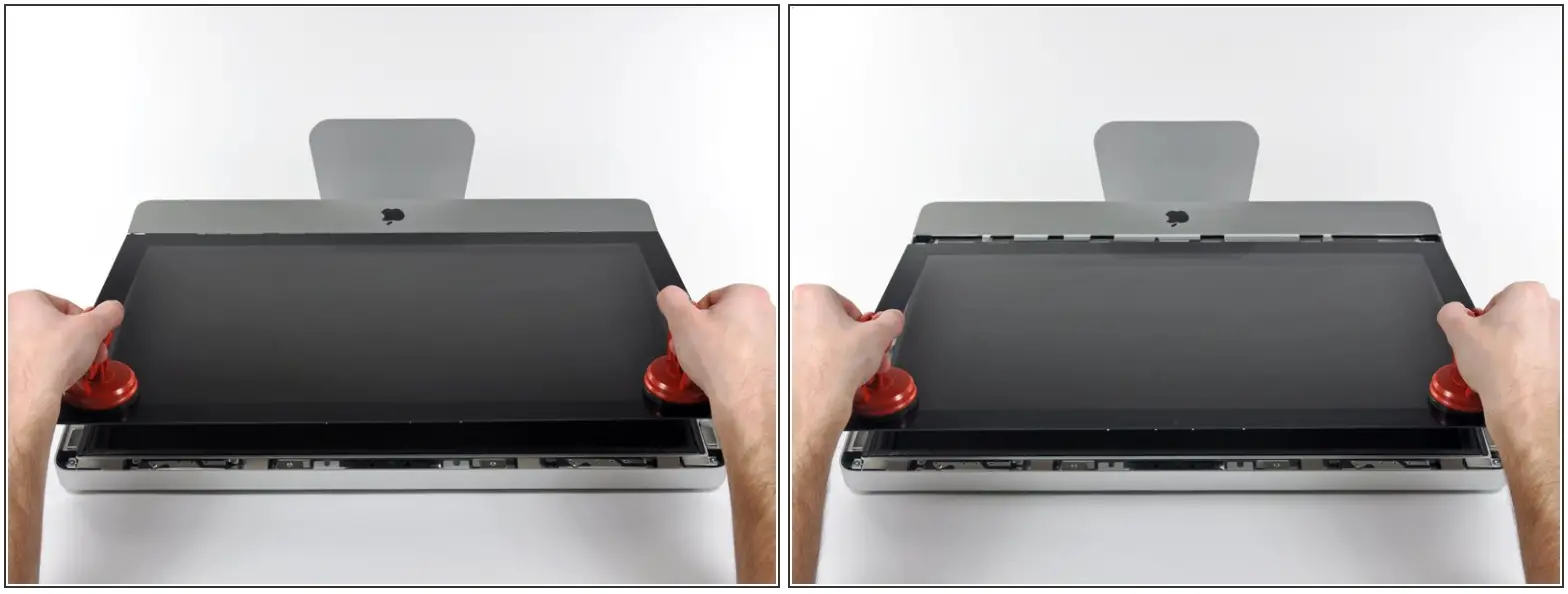
• Gently lift the glass panel perpendicular to the face of the LCD enough to clear the steel mounting pins attached along the underside of the top edge of the glass panel.
• Pull the glass panel away from the lower edge of the iMac and carefully set it aside.![]() During reinstallation, be sure to meticulously clean the inside of the glass panel and the face of the LCD as any dust or fingerprints trapped inside will be annoyingly visible when the machine is turned on.
During reinstallation, be sure to meticulously clean the inside of the glass panel and the face of the LCD as any dust or fingerprints trapped inside will be annoyingly visible when the machine is turned on.
Step 3 — Display
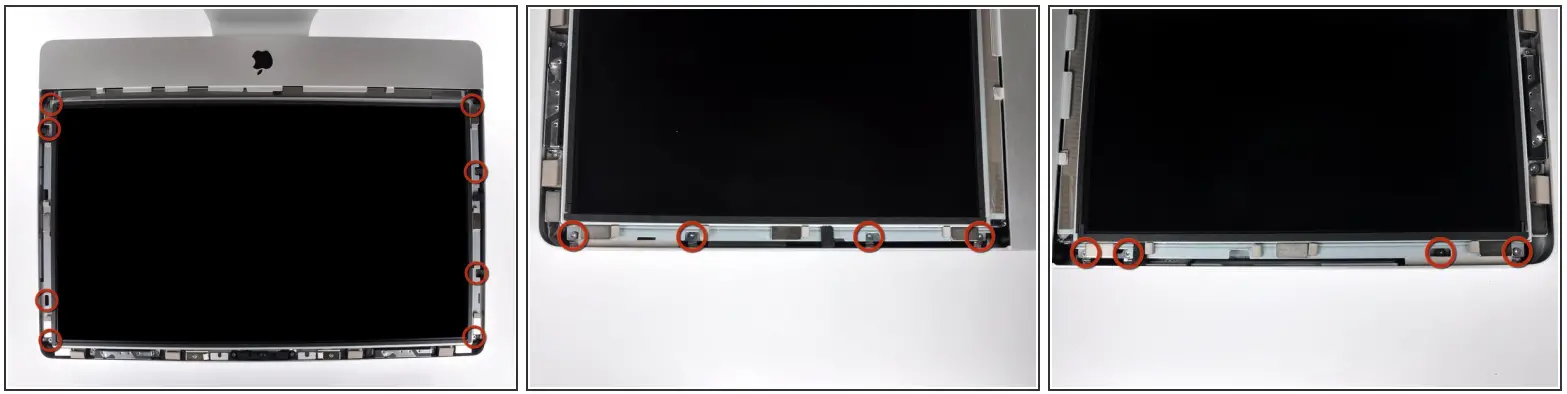
![]() Remove the eight 8 mm T10 Torx screws securing the display to the outer case.
Remove the eight 8 mm T10 Torx screws securing the display to the outer case.![]() The last two pictures are detail shots of each side of the display.
The last two pictures are detail shots of each side of the display.
This document was generated on 2022-12-01 01:27:13 PM (MST).
Step 4
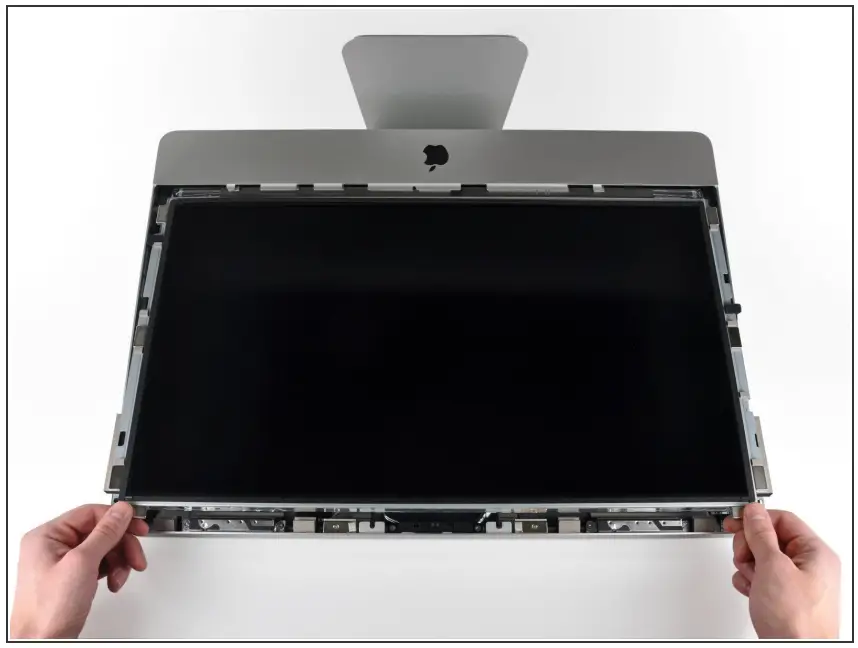
• Slightly lift the top edge of the display out of the outer case.![]() Do not lift it too much. There are several cables attaching the display to the logic board.
Do not lift it too much. There are several cables attaching the display to the logic board.
Step 5
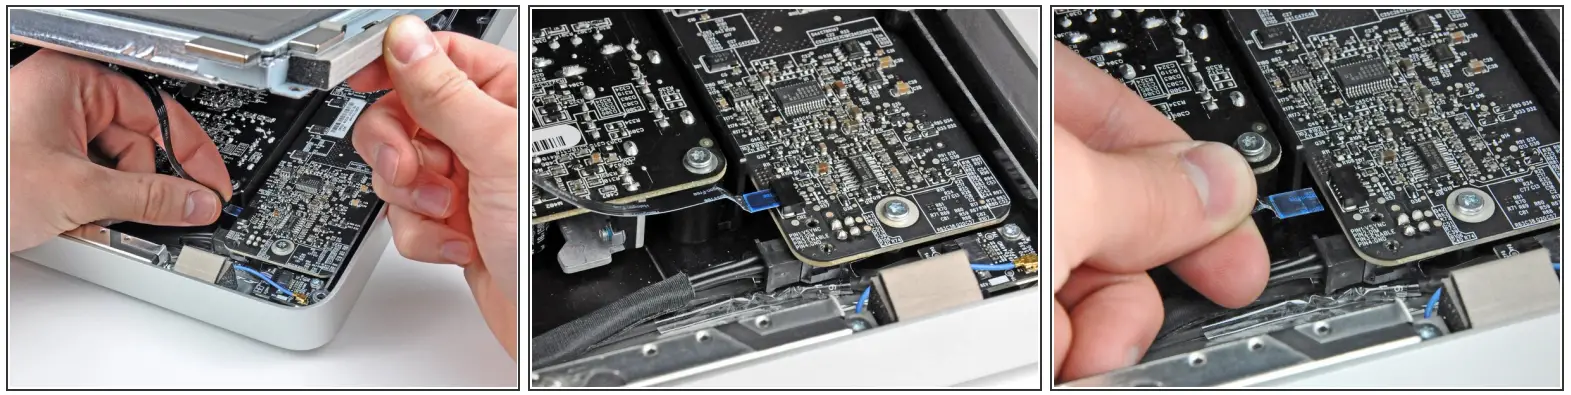
• Pull the vertical sync ribbon cable out of its socket on the LED driver board near the top left corner of your iMac.![]() The vertical sync ribbon cable has a ZIF style end, but the socket has no lock or retaining flap. Simply pull the cable away from its socket toward the optical drive side of the iMac to disconnect it from the LED driver board.
The vertical sync ribbon cable has a ZIF style end, but the socket has no lock or retaining flap. Simply pull the cable away from its socket toward the optical drive side of the iMac to disconnect it from the LED driver board.
Step 6

• Rotate the display out of the outer case enough to disconnect the LED backlight power cable from the LED driver board.![]() Disconnect the LED backlight power cable by depressing the locking mechanism while pulling the connector away from its socket (toward the bottom edge of the iMac).
Disconnect the LED backlight power cable by depressing the locking mechanism while pulling the connector away from its socket (toward the bottom edge of the iMac).
Step 7
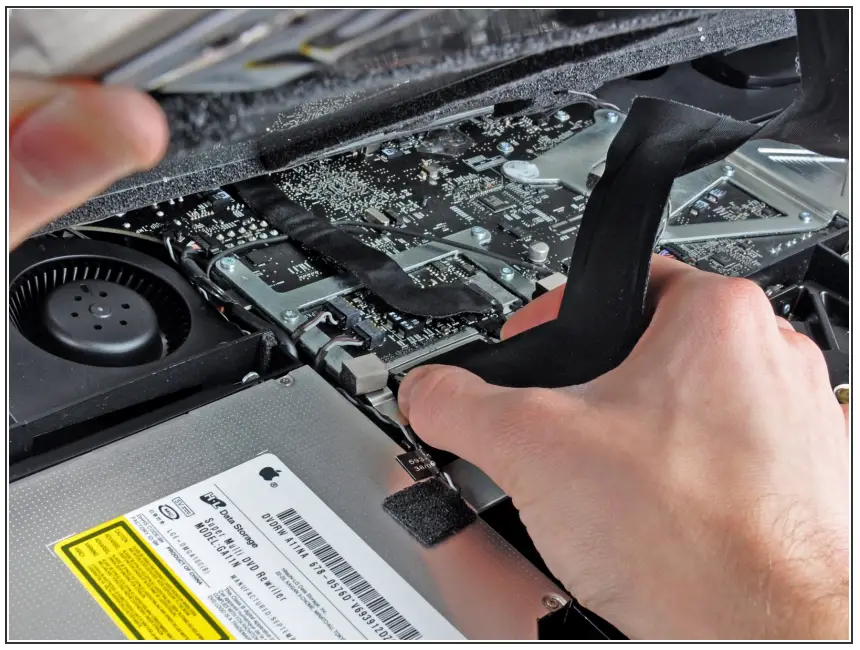
• Squeeze the two display data cable connector arms together to unlock it from its socket on the logic board.
• Pull the display data cable connector away from its socket on the logic board.![]() Be careful when disconnecting and reconnecting this cable, as it is easily damaged.
Be careful when disconnecting and reconnecting this cable, as it is easily damaged.
Step 8
• Disconnect the LCD thermal sensor cable connector from its socket on the logic board.![]() If your fan is spinning full speed after completion, check this connection or the hard drive’s thermal sensor cable.
If your fan is spinning full speed after completion, check this connection or the hard drive’s thermal sensor cable.
Step 9
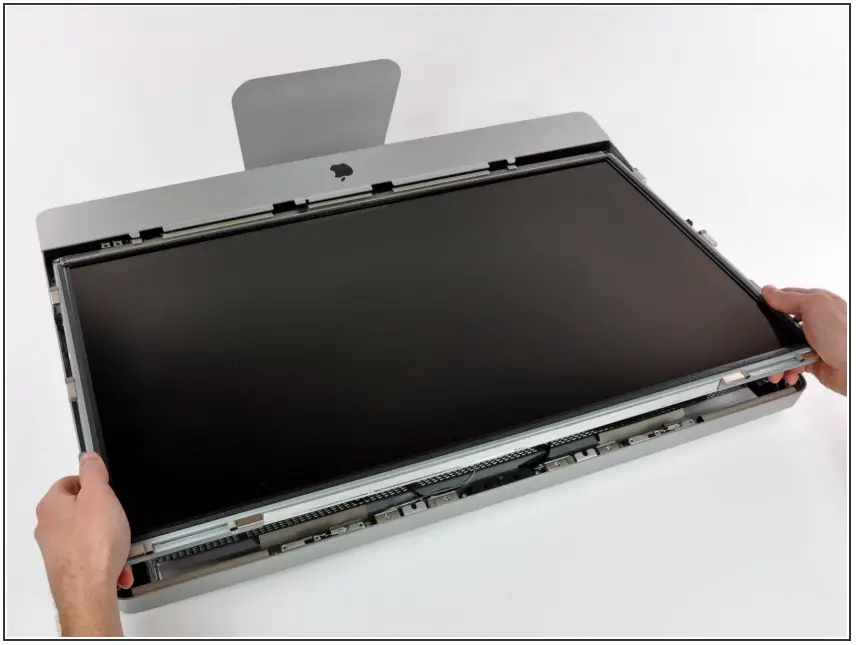
• Carefully pull the display toward the top edge of your iMac and lift it out of the outer case, minding any cables that may get caught.
Step 10 — Hard Drive
![]() Before disconnecting the thermal sensor cable, take note of its orientation. It is extremely important to reinstall the connector reversed from the current orientation so the fans will not run at full speed.
Before disconnecting the thermal sensor cable, take note of its orientation. It is extremely important to reinstall the connector reversed from the current orientation so the fans will not run at full speed.
• Disconnect the thermal sensor by pulling its connector away from the side of the hard drive.![]() During reassembly, be sure that the thermal sensor connector is connected to set of pins closest to the SATA connectors. If the fans spin at full speed, reverse the connector’s position.
During reassembly, be sure that the thermal sensor connector is connected to set of pins closest to the SATA connectors. If the fans spin at full speed, reverse the connector’s position.
Step 11
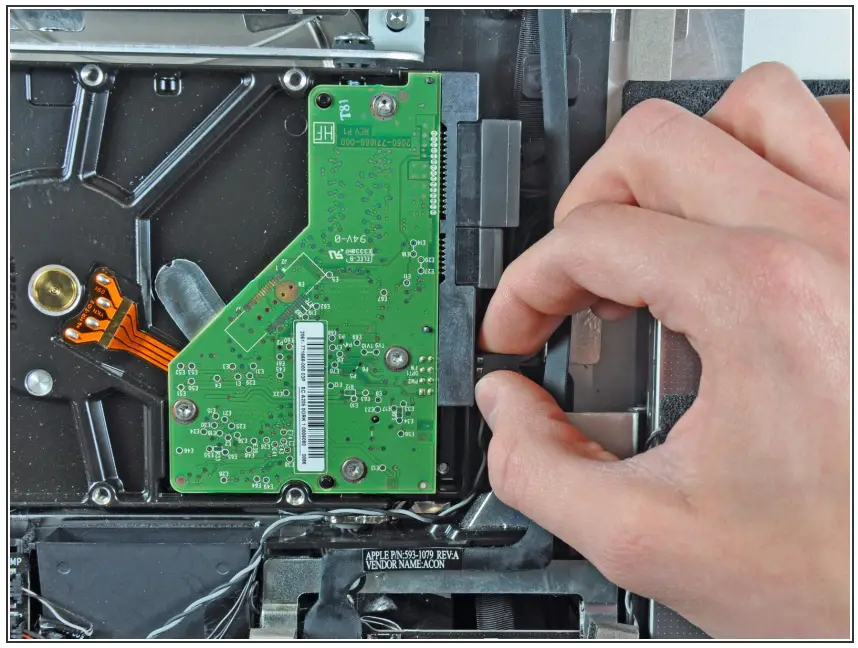
• Disconnect the SATA data cable by pulling its connector away from the hard drive.
• Use the flat end of a spudger to help disconnect the SATA power connector from the hard drive.
Step 12
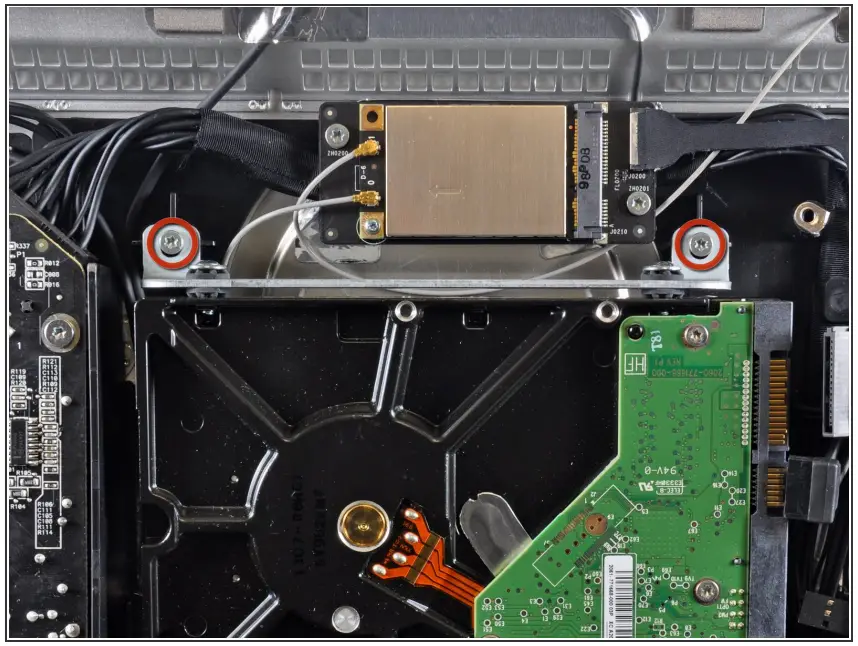
![]() Remove the two 9 mm T10 Torx screws securing the upper hard drive bracket to the outer case.
Remove the two 9 mm T10 Torx screws securing the upper hard drive bracket to the outer case.
Step 13
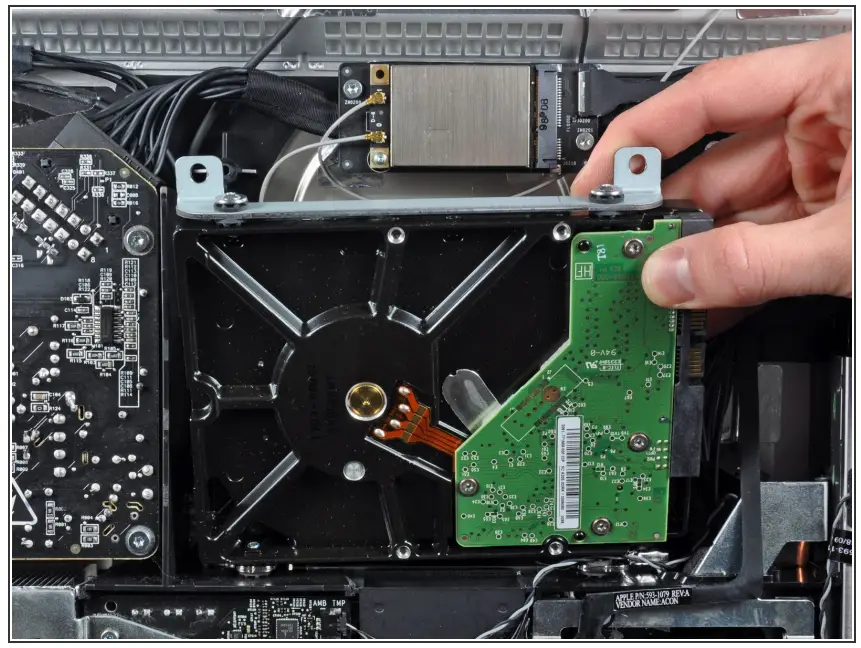
• Slightly rotate the hard drive out of the outer case and lift it up off its mounting pins toward the top edge of the iMac.
Step 14 — Hard Drive
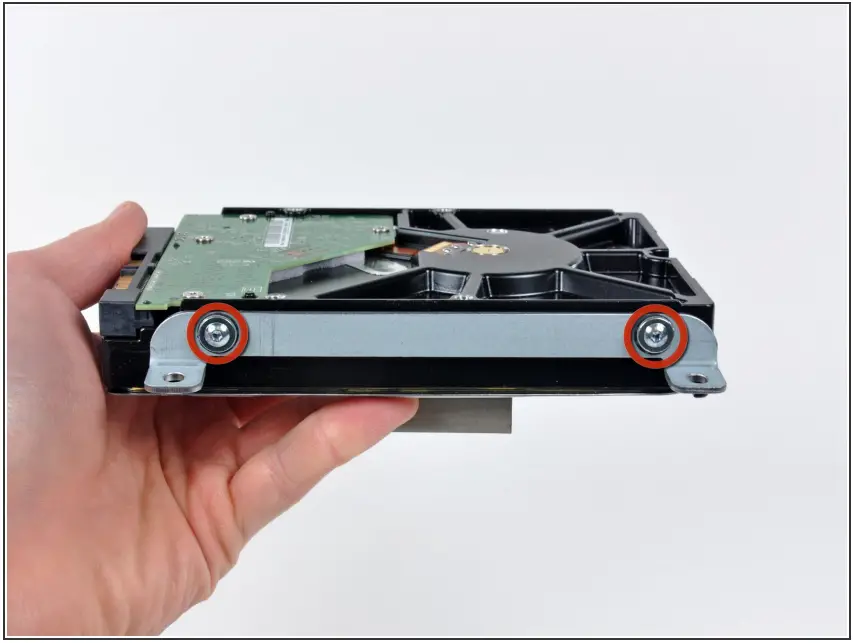
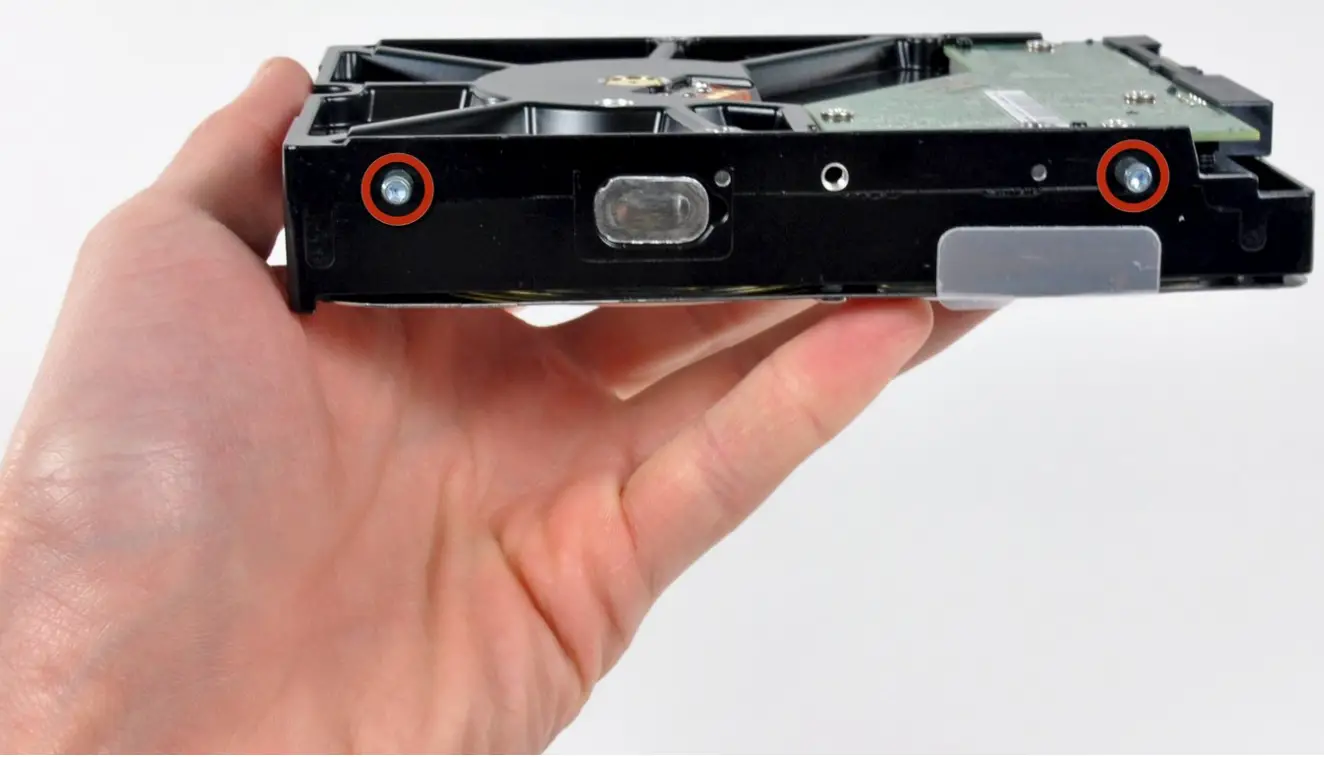
![]() Remove the two T8 Torx screws securing the upper bracket to the hard drive.
Remove the two T8 Torx screws securing the upper bracket to the hard drive.
• Remove the upper bracket from the hard drive.
Step 15
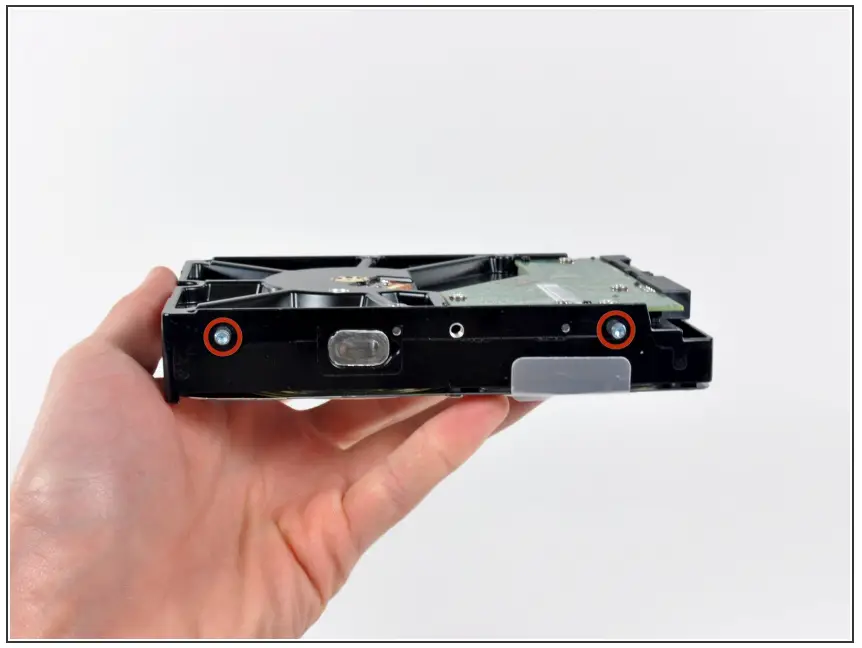
![]() Remove the two T8 Torx pins from the other side of the hard drive.
Remove the two T8 Torx pins from the other side of the hard drive.
Step 16
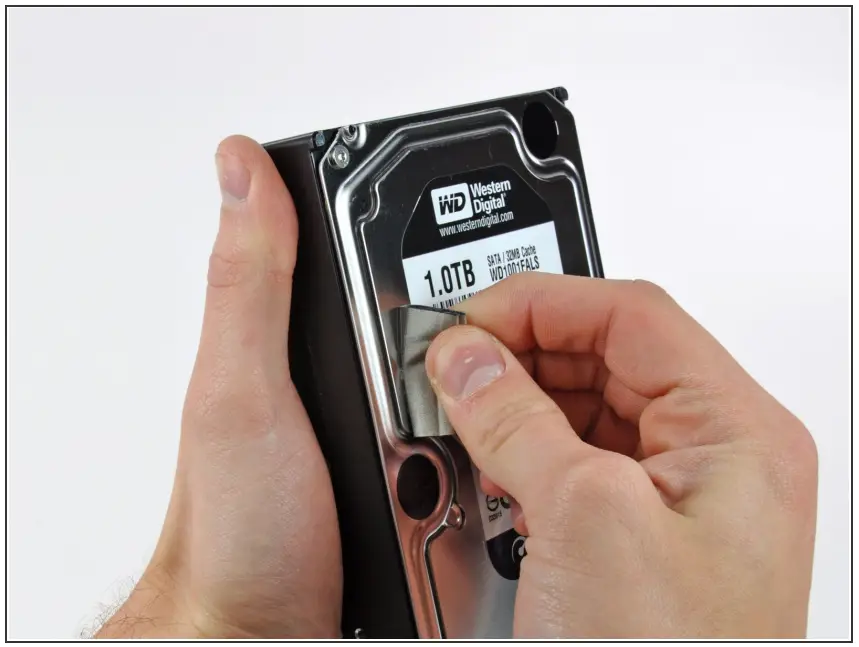
• Carefully peel off the piece of EMI foam attached to the front of the hard drive.![]() Don’t forget to transfer this to your new hard drive.
Don’t forget to transfer this to your new hard drive.
Step 17 — Replace the hard drive with an SSD
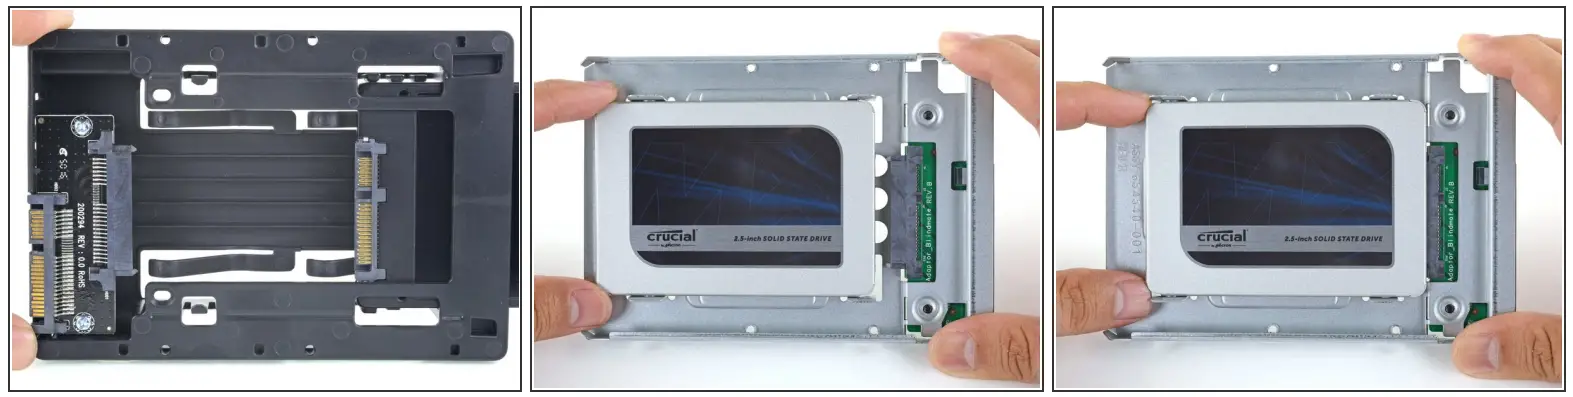
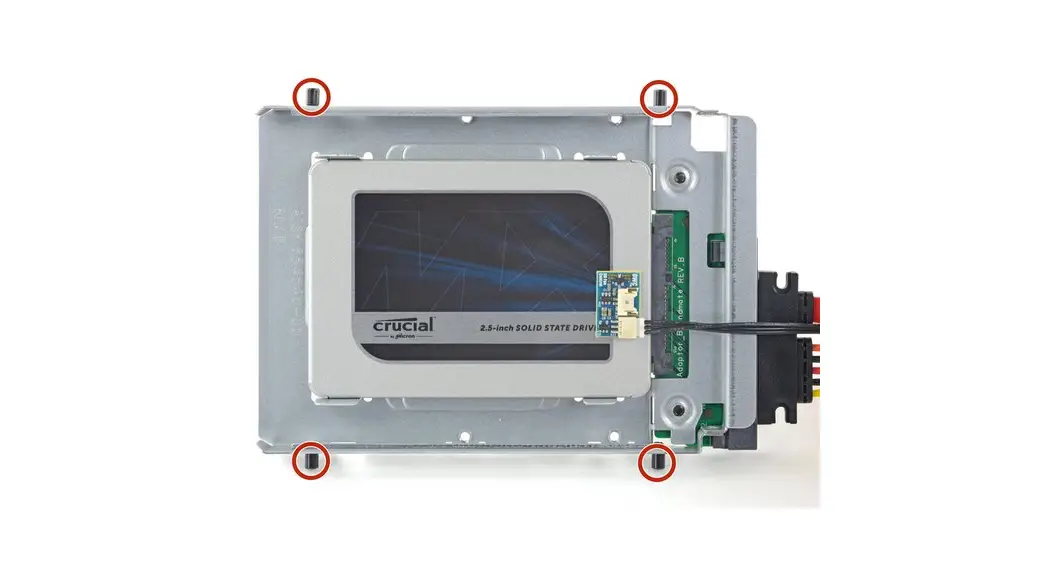
![]() Follow the next steps if you are replacing your hard drive with an SSD kit.
Follow the next steps if you are replacing your hard drive with an SSD kit.![]() If your SSD enclosure looks like the first image, follow this guide instead.
If your SSD enclosure looks like the first image, follow this guide instead.
• Line up the SSD connectors with the metal enclosure’s sockets.
• Press the drive against the enclosure sockets until the SSD is firmly seated.![]() The SSD connects with the enclosure in only one direction. If the connectors don’t line up, rotate the SSD and try again.
The SSD connects with the enclosure in only one direction. If the connectors don’t line up, rotate the SSD and try again.
Step 18
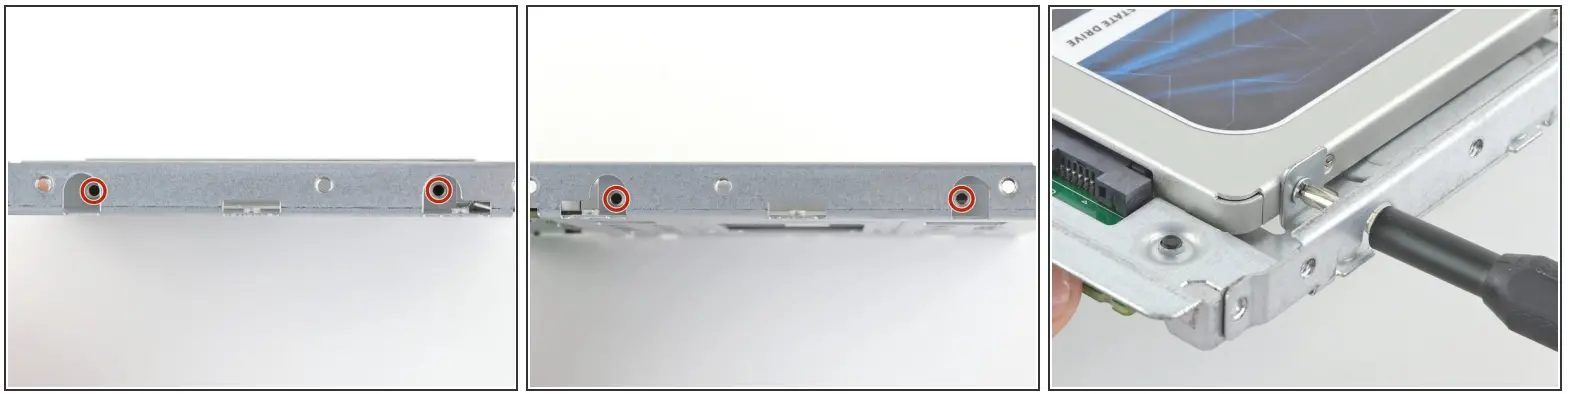
![]() Use a Phillips screwdriver to install the four silver screws (two on each side) along the edges of the SSD to secure it to the enclosure.
Use a Phillips screwdriver to install the four silver screws (two on each side) along the edges of the SSD to secure it to the enclosure.
Step 19
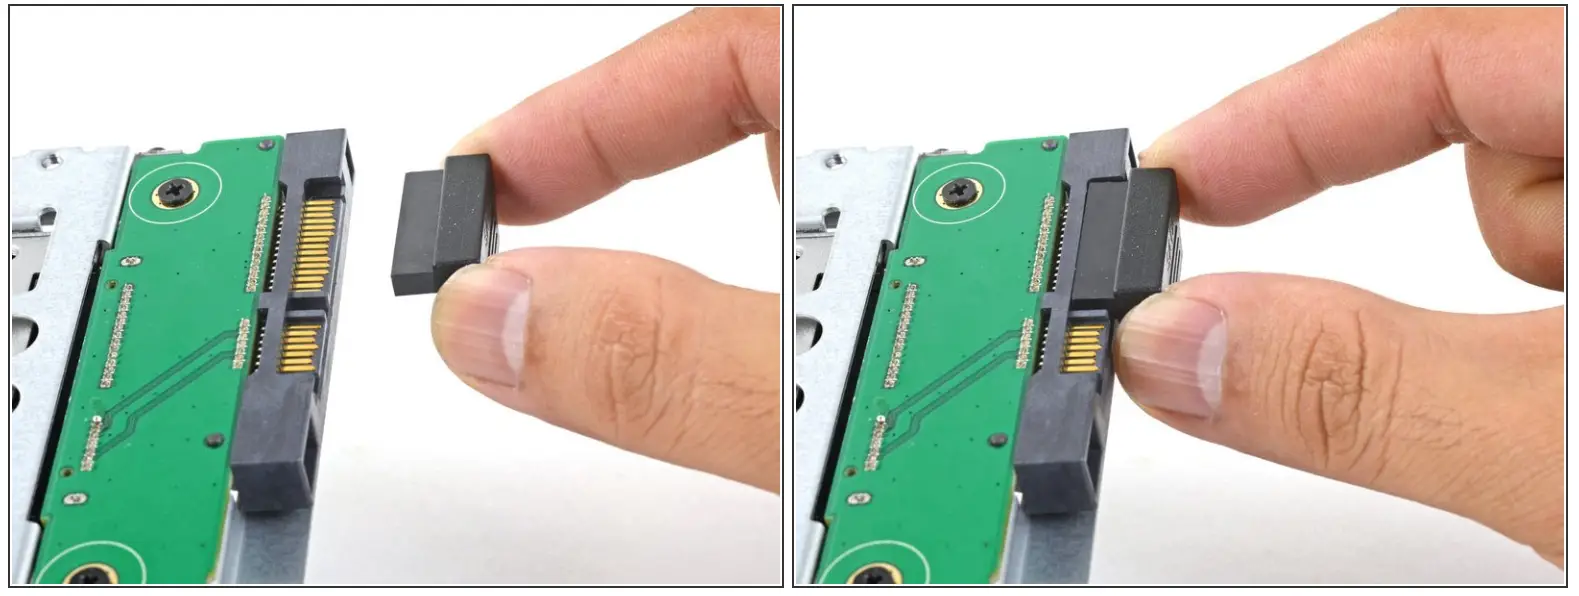
• Plug the included sensor-enabled SATA power cable into the enclosure’s port.![]() The cable is keyed to connect in only one orientation. If you can’t connect the cable, rotate it 180° and try again.
The cable is keyed to connect in only one orientation. If you can’t connect the cable, rotate it 180° and try again.
Step 20
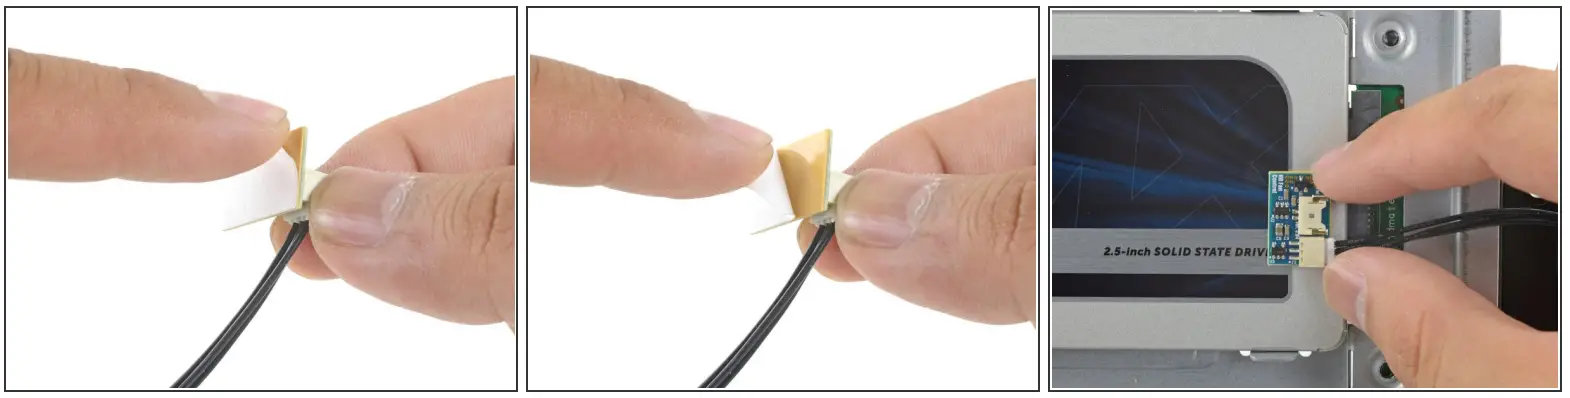
- Peel the white liner off the back of the small temperature sensor board in order to expose the adhesive.
- Adhere the temperature sensor board to an exposed, metal surface of the SSD, close to the SATA connector.
- Fold the excess temperature sensor wires so that they are out of the way while you install the enclosure.
Step 21
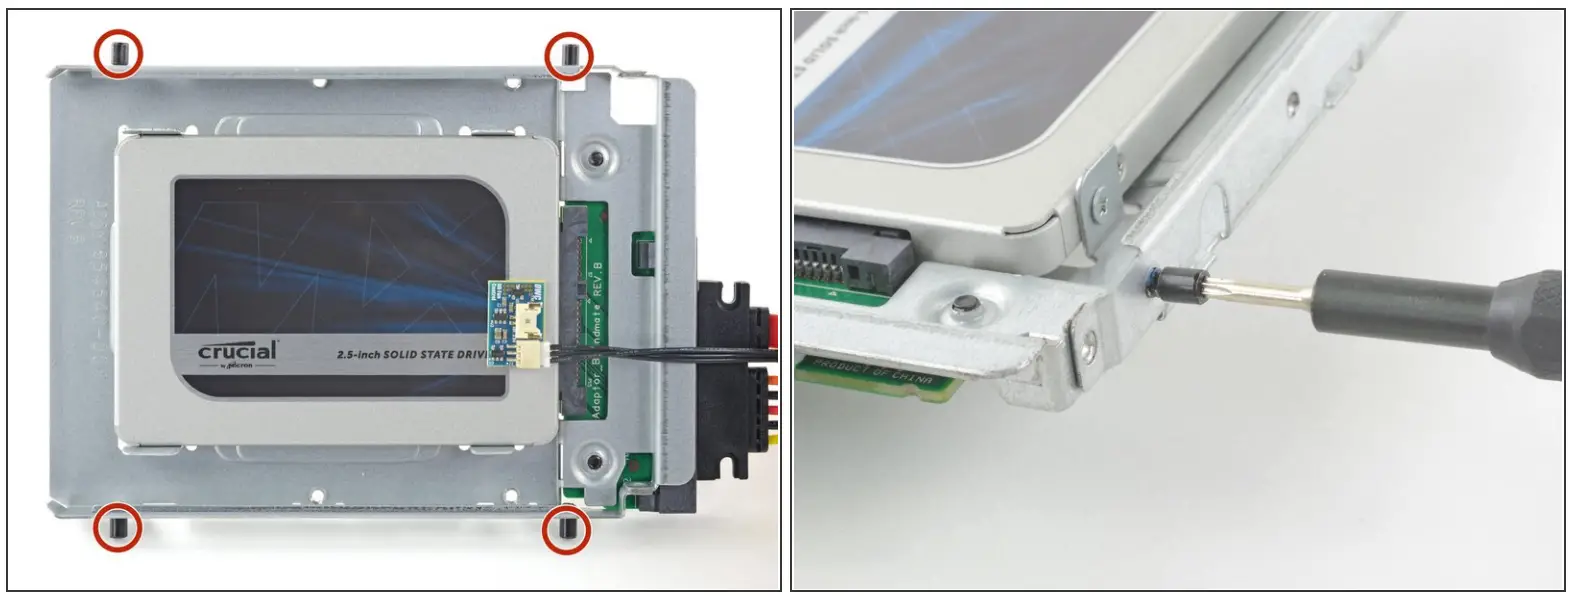
![]() Use a T8 driver to install the mounting pins from the old hard drive onto the sides of the enclosure.
Use a T8 driver to install the mounting pins from the old hard drive onto the sides of the enclosure.
Step 22
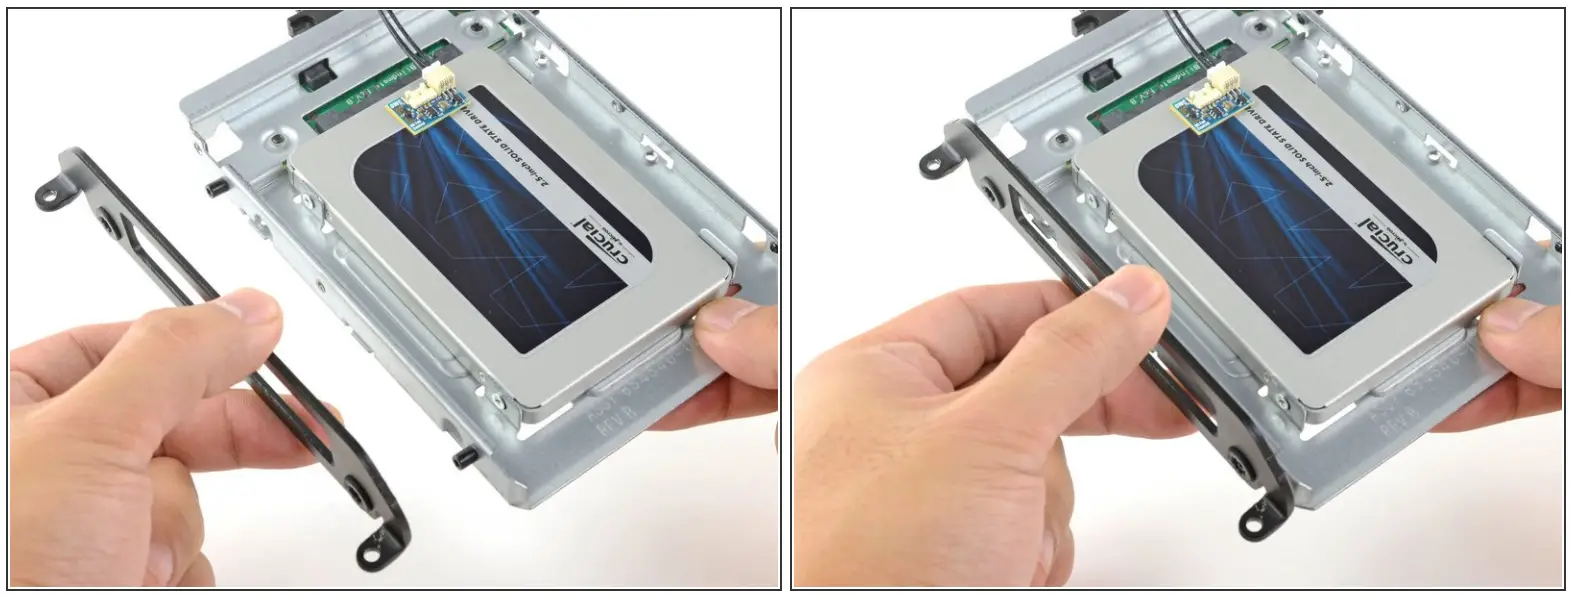
• Attach any mounting brackets removed from the old hard drive onto the enclosure.
Step 23
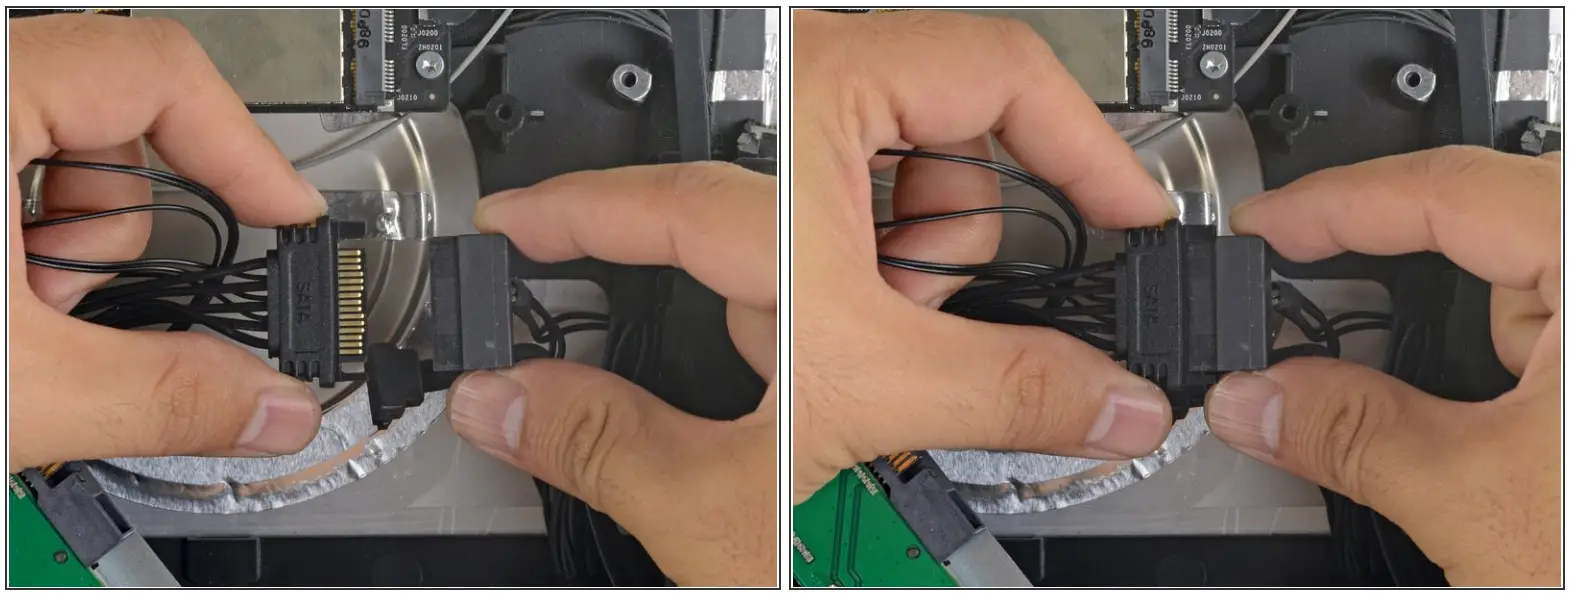
- Connect the iMac’s SATA power cable to the other end of the new sensor-enabled SATA cable.
Step 24
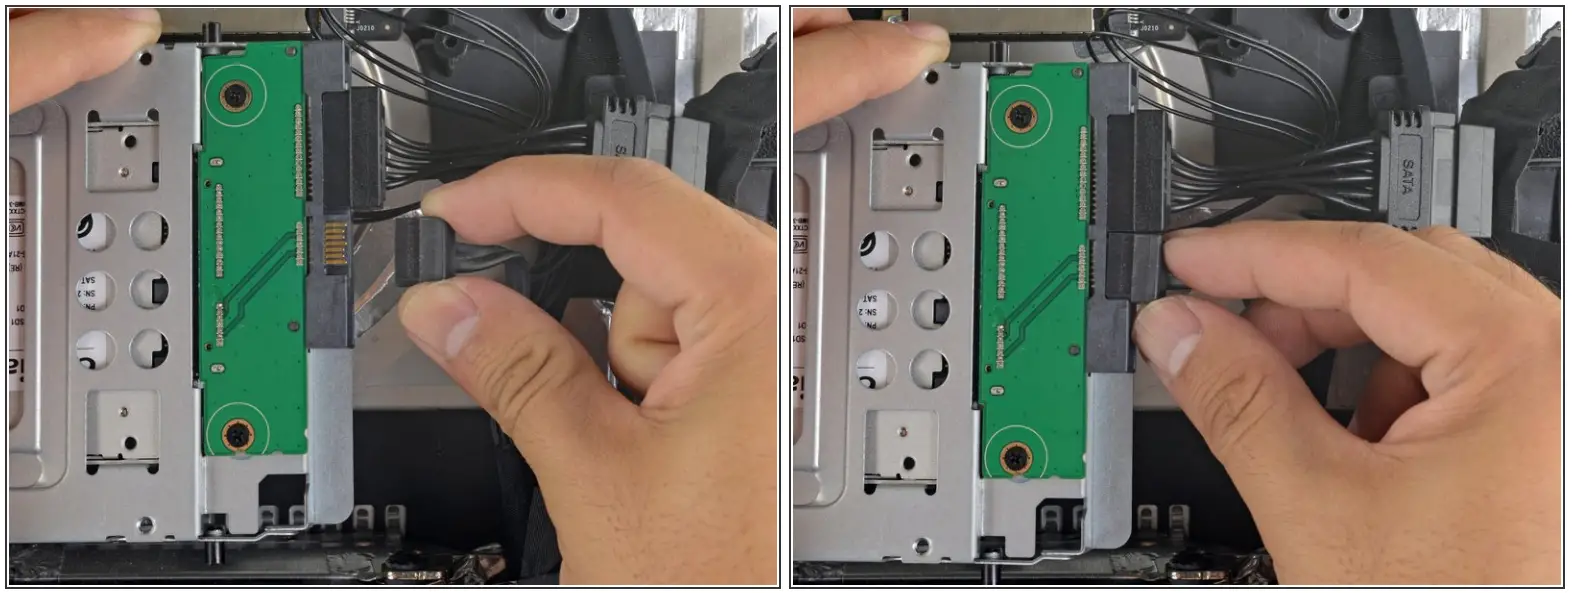
- Connect the iMac’s SATA data cable to the enclosure’s socket.
Step 25
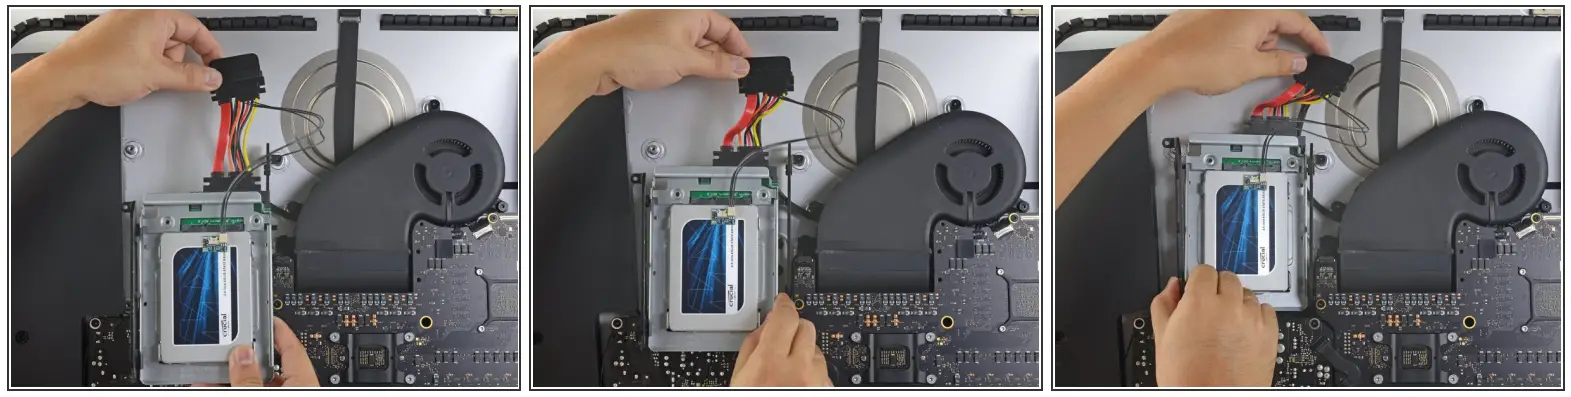
![]() The images used in this step come from a 2017 iMac. Your cables may look slightly different, but the procedure remains the same.
The images used in this step come from a 2017 iMac. Your cables may look slightly different, but the procedure remains the same.
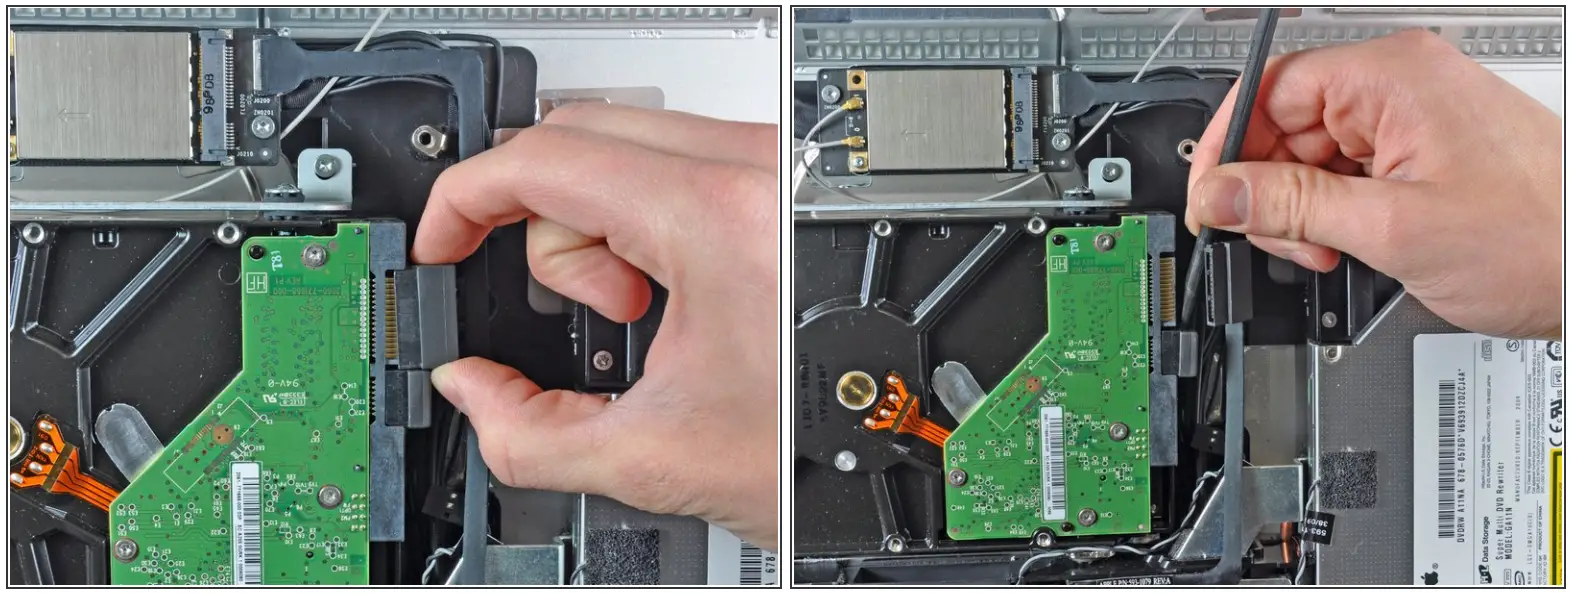
• Slide the SSD enclosure into the space previously occupied by the hard drive.
• Route the SATA cables so that they will not interfere with any other components.![]() Try to keep the cables free from any sharp bends, and route them such that they are not pinched.
Try to keep the cables free from any sharp bends, and route them such that they are not pinched.
Step 26
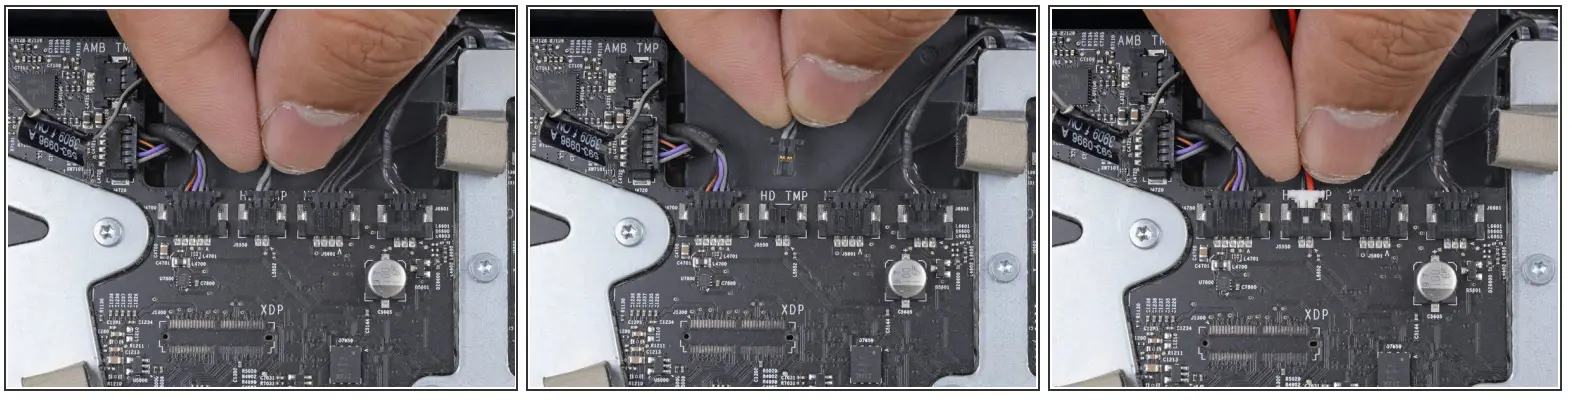
![]() If your motherboard has a socket for a hard drive temperature sensor, follow this step to plug the sensor wires in.
If your motherboard has a socket for a hard drive temperature sensor, follow this step to plug the sensor wires in.
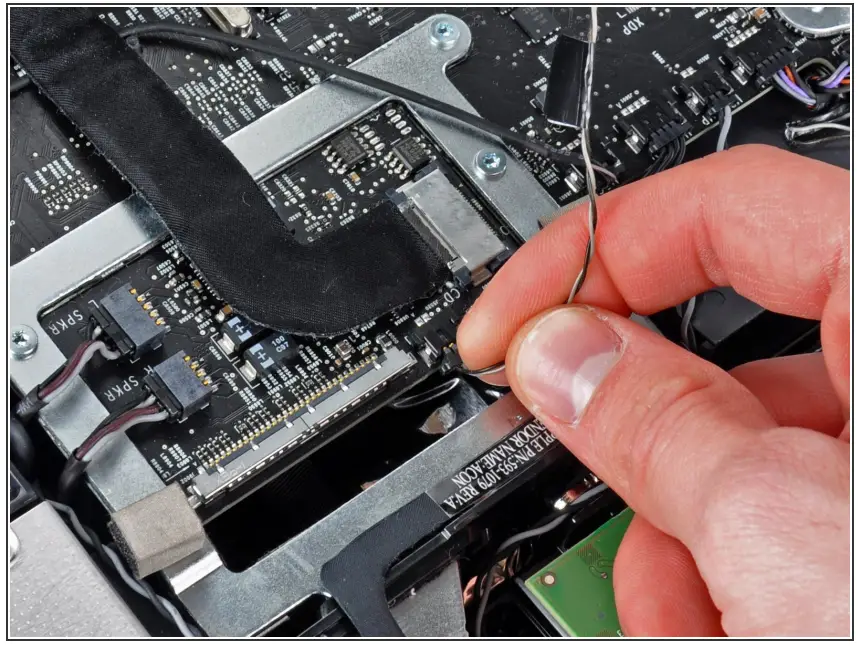
• Find the connector on the motherboard labeled HD TMP or HDD TEMP.![]() If you have trouble locating it, trace the two-wire temperature cable you disconnected from the old hard drive.
If you have trouble locating it, trace the two-wire temperature cable you disconnected from the old hard drive.
• If the previous temperature cable is still connected to the board here, disconnect and remove it.
You will no longer need it.
• Connect the temperature sensor’s two-wire red-black cable to the motherboard plug labeled HD TMP or HDD TEMP.![]() The connector is keyed to fit in only one orientation. If it doesn’t fit one way, rotate it 180° and try again.
The connector is keyed to fit in only one orientation. If it doesn’t fit one way, rotate it 180° and try again.
• Route the excess wire so it does not interfere with any other components.
To reassemble your device, follow these instructions in reverse order.
This document was generated on 2022-12-01 01:27:13 PM (MST).
© iFixit — CC BY-NC-SA
www.iFixit.com
References
 Amazon.com : 3 TB SATA Desktop Hard Drive
 eustore.ifixit.com/products/heavy-duty-suction-cups-pair
-
eustore.ifixit.com/products/phillips-1-screwdriver
-
eustore.ifixit.com/products/spudger
-
eustore.ifixit.com/products/tr10-torx-security-screwdriver
-
eustore.ifixit.com/products/tr8-torx-security-screwdriver
-
Amazon.com : 2 TB SATA hard drive
-
Amazon.com : 4 TB SSD Hybrid 3.5%22 Hard Drive
-
iMac 2009-2010 SSD Replacement (2009, 2010) - iFixit Repair Guide


