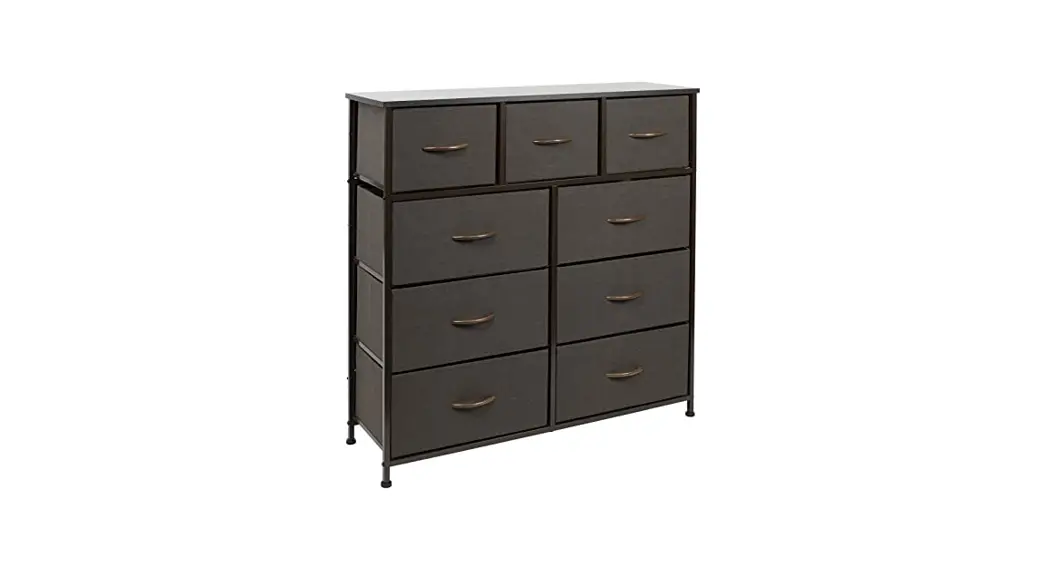
![]() DRW-9D-RUB 9 Drawer Storage
DRW-9D-RUB 9 Drawer Storage
Instruction Manual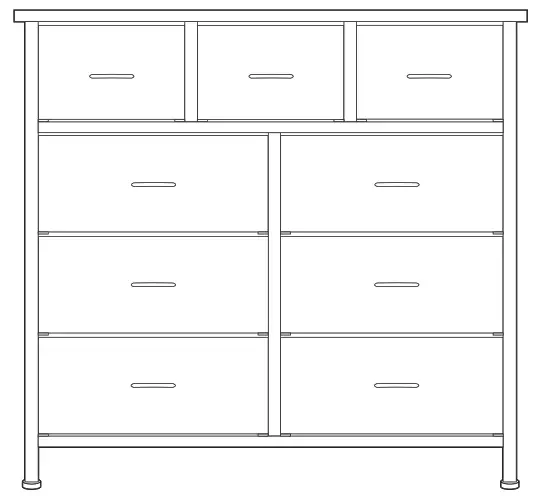
DRW-9D-RUB 9 Drawer Storage
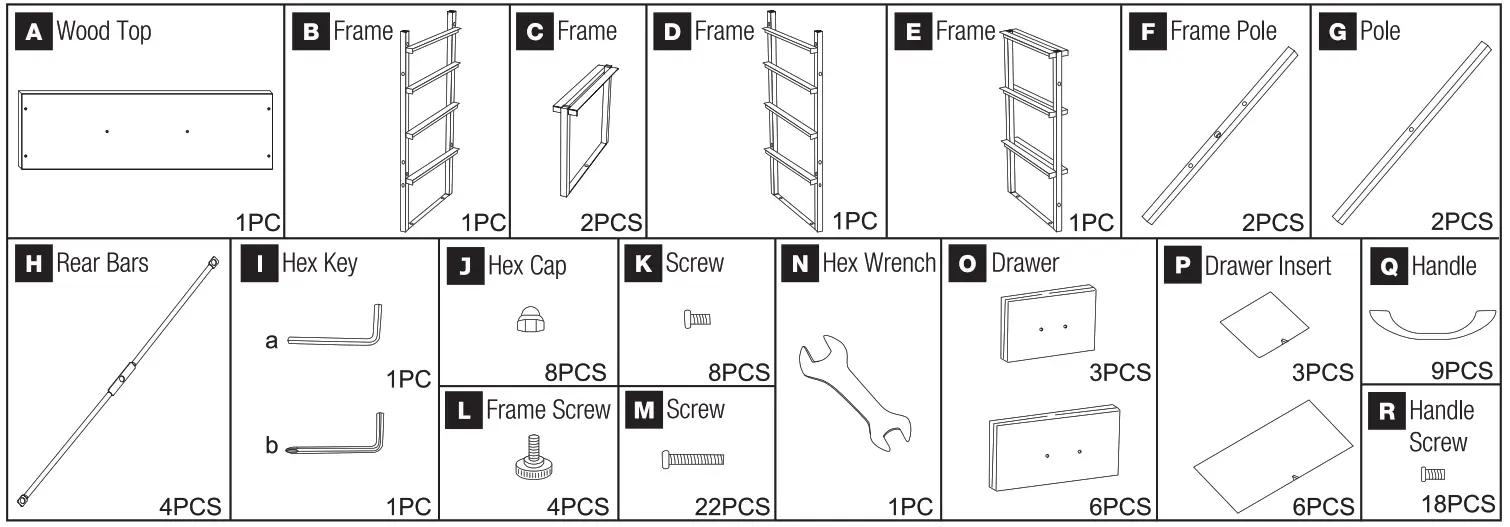
Thank you for your purchase. Please reference assembly instructions before use. Make sure all parts are present and place them side by side for easy identification.
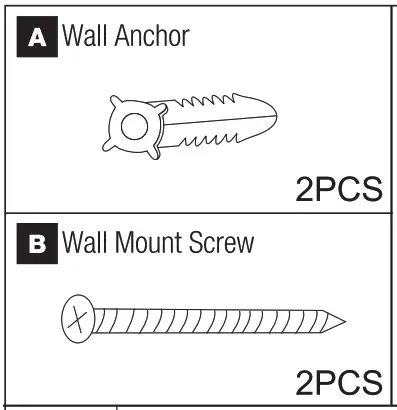
package contents
FOR EACH STEP MAKE SURE THE FRAMES ARE FACING THE CORRECT DIRECTION!
Notice the placement of these holes on the wood top (A) make sure the frames (B, C, D, E) are secured in the correct holes (if not the piece will be assembled backward and the drawers won’t fit).
Step 1: Secure frame (B) to wood top (A) as shown above with screws (K) then tighten with hex key (Ia). The drawer stopper should be facing the back.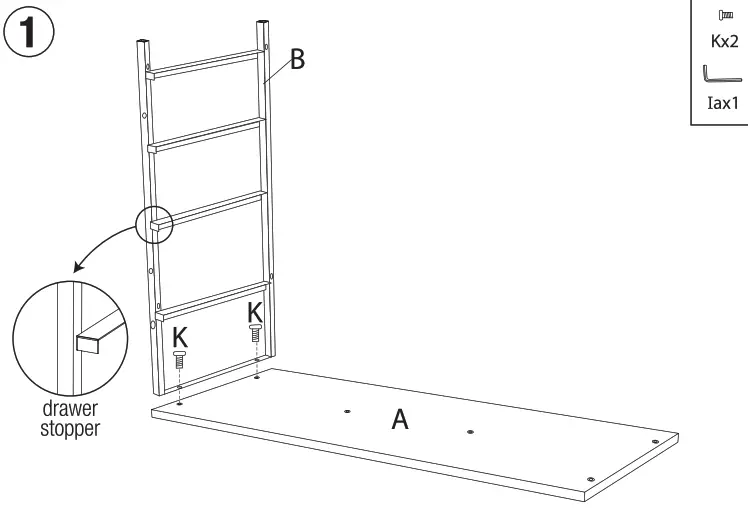
Step 2: Secure frames (C) to wood top (A) as shown above with screws (K) then tighten with hex key (Ia). Make sure the holes in the drawer top and the frame match the picture above. The drawer stopper should be facing the back.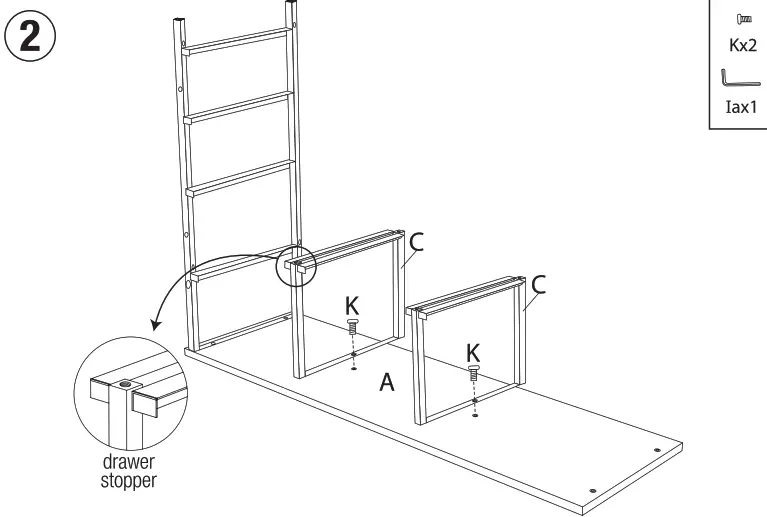
Step 3: Secure frame (D) to wood top (A) as shown above with screws (K) then secure with hex key (Ia). Please make sure the holes in the drawer top and the frame match the picture above. The drawer stopper should be facing the back.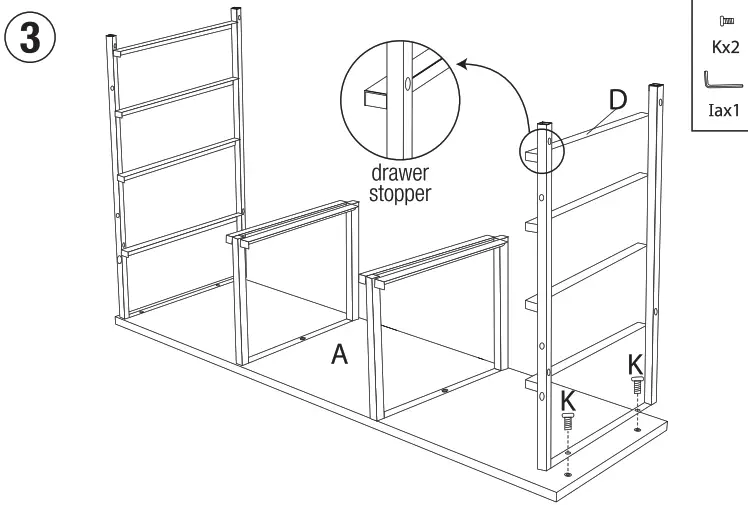 Step 4: Follow the guide above. Make sure the small middle hole is facing up. (If not the screws won’t fit in.) Position the frame poles (F) into place and secure them with screws (M) and hex key (Ia) as shown.
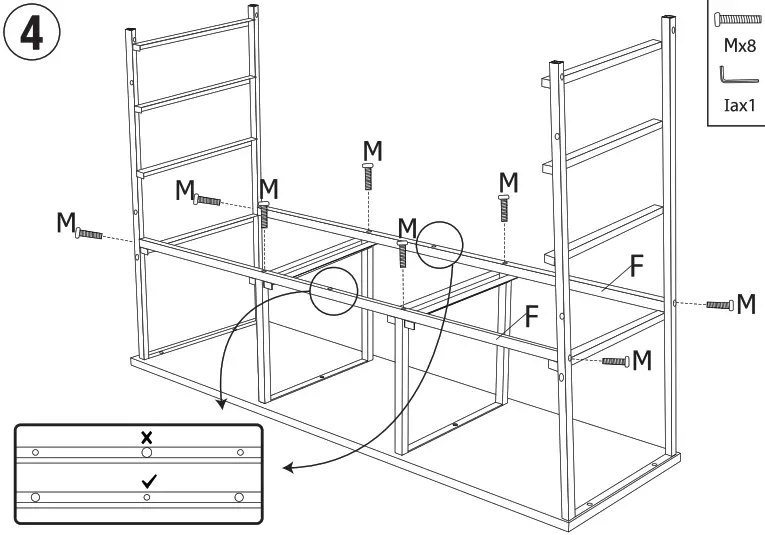
Step 5: Position frame (E) into place and secure to pole (F) with screws (M) using a hex key (Ia). The drawer stopper should be facing the back.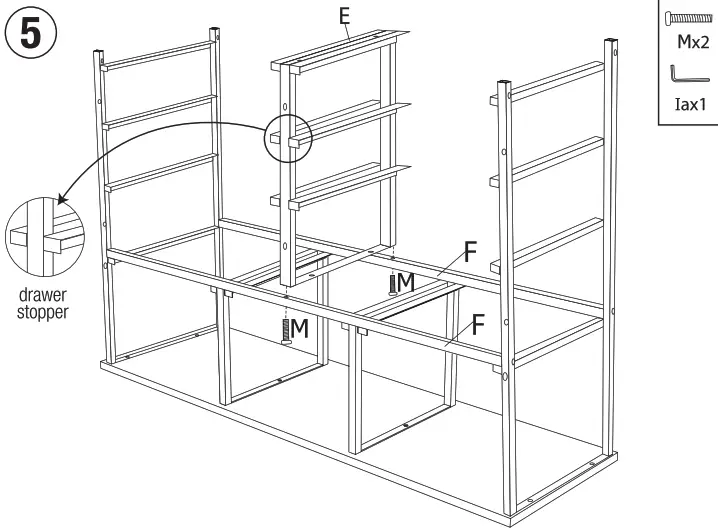 Step 6: Secure poles (G) with screws (M) using a hex key (Ia). Insert frame screws (L) into the legs of frames (B, D), and twist until tight.
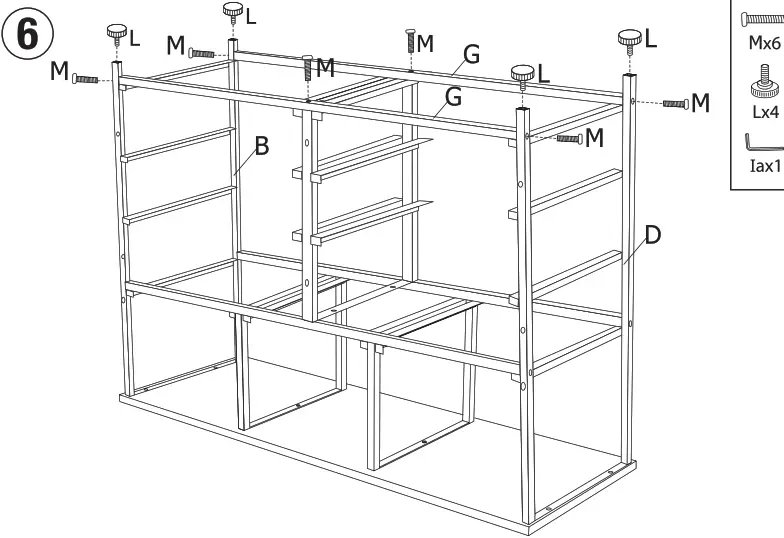 Step 7: Align and secure both sets of rear bars (H) together using a hex cap (J) and screw (K). Tighten with hex key (Ia) and hex wrench (N).
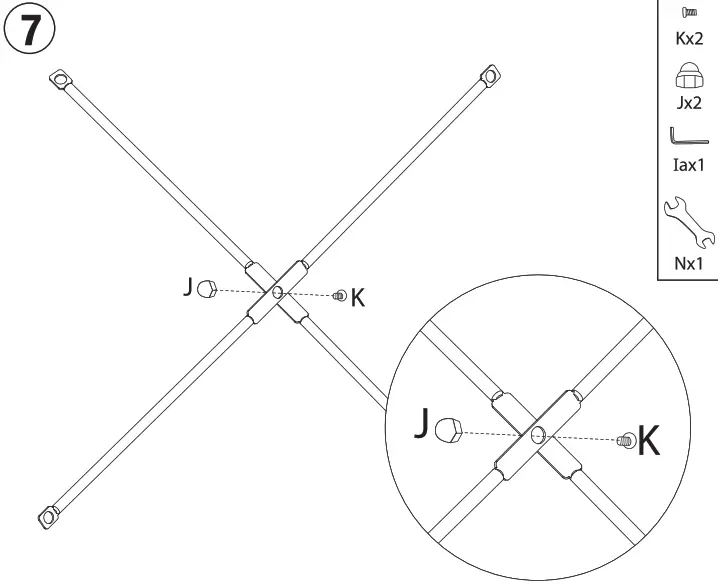 Step 8: Secure rear bars (H) to frame (D) using hex caps (J) and screws (M) as shown. Tighten with hex key (Ia) and hex wrench (N). Secure the remaining holes of both rear bars (H) to frame (E) using hex caps (J) and screws (M) as shown.
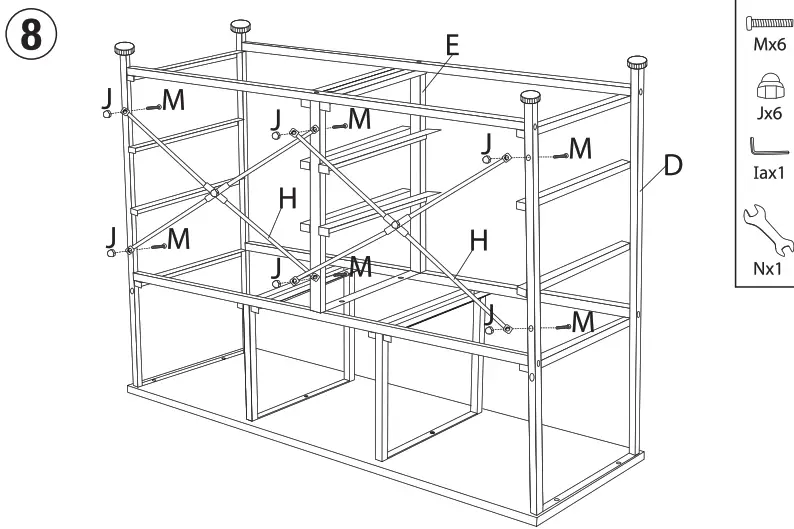
Step 9: Unfold drawers (0) then place drawer insert (P) inside. Secure handle(Q) and handle screws (R) to the drawers (0) using the hex key (lb).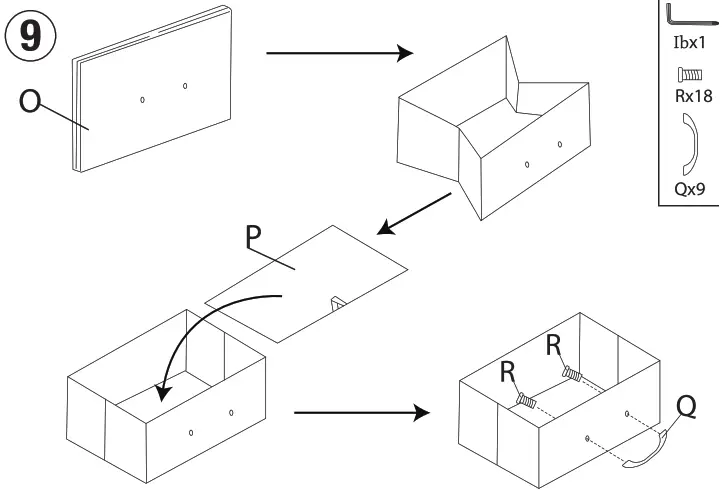 Step 10: Turn over the shelf frame. Insert drawers (0) into assembled storage dresser. Make sure everything is tightened & secure before use. Enjoy!
 For your safety, please secure the unit to the wall with the following steps
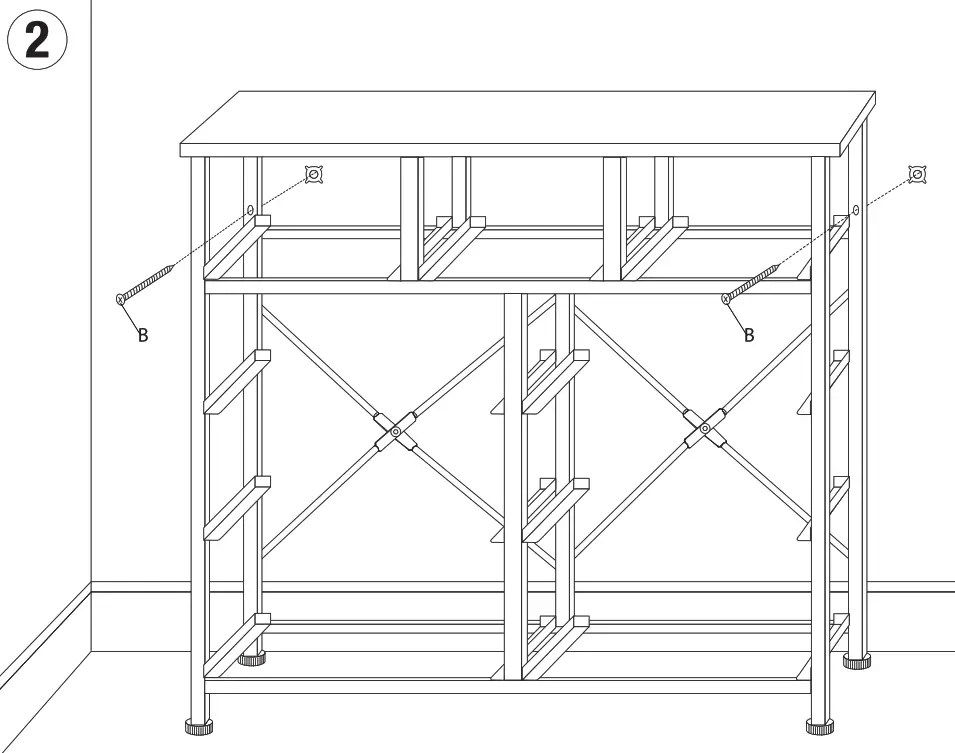
Step 1: Drill a hole into the wall using a 6mm bit and gently insert the wall anchor (A) with the help of a hammer.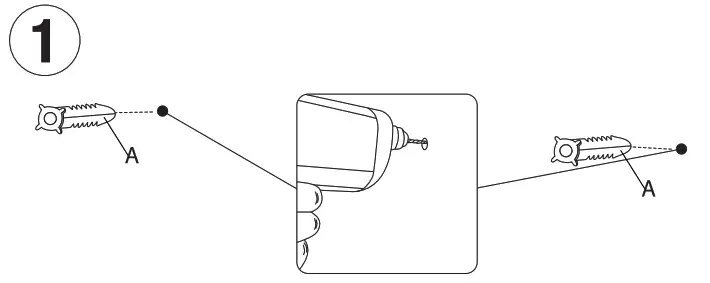
Step 2: Place the shelf against the wall, and insert the wall mount screws (B). After making sure everything is secure, feel free to use it. Enjoy!
www.sorbushome.com
© Sorbus Made in China


