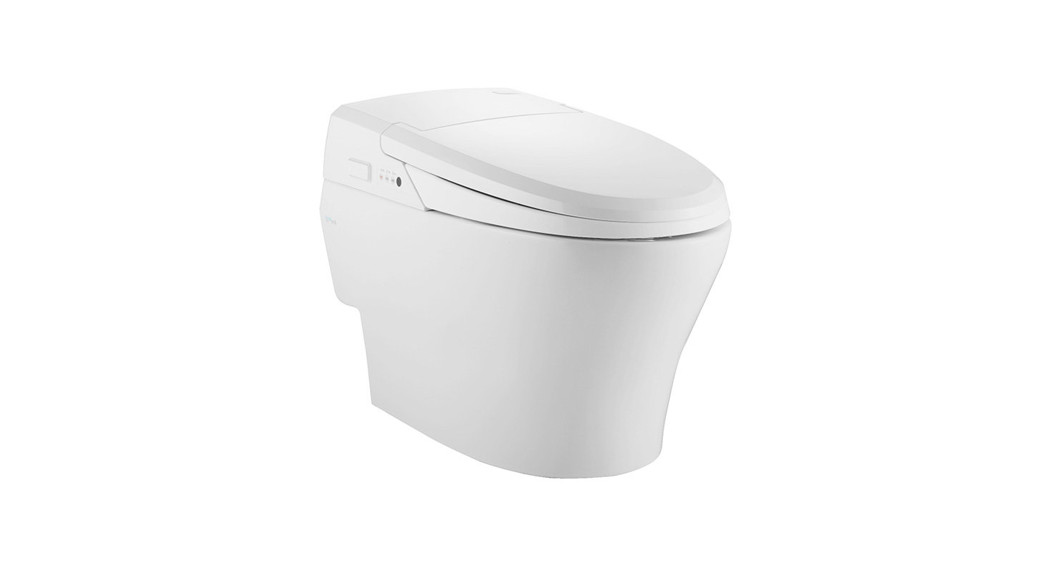
![]()
How to use
Remote control model
How to connect remote control (pairing)
- Pairing must be made within 1 minute after supplying power.
- Press and hold the Stop button for at least 3 seconds.
- Pairing is completed when you hear a “beep” buzzer and the remote control LED is on.
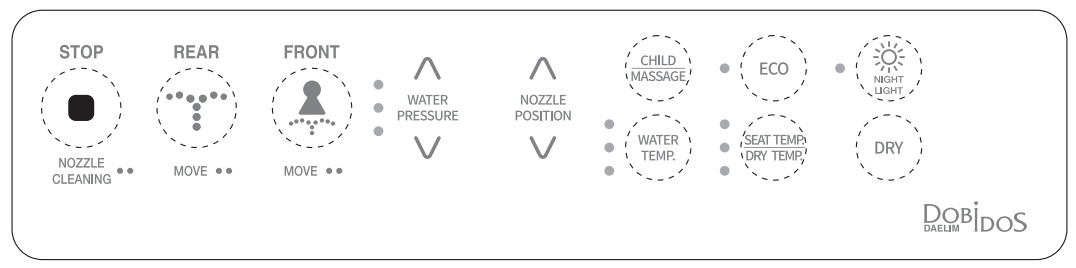
STOP
- Press this button to stop the operation.
REAR - Press this button for a rear wash. Press this button twice in a row to use the move function.
- Press this button again to stop the move function.
FRONT - Press this button for the front wash.
- Press this button twice in a row to use the move function.
- Press this button again to stop the move function.
CHILD - The product operates without sensing a user on the seat.
- After washing operation for 30 seconds (Level 1), the dry function operates automatically for 1 minute.
MASSAGE - Massage with water helps you with bowel movements.
ECO - You can adjust the temperature of the seat, hot water, or dry air to control power consumption.
- When the bidet is not in use, the seat and hot water remain in Level 1.
- When bidet is not in use, the hot water remains at 77℉.
WATER PRESSURE - The water pressure can be adjusted in 3 levels.
WATER TEMP. - The water temperature can be adjusted in 3 levels.
SEAT TEMP. / DRY TEMP. - You can adjust the seat and dry temperature in 4 levels.
- You can adjust the temperature to 4 levels during the dry action.
NIGHT LITING - You can easily find the toilet without turning on the lights at night.
DRY - You can dry the wet area after wash.
Remote control model
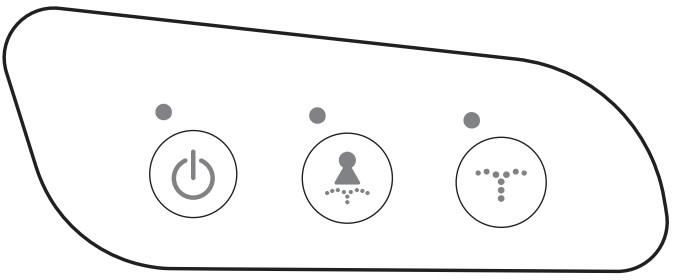
![]() ▶ Power On/Off: Press and hold the button for 5 seconds to switch off the power, and press it again to turn on the power.
▶ Power On/Off: Press and hold the button for 5 seconds to switch off the power, and press it again to turn on the power. ▶ FRONT function: Press the Front button for front wash. Press this button twice in a row to use the move function, and press it again to stop the function.
▶Seat temp. : Green(Low) → Yellow(Mid) → Red(High) → Off(room temperature)![]() ▶ REAR function: Press the Rear button for a rear wash. Press this button twice in a row to use the move function, and press it again to stop the function.
▶ REAR function: Press the Rear button for a rear wash. Press this button twice in a row to use the move function, and press it again to stop the function.
▶Hot water temp. : Green(Low) → Yellow(Mid) → Red(High) → Off(room temperature)
Wash
1. Cleaning the exterior part of the main body
•Wipe the exterior part of the main body with a soft sponge or cloth which is soaked with a neutral detergent. Do not use hydrochloric detergent, thinner, benzene, lubricant, sandpaper, odorant, insecticide, etc.
2. Nozzle cleaning
•When the user is not seated, press the WASH button to eject the nozzle cylinder. Lightly wipe the nozzle with a soft sponge or a toothbrush that is soaked with kitchen detergent. After cleaning, press the WASH button again or press the STOP button to restore the nozzle to its initial position.
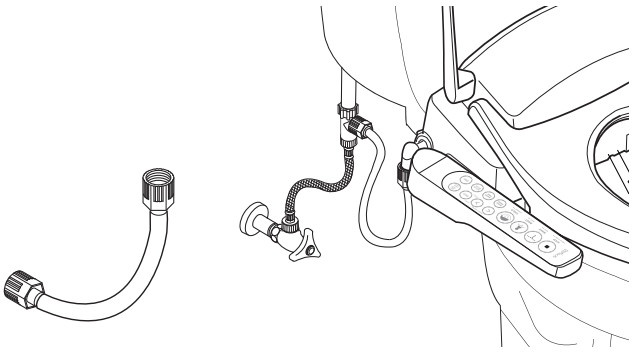
3. Filter mesh cleaning (water supply is not provided)
•Close the water supply valve and disassemble the e-bidet hose. Clean the filter mesh at both sides of the hose with a brush or other equipment.
•Clean the hose after disassembling it completely.
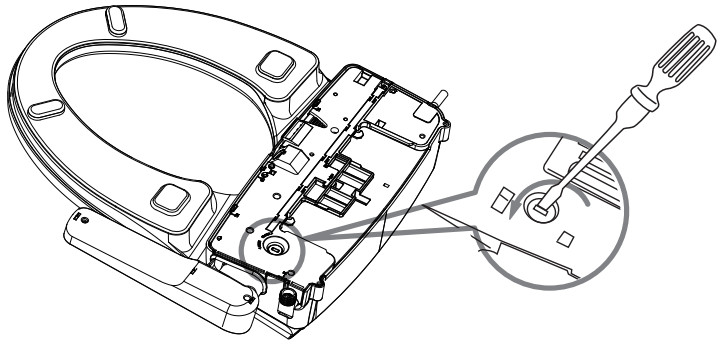
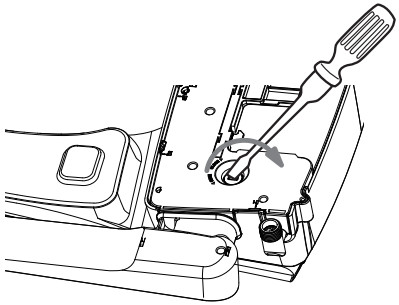
4. Main body disassembly and assembly
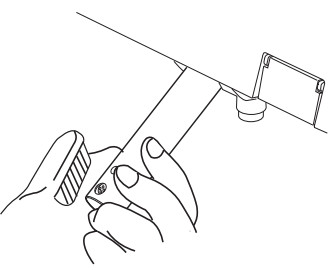
•Main body disassembly: Hold both sides of the main body and pull it forward while pressing the lock button located on the right.

•Main body assembly: Align the center of the main body with the center of the fixing plate guide and slide the body backward until there’s a “click” sound.
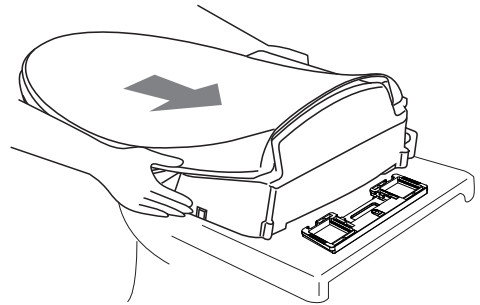
※Do not lift up the main body by grabbing the seat and seat cover. You may drop the main body which may cause injury.
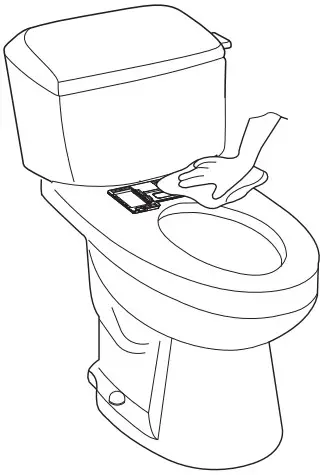
5. Fixing plate cleaning
•Remove the e-bidet and clean dust, dirt or stains on the fixing plate.
When not in use for a long time
Draining and cutting off power
1. Unplug the power cord from the outlet.
2. Close the water supply valve and stop the water supply which flows into the tank.
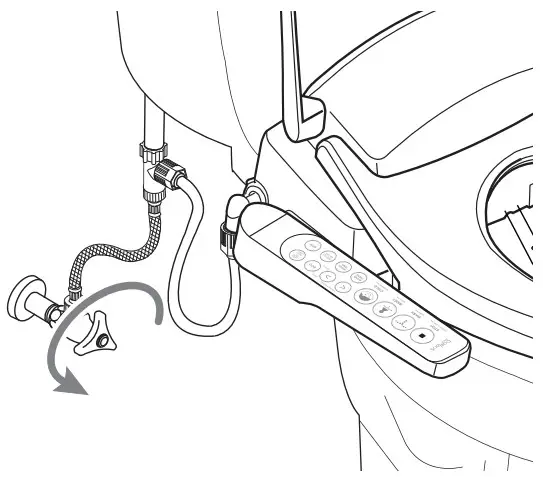
3. Release the water supply hose connected to the T-Connector to thoroughly drain water through the hose.

4. Open the drain cock at the bottom of the body to drain water from the water tank.
5. After draining water from the tank, close the drain cock.
6. When using the product again, make sure to check preparations and check points and perform a test operation.
•Make sure to shut the water supply valve in order to open the drain cock and drain water.
Winter care
•Always connect the power even if you temporarily stop using the product.
•Set the hot water temperature on the control panel to at least “Low”.
•You can prevent the water tank from freezing by setting the hot water temperature.
Self-diagnosis indication and measures against failure
– DB-5500 model
Self-Diagnosis Display

Self-Diagnosis Display
| Condition Display | Cause | Solution |
| All 3 lamps of WATER PRESSURE blink simultaneously. | There is no water inside the water tank. | 1. Press the WASH button to supply water. 2. If all 3 lamps of WATER PRESSURE still blink from 1 minute after the user presses the WASH button, it indicates that the the water tank is still not filled up with water. 3. If water is not supplied even when the water supply valve is opened, unplug the the power cord from the socket and contact customer service center. |
※ For the following cases, unplug the power cord from the socket and contact the customer service center.
| Condition Display | Cause | Solution |
| All 3 lamps of WATER TEMP. blink, Makes“beep” sound | Overheated water tank | Contact customer service center. |
| 1 lamp of WATER TEMP. blinks | Malfunction of water temperature sensor | |
| 3 lamps of SEAT LEVEL blink | Overheated seat | |
| 1 lamp of SEAT LEVEL blinks | Malfunction of seat temperature sensor | |
| Lamps of LEVEL1 and LEVEL2 of ECO blink simultaneously | Malfunction of AC input power source |
| •The product should be disassembled, repaired, or remodeled only by a qualified engineer. |  | |
| WARNING | ※ This may cause electric shock or fire which could lead to product malfunction or injury. | DISASSEMBLY PROHIBITED |
– DB-5600 model
Self-Diagnosis Display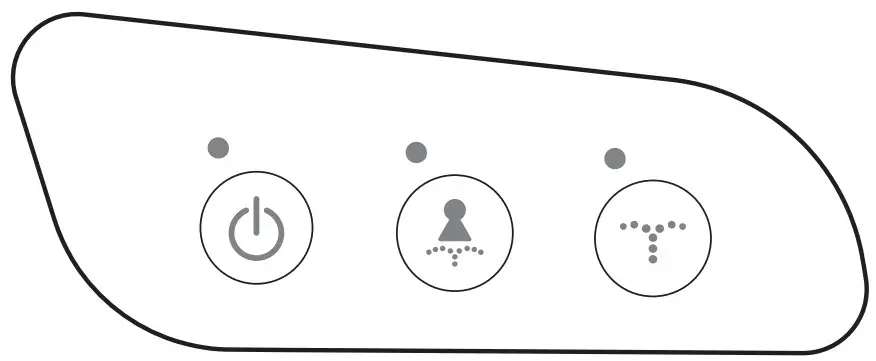 Self-Diagnosis Display
| Condition Display | Cause | Solution |
| All 3 lamps of POWER blink simultaneously. | There is no water inside the water tank. | 1. Press the WASH button to supply water. 2. If all 3 lamps of WATER PRESSURE still blink from 1 minute after the user presses the WASH button, it indicates that the the water tank is still not filled up with water. 3. If water is not supplied even when the water supply valve is opened, unplug the the power cord from the socket and contact customer service center. |
※ For the following cases, unplug the power cord from the socket and contact the customer service center.
Specifications
| Category | DB-5500 | DB-5600 |
| Rated voltage | AC 120V / 60Hz / 1260W | AC 120V / 60Hz / 1260W / 2.4GHz |
| Water type | Continuous water Cold, low(91.41), medium(96.8°F), high(102.21) | |
| REAR | 3 levels of WATER PRESSURE (Max. 0.5/min), Temperature fuse, thermostat, temperature sensor | |
| FRONT | Same as REAR function | |
| MOVE | Applicable | |
| DRY | Temperature control in 1-4 levels (Room temperature-55’Q 290W 2EA of the temperature fuse | |
| NIGHT LIGHT | Applicable | |
| Air bubble | Applicable | |
| NOZZLE CLEAN | Applicable (Possible to clean the nozzle when it ejects) | |
| ECO | Level 1(Normal-saving mode) Level 2(Power-saving mode) | |
| MASSAGE | Automatic MOVE + repeat high 4- low level of WATER PRESSURE | |
| Temperature of SEAT LEVEL | Cold, low(91.4T), medium(96.8T), high(102.2°F), 55W, seat sensor, temperature fuse, temperature sensor | |
| Water supply type | Direct coupling to the tap water | |
| Water pressure range | 10-106psi / 69-735kPa | |
| Tap water temperature | 37.4-951 | |
| Operating temperature | 37.4-1041 | |
| Dimension | W18.4s xD20.6″ x H7′ | W15.9′ x D20.6″ x H7′ |
| Weight | 8.81 Ib / 4.kg | 8.591b / 3.9kg |
![]()
| Product name | Model |
| Date of purchase | Serial No. |
| Dealer | Amount of purchase |
We guarantee that our products are free from manufacturing defects in normal use. Service is provided for one year from the date of purchase. his warranty is provided to the original purchaser, and shall not be transferable. The warranty period is limited to 6 months for business and commercial use.
Please contact the dealer if the product is defective.
Daelim Trading CO., LTD.
How can I request after-sales service?
Double-check the operation guide in this manual.
If the problem continues after checking, stop using it and contact the dealer.


