![]()
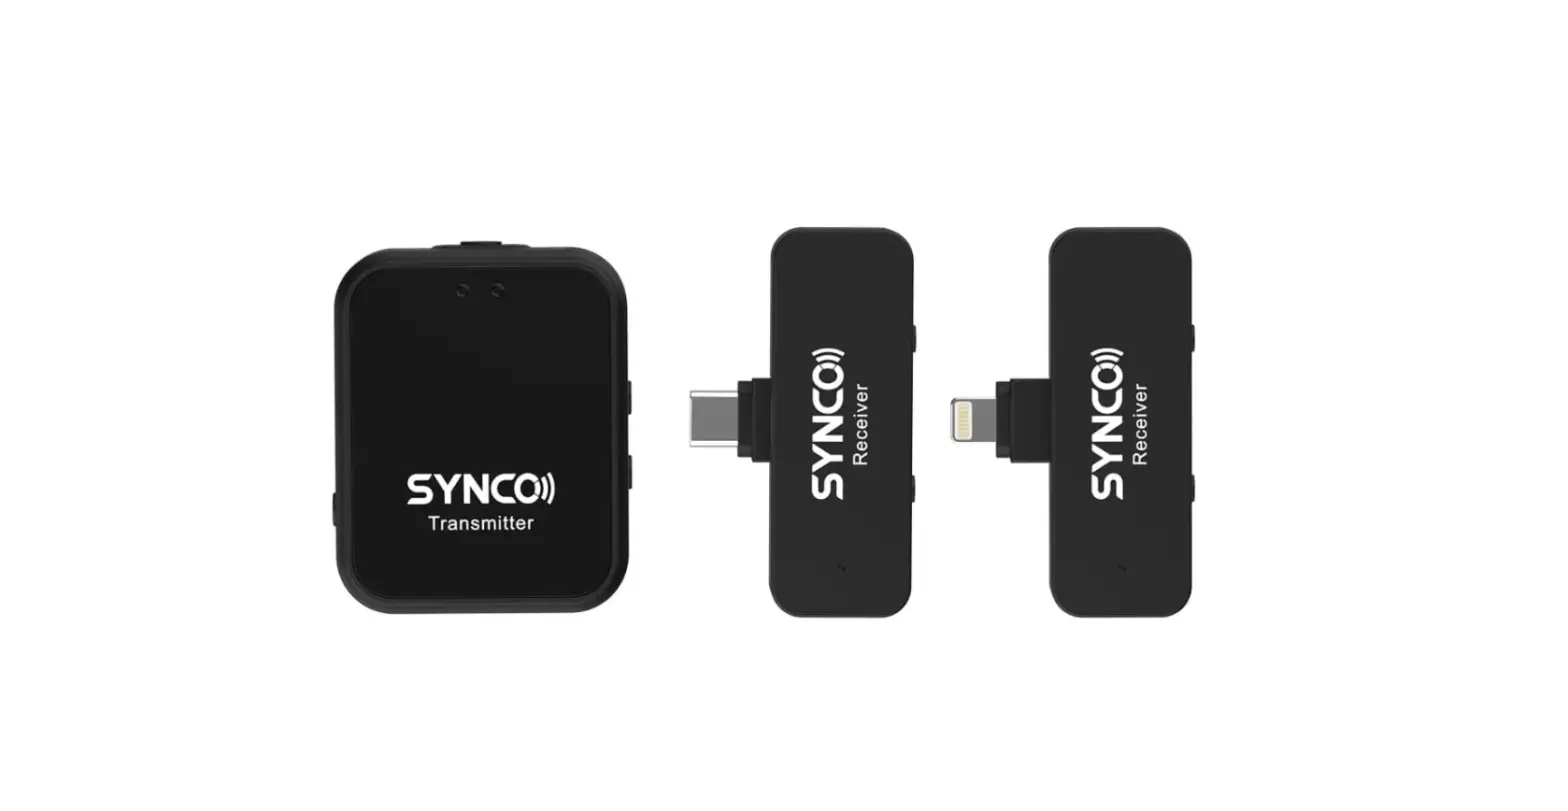
Microphone P1L User Manual
Thank you for choosing the SYNCO product.
Please read this manual carefully before use and follow all instructions mentioned herein.
Caring For Your SYNCO Product
- Please keep the product in a dry, clean, dust-free environment.
- Keep corrosive chemicals, liquids, and heat sources away from the product to prevent mechanical damage.
- Use only a soft and dry cloth for cleaning the product.
- Malfunction may be caused by dropping, the impact of external force.
- Do not attempt to disassemble the product. Doing so voids the warranty.
- Please have the product checked or repaired by authorized technicians if any malfunctions happen.
- Failure to follow all the instructions may result in mechanical damage.
- Warranty does not apply to human errors.
Package List Product Instruction
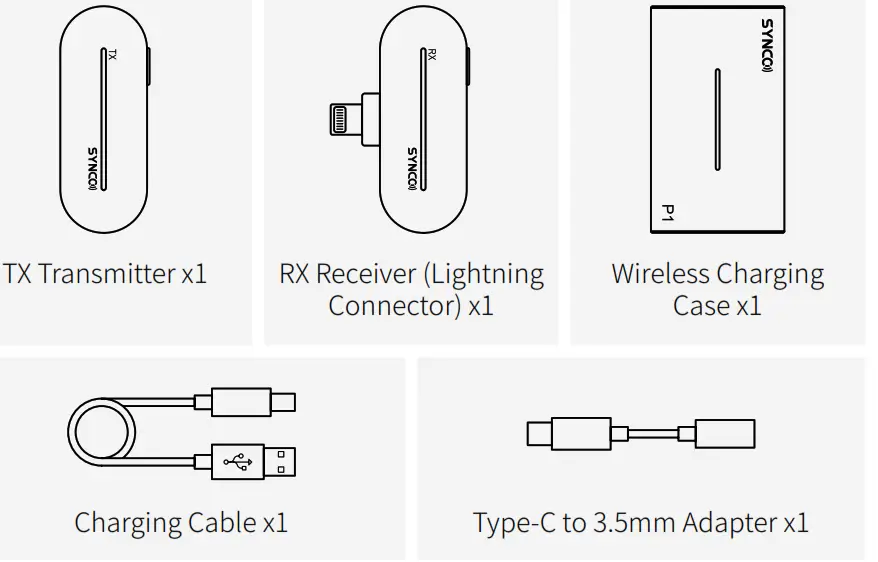
TX Transmitter
 | ① Power ② Working Indicators ③ Built-in Mic ④ Contacts ⑤ Pocket Clip |
RX Receiver
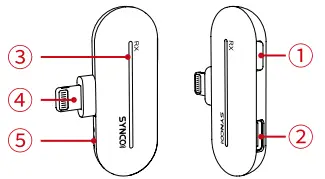 | ① Vocal Effects ② Type-C Port ③ Working Indicators ④ Connector ⑤ Contacts |
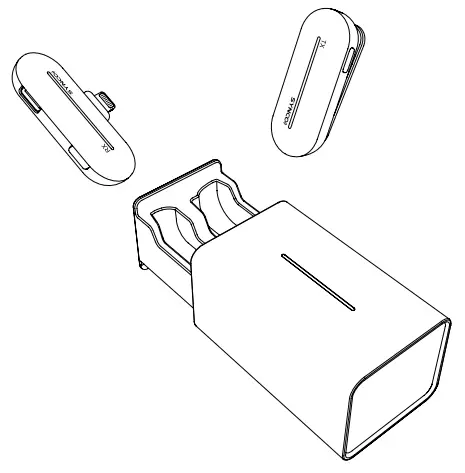
Wireless Charging Case
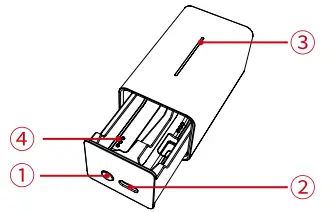 | ① Pairing/ Power Prompt ② Type-C Port ③ Working Indicators ④ Contacts |
Indicator — Transmitter (Double press the Power button to turn off light effect)
Working Indicators (White Light) | |
| Flash concurrently
| System unpaired |
| Single light flashes
| Low battery |
| Illuminate sequentially (Light effect on)
| System paired, normal working |
| Single light keeps on (Light effect off)
| System paired, normal working |
| Working Indicators (Red Light) | |
| Single light keeps on (In this case)
| Charging, and then turns off when fully charged |
Indicator — Receiver
Working Indicators (White Light) | |
| Flash concurrently
| System unpaired |
| Illuminate sequentially
| System paired |
| Single light keeps on & Illuminate sequentially
| Original sound |
| Single light flashes twice & Illuminate sequentially
| Vocal effects on |
Indicator — Wireless Charging Case
| Working Indicators (White Light) | |
| Illuminate sequentially
| Pairing |
Operations
1. Usage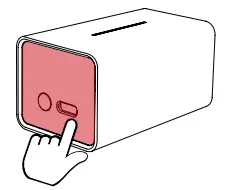
- Tap on the right side of the charging case to pop out the drawer
- Take the TX and RX out
- TX should boot automatically as it left the case, and switch itself off automatically when returning to the case.
(Forcible switch: Long press the Power button on TX for 3 seconds) - RX should boot automatically as it is plugged into a smartphone
2. Manual Pairing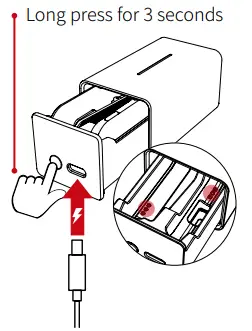
- Place the TX and RX in the case with their contacts are connected with the case’s
- Long press the Pairing button on the case for 3 seconds with the drawer open
- The indicators on the TX and RX should light up and illuminate sequentially when pairing is successful
Note: The transmitter will automatically switch off if it is unpaired or disconnected for 5 minutes.
3. Charging
Charge the TX: Place the TX in the case with contacts connected with the cases.
Charge the case: Connect the case with the power supply via the charging cable.
4. Check the power
TX: Short press the Power button, the indicators will light up according to remain power for 5 seconds Charging Case: Short press the Power Prompt button, the indicators will light up according to remain power for 5 seconds
5. Use vocal effects
Short press the Vocal Effects button on the receiver to switch sound effects:
Original >> Studio FX >> KTV FX >> Voice Amplification >> EDM (Electronic Dance Music) >> Baby FX >> Male to Female >> Female to Male >> Monster FX. Default effect: Original
6. Charging phone device
Plug your phone charging cable into the Type-C Port on the receiver.
7. In-Ear monitoring
Plug the included Type-C to 3.5mm Adapter into the Type-C Port on the receiver. Then plug in your headphones to real-time monitor mic recording and device’s backgrounding.
Note: The included Type-C to 3.5mm Adapter is exclusive, not available for other devices.
Specifications
TX Transmitter
| Wireless Transmission | Digital 2.4GHz |
| RF Frequency Band | 2400-2483.5MHz |
| Frequency Response | 20Hz-20KHz |
| Working Distance | 492ft/150m(LOS area); 164ft/50m(NLOS area) |
| Sampling Rate | 48KHz |
| Bit Depth | 16Bit |
| Sensitivity | -26dB |
| SNR | >75dB |
| RF Output Power | 10dB |
| Battery Type | Built-in Lithium Battery, 120mAh |
| Battery Charging Time | 1.5H |
| Battery Life | 5H |
| Dimensions | 49x19x19 (mm) |
| Material | ABS |
| Weight | 10g |
RX Receiver
| Wireless Transmission | Digital 2.4GHz |
| RF Frequency Band | 2400-2483.5MHz |
| Working Distance | 492ft/150m(LOS area); 164ft/50m(NLOS area) |
| Sampling Rate | 48KHz |
| Bit Depth | 16Bit |
| Antenna | Built-in |
| Monitoring | 3.5mm In-Ear Monitoring |
| Connector | Lightning Output |
| Power Input | Type-C |
| Dimensions | 49x30x9 (mm) |
| Material | ABS |
| Weight | 5g |
Wireless Charging Case
| Battery Type | Built-in Lithium Battery, 300mAh |
| Battery Charging Time | 1.5H |
| Charging Port | Type-C Port |
| Power Requirements | 5V 2A |
| Dimensions | 70x43x37 (mm) |
| Weight | 58g |
Warranty
Warranty Period
Thank you for purchasing SYNCO products.
- Customers are entitled to free replacement or repair service in case of the quality defect(s) found in the product under normal use within 30 days upon receipt of the product.
- Original SYNCO products are entitled to 12-month limited warranty service. The warranty period begins on the date of purchase of brand new, unused products by the first end-user. Within the warranty period, if a product defect or failure is attributable to material defection or technological problem, the defective product or defective part will be repaired or replaced without charge (service and materials fee).
Warranty Exclusions and Limitations
Faults resulted from inappropriate use of a product without following its operation specification
- Artificial damage, e.g. crash, squeeze, scratch, or soaking
- Modifications to a product by its user or a third party without the prior written consent of SYNCO, e.g. replacement of element or circuit, label alteration
- The code on the product is inconsistent with that of the warranty certificate, or the code on the product or warranty certificate is altered or torn off
- All consumable accessories attached to a product, like a cable, wind muff, battery
- Faults as a result of force majeure, such as fire, flood, lightning, etc.
Warranty Claim Procedure
- If failure or any problem occurs to your product after purchase, please contact a local agent for assistance, or you can always contact SYNCO’s customer service through email at [email protected].
- Please retain your sales receipt and warranty certificate as proof of purchase. If any of these documents are missing, only sales return or chargeable service will be provided.
- If the SYNCO product is out of warranty coverage, the service and the cost of the parts will be charged.
WARRANTY CERTIFICATE |
| Please register your warranty. Meanwhile, you are welcome to contact us via Email:[email protected] |
| USER INFORMATION | Customer Name: |
| Phone Number: | |
| Email: | |
| Address: |
| SALES INFORMATION | Sales Date: |
| Model: | |
| Product Code: | |
| Dealer: |
| REPAIR RECORD | Service Date: | ||
| Technician: | |||
| Issue: | |||
| RESULT | Solved | Unsolved | Returned(Replaced) |
Guangzhou Zhiying Technology Co., Ltd
![]()
![]() Block 15th, No.200 Fangcun Avenue East,
Block 15th, No.200 Fangcun Avenue East,
Liwan District, Guangzhou, China, 510000![]() [email protected]
[email protected]![]() www.syncoaudio.com
www.syncoaudio.com![]() https://www.facebook.com/syncomicrophones
https://www.facebook.com/syncomicrophones


 2 Person Wireless Microphone User Manual")


