![]() FOG0182625
FOG0182625
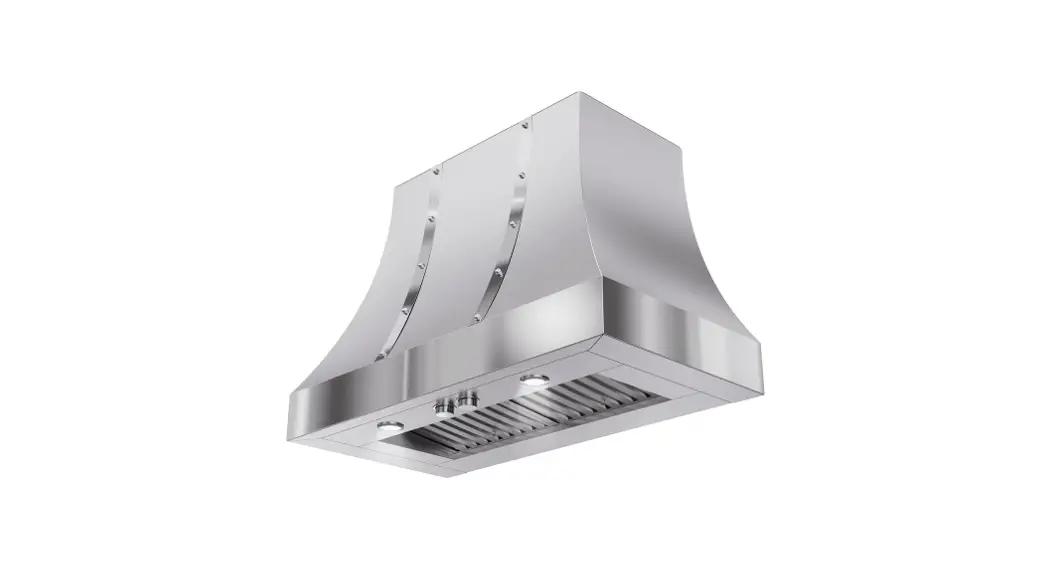
Instruction sheet for Hood Cabinet
INSTALLATION INSTRUCTIONS
DIMESIONS AND CLEARANCES
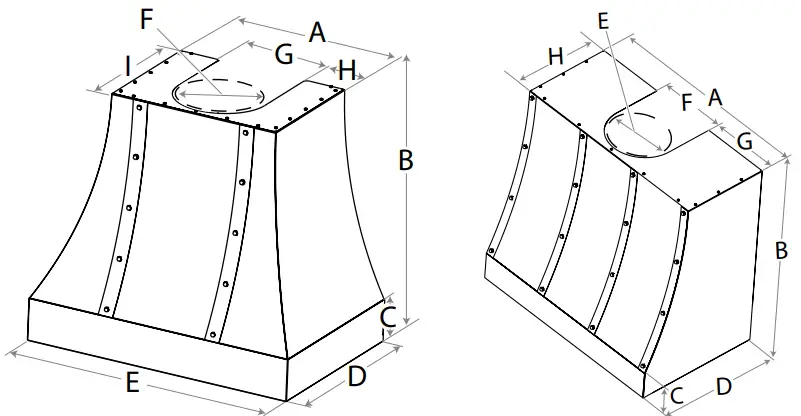
| EORX36SS | EORX48SS | ECTX36SS | ECTX48SS | ||
| A | 22 3/₄” (57.8 cm) | 22 3/₄” (78.8 cm) | A | 36″ (91.6 cm) | 48″ (122.1 cm) |
| B | 31 5/₈” (80.3 cm) | 31 5/₈” (80.3 cm) | B | 34″ (86.5 cm) | 34″ (86.5 cm) |
| C | 5 1/₂” (14 cm) | 5 1/₂” (14 cm) | C | 5″ (12.6 cm) | 5″ (12.6 cm) |
| D | 24 5/₁₆” (61.7 cm) | 24 3/₁₆”(61.5 cm) | D | 22 1/8″ (56.2 cm) | 22 1/8″ (56.2 cm) |
| E | 36 3/₁₆” (91.9 cm) | 48″ (122.1 cm) | E | 11 13/₁₆” (30 cm) | 11 13/₁₆” (30 cm) |
| F | 12″ (30.4 cm) | 12″ (30.4 cm) | F | 11 13/₁₆” (30 cm) | 11 13/₁₆” (30 cm) |
| G | 12″ (30.4 cm) | 12″ (30.4 cm) | G | 12 1/₈” (30.8 cm) | 18 1/₈” (46 cm) |
| H | 5 3/₈” (13.7 cm) | 9 1/₂” (24.2 cm) | H | 15 5/₁₆”(38.9 cm) | 15 5/₁₆”(38.9 cm) |
| I | 17 5/₁₆”(44 cm) | 17 5/₁₆”(44 cm) |
PARTS INCLUDED
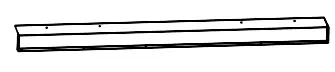
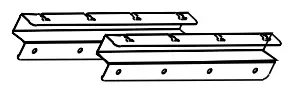 | Vertical supports | 2 |
 | Horizontal support | 1 |
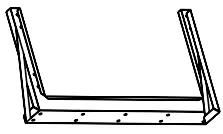
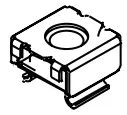
 | Hood insert rear bracket (only for ETRXXXXX hood models) | 1 |
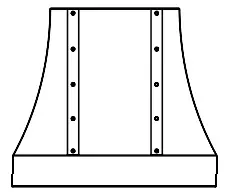 | Cabinet | 1 |
| Min. hood installation height for gas cooktop | 30″ (76.2 cm) |
| Min. hood installation height for electric cooking surface | 24″ (61 cm) |
Hardware bag with
 | 4.2 x 15 mm screws | 12 |
 | Clip nuts | 4 |
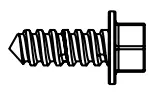 | 6 x 16 mm screws | 4 |
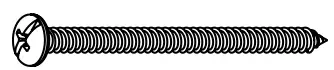 | 5.4 x 75 mm screws | 18 |
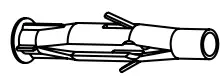 | 10 x 50 mm anchors | 18 |
 | 5.3 x 20 mm washers | 18 |
 | Mounting template | 1 |
| Cabinet | Hood |
| EORX36SS | EAR634SS & EAR134S4 |
| EORX48SS | EAR140S4 |
| ECTX36SS | ETR134S1 & ETR634SS |
| ECTX48SS | ETR146SS |
Installation instructions
- Determine installation heigh according your hood installation manual information and trace a baseline at the selected mounting heigh on the wall.
- Trace a vertical centerline over the baseline.
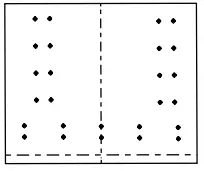
- Place the template on the wall and align the baseline and centerline, tape it.
 A. Centerline
B. Baseline - Draw the propper holes for horizontal and vertical supports considering your cabinet model and remove template.
- Drill ³⁄₁₆” (4.8 mm) pilot holes at marked locations.
- Place the vertical supports on the wall and fix each with 4 – 5.4 x 75 mm screws using 10 x 50 mm anchors.
- Place the horizontal support on the wall and fix with 10 – 5.4 x 75 mm screws using 10 x 50 mm anchors.

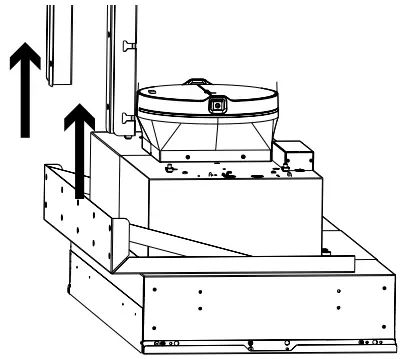
- Using 2 or more people, lift the hood insert near the cabinet sliding it from below the supports.

- Place the hood insert near its mounting position and run the power supply cable through the strain relief into terminal box (enough to make connection).
- Tighten the strain relief screws.
- Remove hood metal grease filters.
- Place the hood insert under the horizontal support.
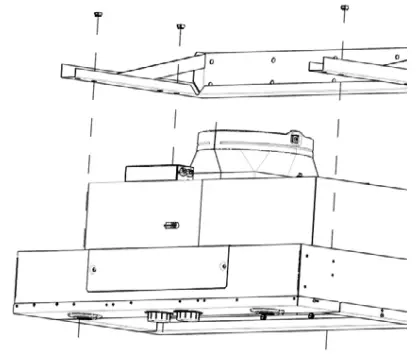
- Fix the hood insert to the horizontal support with 4 – 6 x 16 mm screws and 4 clip nuts.

- Only for ETRXXXXX hood models unscrew and remove hood insert rear bracket support that will be attached to the back of the cabinet
 A. Screws
 - Only for ETRXXXXX hood models attach hood insert rear bracket support with 4 – 4.2 x 15 mm screws on the back.

- Make electrical connection according your hood installation manual.
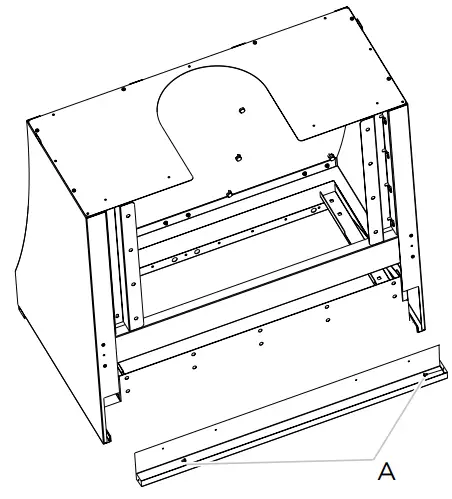
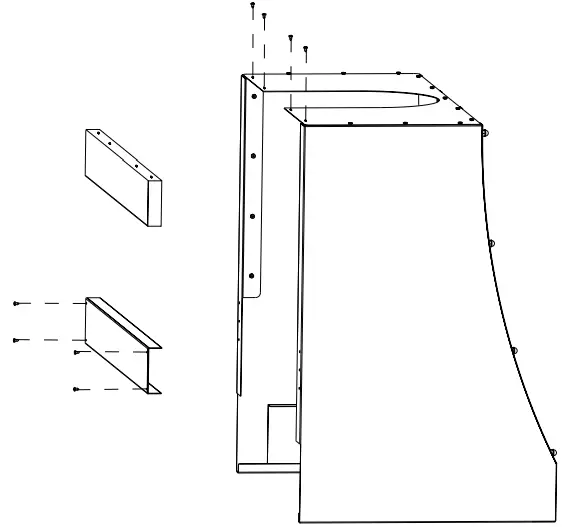
- Unscrew 4 rear and 4 top screws and remove both metalic and wood support rear brackets from cabinet. Dispose of this brackets.

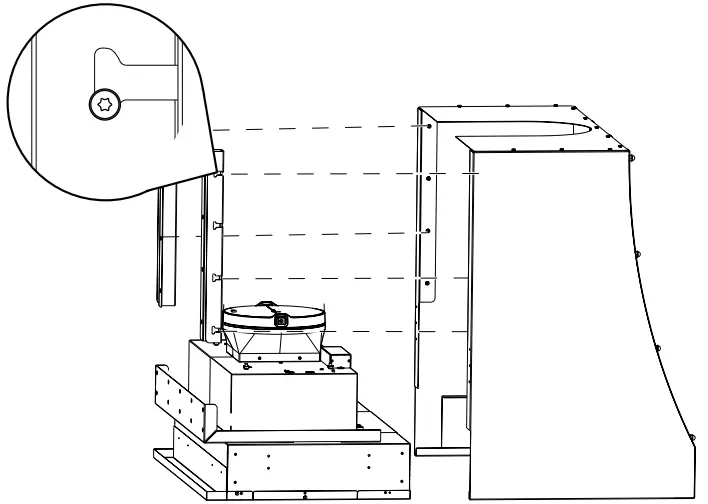
- Lift the hood cabinet beneath the motor housing. Insert the cabinet pins into the vertical support slots. Once the eight pins are already inserted, the cabinet stands hanging.

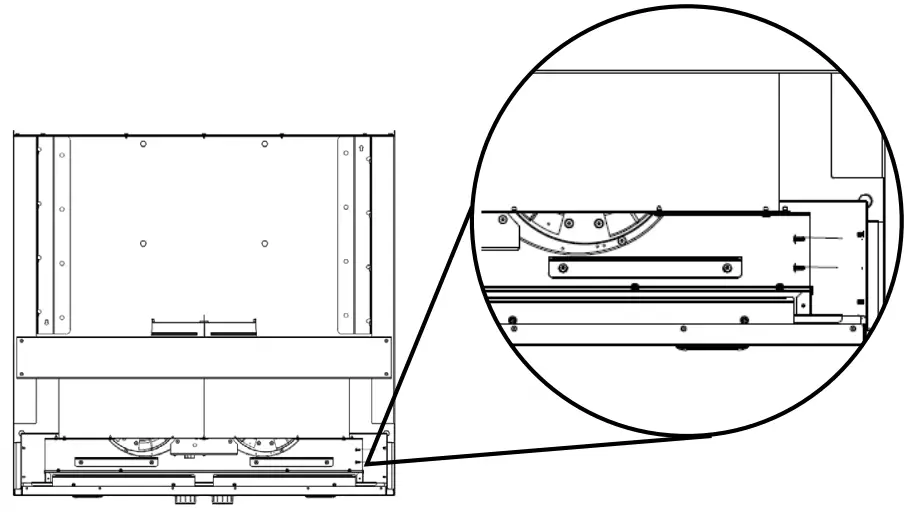
- Fix the cabinet to hood insert with 4 – 4.2 x 15 mm screws on each side. Use the following image as a guide.

- Replace metalic grease filters.
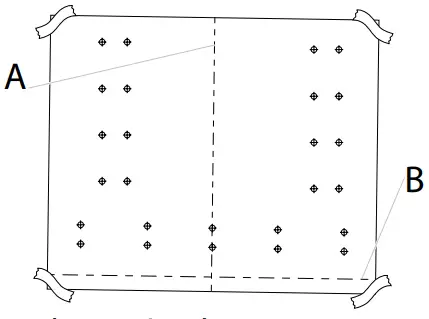 A. Centerline
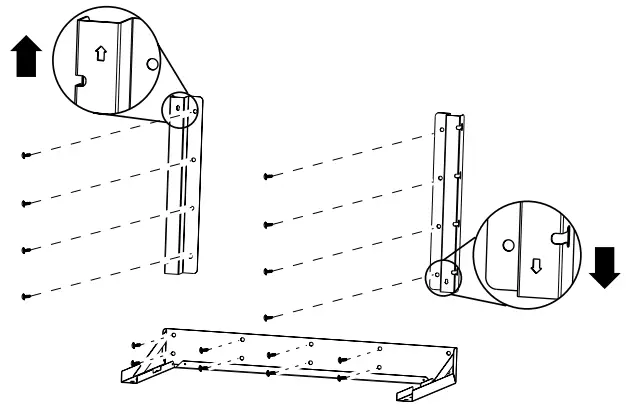
 A. Screws
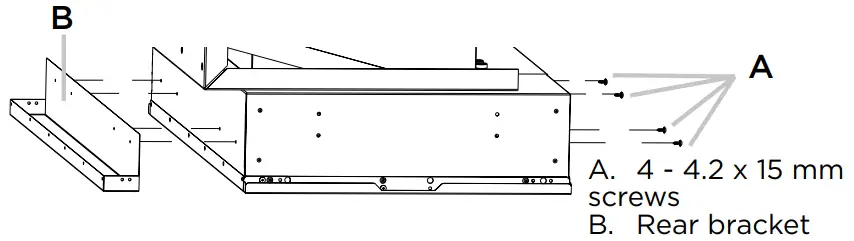
ELICA North America
TWO-YEAR LIMITED WARRANTY
Register your product inelica.com and earn a 3rd year of factory warranty, covering all parts plus in-home labor.
TO OBTAIN SERVICE UNDER WARRANTY
Owner must present proof of original purchase date. Please keep a copy of your dated proof of purchase (sales slip) in order to obtain service under warranty.
PARTS AND SERVICE WARRANTY
For the period of two (2) years from the date of the original purchase, Elica will provide free of charge, non consumable parts or components that failed due to manufacturing defects. During these two (2) years limited warranty, Elica will also provide free of charge, all labor and in-home service to replace any defective parts.
WHAT IS NOT COVERED
- Damage or failure to the product caused by accident or act of God, such as, flood, fire or earthquake.
- Damage or failure caused by modification of the product or use of non-genuine parts.
- Damage or failure to the product caused during delivery, handling or installation.
- Damage or failure to the product caused by operator abuse.
- Damage or failure to the product caused by dwelling fuse replacement or resetting of circuit breakers.
- Damage or failure caused by use of product in a commercial application.
- Service trips to dwelling to provide use or installation guidance.
- Light bulbs, metal or carbon filters and any other consumable part.
- Normal wear of finish.
- Wear to finish due to operator abuse, improper maintenance, use of corrosive or abrasive cleaning products/pads and oven cleaner products.
- When the product has not been operated in accordance with the accompanying instructions for use.
WHO IS COVERED
This warranty is extended to the original purchaser for products purchased for ordinary residential use in North America (Including the United States, Guam, Puerto Rico, US Virgin Islands & Canada).
This warranty is non-transferable and applies only to the original purchaser and does not extend to subsequent owners of the product. This warranty is made expressly in lieu of all other warranties, expressed or implied, including, but not limited to any implied warranty of merchantability or fitness for a particular purpose and all other obligations on the part of Elica North America, provided, however, that if the disclaimer of implied warranties is ineffective under applicable law, the duration of any implied warranty arising by operation of law shall be limited to two (2) years from the date of original purchase at retail or such longer period as may be required byapplicable law.
This warranty does not cover any special, incidental and/or consequential damages, nor loss of profits, suffered by the original purchaser, its customers and/or the users of the Products.
WHO TO CONTACT
To obtain service under warranty or for any service related question:
USA & CANADA – Western Provinces
SERVICE POWER
888 732 8018
[email protected]
CANADA – Ontario Province AGI Services
888 651 2534
[email protected]
CANADA – Quebec & Atlantic Provinces Ateliers G. Paquette
800 463 0119
[email protected]
To ensure prompt after-sales service, when you call we will kindly ask you to provide the following information indicated on the nameplate inside the hood: hood model, 12 NC and date of purchase on original invoice.To access the nameplate, all you have to do is remove the grease filters.
12NC:________________________________________
Hood model:___________________________________
Serial No:_____________________________________
Date of purchase on original invoice:________________


