IMOU IPC-F46FE-D Bullet Camera User Guide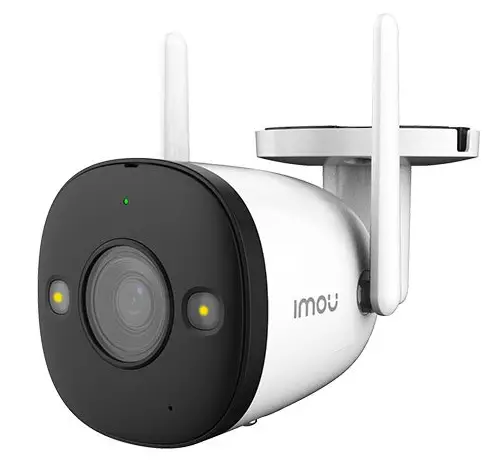
Welcome
Thank you for choosing IMOU.
We are devoted to providing you easy smart home products. If you have problems using the product, please contact our service team at [email protected].
For FAQs or more support, please visit: https://en.imoulife.com/support/help.
Device Safety Precautions
- Follow all instructions for safe use and handling of the device.
- Do not disassemble the device.
- Do not point the device directly at the sun or a source of intense light.
- Use the device at temperatures from -20 °C (-4 °F) to +50 °C (+122 °F).
- Periodic cleaning may be required. Use a dry cloth dampened with alcohol. Do not use any harsh, chemical-based cleaners.
Package Contents
- Camera x1

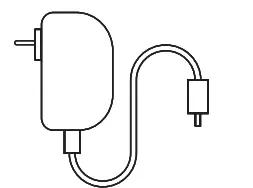
- Power Adapter x1

- Waterproof Connector Pack x1

- Mounting Template x1

- Quick Start Guide x1

- Screw and Anchor Pack x1

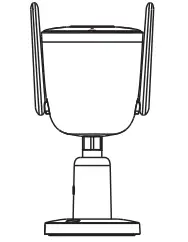


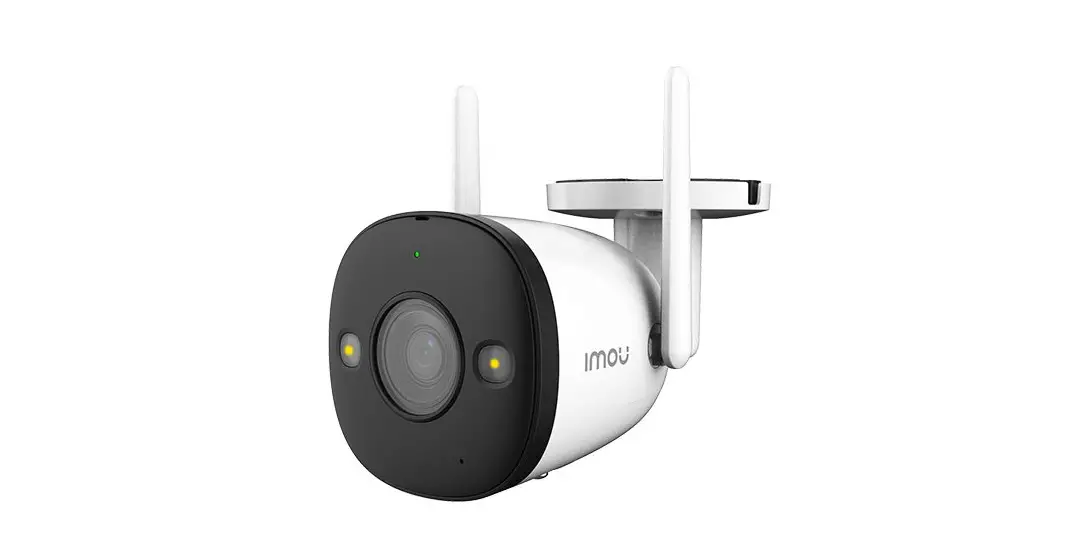
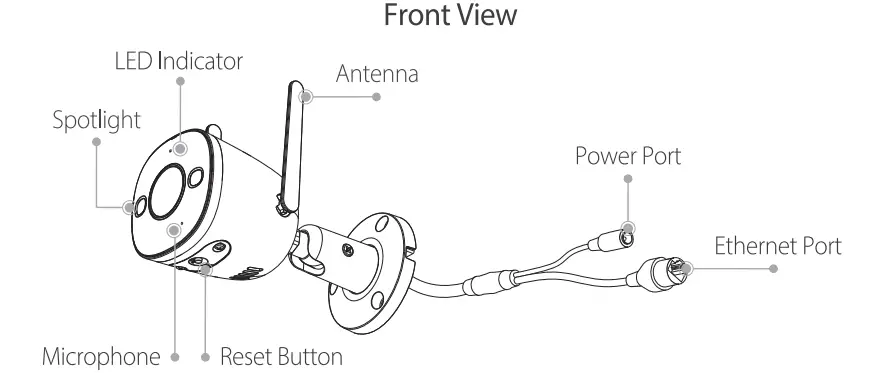
Overview
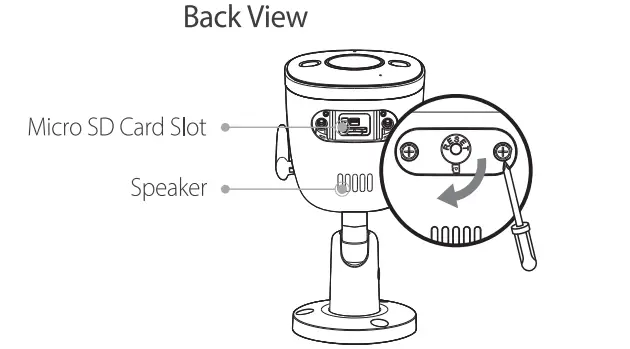
How to reset the camera
Press and hold the reset button for 10 s until the LED turns solid red.
See the table below for meaning of camera’s LED behavior
| LED Status | Device Status |
| Off |
|
| Solid red |
|
| Flashing red |
|
| Flashing green | Ready to set up the device |
| Solid green | Operating correctly |
| Flashing green and red | Updating firmware |
Set Up the Device
Scan the QR code below, search for “Imou Life” in the app store, or navigate to Support > Download Center in our official website to download and install the app.
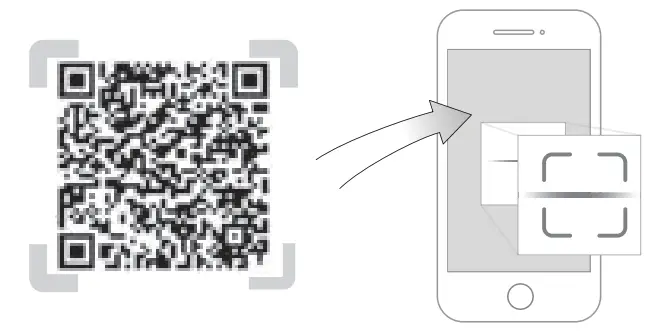


If you already use the app, make sure that you are using the latest version.
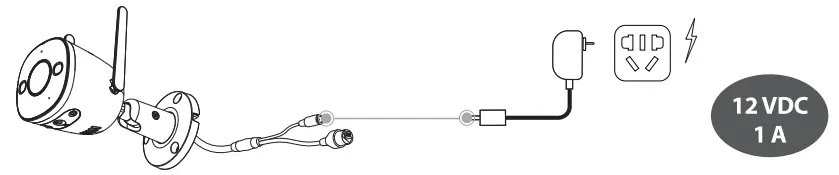
Option 1: Wireless Connection
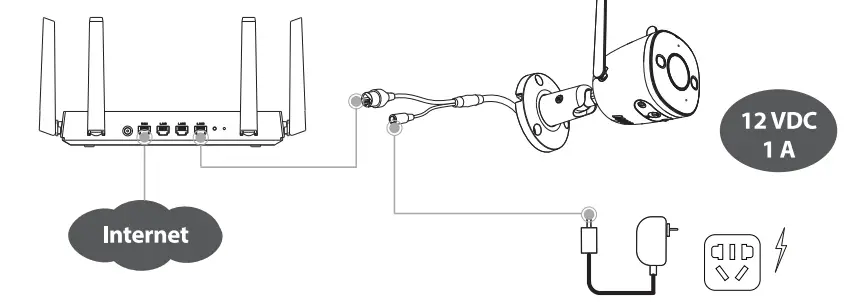
Option 1: Wired Connection
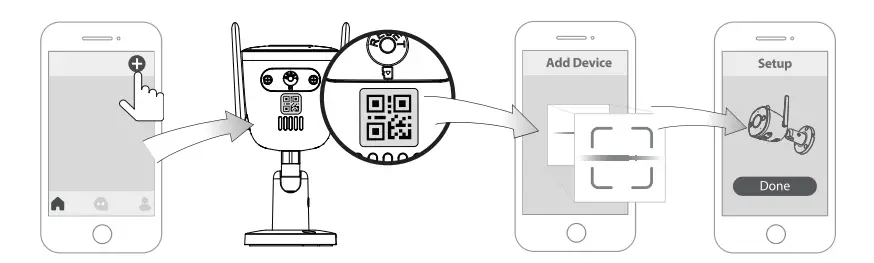
The app will guide you through the setup process.
Install the Camera
- Make sure that the mounting surface is strong enough to hold at least three times the weight of the camera.
- You are recommended to remove the protective film on the camera before use.
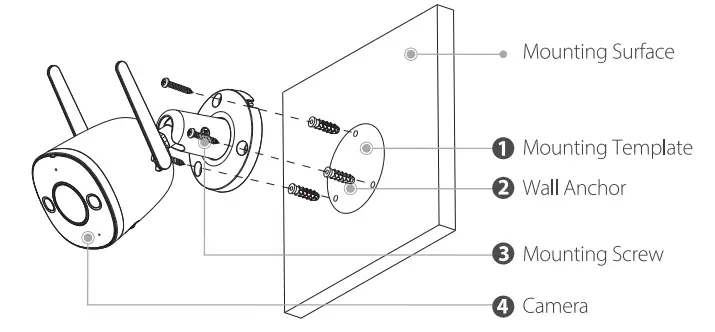
Step 1 Peel off the mounting template and stick it to the mounting surface.
Step 2 Drill screw holes as the mounting template marks, and then insert wall anchors if installing on stucco, brick, or concrete. For wood, wall anchors are unnecessary.
Step 3 Feed the cable through the mounting surface or cable notch and secure the camera stand to the surface with provided screws.
Step 4 Power on the camera and then adjust its angle properly.
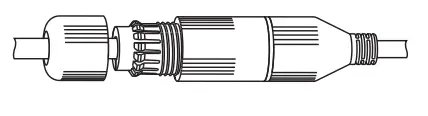
Install Waterproof Connectors
You are recommended to use waterproof connectors when the camera is installed outdoors.
With Ethernet Cable
Step 1 Thread the Ethernet cable through the endcap (1) and the nut (2).
Step 2 Place the gasket (4) onto the Ethernet port (5) of the camera. Connect the Ethernet cable to the Ethernet port (5), and then tighten the nut (2) and the Ethernet port (5).
Step 3 Put the seal (3) around the Ethernet cable and then push it into the nut (2).
Step 4 Tighten the nut (2) and the endcap (1).
Without Ethernet Cable
Step 1 Insert the plug (1) into the seal (2), and then push the seal (2) into the nut (3).
Step 2 Tighten the endcap (4) and the nut (3).
Step 3 Place the gasket (5) onto the Ethernet port (6) of the camera.
Step 4 Tighten the nut (3) and the Ethernet port (6).


