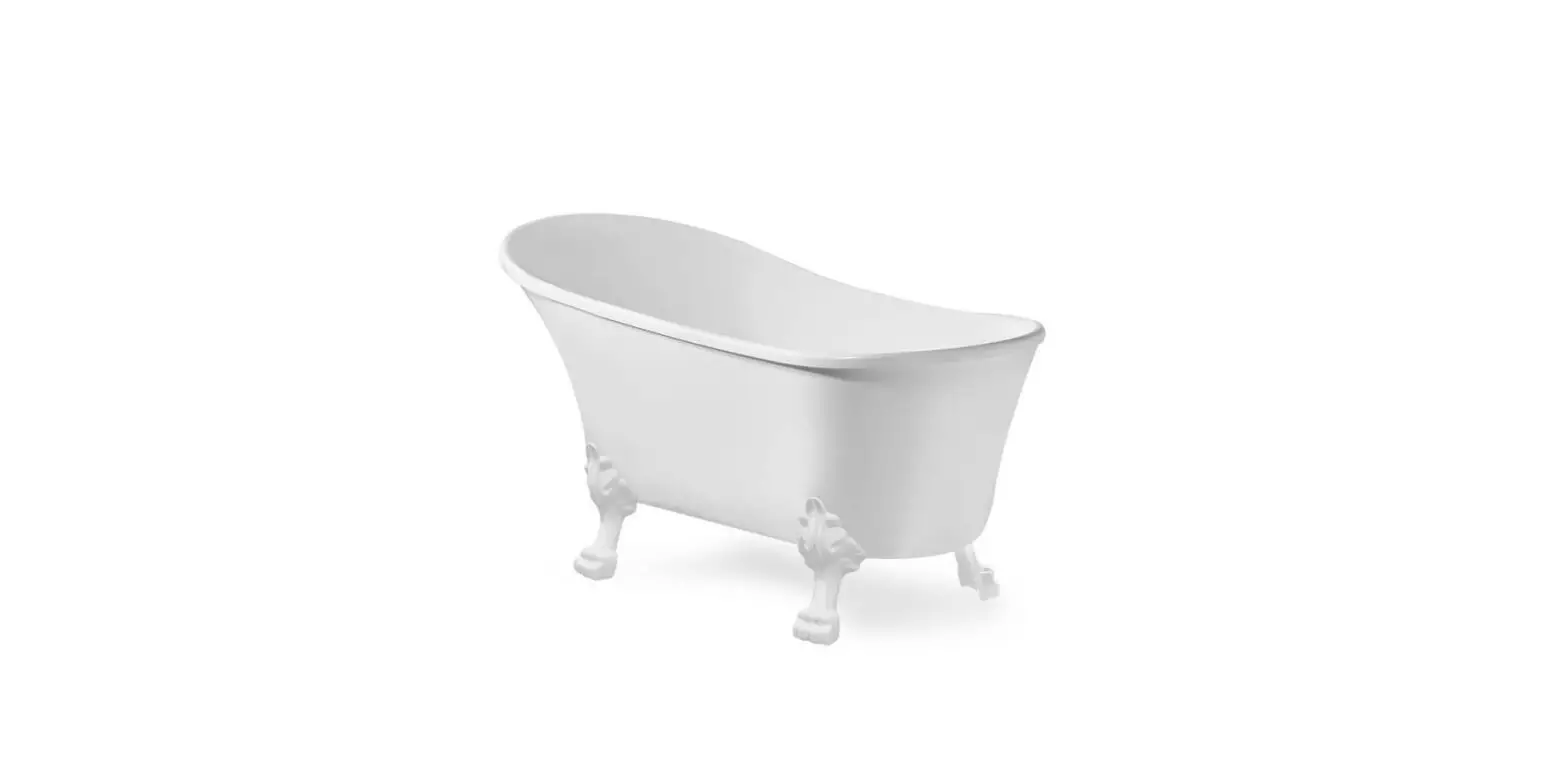
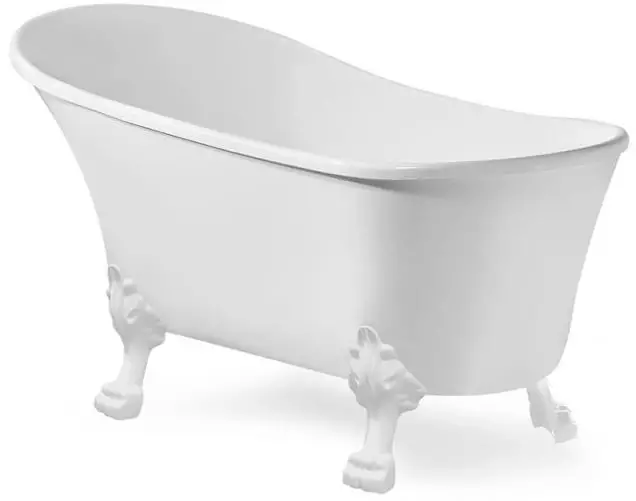
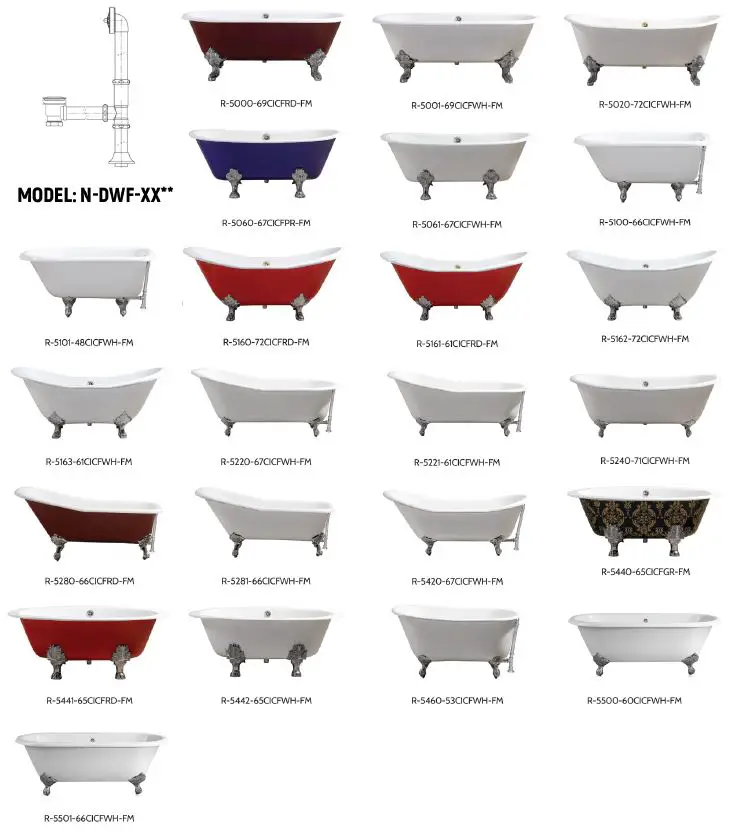
Streamline Castّ Iron ClawFoot Bathtub Series
READ THE ENTIRE INSTALLATION GUIDE PRIOR TO INSTALLING THE BATHTUB
This bathtub should only be installed by a certified plumber two people are required to lift the bathtub
For installation and assembly videos, please visit our website
www.streamlinebath.com
OR
our YouTube page by searching for “Streamline Bath”
OR
following the below link to our channel:
https://www.youtube.com/channel/UCll7TGMbkwoGSqzo-pGfaJw.
PRIOR TO INSTALLATION
- These products must be installed by a fully insured and licensed plumber only.
- Installation of any product by anyone other than a fully insured and licensed plumber shall void the limited warranty.
- We are not responsible for any local code compliance for this product. Building and plumbing codes may vary state-to-state.
- Streamline shall not be held liable for any and all incidental damages or floods caused due to the use of this product.
- Streamline shall not be held liable for any and all fees stemming from the cost of installation, re-installation, removal, subsequent damage, or transportation in a case of a product defect.
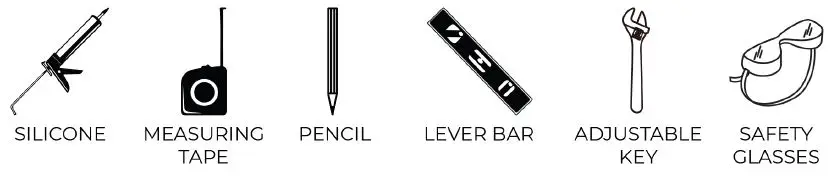
TOOLS REQUIRED
WHAT’S IN THE BOX
Please note:
Different bathtub models have different drain models. Please see the next page to determine which drain model applies to the bathtub model that you have purchased.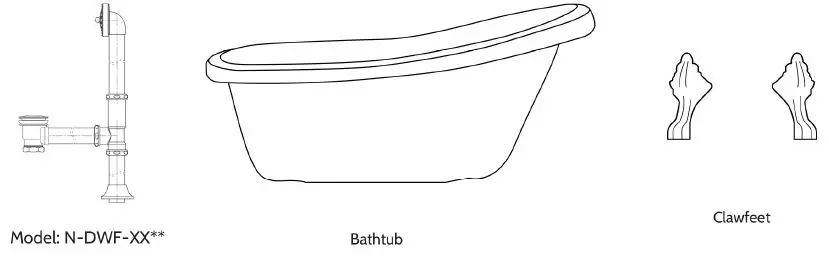
DRAIN MODEL COMPATIBILITY
FREESTANDING BATHTUB  DRAIN DIAGRAMS
 DRAIN DIAGRAMS
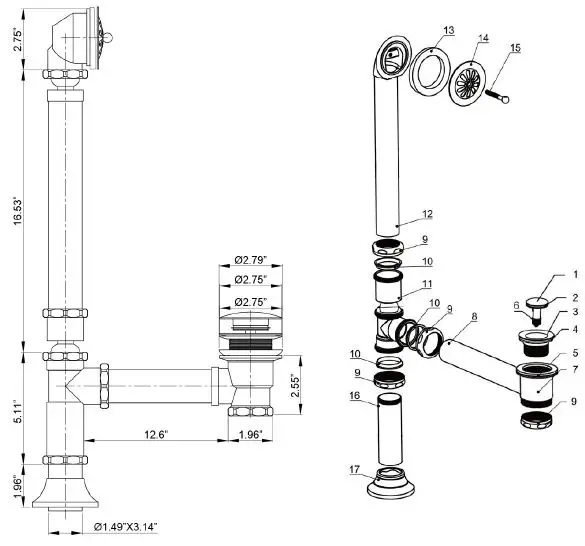
| No. | ITEM | Qty |
| Pop-Up Cover | 1 | |
| 2 | 0 Ring | 1 1 1 1 1 1 1 1 1 1 1 1 |
| 3 | Strainer | |
| 4 | Upper Rubber Gasket | |
| 5 | Lower Rubber Gasket | |
| 6 | Cartridge | |
| 7 | Drain Tee | |
| 8 | Drain Ell | |
| 9 | Drain Cap | |
| 10 | Washer | |
| 11 | Tee | 1 1 1 1 1 1 1 1 |
| 12 | Overflow Ell | |
| 13 | Tapered Rubber Gasket | |
| 14 | Overflow Plate | |
| 15 | Pin Bolt | |
| 16 | Tail Piece | |
| 17 | Flange | 1 |
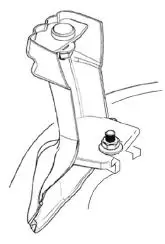
CLAWFOOT CONFIGURATION
Clawfeet: R-CFL03, R-CFL04, R-CFL06, and R-CFL-20 have specific foot placement. Each foot in the set is unique. Inside each foot is labeled with a letter to help you find the proper location on the tub for installation. Match up the letters on the clawfeet with the letters on the underside of the tub. The letters on the tub will be the same as what are on the clawfeet and will match accordingly.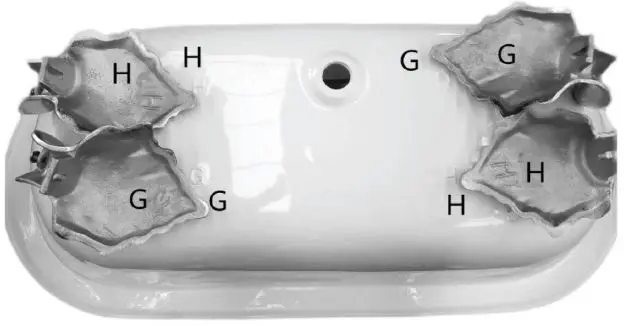
CLAWFOOT DIAGRAM
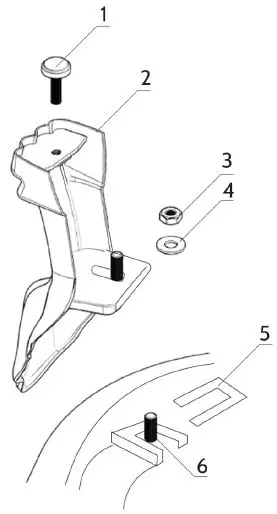
| No. | ITEM | Qty |
| 1 | Adjustable Feet | 4 |
| 2 | Claw Feet | 4 |
| 3 | Nut | 4 |
| 4 | Washer | 4 |
| 5 | Rubber Washer | 4 |
| 6 | Bolt | 4 |
APPLICABLE MODELS
| R-CFL0l-CH | R-CFL03-WH | R-CFL06-GLD | R-CFL16-CH |
| R-CFL0l-WH | R-CFL03-GLD | R-CFL08-CH | R-CFL-20-CHR |
| R-CFL0l-GLD | R-CFL04-CH | R-CFL08-WH | R-CFL-20-GLD |
| R-CFL02-CH | R-CFL04-WH | R-CFL08-GLD | R-CFL-20-WH |
| R-CFL02-WH R-CFL02-GLD | R-CFL04-GLD R-CFL06-CH | R-CFLl0-CH R-CFLl0-WH | |
| R-CFL03-CH | R-CFL06-WH | R-CFLl0-GLD |
BATHTUB INSTALLATION
- Ensure that the floor at the installation site has sufficient floor support and level.

- Waterproofing the floor is highly recommended.

- Determine the location of the drain pipe on the floor by taking measurements of the drain and waste location underneath the unit. Clean the drain hole area in preparation for setting the drain. The area should be dry & free from any debris.

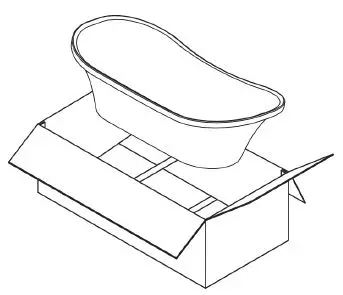
- Remove the bathtub from its box. It is recommended that the bathtub is carried by a minimum of two people.

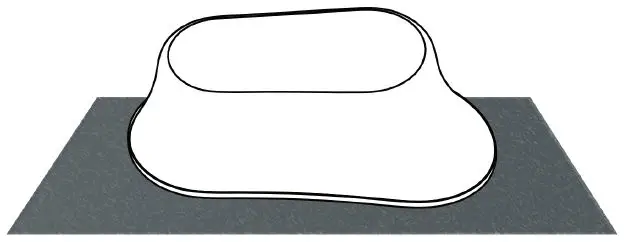
- Gently place the bathtub in the upside-down position on a tarp or cardboard sheet in order to avoid contact with any rough surface.

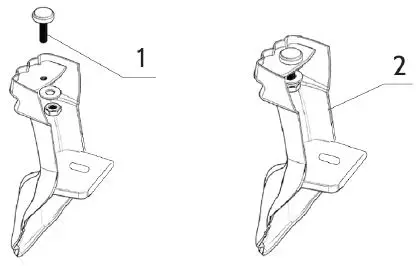
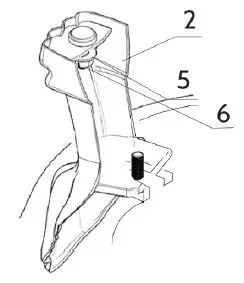
- Take l adjustable foot [Part #1], and place it through the hole in the clawfoot [Part #2].

- Place the 1 rubber washer [Part #5] and place it over the bolt [Part #6]. Please note, the rubber washer is optional and is NOT required to be used. It is provided to assist with having the clawfoot sit flush with the bathtub. Installation of the clawfoot can occur without the need for the rubber washer if the claw feet are sitting flush.

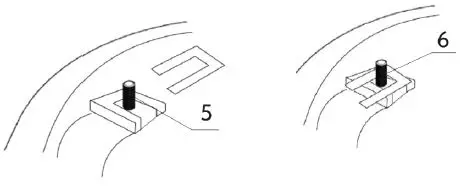
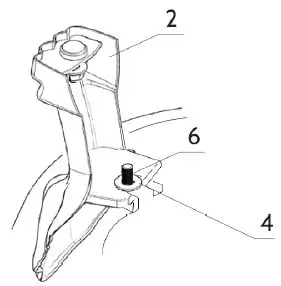
- Take the clawfoot [Part #2] and place it over the rubber washer [Part #5] and bolt [Part #6].

- Take one washer [Part #4] and place it over the clawfoot [Part #2] and bolt [Part #6].

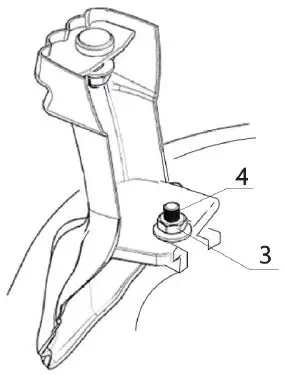
- Take l nut [Part #3] and place it over the washer [Part #4].

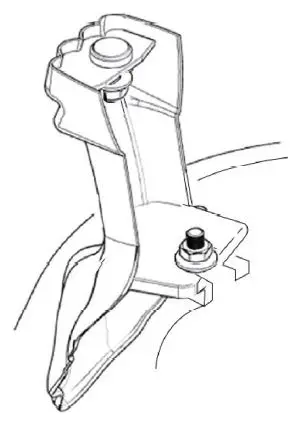
- Make sure to adjust the clawfoot so that it fits snugly with the bolts on the bathtub. This will help to ensure that the claw feet are placed correctly and are functioning properly.

- Tighten the nut [Part #3] with a wrench and adjust the clawfoot as needed. Repeat for the other 3 claw feet.


THE BELOW INSTRUCTIONS ARE FOR INSTALLING DRAIN ASSEMBLY N-DWF-XX
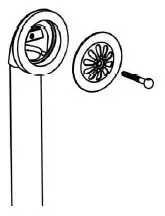
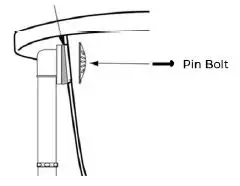
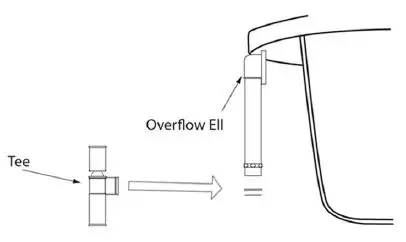
- Take the overflow ell and unscrew the pin bolt, removing the overflow cover as well.

- Take the tapered rubber gasket and the overflow ell and place it on the overflow hole on the back of the bathtub. Run the pin bolt with the overflow cover through the overflow hole and tighten it firmly.

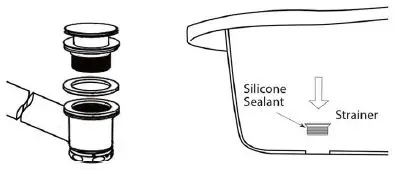
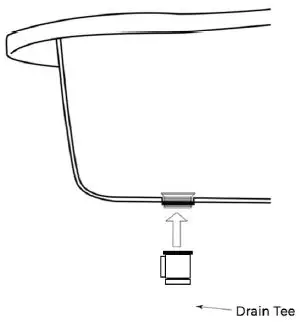
- Remove the strainer from the drain tee. Take off the larger, lower rubber gasket. Set it aside. DO NOT TAKE OFF THE SMALLER, UPPER GASKET. Place the strainer through the drain hole in the bathtub. Use silicone sealant to seal and ensure a tight connection. DO NOT use plumber’s putty.

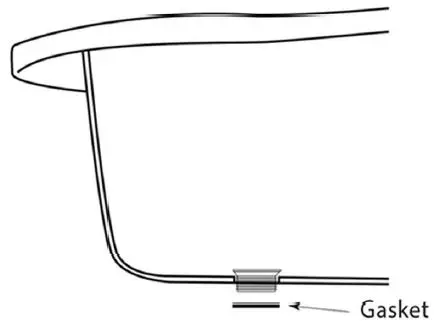
- Take the lower gasket that was previously removed and re-attach it to the strainer from underneath the bathtub.

- Screw on the drain tee to the bottom of the drain, making sure the opening of the drain tee is facing outwards to align with the overflow hole.

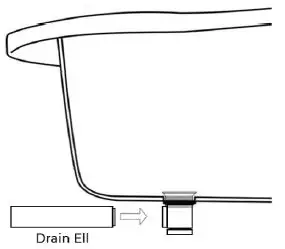
- Insert the drain ell into the drain tee and screw in tightly. The use of threaded plumbing tape may be necessary at the joint to prevent leakage. This can be done at your discretion.

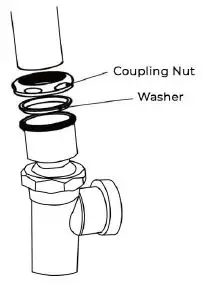
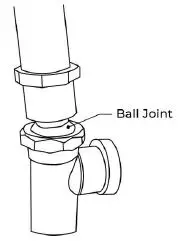
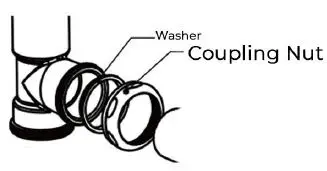
- Remove the coupling nut and washer from the top of the tee where the ball joint is located.

- Connect the top of the ball joint tee with the overflow ell using the washer and coupling nut. Tighten firmly to have a leakless connection.

- Use the ball and joint to angle the drain properly to allow for proper installation in the bathroom.

- Remove the coupling nut and washer from the left-hand side of the drain tee.

- Connect the drain ell with the left-hand side of the drain tee using the coupling nut and washer. Tighten firmly to have a leakless connection.

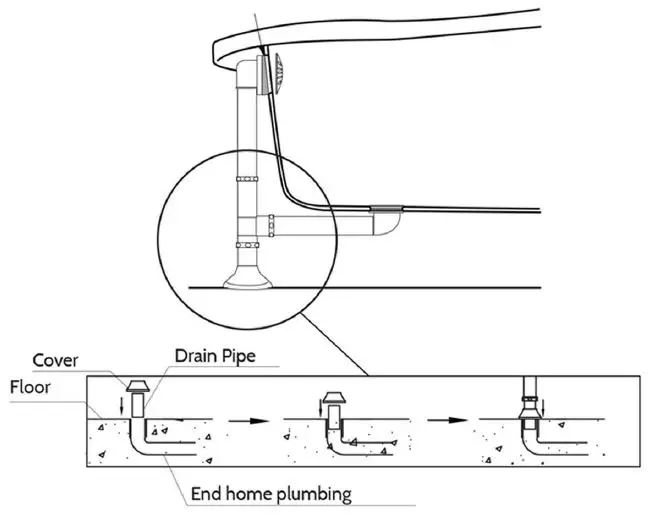
- Attach the flange to the base of the external drain and proceed to connect the drain to the end home plumbing.

- Prior to finalizing installation, check all drain connections and fill the bathtub with a minimal level of water to test and ensure that no connections are leaking.

Contact Information
streamlinebath.com.
[email protected].
(310) 935-0028.


