
EO Charging Genius 2 Smart Electric Vehicle Charging

Product Information
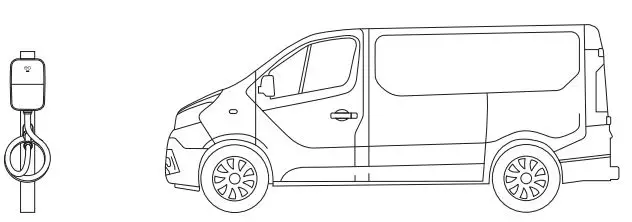
The Genius 2 is a tethered charger designed for electric vehicles. It is compatible with various electric vehicle models and is equipped with a charger dock and hook for easy cable storage. The charger has LED indicators to provide information about its status, including power off, initializing, ready to charge, cable inserted, charging, cable removed, paused, and fault.
Product Usage Instructions
Starting a Charging Session:
- Unlock the vehicle.
- Note: When the battery is full, the charging session stops automatically.
- Disconnect the charging cable from the electric vehicle.
- Return the charging cable to the charger dock and hook (if available).
- For wall-mounted chargers, coil the cable around the charger case and holster the cable handle to the charger.
- Note: The charger and vehicle may lock the cable in place to prevent theft. Follow your vehicle’s instructions for releasing the cable. Unlocking the vehicle is the most common method.
Stopping a Charging Session:
- Unlock the vehicle (if necessary).
- Disconnect the charging cable from the electric vehicle.
- Return the charging cable to the charger dock and hook (if available).
- For wall-mounted chargers, coil the cable around the charger case and holster the cable handle to the charger.
- Note: The charger and vehicle may lock the cable in place to prevent theft. Follow your vehicle’s instructions for releasing the cable. Unlocking the vehicle is the most common method.
Charger LED Guide:
The charger LED provides information about the charger’s status. The following table explains the different LED colors and states:
| LED Color | State | Meaning |
|---|---|---|
| Not illuminated | Power off | No power is available. The unit is not operational. |
| Solid white | Initialising | The charger is powering up and initializing. |
| Pulsing blue | Ready | The charger is ready to start a charging session. |
| Pulsing green | Cable inserted | The charger is communicating with the vehicle and trying to start a charge session. |
| Solid green | Pulsing blue | The charging session has successfully started. |
| Solid yellow | – | The charger has returned to ready to charge. |
| Solid red | – | A general fault event has occurred. |
| Pulsing blue | – | The charger has returned to ready to charge. |
If you experience any other faults impacting the ability to charge, please escalate the issue to the on-site shift manager.
STARTING A CHARGING SESSION
- Step 1. Remove the charging cable from the charger dock.

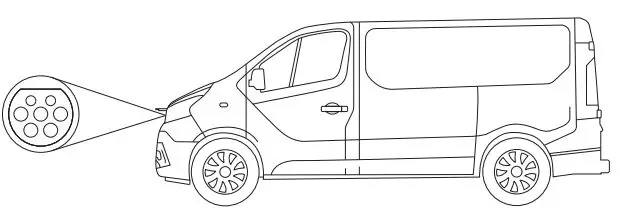
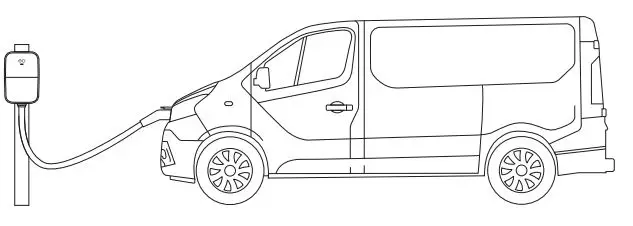
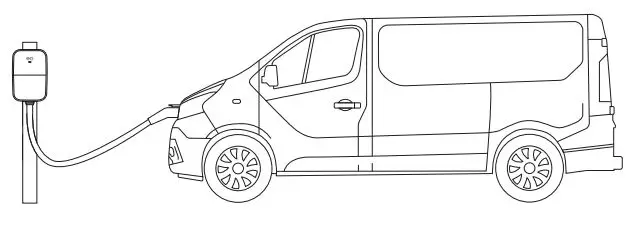
- Step 2. Plug-in the charging cable to the connector on the vehicle.
- Step 3. If the charger has been set up for plug and play, the charging session will start after step 2.
If the charger has been set up as RFID-enabled, simply tap your RFID card below the EO logo and LED on the front of the charger. The LED light will indicate when the RFID card has been read. - Step 4. Common LED sequences to lookout for:
- Solid green = charging
- Flashing green = connected, but not charging
- Yellow = charging paused (could be due to vehicle or charger schedule, or load management)
- Red = there is a fault. Unplug and reattempt the steps, if it persists please report to your on-site shift manager
STOPPING A CHARGING SESSION
- Step 1. Unlock the vehicle.
Note: When the battery is full, the charging session stops automatically.
- Step 2. Disconnect the charging cable from the electric vehicle and return the charging cable to the charger dock and hook, where provided, or for wall-mounted chargers, coil the cable around the charger case and holster the cable handle to the charger.

Note: The charger and vehicle will commonly lock the cable in place to prevent theft. Follow your vehicle’s instructions for releasing the cable. Unlocking the vehicle is the most common method.
CHARGER LED GUIDE
Charger power up
| LED colour | State | Notes |
| Not illuminated | Power off | No power is available. |
| Solid white | Initialising | The unit is powering up and initialising. |
| Pulsing blue | Ready | Initialisation successful and ready to charge. |
Charger power up
| LED colour | State | Notes |
| Pulsing blue | Ready | Charger has returned to ready to charge. |
| Pulsing green | Cable inserted | The charger is communicating with the vehicle and trying to start a charge session. |
| Solid green | Charging | A charging session has successfully started. |
| Pulsing blue | Cable removed | Charger has returned to ready to charge. |
| Solid yellow | Paused | The charge session has been placed on pause by the vehicle. |
| Solid red | Fault | A general fault event has occurred. |
FAQs
- What if the charger LED is off?
There may be a loss of power to the charger. Please report this to the on-site shift manager and connect to another charger. - What If the charger LED is white?
Please report this to the on-site shift manager and connect to another charger. - Do I need to scan my badge or a card to start charging?
If the charger has been set up as RFID-enabled, please follow the
‘Starting a charging session’ procedure. - What does it mean if I connect the charger to my vehicle and the LED is red?
If there is a red LED displayed on the charger, please report this to the on-site manager and connect to another charger.
Note: If you experience any other faults impacting the ability to charge, please escalate to the on-site shift manager.


 Charging User Manual")

 Charging Program User Guide")

