LCN 404XP Surface Mounted Closer Instruction Manual

Digital instructions – please read
For the best installation experience, we now have Smartphone friendly digital interactive instructions. Just scan the QR code below or enter the url into your browser to view them.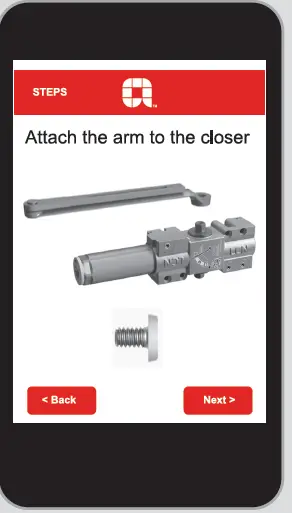
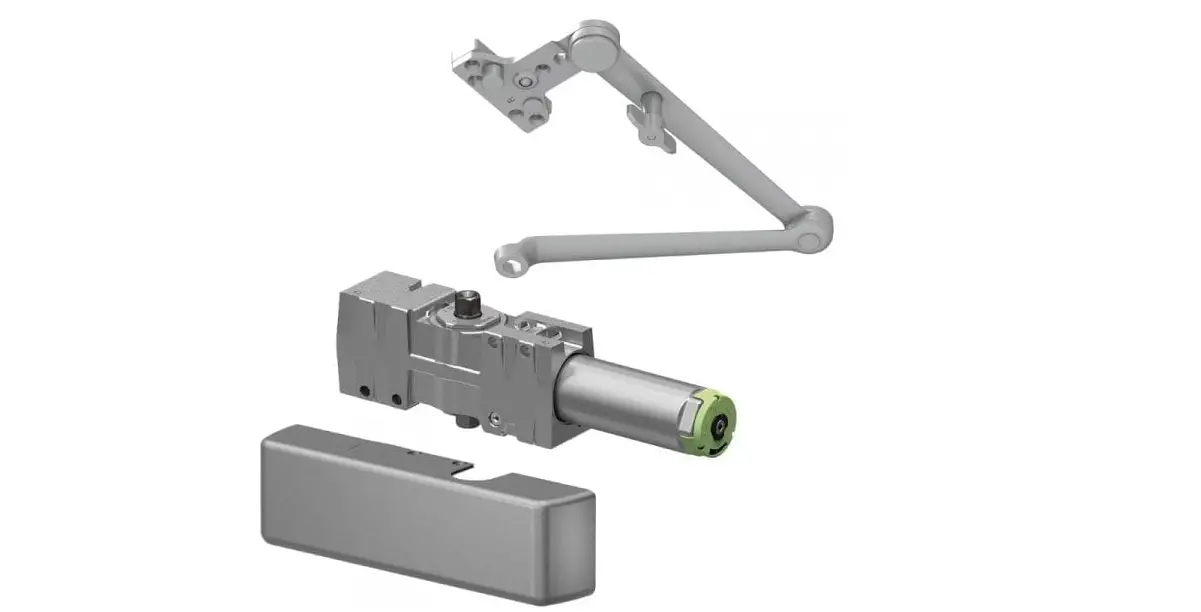
Parts included 

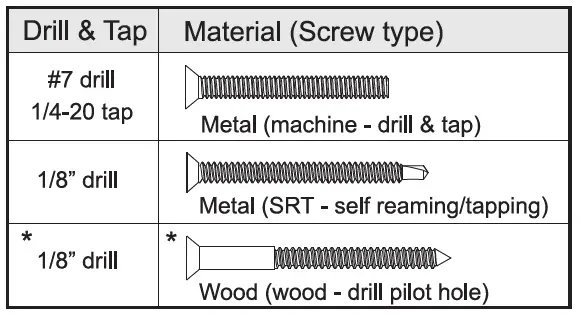
Drill and tap information 
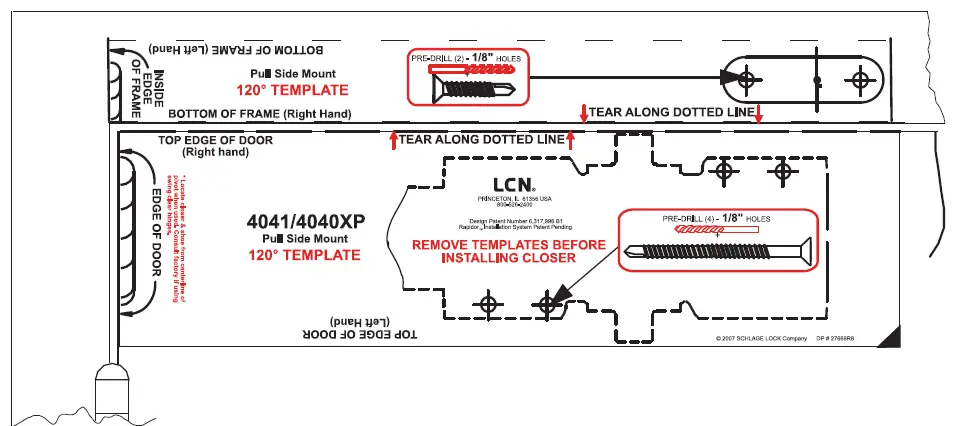
Pull Side Mount
- Locate the proper template, tear along the dotted line, peel the template and apply. Center punch all hole locations.


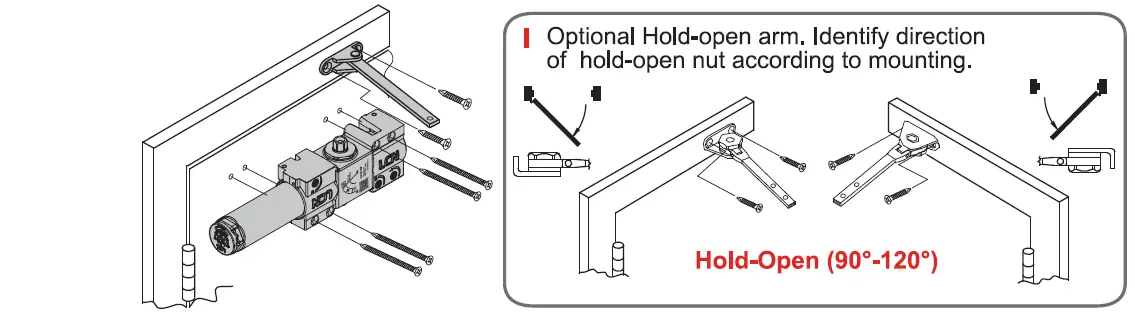
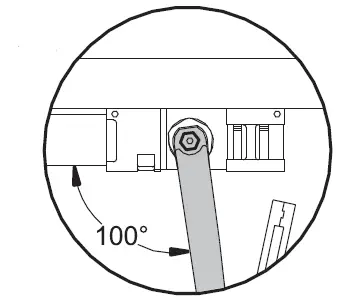
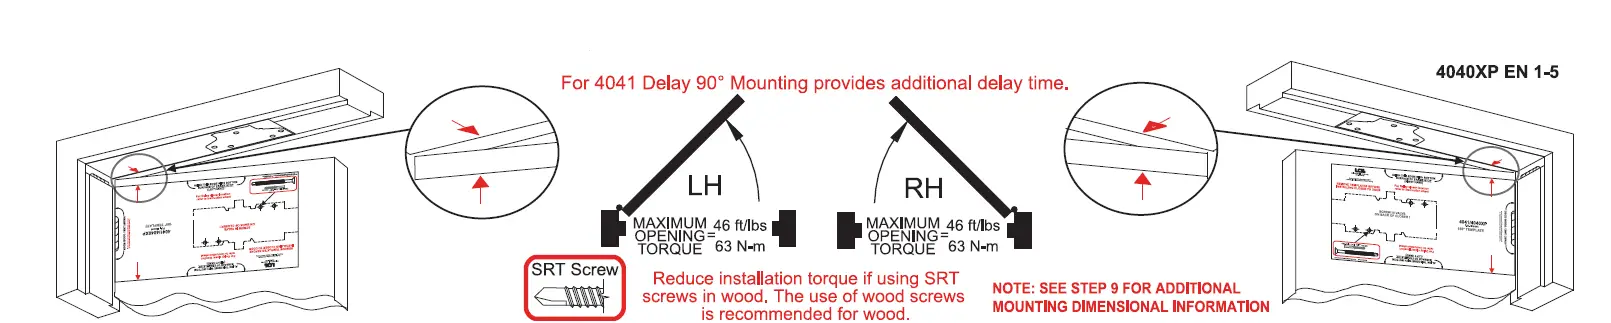
- Mount arm on the shaft at 100 to closer as shown.


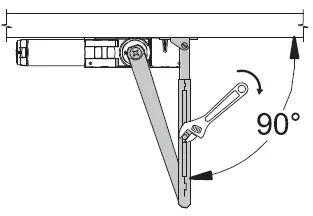
- Pre-load arm to 90°. V Fasten with screws provided.

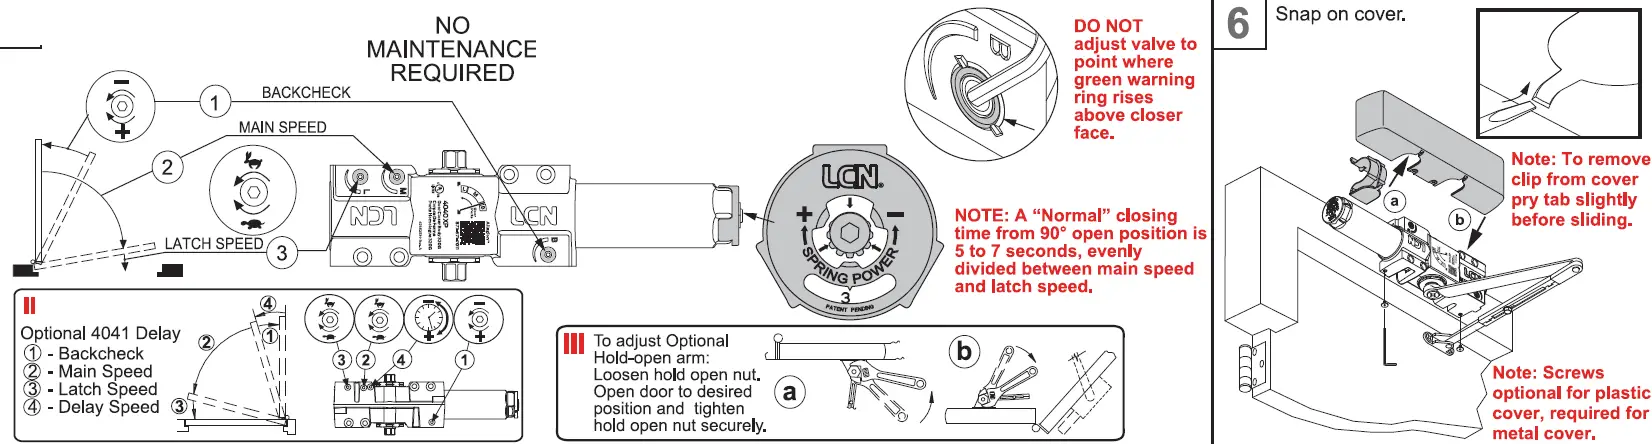
- If necessary adjust closer.

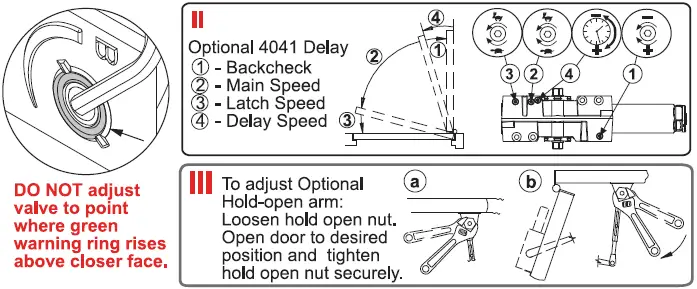
- DO NOT adjust the valve to the point where the green warning ring rises above the closer face.

- Snap-on cover.

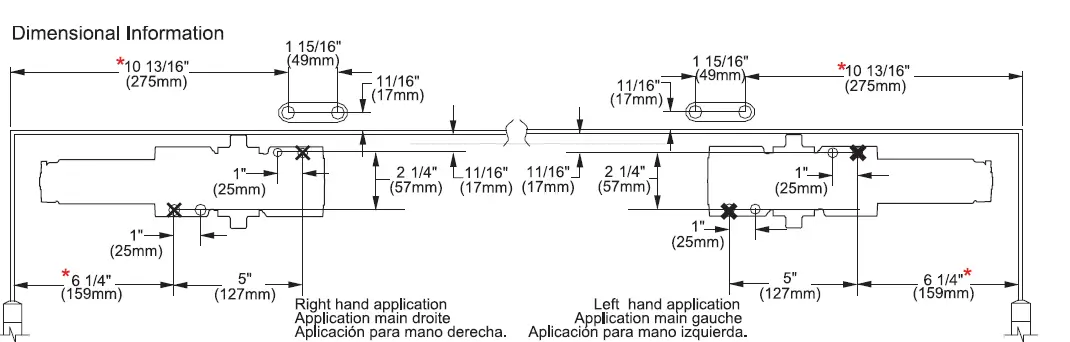
- Dimensional Information


installation instruction
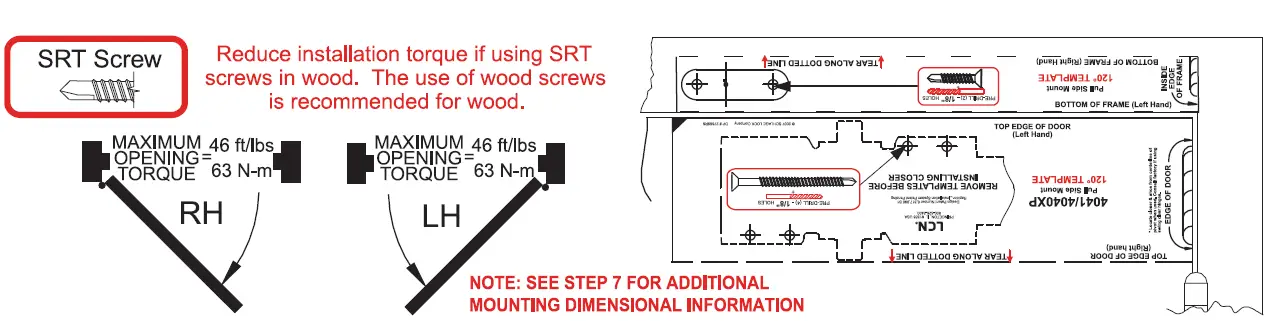
- Locate the proper template. Peel the template and apply so the red arrows align. Center punch all hole locations. For self-reaming tapping screws (SRT} drill 1/8″ pilot holes. Remove template after marking hole locations. DO NOT MOUNT CLOSER UNTIL STEP 5a.


caution
Improper installation or regulation may result in personal injury or property damage. Follow instructions carefully. For questions call 877-671-7011
Screw in Main Speed valve on front and back check selector valve on the back of closer until seated.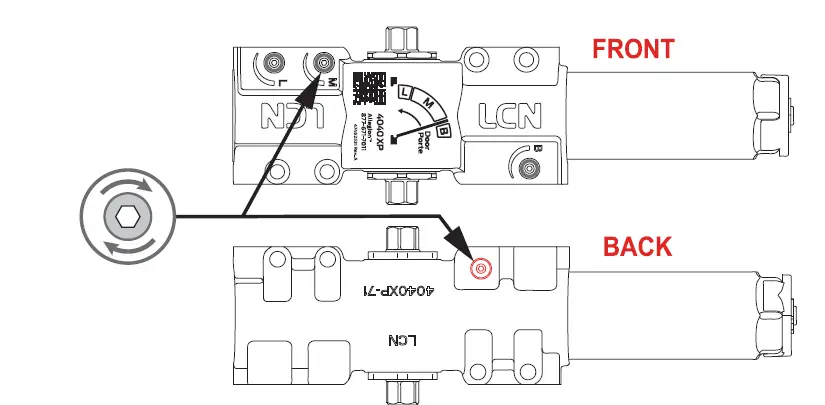
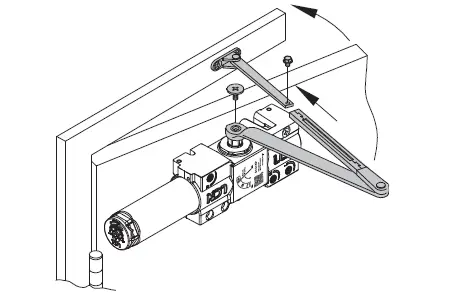
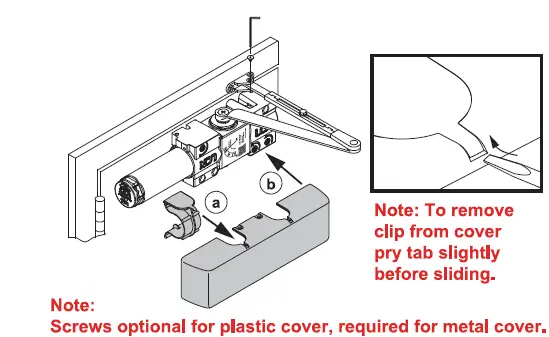
Attach the arm to closer with provided fastener.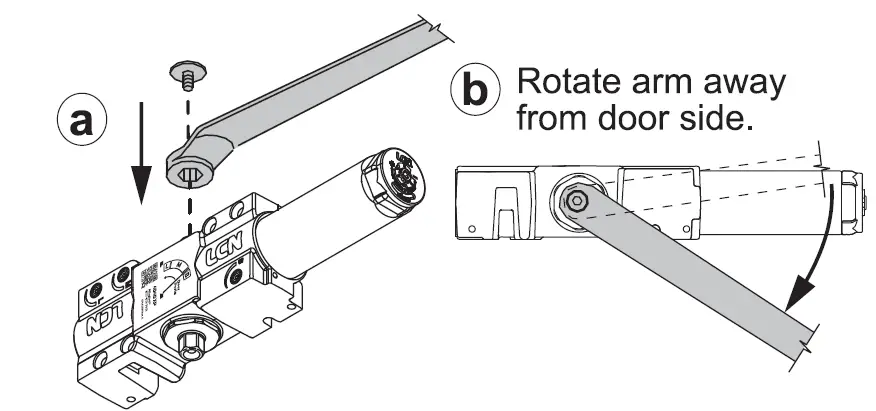
Using screws provided, @Turn Main Speed valve secures closer 6 to door. Turn Main Speed valve secure closer 6 counter-clockwise 1 1 /2 turns to the factory default setting (arm should return to a parallel position).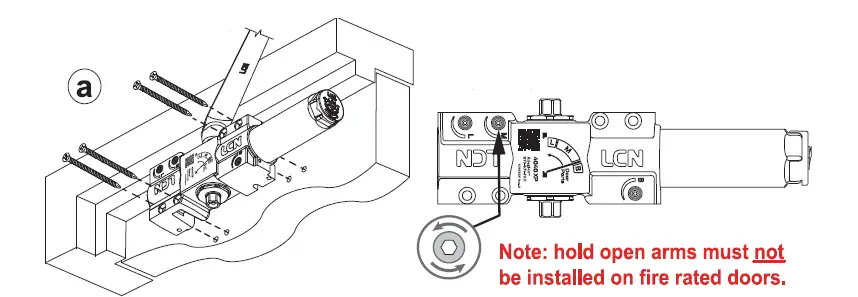
If necessary adjust closer.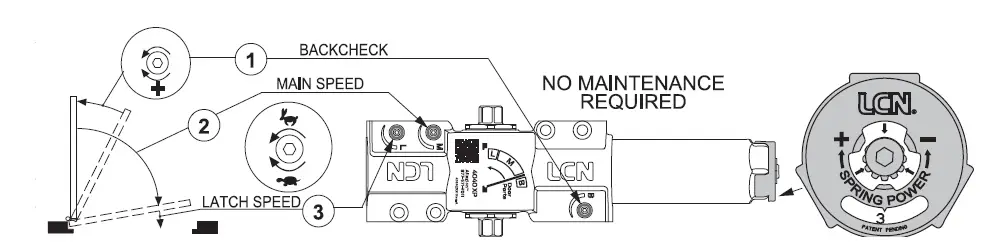
DO NOT adjust the valve to point where green warning ring rises above closer face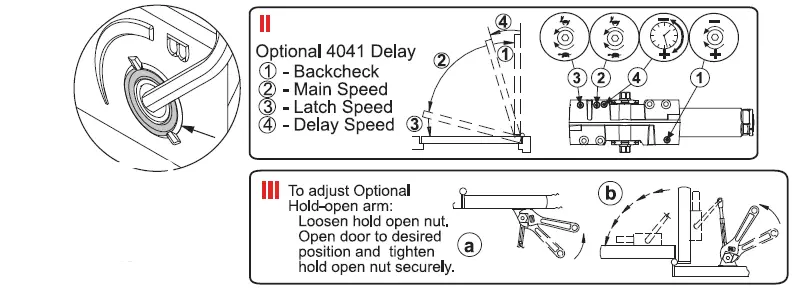
snap on cover.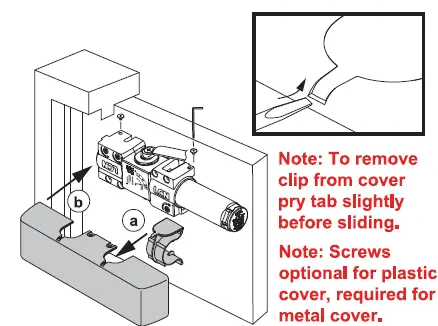
Dimensional Information for standard and delay action mounting.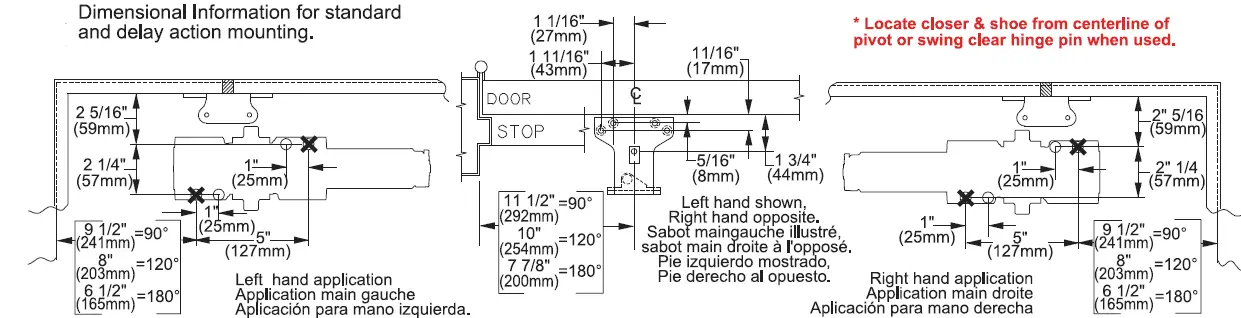
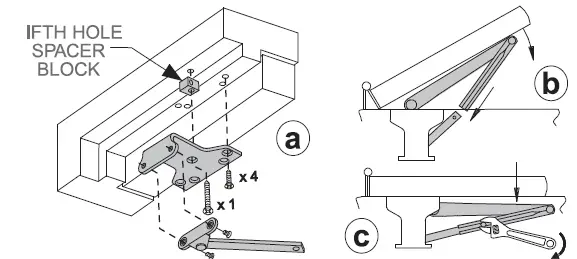
TOP Jamb mount
Locate the proper template. Center punch all hole locations. For self-reaming tapping screws (SRT) drill 1/8″ pilot holes.
NOTE:
MOST 4040XP TOP JAMB INSTALLATIONS REQUIRE A PLATE. (SEE REVERSE SIDE OF SHEET FOR TEMPLATING.) FLUSH HEADER OR SINGLE ABETTED FRAME MOUNT REQUIRES 3 1/2″ FRAME FACE 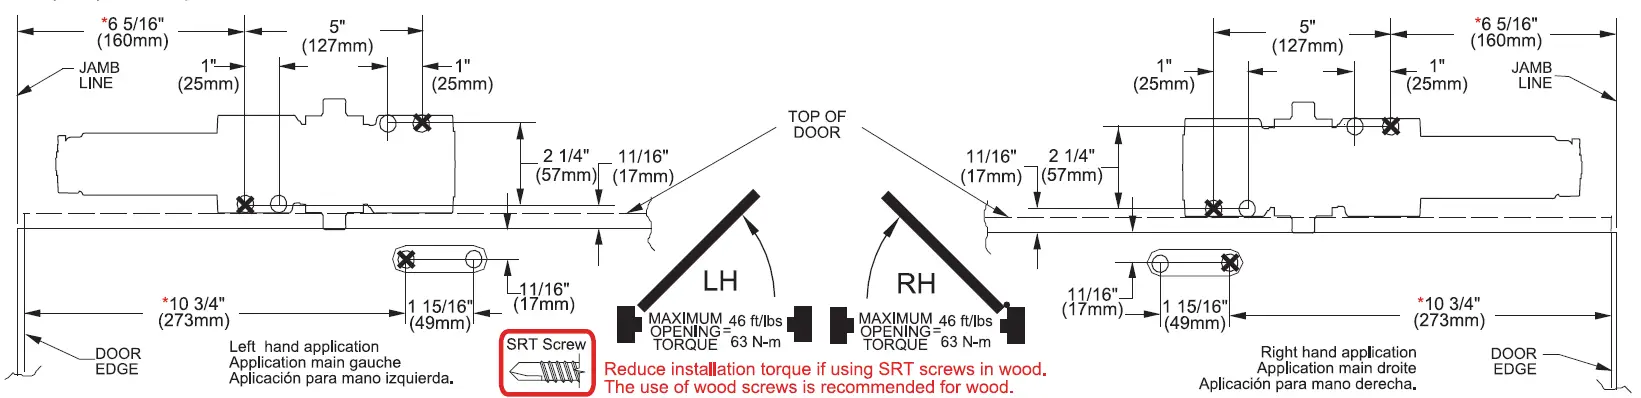
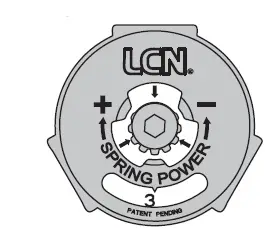
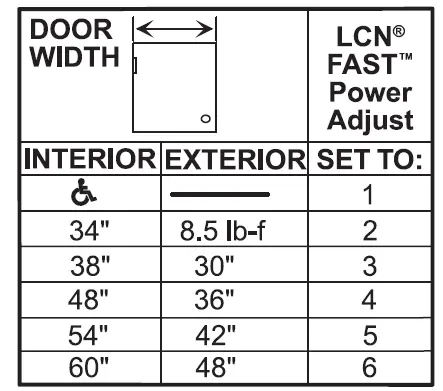
Determine door width, and adjust spring power to match the chart. 
LCN FAST Power Adjust for Spring Power Adjustment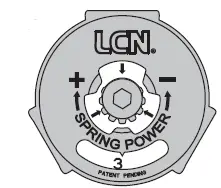
CAUTION
Improper installation or regulation may result in personal injury or property damage. Follow instructions carefully. For questions call 877-671-7011Secure closer and forearm with fasteners provided. 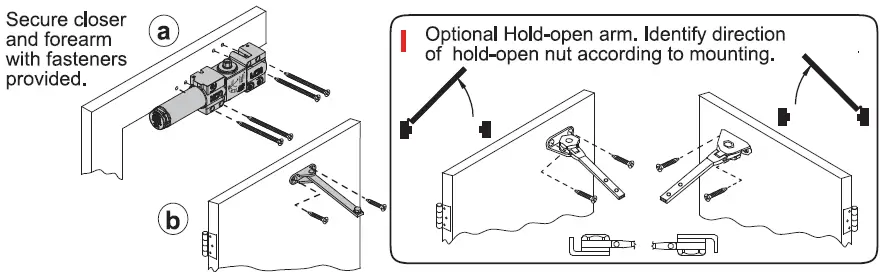
Mount arm on shaft at 100° to closer, as shown.

If necessary, adjust closer.