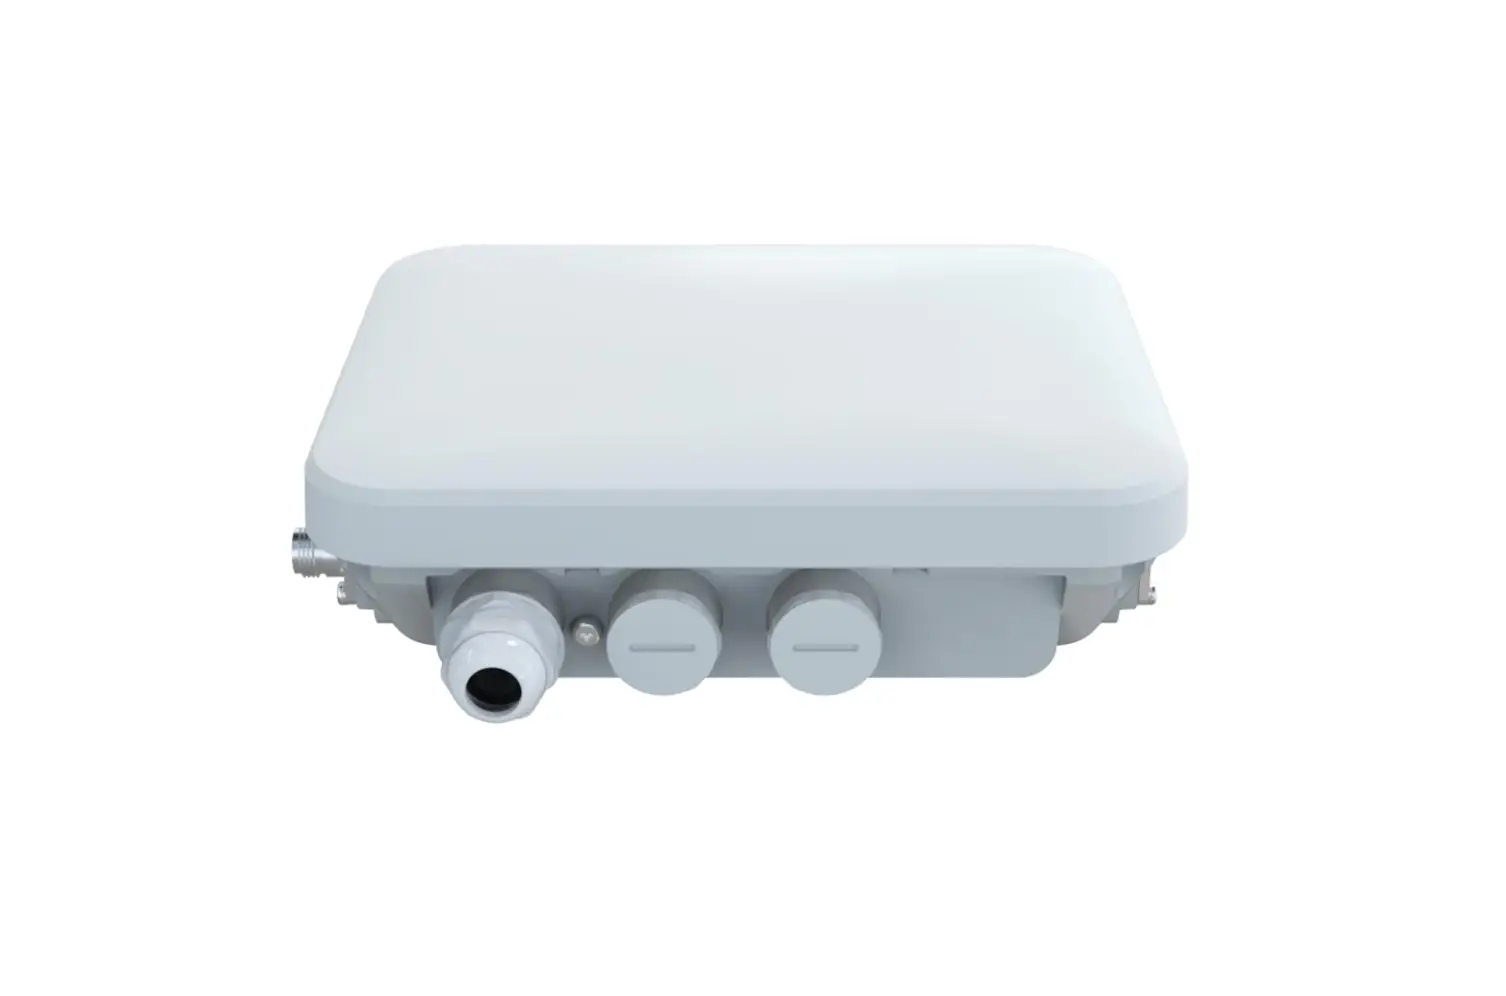
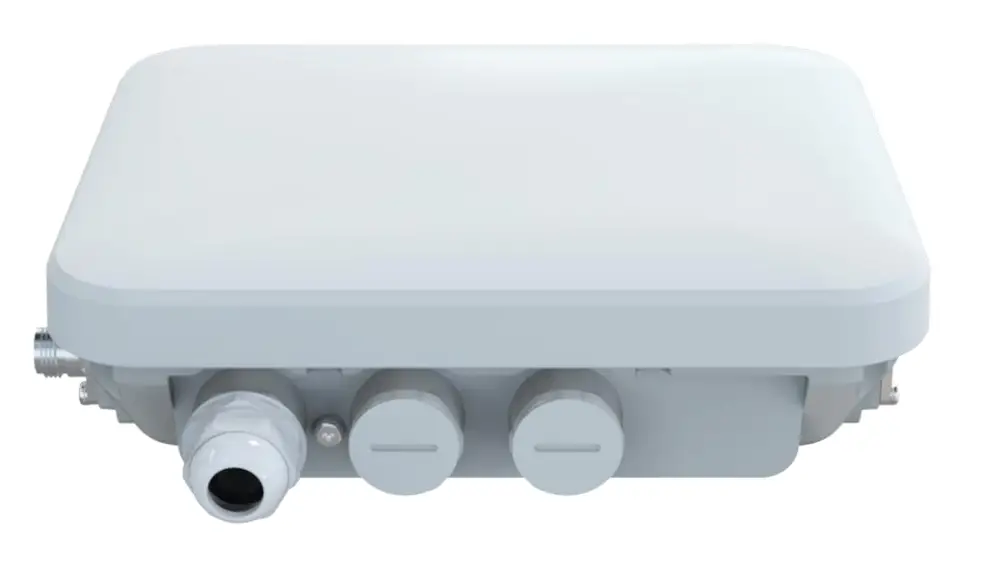
COTX X5 Outdoor Gateway
Package Contents
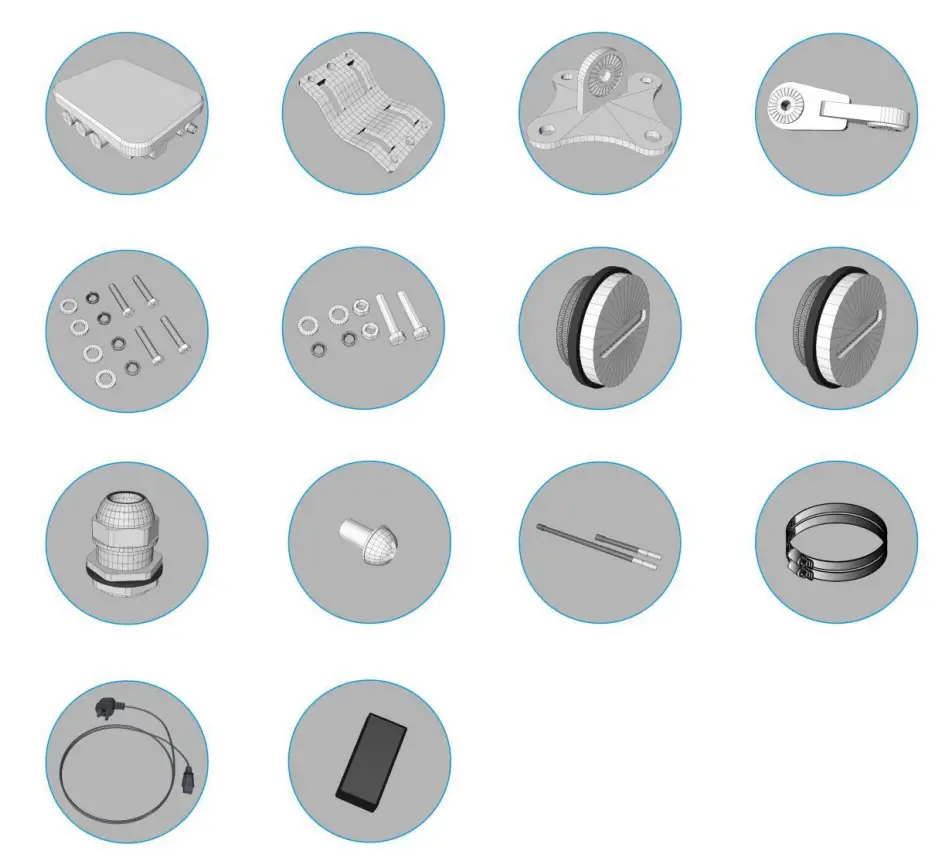
Your COTX-X5 Outdoor Gateway comes with the following items:
1 COTX-X5 outdoor gateway
3 installation kit
4 fixing screws (including accessories)
2 long connecting rod screws (including accessories)
2 waterproof interface
1 waterproof plug (Type N)
1 ground screw
2 external antennas
2 stirrups
1 power cord
1 POE module
Warnings
Pay attention to these important warnings when using your Outdoor Gateway:
- Never power up the Outdoor Gateway without the LoRaantenna connected, as this may damage the device.
- Before outdoor installation, make sure you tighten all connectors and the case itself very well to avoid any unintended water ingress.
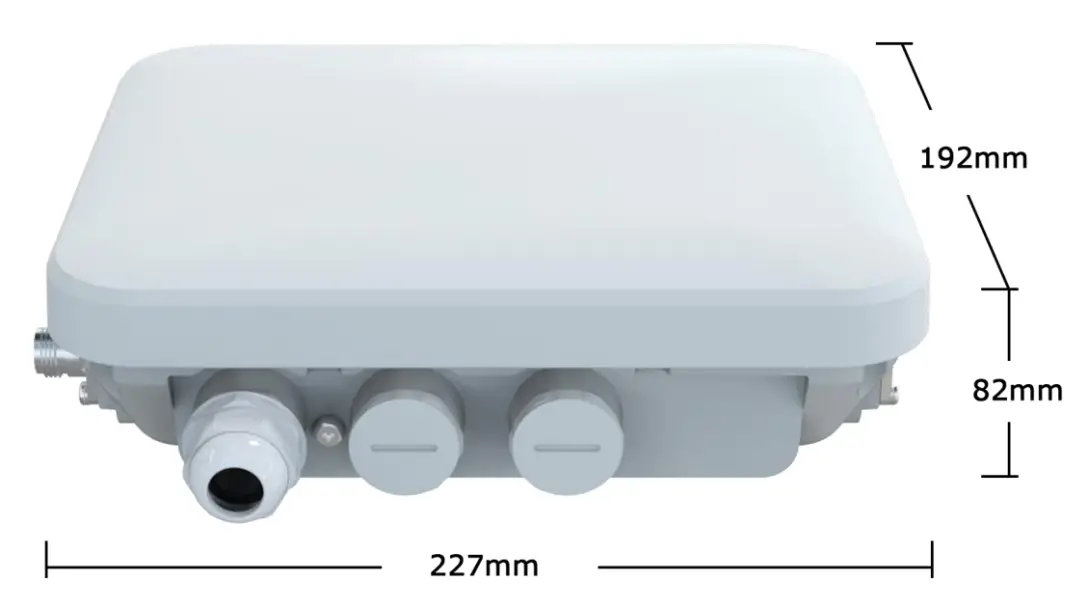
Structure size
The outer dimension of COTX-X5 is 227 x 82 x 192 mm, as shown below:
Interface description

Quick Specifications
| General Specification | |
| Weight | 1.7Kg |
| Material | Aluminum Case + Plastic Cover |
| Installation | On the Pole/ Wall |
| Operating Temperature | -40~55℃ |
| LoRa Performance | |
| Power | <=20dBm, or<=27dBm, corresponding to the local frequency respectively, according to local laws |
| Frequency | US915, AS923, AU915, EU868, IN865, KR920 |
| Channel | 500 kHz LoRa reception with 8 x 8 channels LoRa® packet detectors, 8 x SF5-SF12 LoRa® demodulators,8 x SF5-SF10 LoRa® demodulators |
| Power consumption | |
| Power supply | POE (support 802.3at)/48V DC-Jack |
| Maximum power consumption | <25.5W |
| Platform specifications | |
| RAM | 2GB LPDDR4-3200 SDRAM (4G/8G Optional) |
| CPU | Broadcom BCM2711, Quad core Cortex-A72 (ARM v8) 64-bit SoC @ 1.5GHz |
| OS | Ubuntu20.04 |
| Main-board | Raspberry Pi 4B |
| Interface | |
| Network port | 1*10/100/1000M Ethernet interface(RJ-45) |
| WiFi | 2.4 GHz and 5.8 GHz IEEE 802.11ac |
| 4G | Frequency band: global frequency band, Rate: Cat1 |
| Bluetooth | Bluetooth 5.0, BLE |
| SD card | 1*Micro SD card |
| LoRa® antenna | N-Male*1,860~930MHz,Gain:3.5dBi |
| 4G antenna | N-Male*1 860~960MHz,1710~2700MHz, Gain:3dBi |
| LED indicator | |
| System indicator | On (in normal operation), Blinking (in system upgrade), Off (the device is abnormal) |
| ETH indicator | On (the network is normal), Blinking/Off(abnormal function) |
| WiFi indicator | On (normal WiFi connection), Blinking/Off (abnormal function) |
| LTE indicator | On (LTE function is normal), Blinking (SIM card is identified, network is abnormal), Off (function is abnormal) |
| BLE indicator | On (BLE connected), Off (abnormal function), Blinking(BLE enabled, to be connected) |
Quick Installation Guide
Configuring Your Outdoor Gateway
To configure the gateway, please download the COTX APP from the Apple store or Google Play directly by searching “COTX”. Please create a Helium wallet account by using the “COTX” APP or “Helium Hotspot” APP first and then configure to the next step shown below:
Step 1: Turn on COTX Gateway, so the COTX APP can detect the gateway to further configuration.
Step 2: Open the COTX application and log in.
Step 3: Click “COTX Hotspot”–>“Add a Hotspot” and choose “COTX Gateways BLE” from the list.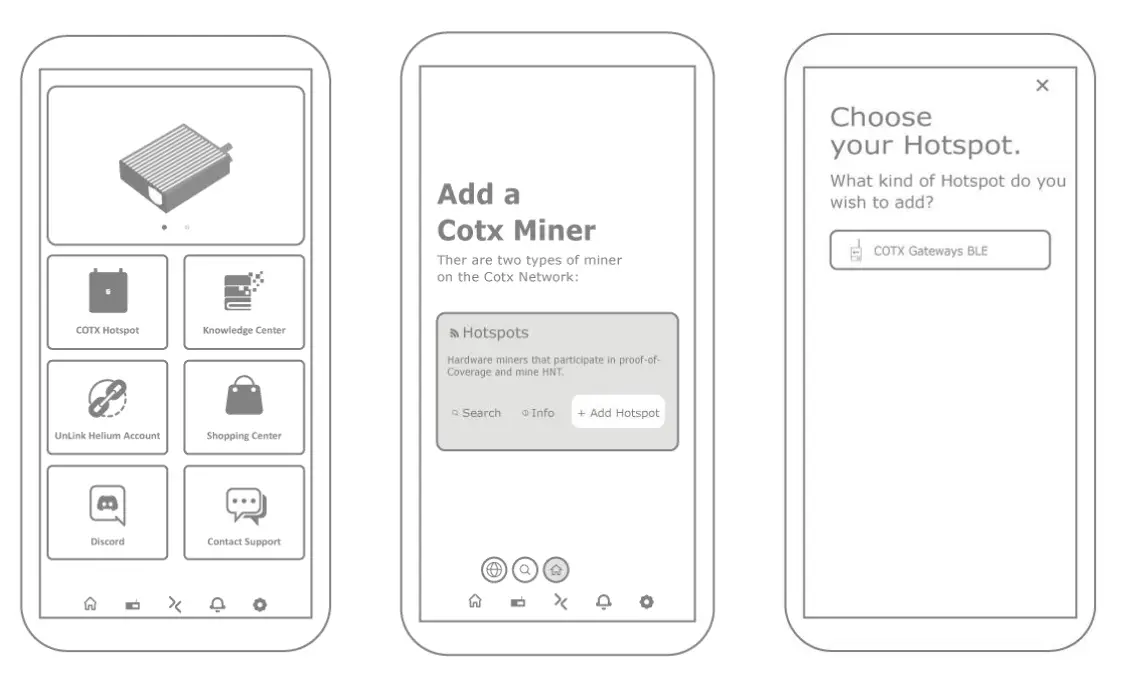
Step 4: Follow the steps on the App and get to the “Bluetooth” page.
Gateway Bluetooth is automatically turned on after the COTX outdoor device is powered up. Click “Scan for my Hotspot” to pair up.
Step 5: Click the entry for your gateway in the app. You can check if it is correct by matching the last 4 characters shown in the application with the last 4 characters of the mac address printed on the label.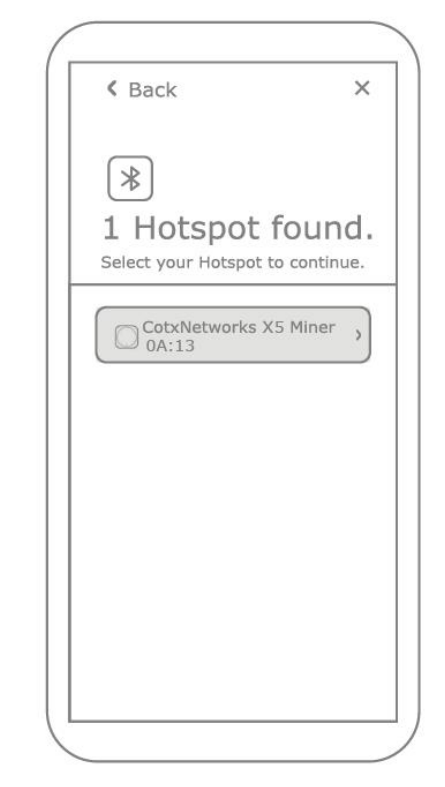
Step 6: The app will show the available WiFi networks within the range of your Gateway.
If you are using Ethernet, tap Use Ethernet Instead and skip to Step 7.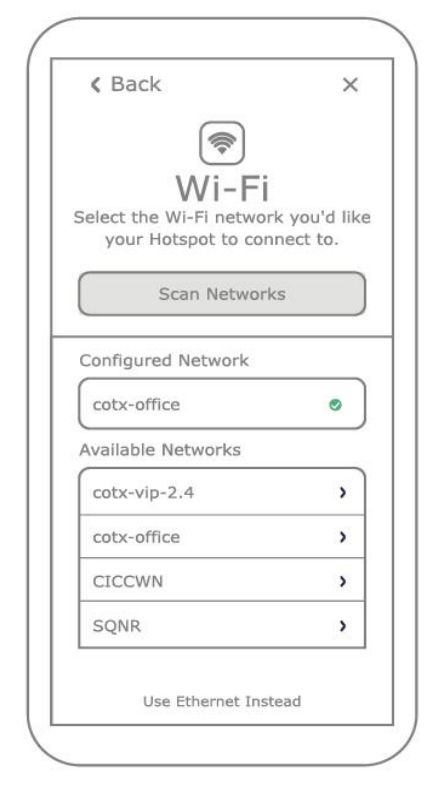
If using WiFi, tap on the name of your WiFi network on the app, which will bring you to the following screen. Type in your WiFi network password, then tap Connect, which will connect to your WiFi network.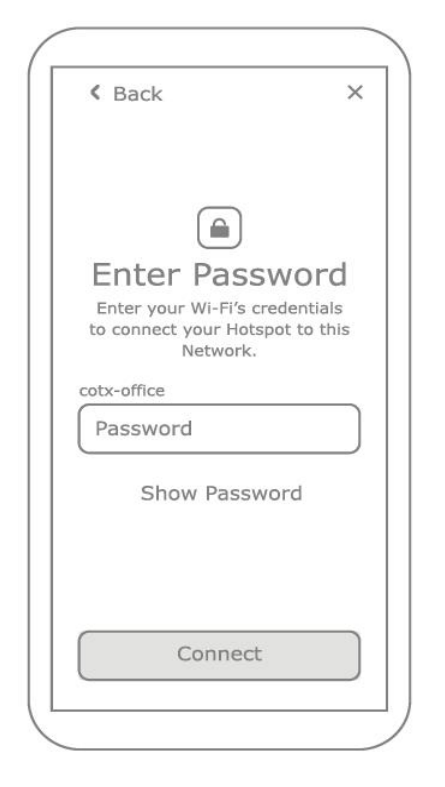
Step 7: The app will then ask you to set your gateway’s location, and you can confirm the location of your gateway. A Helium wallet account should be created first so you can continue to the next step.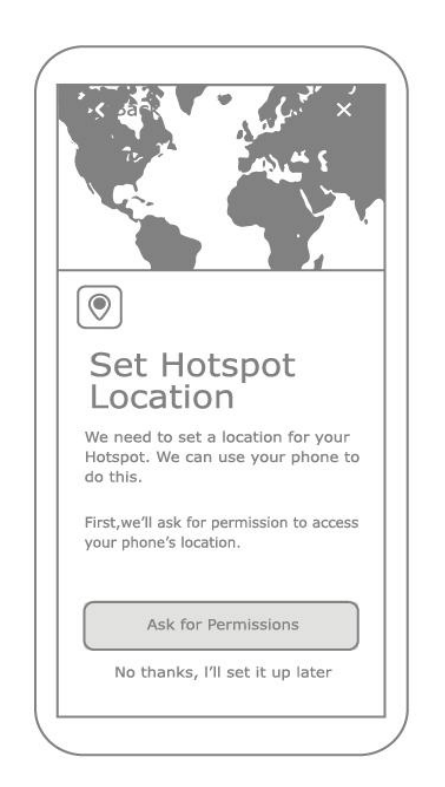
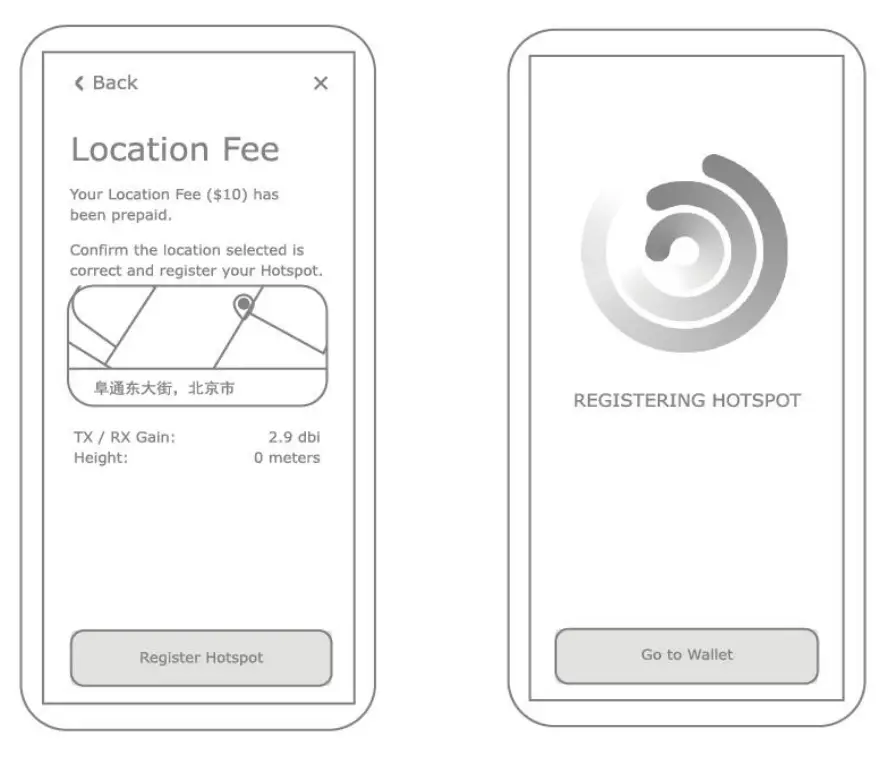
Step 8: Register the gateway to the Helium Network to provide IoT services for related devices. The setup is now complete. It’ll submit the details of the COTX Gateway to the Helium network. In approximately 15 minutes, it will be confirmed that it is added to the Helium network.
Deploying Your Outdoor Gateway
Before deploying your outdoor gateway, please finish your gateway configuration by using the “COTX” APP.
Step 1: First, carefully connect the LoRa® antenna to the “Lora” port of the gateway, the WiFi antenna to the “WiFi/BLE” port, and the LTE antenna to the “LTE” port.

Step 2: Next, find a suitable location for your gateway. Make sure it will provide the best coverage. For details about the installation method, see “Pole Mounting”.
Step 3: To integrate the Ethernet network, use a network cable and connect the gateway to the switch or router.
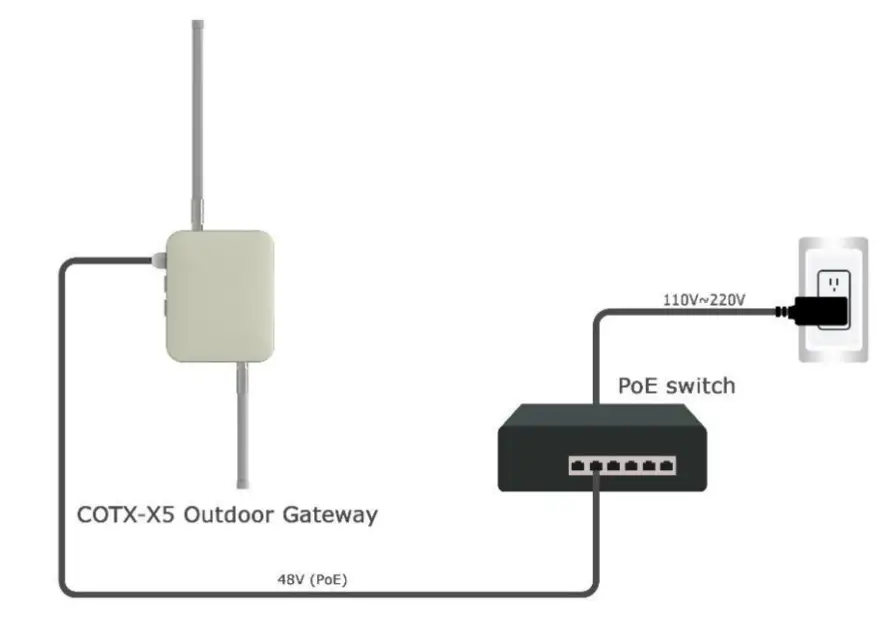
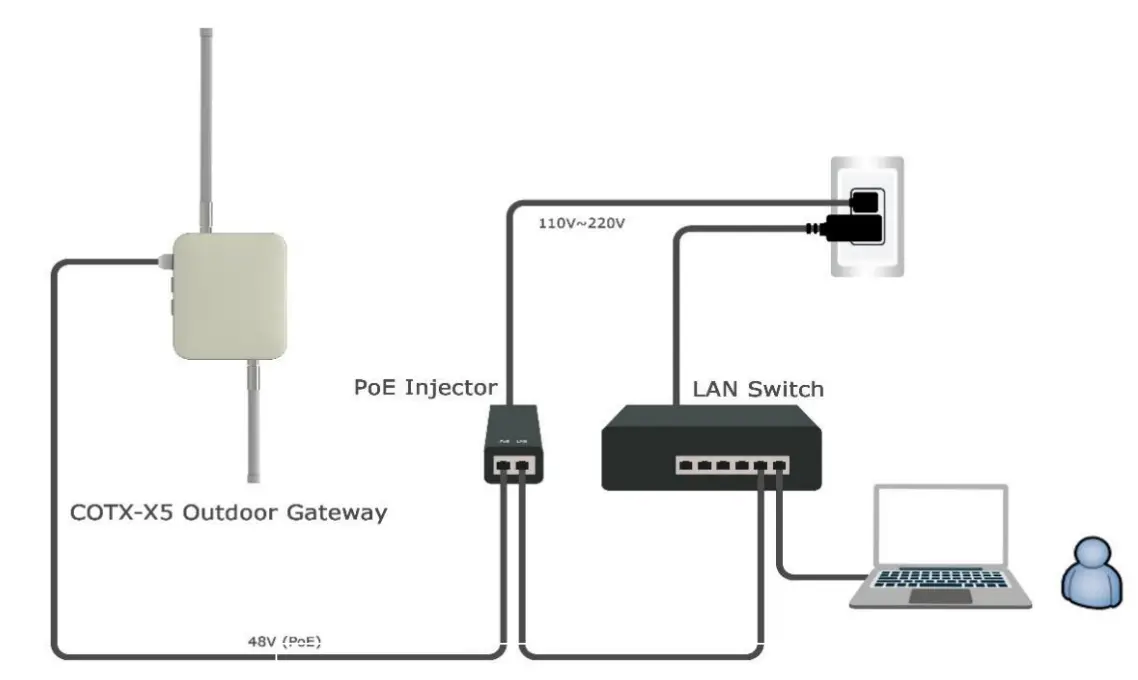
Step 4: The default setting is Power over Ethernet (PoE). Connect the Ethernet port of the gateway to a switch with the PoE function (PoE – IEEE 802.3at). If unavailable, use a PoE injector and power up.
- Power on by PoE Switch

- Power on by PoE Injector

Now System LED lights up. When the system gets ready, that light will turn green.
Pole Mounting
Step1 Place the base bracket on the back of the device with four M6*4 screws as shown below:
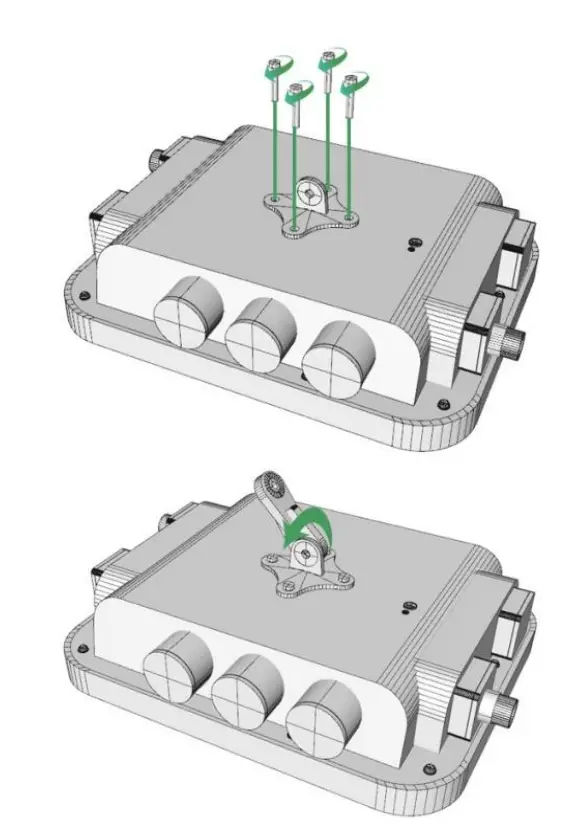
Step2 Attach the 3-Axis brackets on the back of the device with two number 7 screws as shown below:

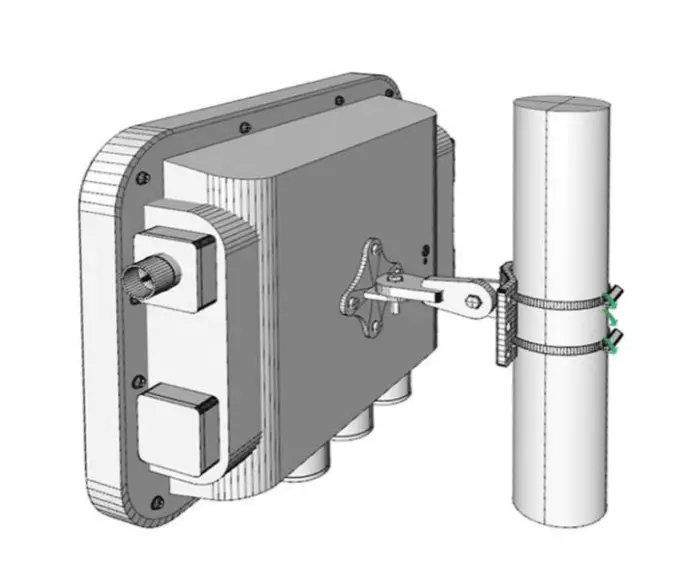
Step3 Insert the steel band clamps through the four holes on the mount kit, wrap the band clamps around the mounting pole, lock and tighten the clamps using a screwdriver.
Customer Support
Beijing COTX Networks Technologies Co., Ltd.
www.cotxnetworks.com