![]() IN-GROUND SPRINKLER SYSTEM WITH CLICK-N-GO™
IN-GROUND SPRINKLER SYSTEM WITH CLICK-N-GO™
HOSE CONNECT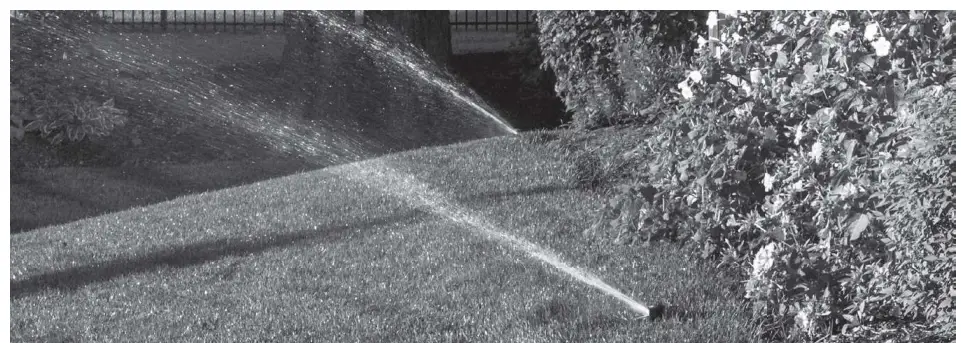
Installation & Operating Guide
About This System
Thank you for purchasing the Rain Bird in ground sprinkler system with Click-n-Go” hose connection. This system includes four professional grade rotors that utilize the same precision watering technology as in professionally installed Rain Bird systems.
Specifications
- Approximate total coverage area: Up to 3,000 ft (depends on sprinkler placement and your home’s water pressure/flow)
- Recommended water pressure: 40- 75 psi
- Minimum water flow: 6 gallons per minute (GPM)
- Sprinkler throw distance (adjustable): 16′ -24′
- Sprinkler patterns (adjustable): 40° to 360°
CAUTION
Buried Utility Warning
Call 811 (JULIE INC.) at least 24 hours in advance before you dig (Federally Mandated).
Backflow Protection
You must confirm that the faucet to which the system will be attached includes a hose bibb vacuum breaker or other anti-siphon device to protect against backflow of water. Be sure to check local plumbing codes to determine if more is required. Rain Bird is not responsible for any damage or harm caused if appropriate backflow protection is not installed on the faucet.
Elevation
You must confirm that the elevation of the yard is not greater than 6 ft. from the hose bibb to any sprinkler head in order to ensure proper operation of the system.
Elevations greater than 6 ft. will reduce sprinkler throw distance.
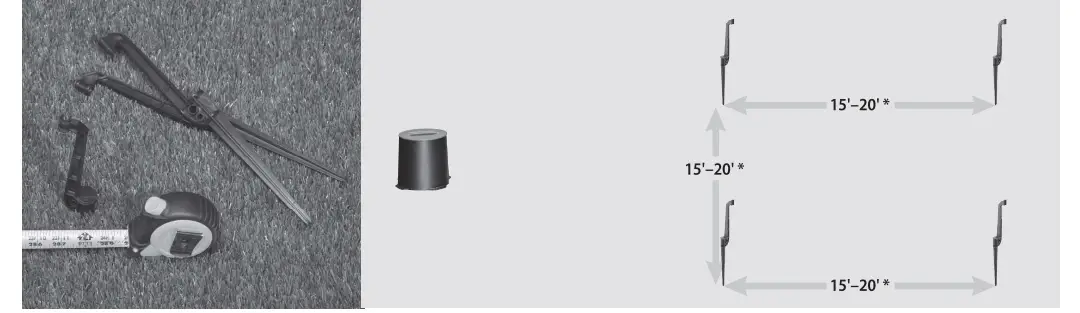
YOU WILL NEED

Optional Timer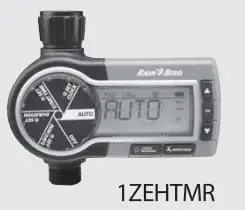
BEFORE YOU INSTALL
![]() Check Your Water Flow Rate
Check Your Water Flow Rate
Before you plan your sprinkler spacing, you will first need to check your home’s water flow rate. Using a 5 gallon pail, turn on the faucet and time how long it takes to fill the pail. Determine gallons per minute (GPM) with the following formula: 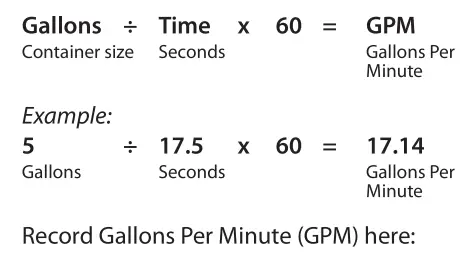
Refer to the table below as a general guide to determine sprinkler spacing and maximum coverage area for your irrigation layout.
Sprinkler System Coverage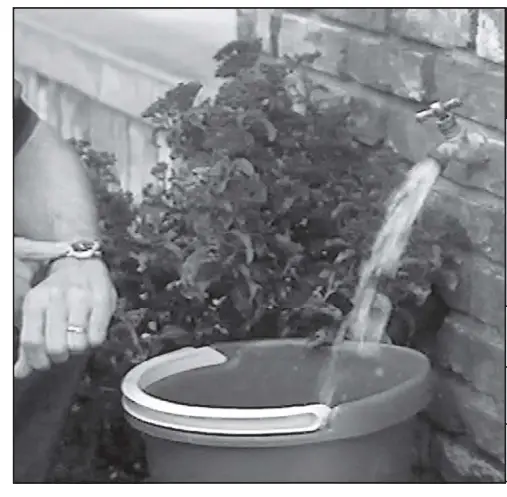
| Your home’s water flow | Sprinkler throw | Coverage Rectangle | Maximum watering area All sprinklers full circle | |
| 6 gpm | 22,7 Ipm | 18 ft | 659 ft2 | 3,364 ft2 |
| 8 gpm | 20,3 1pm | 20 ft | 812 ft2 | 3,844 ft2 |
| 10 gpm | 37,8 1pm | 24 ft | 1,156 ft2 | 5,041 ft2 |
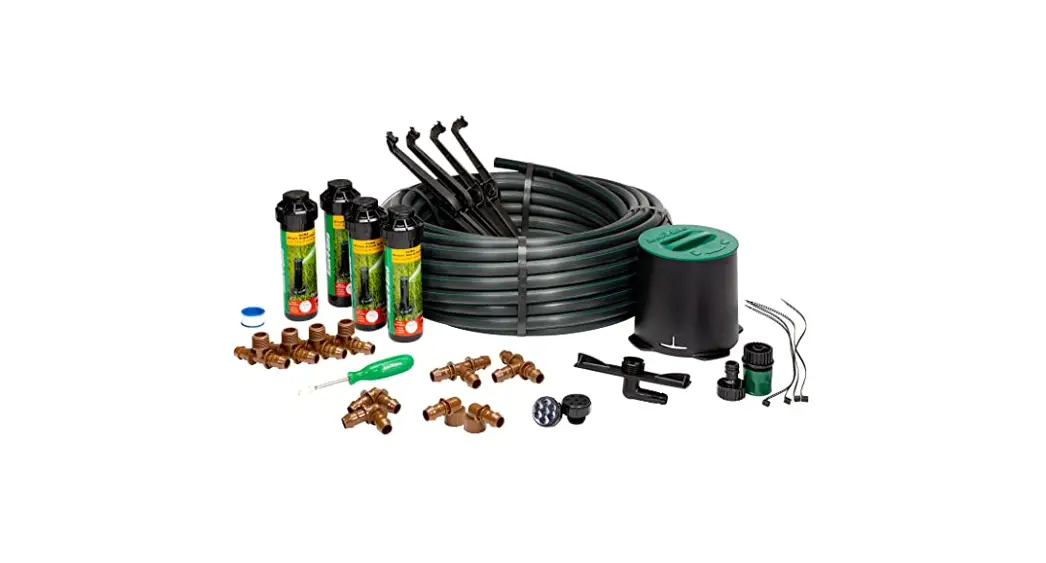
CONTENTS
THIS KIT INCLUDES
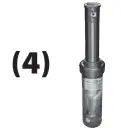 | 32SA Gear-Drive Rotary Sprinklers /16-24 ft adjustable throw. |
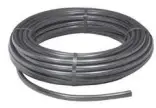 | 90′ Coil Of In-Ground Tubing Connects sprinklers underground. Easy to cut in required lengths. |
 | Stakes and Cable Ties Support sprinklers for testing b final positioning. |
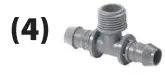 | Threaded Male Tees Connect in line sprinklers to the distribution tubing. |
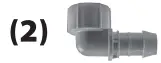
 | 1/2″ Barbed Tee To divert water to two separate runs. |
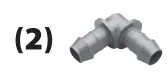 | 1/2″ Barbed Elbow For corners. |
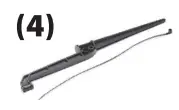
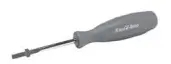 | Rotary Spray Adjustment Tool For easy pull up and maintenance adjustments. |
 | Threaded Elbow Connects filtered drain valve to tubing. |
 | Filtered Drain Valves To drain irrigation lines after each use. |
| Click-N-Go Hose Connect Station Allows single quick-connection of your garden hose. Supplies water to all 4 sprinklers. | |
 | Roll- PTFE Tape Seal threaded fittings. |
EXAMPLE LAYOUTS
STEP 1
Sketch & Stake Your Watering Layout Each sprinkler has an estimated throw distance of 16′ to 24′ depending upon your home’s water pressure and flow. Using the grid on the facing page, sketch a watering layout that maximizes coverage without overspraying onto buildings, sidewalks and other non-grassy areas. The sprinklers adjust easily to water full circle or part circle patterns. See steps 12A and 12B for how to adjust patterns and throw distances.
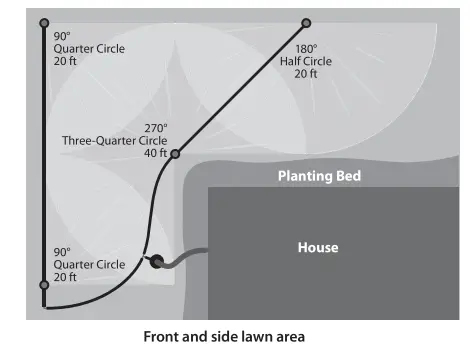
Front and side lawn area’148,6m? ±1,600ft 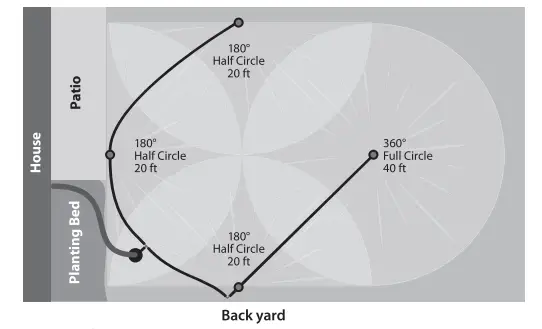
Backyard \223,0m? ±2,400ft 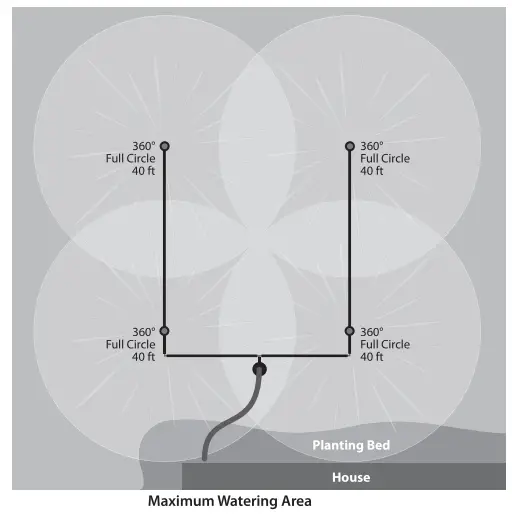 Maximum Watering Area ±4,600ft ‘427,3 m?
Installation Tip
Sample drawing
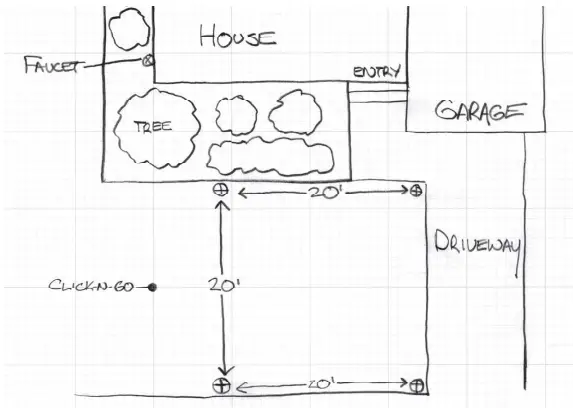
To obtain even coverage of your watering area, each sprinkler should be located so that its watering “throw” distance reaches the next sprinkler.
Note any obstacles you need to work around in routing the underground distribution tubing. Mark the intended location of each sprinkler head. Scale: 1 Square= 8 ft.
INSTALLATION
Mark Sprinkler Locations
Following your irrigation layout sketch, measure the distances between each sprinkler head and mark their locations with the plastic stakes. TIP: Place sprinklers within 3-4 inches of a sidewalk or other straight run if possible. Then measure other sprinklers from those points. Suggested spacing for overlapping sprinkler ‘Head-To Head’ coverage.
STEP 3
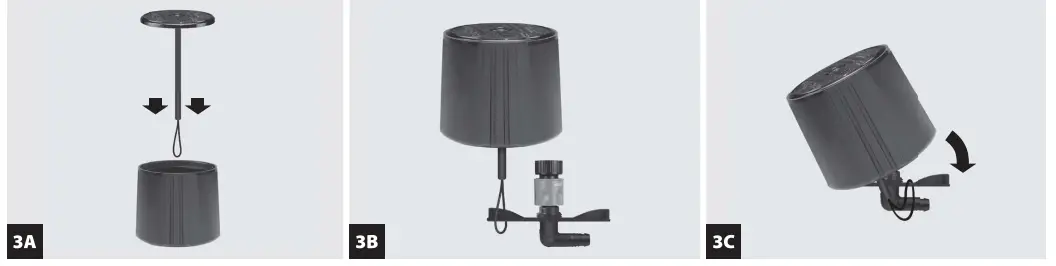
Assemble the water supply housing
3A) Drop the housing cover cord through the opening in the housing. 3B) Slip the cord’s loop over the pipe bracket. 3C) Snap the pipe bracket into the underside of the housing.
INSTALLATION CONTINUED
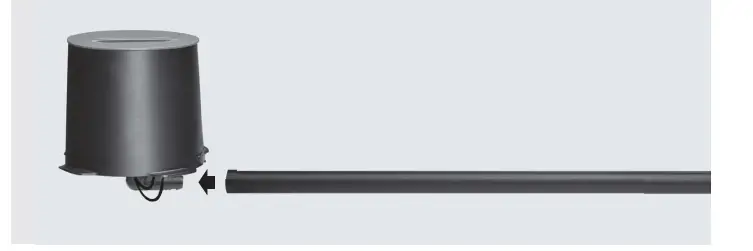
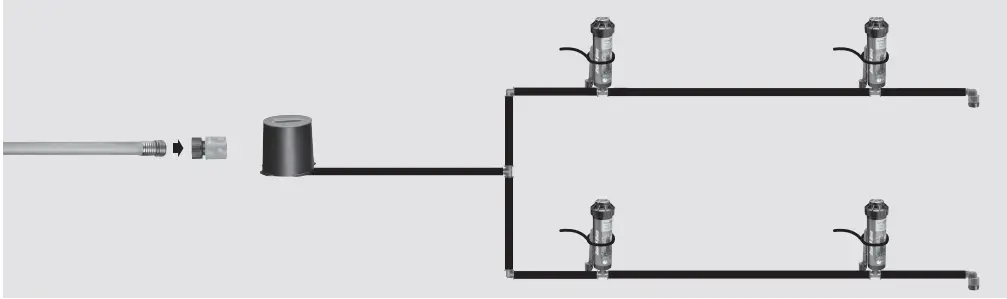
Connect Distribution Tubing To Housing
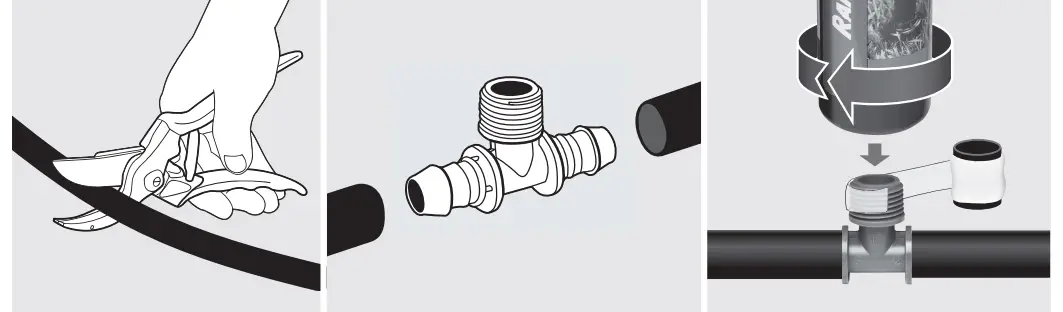
Push the end of the Black Distribution Tubing onto the adapter.
STEP 5
Uncoil and connect two sections of distribution tubing to the tee and run it on top of ground to each sprinkler. After the last sprinkler on each run, keep a tubing piece with at least 6″ extra length for later trimming.
Step 6
Attach Sprinklers
Cut tubing at sprinkler head locations and insert threaded tees. Apply PTFE tape to the 1/2″ threaded fitting on top of each tee, then connect Sprinklers.
STEP7
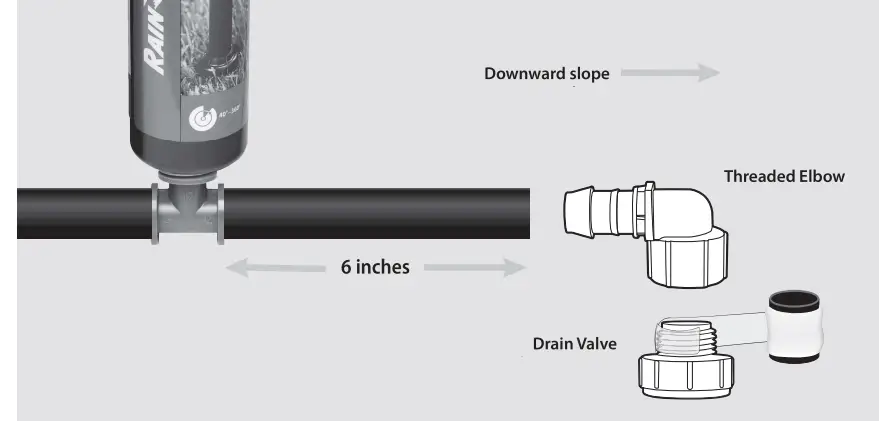
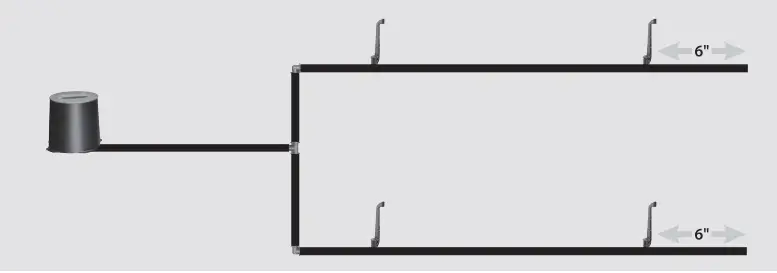
Assemble and Attach Drain Valve Components
Push the barbed end of the elbow into the 1/2″ Distribution Tubing. Face the threaded end downward and connect the Automatic Drain Valve
INSTALLATION CONTINUED
STEP 8
Temporarily attach sprinklers to stakes using cable ties.
Attach Click-n-Go fitting to your hose.
STEP9
Pre-Test Watering Coverage
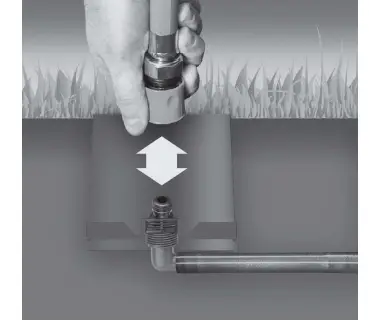
Remove the housing lid and insert the quick connect and hose onto the male fitting. Push the connector down firmly until it “clicks” in place, allowing water to flow.
Turn on faucet all the way to check maximum watering coverage. Sprinkler will pop up. See step 10 if you need to adjust the sprinkler’s arc and distance. If necessary move sprinkler to optimal
position.
Step 10
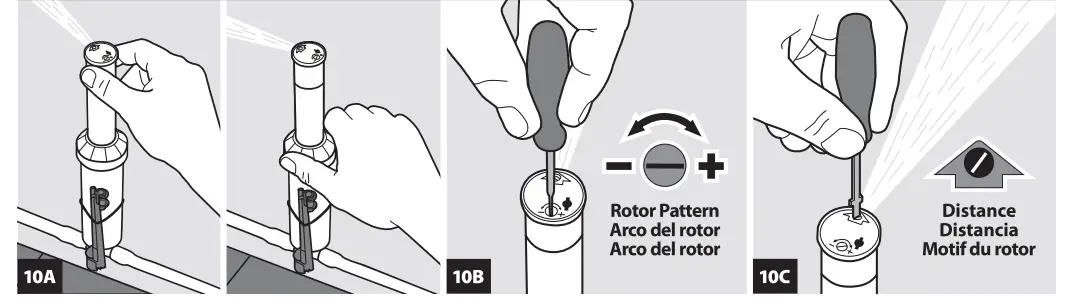
A) Adjust Sprinkler Direction
With the water on, adjust the sprinkler direction by turning the center cap to the right until it stops, then to the left until it stops. This left stop is your fixed left edge, the starting point from which rotation begins. To match the fixed left edge with your watering area, rotate the entire sprinkler body to the desired position.
B) Adjust Sprinkler Pattern
To adjust the pattern from 40° to 360° (part or full circle), turn the pattern adjustment screw +/- using a small flat blade screwdriver. Turn it to the RIGHT for more rotation, to the LEFT for less rotation. A properly adjusted pattern covers all of the grass that can be reached from that head without overspraying onto the sidewalk, driveway or other non-grass areas.
C) Adjust Spray Distance
Confirm that all areas of your lawn section are being watered evenly and completely. If not, you can adjust each sprinkler’s spray distance by using a small flat blade screwdriver to turn the distance screw. Turn to the LEFT to increase distance, to thRIGHT to decrease distance.
View the adjustment video: https://www.youtube.com/
watch?v=y2hB6CDYYx8

Step 11
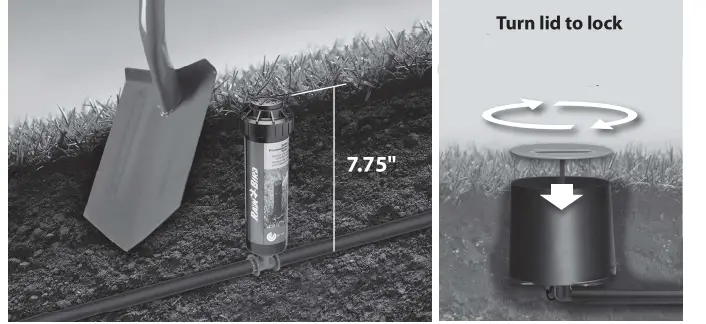
Bury Housing, Tubing and Sprinklers
Use a trenching shovel and work along in short intervals, pushing the tubing in with your hands. Take care not to nick the tubing with your shovel. The housing, tubing and sprinklers must be deep enough so that the sprinklers are flush with the ground. Finish by packing dirt around the sprinklers and tamping the ground for a neat appearance.
STEP 12
Final Testing
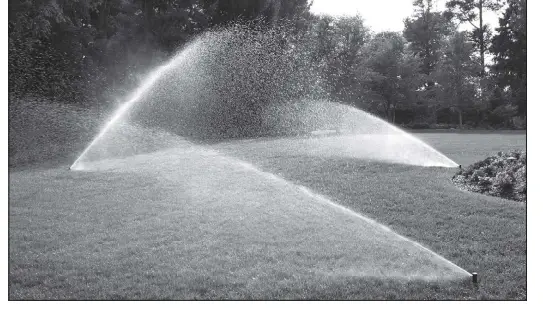
Turn water on and check sprinkler function. Some things to check:
- All sprinklers are in full popped-up position
- The watering streams are even, not spitting or misting To adjust sprinkler pattern or throw distance, repeat steps 1 OA and 1 OB.

Repairing Leaks
Occasionally when digging around your yard, you may nick the underground tubingThis is easy to repair. If you notice puddling anywhere in the watering layout, there may be a break in the underground tubing. To repair a leak, do the following:
A) Dig carefully around the wet area to ex- pose the tubing break.
B) Cut tubing on each side of the leak.
C) Splice with the barbed coupling.
Important: If tubing is damaged in more than one place, purchase additional Rain Bird 1/2″ drip tubing from your dealer.
Replacement tubing: T63-50 orTS70-50
Barbed fitting: BCS0
Larger sections will need 2 couplings and replacement tubing.
Questions?
Visit Rainbird.com or call
1-800-RAINBIRD
![]() Rain Bird Corporation
Rain Bird Corporation
6991 East South point Road
www.rainbird.com
Tucson, AZ 85756
Phone: (520) 741-6100
Fax: (520) 741-6522
Registered Trademark of Rain Bird Corporation
© 2020 Rain Bird Corporation


