![]() C319H IP Door Phone User Guide
C319H IP Door Phone User Guide
Unpacking
Before you begin using the device, please check the version you got and ensure that the following items are included in the shipped box:
| Plastic wall anchor x 4 | |
| M3x6 crosshead screw x 1 | |
| 11-Pin cable x 1 | |
| Wall-mounting bracket x 1 | |
| ST4x20 crosshead screw x 4 | |
| M3x10.5 hex socket screw x 1 | |
| 10-Pin cable x 1 | |
| M4x30 crosshead screw x 4 | |
| Diode x 2 | |
| Allen wrench x 1 | |
| C319H x 1 |
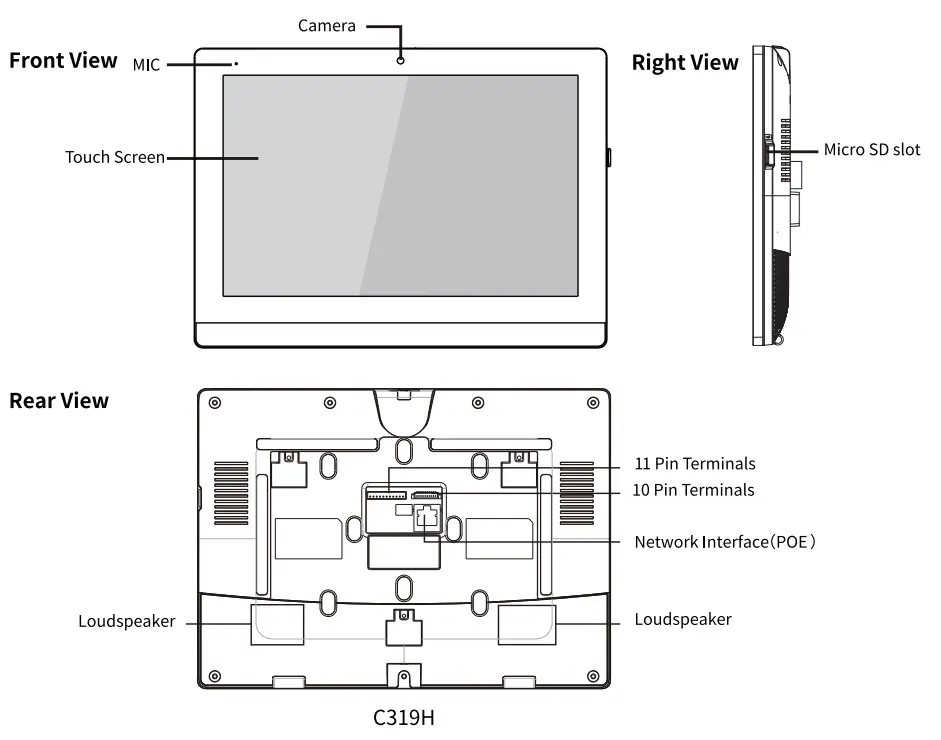
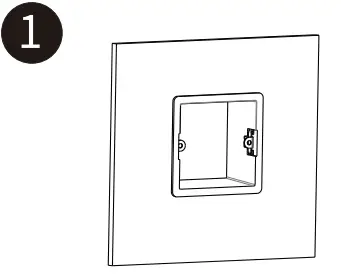
Product Overview
Installation
Step 1: Wall-mounting Bracket Installation Without embedded box in the wall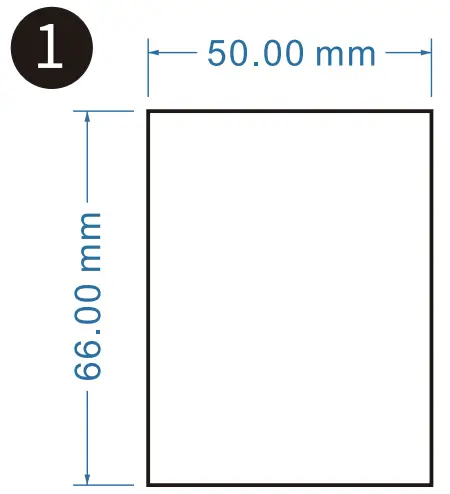 According to the position of the cable in the wall, dig out a square hole (height*width*depth=66*5 0*50mm) that can accommodate all cables.
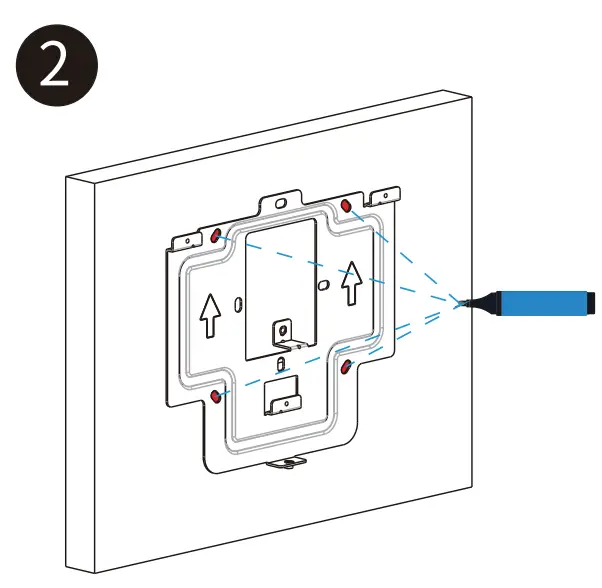 Align the square hole of the wall-mounting bracket with the hole dug out before, then mark the four fixation holes through wall-mounting bracket on the wall.
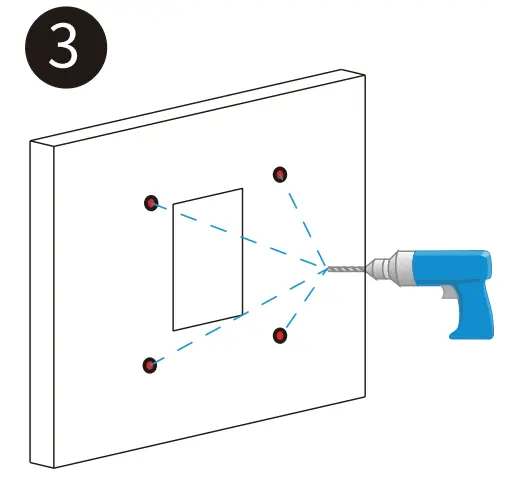 Take down the wall-mounting bracket, then using a 6mm hand drill to make the four fixation holes on the wall which marked before.
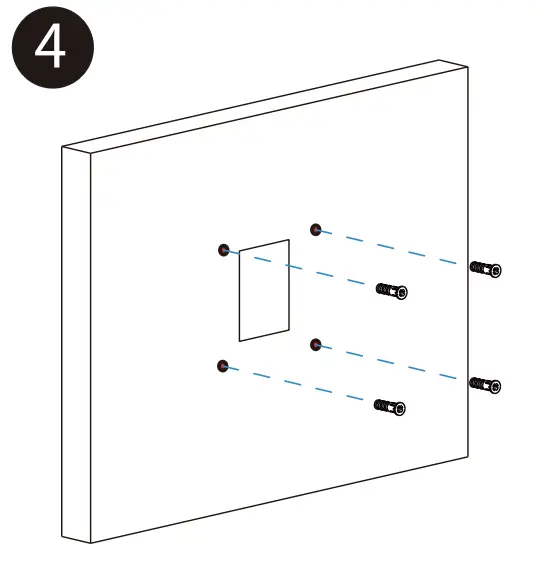 Once the fixing holes were made, insert four plastic wall anchors.
Then fix the wall-mounting bracket on the wall with four ST4x20 crosshead screws. If there is a ground wire to be connected, please use M3x6 crosshead screw to fix it on the wall-mounting bracket.
With embedded box in the wall
 Make sure all cables in the embedded box.
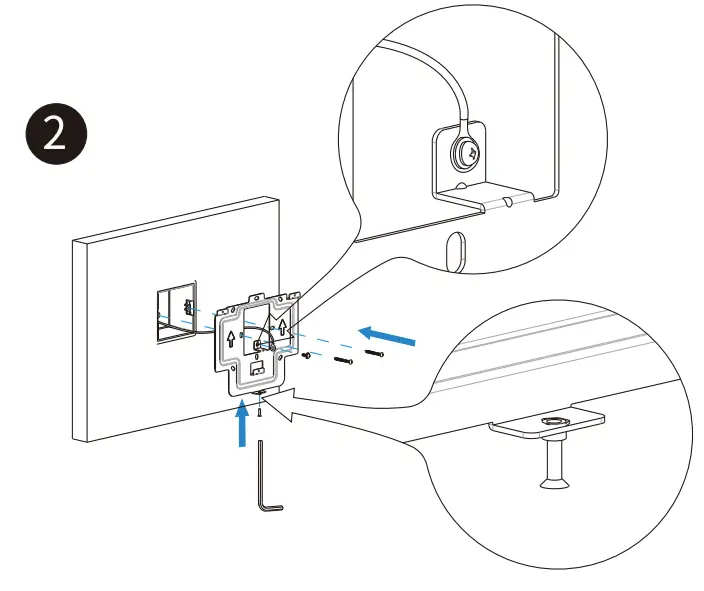 Twist M3x10.5 hex socket screw into the bottom hole of the wall-mounting bracket until the tail of which align to the edge. Then fix the wall-mounting bracket on the wall with two M4x30 crosshead screws. If there is a ground wire to be connected , use M3x6 crosshead screw to fix it on the wall-mounting bracket.
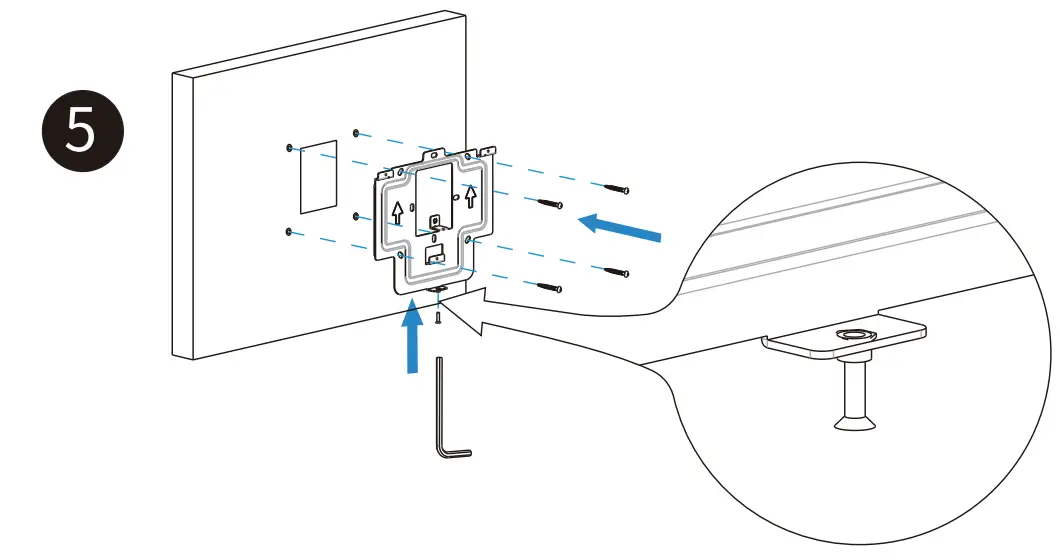
Step 2:Device Mounting
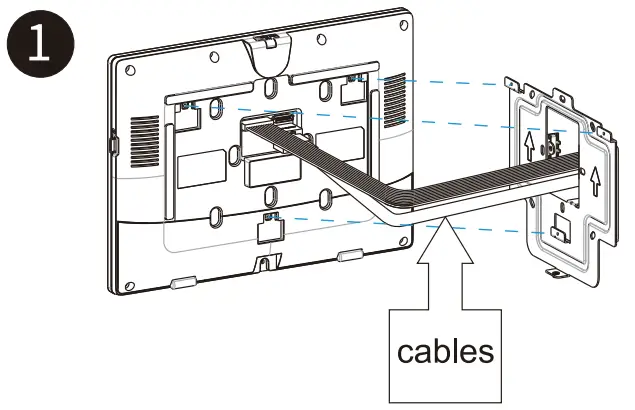 Connect tne cables to device.
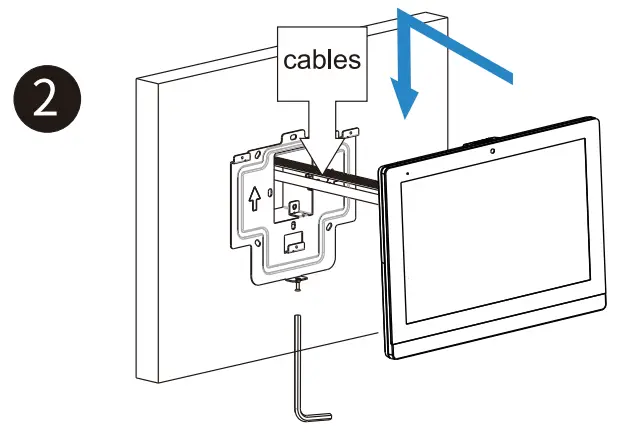 Push down to fix the device securely. Tighten M3x10.5 hex socket screw on the device with alien wrench.
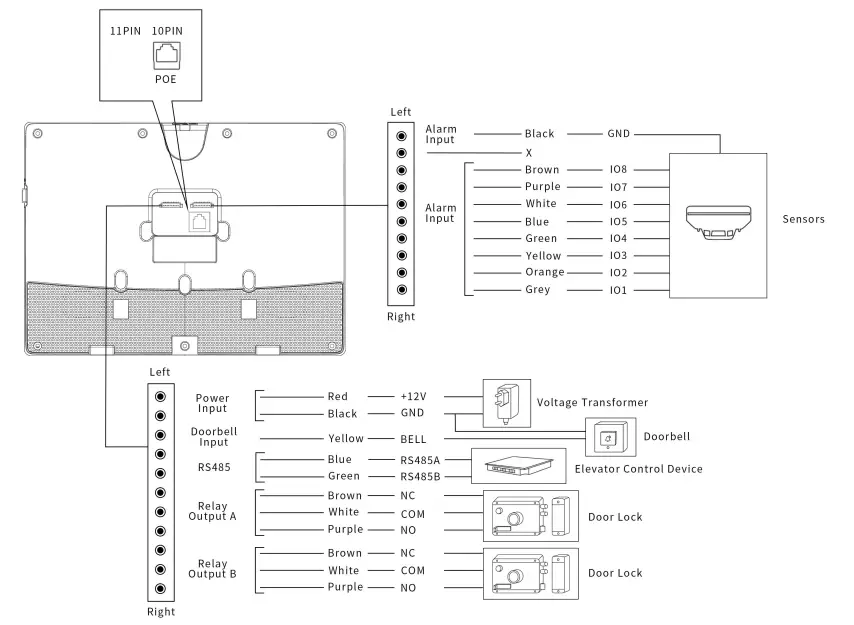
Device Wiring
![]() Warning
Warning
When you connect a device containing a coil, such as a relay or an electromagnetic lock, it is necessary to protect the intercom against voltage peak while switching off the induction load.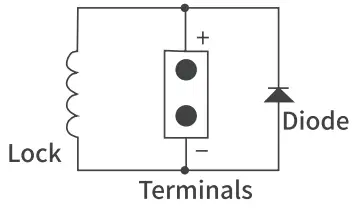 For this way of protection we recommend a diode 1 A / 200 V (included in the accessories) connected antiparallet to the device.
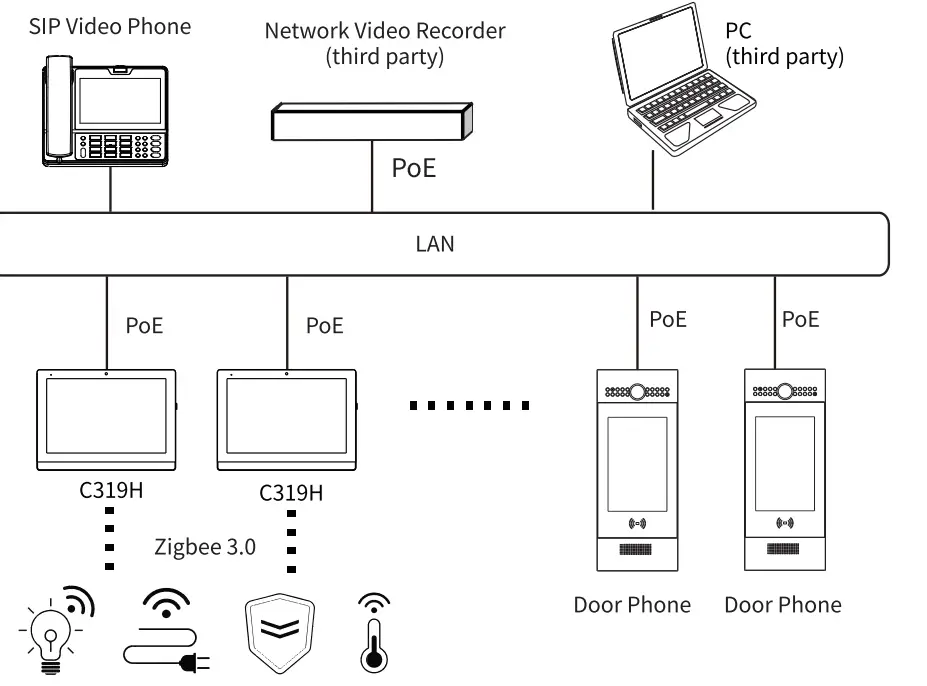
Application Network Topology
Configuration
Device Initialization:
- Power on the device, and start device initialization.
- Select your language, then press Next.
- Select your time zone, then press Next.
- Select your internet connection via Ethernet or Wi-Fi, then press Done, then Next.
- Press
 to enable the C319H to start paring with Zigbee devices that have been set up in the Akuvox Cloud.
 - Reset the Zigbee device to pairing mode and wait until the the device is paired with the C319H successfully.
Note: Please refer to the Zigbee device manual for the pairing operation. - Press the Zigbee device icon on the screen, and press Next, and you will see the Zigbee device connection successfully.
Note: All the Zigbee device(s) synchronized from the Akuvox Cloud have to be added on the C319H before you can finish the device initialization. After the initialization, you are allowed to add extra Zigbee devices in Home Automation interface if needed.
Access Basic Information: After setting up network and power, enter Setting > System Info to check Account, Network,Version status.
Access the Website: Launch a browser and type in the IP address then enter the username and password to login (user name/password: admin /admin by default).
Operation
Make a call:
Enter the callee’s number or room address, then press Dial![]() icon to make a audio call or press Video
icon to make a audio call or press Video![]() icon to make a video call. Press
icon to make a video call. Press ![]() icon to hang up.
icon to hang up.
Receive a call:
Press ![]() icon to pick up the incoming call in video or press
icon to pick up the incoming call in video or press![]() icon to pick up the call in audio mode.
icon to pick up the call in audio mode.
Unlock:
During the talk, you can press Unlock ![]() icon on the talking interface to unlock the door.
icon on the talking interface to unlock the door.
Monitor:
Press Monitor![]() icon to receive the video from the door phone or from third-party devices.
icon to receive the video from the door phone or from third-party devices.
Notice Information
Akuvox C319H firmware contains third-party open source software under the terms of the GNU General Public License(GPL). Akuvox is committed to meeting the requirements of the GNU General Public License (GPL) and will make all required source code available.
The source code of software under the terms of GNU GPL can be downloaded online, http://www.akuvox.com/gpl.
Information contained in this document is believed to be accurate and reliable at the time of printing. This document is subject to change without notice, any update to this document can be viewed on Akuvox’ s website: http://www.akuvox.com © Copyright 2022 Akuvox Ltd. All rights reserved.

AKUVOX (XIAMEN) NETWORKS CO., LTD.
Add.: 10/F, NO.56 GUANRI ROAD, SOFTWARE PARK II, XIAMEN 361009, CHINA
www.akuvox.com