SFX LW Series Laser Cleaner Machine
Notice
Before using this product, please ensure that the following items are in compliance with the productsafety operation requirements. Otherwise, it is forbidden to turn on the systemand performcleaningoperations.
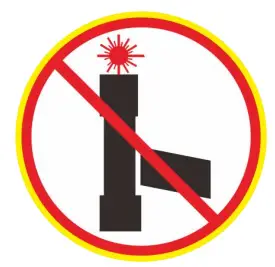
 | It is prohibited to use this product in places with flammable and explosivematerials |
 | When cleaning highly reflective materials (copper, aluminum, etc.), it is forbidden to have people stand around to avoid damage caused by reflected light. |
 | It is forbidden to aim the cleaning head at the human body to avoid injury. |
 | It is forbidden to make the tip of the cleaning head upward. Pay attention to the dustproof of the lens |
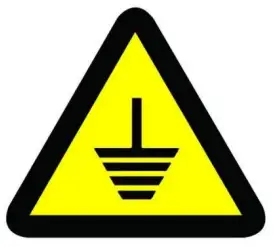 | Make sure that the equipment is reliably grounded |
 | Clean combustible items carefully and equip with fire-fighting equipment. |
 | This product is a Class IV radiation laser. Goggles must be worn |
 | Ensure that the dust-proof air blower works normally to keep the lens clean |
 | The minimum bending radius of the integrated cable should be more than200mm. |
Scope of application
This product can be used to remove attachments or coatings on the surface of objects, includingrust,paint, oil stains, coatings, etc. (High-reflective materials need to be tested and verified). It hastheadvantages of non-contact, no chemical damage, mobility and high efficiency, etc
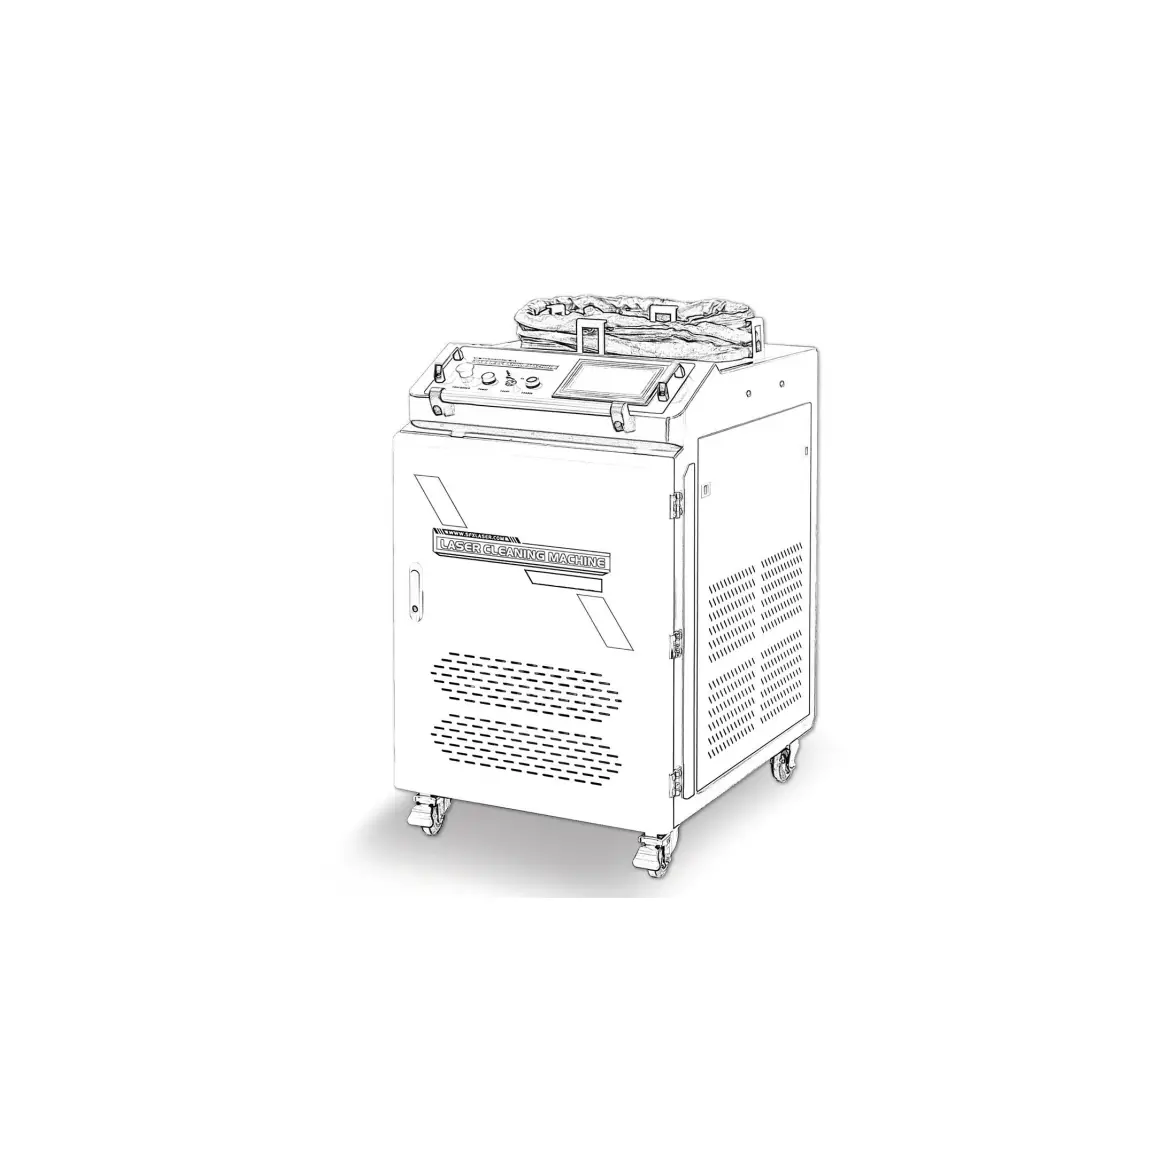
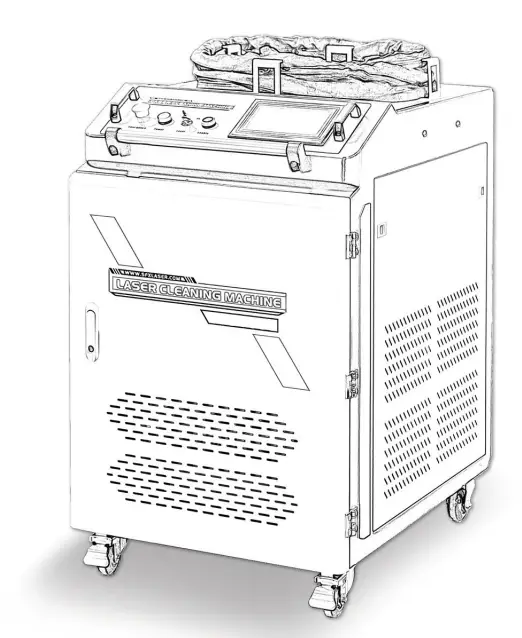
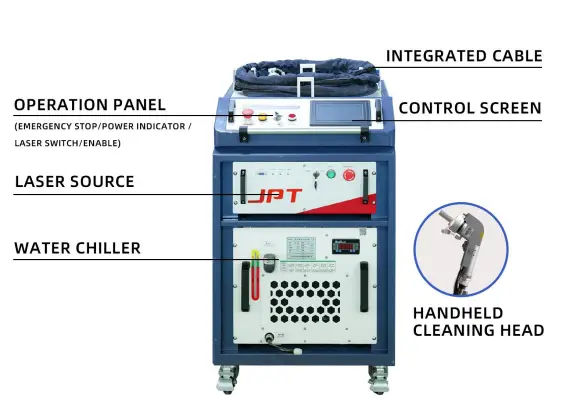
Product Description
Equipment structure diagram
Main technical parameters
| Model | LC-1000 | LC-1500 | LC-2000 |
| Laser Power (W) | 1000 | 1500 | 2000 |
| Laser Wavelength (nm) | (nm) 1080±1 | ||
| Operating Mode | Continuous | ||
| Maximum Modulation Frequency (KHz) | 200 | ||
| Integrated Cable Length(m) | Length(m) 7(customizable) | ||
| Scanning Width (mm) | Length(m) 7(customizable) | ||
| Power Configuration | AC220V±10% 6kw | AC220V±10%8kw | %8kw AC380V±7%10kw |
| Cooling Method | Water cooling (distilled water , deionized water or purewater as medium) | ||
| Machine Size (mm) | 870*560*1050 | ||
| Net Weight (KG) | 145 | 165 | 180 |
Installation and use instructions
Installation and use requirements
| Item | Requirements |
| Environment Temperature | 0℃~35℃ |
| Environment Humidity | 40%-80% |
| Power Configuration | Refer to Ⅱ (2) technical parameters |
| Cooling Medium | Deionized, distilled or pure water |
| Grid Ground | Ground Comply with the national standard |
Ensure that the equipment is installed and used steadily to avoid damage causedbyfallingor tipping.
Ensure good ventilation and keep at least 60cm of space around the equipment for heatdissipation to avoid affecting performance due to poor heat dissipation.
During use, please pay attention to air blowing to avoid damage to the lens causedbydust.
Check the protective lens before use. If it is dirty, please clean in time. (Use a cottonswabdipped in special cleaning solution and scrub the protective lens counterclockwise fromthecenter to the edge.) When cleaning, pay attention to lens protection and avoid scratches.
The hand-held cleaning head should be handled with care. Please put the tip of thecleaninghead downward or lay flat when stored.
Operation precautions
In the cold environment, please ensure that the cooling medium is not frozen, toavoidtheabnormality of the cooling system.
Protect it from rain and water when outdoor use.
When the temperature of the water chiller is lower than 22°C, the laser lowtemperaturealarm will occur, and it needs to be preheated. When the temperature reaches 22°C, pleaseturn it off and then turn it on again to clear the alarm.
The laser has safety protection. If the cleaning is suspended for more than 2 minutes, pleaseclick “Laser” again to activate it and then it will emit light.
Dust-proof lens replacement
Loosen the screw on the dust-proof air outlet.
Press the air pipe to remove the dust-proof air outlet.
Unscrew the compression ring counterclockwise.
Replace the protective lens.
Operation Process
Start-up and preparation
Check the water level of the chiller to ensure that the water level is within the standardrange.
Connect the power cord (pay attention to grounding).
Power on: turn on the main power, emergency stop, laser switch.Turn on the enable. Takeout the hand-held cleaning head and ensure that the minimum bending radius of the integratedcable is more than 200mm.
Set the swing parameters and laser parameters according to the target requirements;
Aim the hand-held cleaning head to the target with an interval of 550-600mm(F500lens). Double-click the cleaning head switch to start working. 4. Shutdown operation: turn off the enable, laser switch, press the emergency stop, and turnoff themain power.
For detailed steps, please watch the video tutorial.
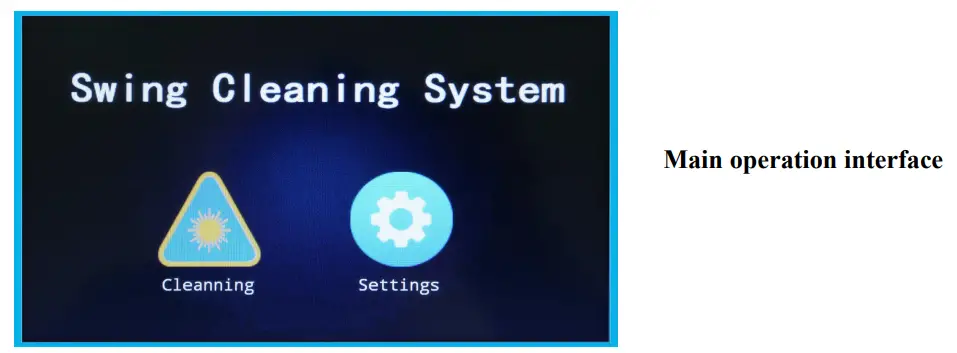
Laser controller interface description
After powering it on, the control screen enters the main operation interface of the handheldlasercleaning system.
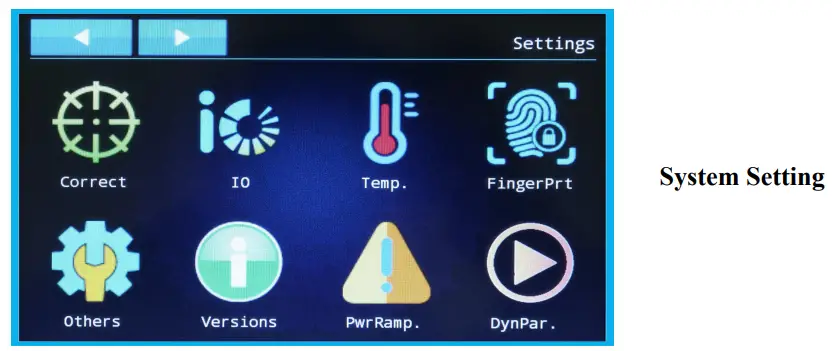
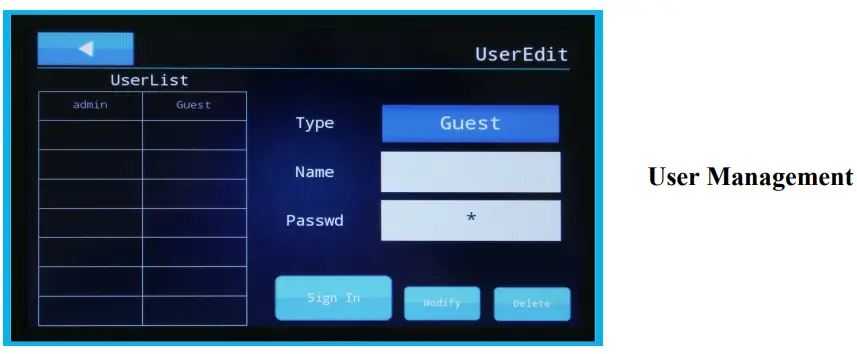
User management
Click “Settings” to enter the system setting interface (default password: 6), click”UserManagement”, and set the user type, user name and password in sequence to completetheusercreation (the system has created an account: admin, password: 1).
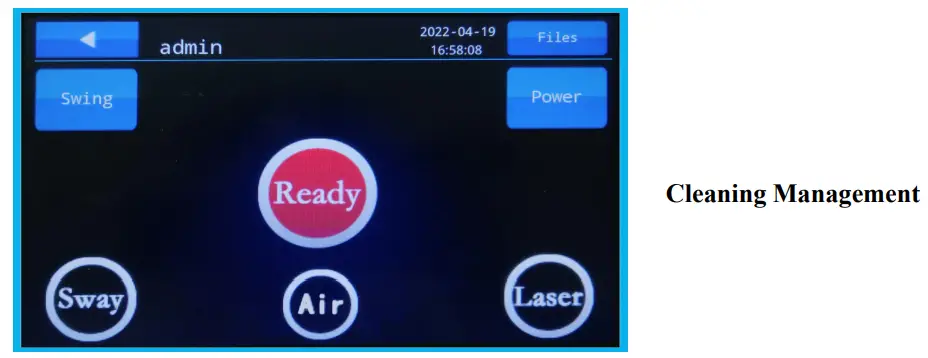
Cleaning Management
Click “Cleaning”, enter the password to enter the interface, and click “Sway” and”Laser”toenter the cleaning preparation state. “Air”: it is used for air one-button test (external airsource) and it will automatically turn on when cleaning .
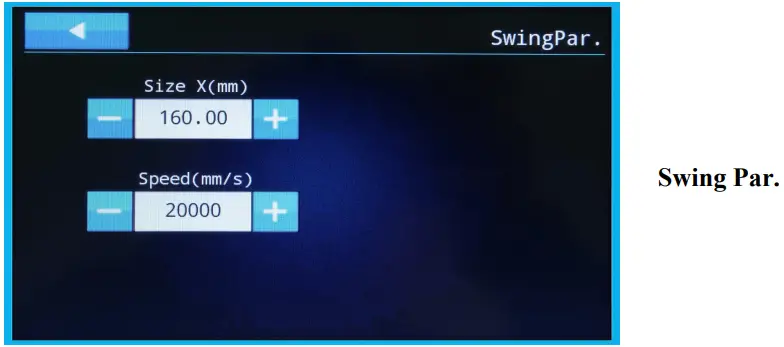
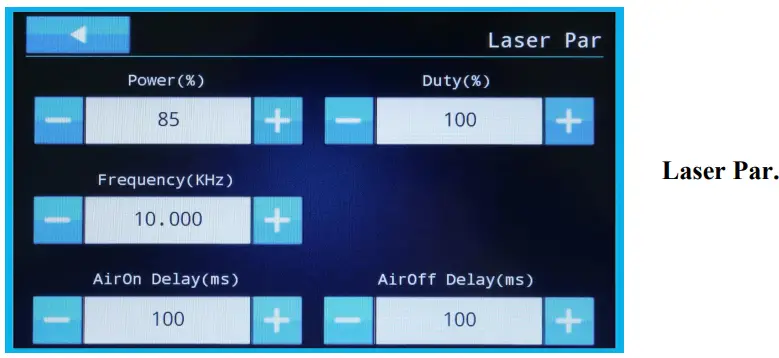
Swing Par. and Laser Par. function instruction are as follows:
| Item | Name | Function | Note |
| Swing Par. | Size (mm) | Set the laser width when cleaning | 160±10 |
| Speed (mm/s) | Set the laser cleaning speed | speed 1-30000 | |
| Laser Par. | Power(%) | Set laser power percentage | 1-100% |
| Duty(%) | Sets the duty cycle of the modulation signal period | 0-100% | |
| Frequency (KHz) | Set the frequency of the modulating signal | modulating signal 0.001-200 | |
| AirOn Delay (ms) | Set the air blowing time in advance before cleaning starts | External air source | |
| AirOff Delay (ms) | Set the time to keep blowing after cleaning |
Fault analysis and troubleshooting
| Fault phenomenon | Cause Analysis | Analysis Troubleshooting method |
| The spot does not swing |
|
|
| Sudden loss of energy during cleaning |
|
|
| The cleaning head is hot |
|
|
Maintenance
Note: In order to avoid personal injury and man-made damage, the maintenance of thehandheld laser cleaning machine must be carried out by professionals
Handheld cleaning head
Daily inspection: Check the protective lens. If there is foreign matter, use a special dustfree cotton swab dipped in industrial alcohol to clean it. If there is coating damageor lensdamage, please replace the protective lens in time to avoid other optical lenses beingburned.
Regular inspection: When the machine is used or not used for some time, first checkthelaser module, and make sure that each optical component is free fromdust pollution, mildew,and other abnormal phenomena before turning it on.
Observing the light spot: The operator can check the laser output light spot withblackimage paper. Once the spot is found to be uneven or skewed, it should be repaired intime.
Water chiller
The dust on the condenser and the dust filter needs to be cleaned regularly.
When the machine is transported or not used for a long time, the coolant should be drained.
When the temperature is lower than 2 ° C, please check and ensure that the chillerisworking properly before using the machine to avoid damaging the laser tube, output head, andwater chiller due to the solidification of the coolant.
The coolant must be replaced in the following cases
2.4.1 The filter element has been replaced.
2.4.2 After 3 months of use.
2.4.3 Use again after long-term non-use
Transportation and stora
- Before moving the equipment, please remove the power cord and drain the coolant insidethesystem. Do not move or transport it with liquid inside.
- When transporting or handling the equipment, please do not bump it up and down or excessivelytilt it (not more than 45°) to avoid bumping, impacting and overturning.
- When storing the equipment, drain the cooling liquid in the chiller, and drain the remainingcooling liquid in the water pump, filter, and pipeline. Wipe off the water and oil stains, packtheequipment with a wrapping film to prevent dust and water, and place it in a cool andventilated place without direct sunlight and dust accumulation. Ⅸ.Warranty terms
Warranty terms
The warranty period of this product is one year for the whole machine, and the warrantyperiod for the laser source is two years:
From the date of purchasing this product, our company provides free warranty withinoneyear. If the machine need to be returned to the factory for repair, the user only needs tobear thecost of two-way transportation.
This product is repaired free of charge for life, and the user only needs to bear thecost ofspare parts and two-way transportation.
The following scopes are not covered by warranty:
Damage caused by improper use such as violent bumping, bending, etc.
Human-caused damage.
Laser accessories and consumables are not guaranteed (collimating mirrors, galvanometers,field mirrors and other optical parts, Integrated cables, etc. are not covered by the warranty).
The relevant technical parameters listed in this manual are for reference only. The relevant product information is subject to change without prior notice. All technical parameters and agreementsaresubject to the terms of the sales contract.
CUSTOMER SERVICES
LUOYANG XINCHENG PRECISION MACHINERY CO.,LTD.
ADD: No.256 East Tanggong Road, Luoyang, Henan, China, 471000
WEB: www.sfxlaser.com
TEL: +1 (240) 560-8967
EMAIL: [email protected]