![]()
I YUAN PRECISION
INDUSTRIAL CO., LTD.
TIY-082002
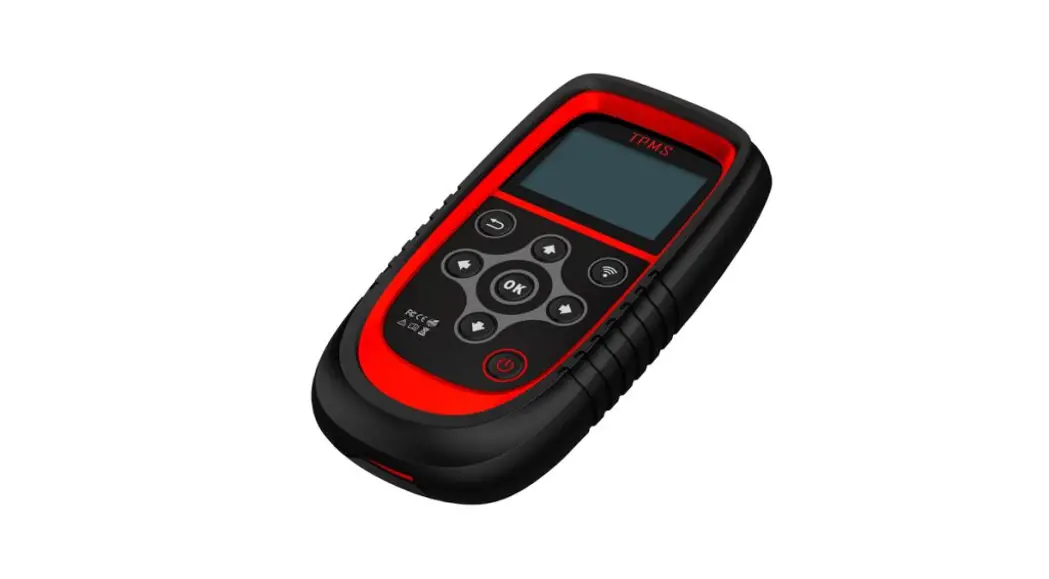
Universal TPMS Display
USER MANUAL
TPMS Display Information
1-1.TPMS Display Description
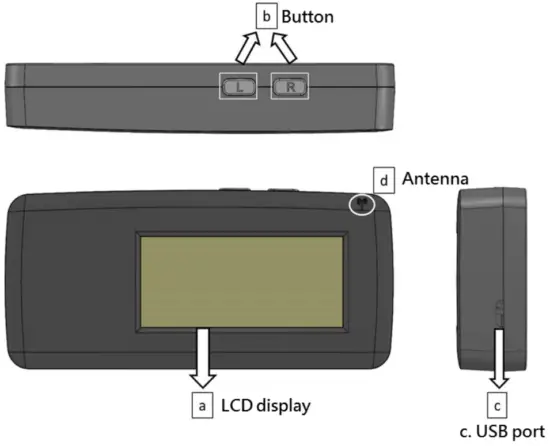
a. LCD Display: To show information.
b. Control Button: To Operate TPMS Display.
c. USB PORT: To Connect TPMS Display to PC for software update or power source.
d. Antenna: To trigger TPMS sensor.
1-2. Button Description
1. Right Button (RB):
2. Left Button (LB):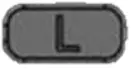
Specification
| Dimensions : | 121.89mm(4.8″) x 56.37mm(2.22″) x 21.32mm(0.84″) |
| Communication ports : | Micro USB |
| Display : | VA, Negative, Transmissive LCD |
| Weight : | 77.3g (0.171b) |
| Operational temp : | 32°F to 122°F |
| Relative humidity : | 10-90% |
| RF Reception | 315 & 433 MHz |
1-4. Accessories Included
a. User Manual: Instructions for operations.
b. USB Cable: For online updates or power supply.
c. Touch Fasteners: For adhesive installation.
Instructions for the first time using and installing
Connect power source (powerbank or battery holder) to TPMS display with USB cable.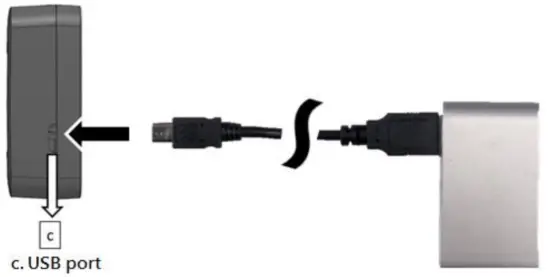
Choose Car Manufacturer
Refer to the following form and find the manufacturer number of your own car.
| Manufacturer | NO. | Manufacturer | NO. | Manufacturer | NO. | Manufacturer | NO. |
| Audi | 7 | Ford | 2 | Plymouth | 2 | Lamborghini | 9 |
| Acura | 3 | Freightliner | 6 | Pontiac | 1 | Rolls-Royce | 7 |
| Alfa Romeo | 6 | Land Rover | 10 | Porsche | 7 | Saturn | 5 |
| Aston Martin | 9 | Lexus | 1 | Rolls-Royce | 7 | Scion | 1 |
| Bentley | 7 | Lincoln | 2 | Freightliner | 6 | Smart | 8 |
| BMW | 7 | Lotus Cars | 8 | Genesis | 4 | Subaru | 1 |
| Bugatti | 7 | Maserati | 7 | GMC | 5 | Subaru | 1 |
| Buick | 5 | Mazda | 2 | Honda | 3 | Suzuki | 5 |
| Cadillac | 5 | McLaren | 7 | Hummer | 5 | Tesla | 9 |
| Chevrolet | 5 | Mercedes-Benz | 6 | Hyundai | 4 | Toyota | 1 |
| Chrysler | 6 | Mercedes-Maybach | 6 | Infiniti | 8 | Volkswagen | 7 |
| CMC | 10 | Mercury | 2 | Isuzu | 5 | Volvo | 9 |
| Dodge | 6 | Mini | 7 | Jaguar | 10 | VPG | 2 |
| Ferrari | 7 | Mitsubishi | 6 | Jeep | 6 | ||
| Fiat | 6 | Nissan | 8 | Kia | 4 |
Sensor Pairing
Start pairing from the “left front wheel.“
4-1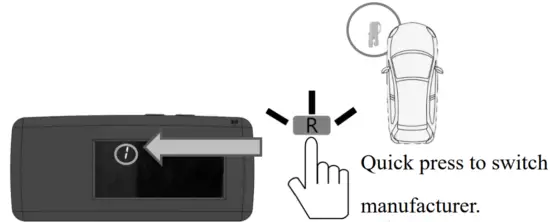 4-2 Keep antenna near tire valve.
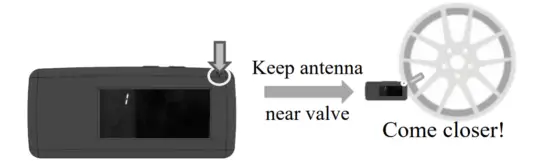 4-3 Press and hold
 ![]() until the car image appears.
until the car image appears.
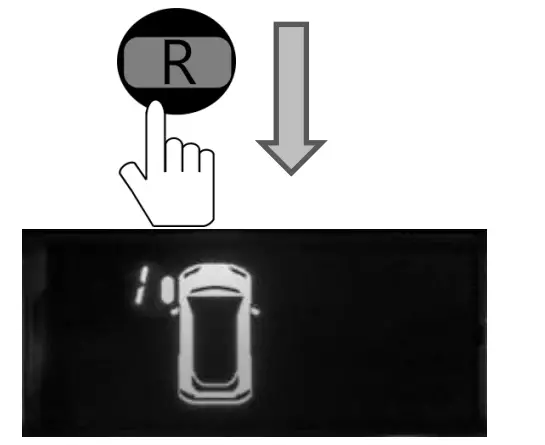
It will take different times which depends on the car manufacturer. The number on the left front wheel will be running when pairing.
4-4 Wait for a few minutes [111] appears when successful pairing . Follow the instructions on the next page to continue.
※ In case of failure, don’t put anything between the antenna and tire valve when pairing. If it fails, start from step 4.1 again.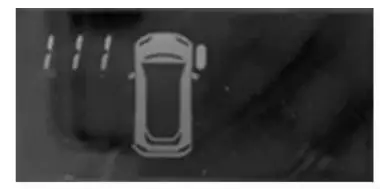 The left Front Wheel was paired in the previous steps. Please do the following procedure to complete.
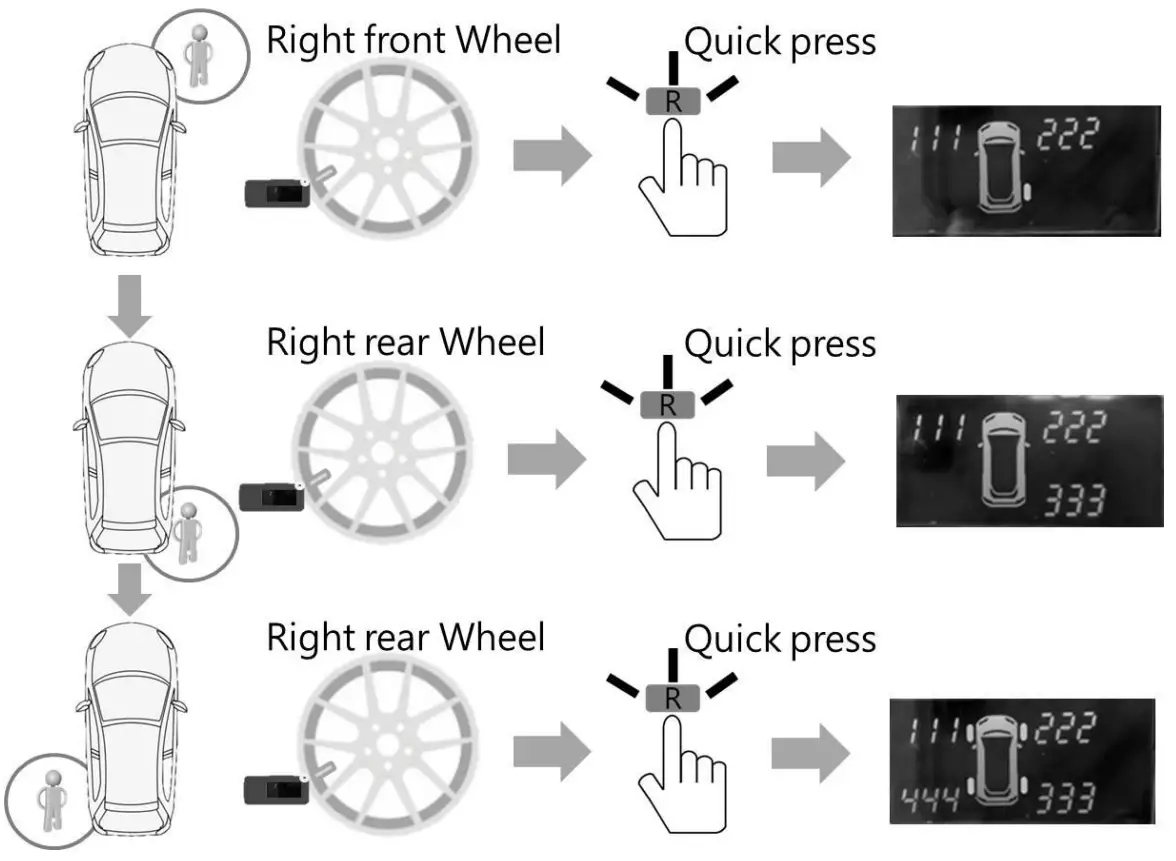
Follow the instructions on the next page to save data.
Save data
There are 4 storage locations (1-4) you can use.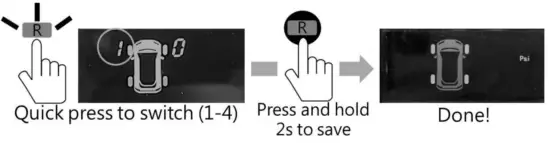
Install on your car and start using
Install TPMS display at the position you want and connect to a power source on your car.
From now on, tire pressure and temperature can be monitored in the Monitor Mode.
※Default settings
Unit: PSI / °F
Pressure Warning:75% of tire pressure when first time pairing.
Buzzer: On
If you want to change settings, please follow the instructions on pages 7-10.
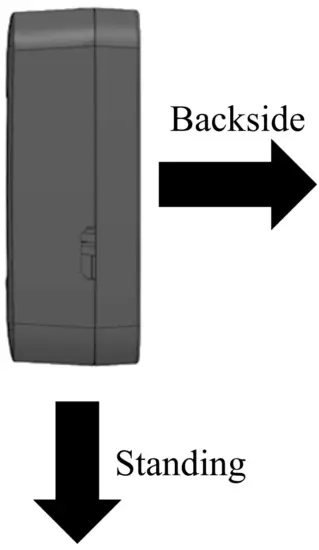
Display installation
2 methods to install the display: Paste 2 touch fasteners on the backside of the display or
or
paste 2 touch fasteners on the bottom of the display.
Pasting direction:
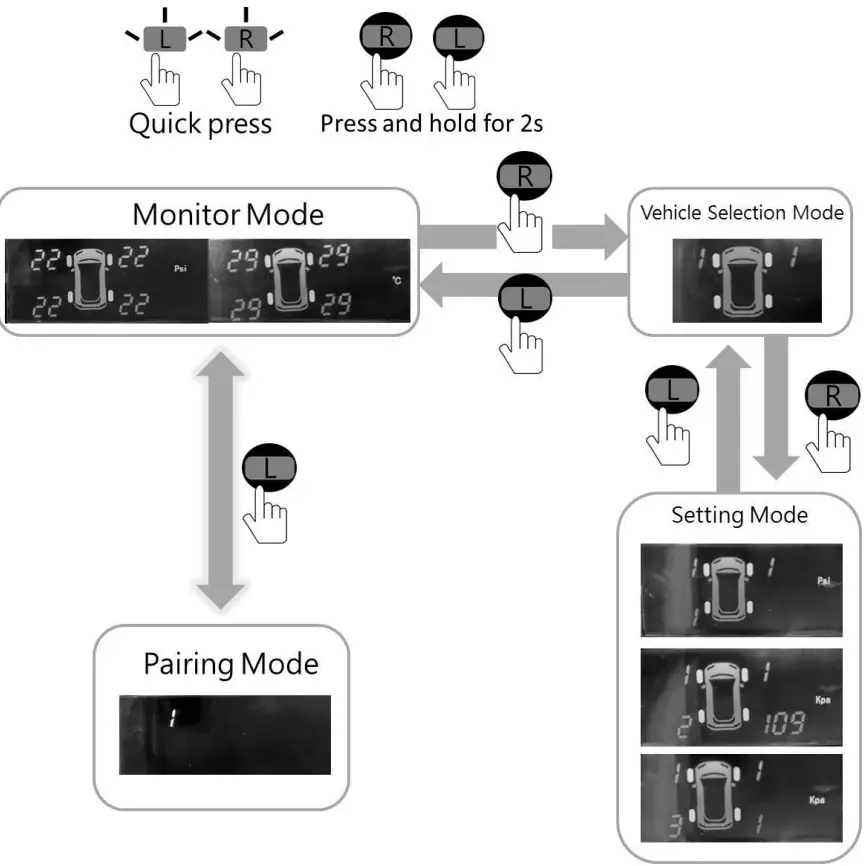
 The operation to Change Mode
 The operation to Change Mode
Follow instructions to change mode.
Operation Instructions
10.1 Monitor Mode
Quick press any button to show pressure or temperature.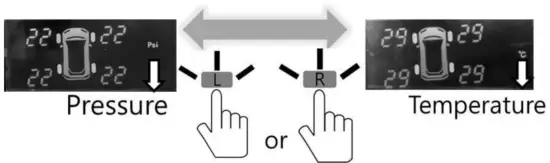
Pairing Mode
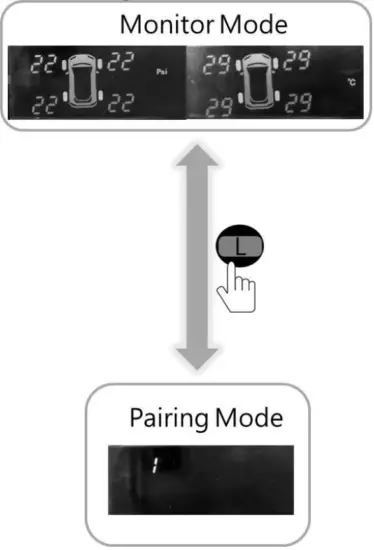
Follow the instructions on page 7 to change mode and instructions on pages 3-5 to learn a new car.
If you don’t want to do the learning procedure, press and hold for![]() 2s to return to Monitor Mode.
2s to return to Monitor Mode.
10.2 Vehicle Selection Mode
Follow the instruction on page 7 and enter Vehicle Selection Mode.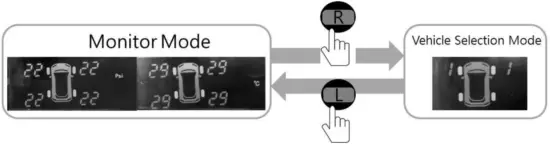 Quick press
![]() to switch vehicle which you have saved before.
to switch vehicle which you have saved before.
Quick press to switch (1-4.)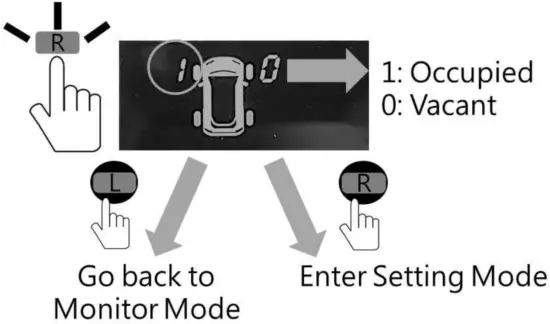 10.3 Setting Mode
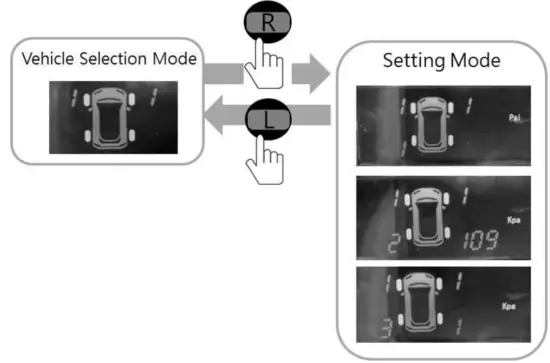 Follow the instructions on page 7 and enter Setting Mode. Quick press to switch the number on the left rear wheel and follow the steps on the next page
![]() to change settings.
to change settings.
Press and hold for 2s to leave this mode whenever you want.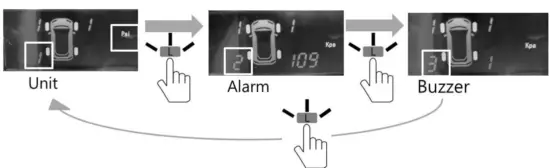
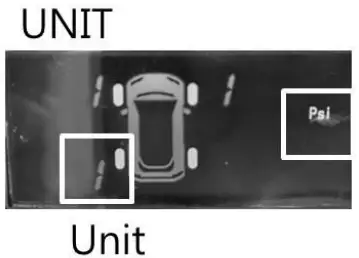 | Pressure: Temperature: | 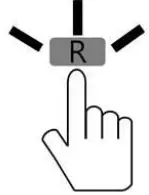 | to switch PSI/KPA to switch °C /°F |  | to confirm. to confirm. |
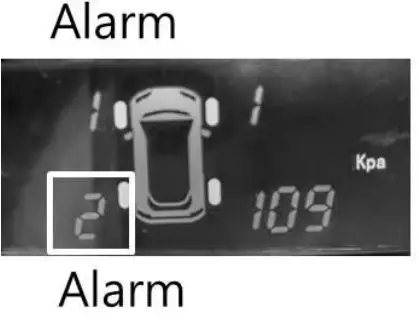 | If tire pressure is lower than this value, it will start waring. |
| to adjust the number of each digit. |
| to switch digits. |
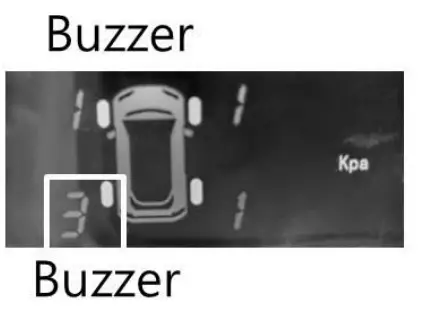 | | to switch numbers. 1: Buzzer On 0: Buzzer Off |
Federal Communication Commission Interference Statement
This equipment has been tested and found to comply with the limits for a Class B digital device, pursuant to Part 15 of the FCC Rules. These limits are designed to provide reasonable protection against harmful interference in a residential installation. This equipment generates, uses, and can radiate radio frequency energy and, if not installed and used in accordance with the instructions, may cause harmful interference to radio communications. However, there is no guarantee that interference will not occur in a particular installation. If this equipment does cause harmful interference to radio or television reception, which can be determined by turning the equipment off and on, the user is encouraged to try to correct the interference by one of the following measures:
- Reorient or relocate the receiving antenna.
- Increase the separation between the equipment and receiver.
- Connect the equipment into an outlet on a circuit different from that to which the receiver is connected.
- Consult the dealer or an experienced radio/TV technician for help.
FCC Caution: Any changes or modifications not expressly approved by the party responsible for compliance could void the user’s authority to operate this equipment.
This device complies with Part 15 of the FCC Rules. Operation is subject to the following two conditions: (1) This device may not cause harmful interference, and (2) this device must accept any interference received, including interference that may cause undesired operation.


