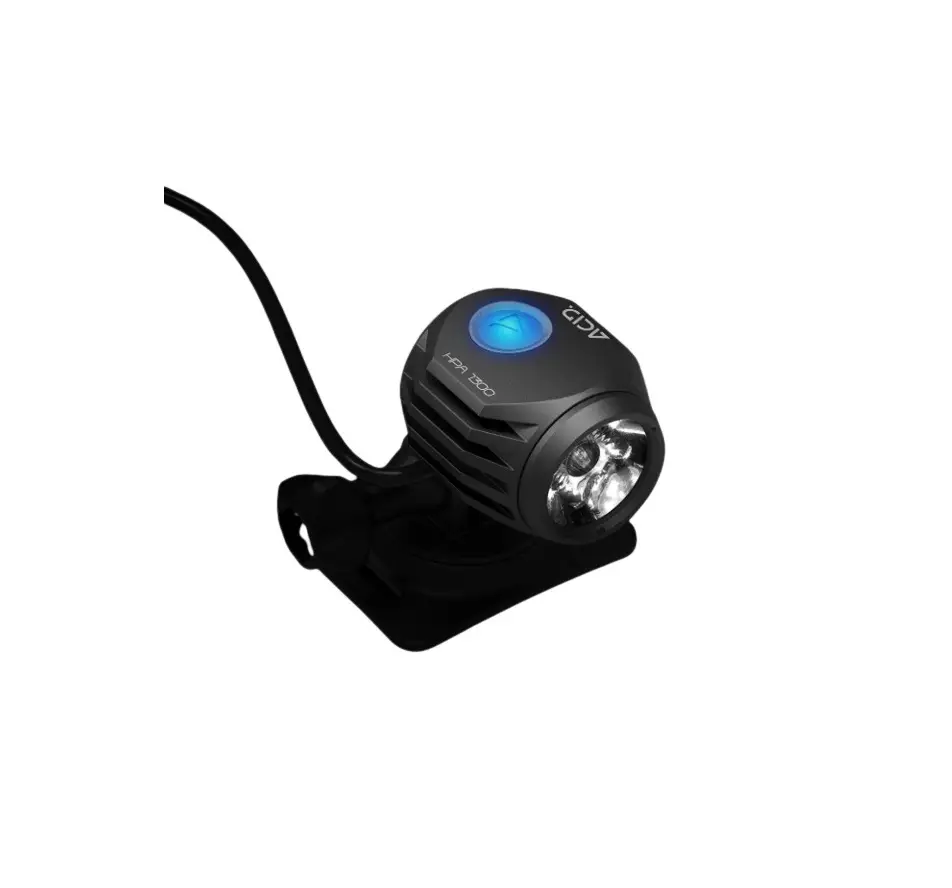
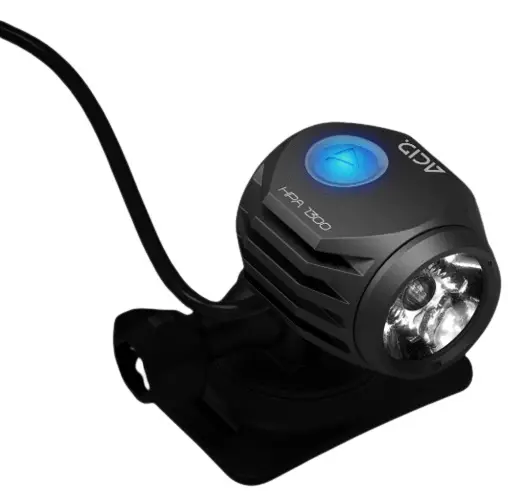
ACID HPA 1300 High Performance Lighting System
GENERAL
The instruction manual is part of this product. It contains important information on safety, assembly and disposal. Before using this product, it is important that you familiarize yourself with all operating and safety instructions. Use the product only as described in the manual and only for the indicated application areas. If you pass on the product to third parties, be sure to also pass on all the documentation.
The battery should be fully charged before using the light for the first time.
SAFETY INSTRUCTIONS
- Do not shine directly into the eyes.
- Keep out of reach of children or pets.
- Do not short-circuit the charger or the battery.
- Do not use or handle the device while charging.
- Never crush or puncture the battery.
- Never place the battery or device on or in heating units.
- Do not dispose the battery or device in a fire.
- Store device in a cool dry area.
- Make sure the battery is charged at least 70% when not in use for more than 3 months.
- Do not charge the battery unattended.
- The attachment of brackets or objects to a helmet can affect its protective effect and restrict the user‘s freedom of movement.
HEAT GENERATION
The light housing can get hot when in use. Please keep it away from heat sensitive and flammable materials and avoid direct contact with your skin. The HPA 1300 is equipped with an overheat protection feature. If the lamp is not sufficiently cooled (e.g. by wind on the ride), the light is automatically reduced in order to lower the temperature. This protects the lamp from permanent damage.
RUNTIMES
The indicated runtimes are average values. Depending on the outside temperature and cooling by airflow, the runtimes may differ from the information.
PROTECTION CLASS IP68
The light head and the battery conform with IP Protection Class 68.
- Full contact protection, dustproof.
- Waterproof when submerged for indefinite periods.
NOTE! The HPA 1300 is not a diving light and is not suited for underwater use.
CONTENTS
Light head | Li-Ion battery | Charger 2A | Remote control |
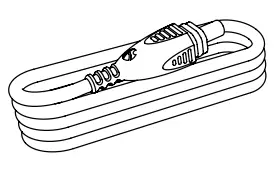
Headband | Extension cable 90 cm | Velcro cable tie | |
2 x Helmet mount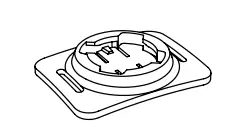 2 x Velcro strap 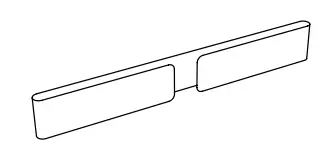 2 x Rubber pad 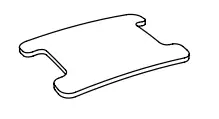 2 x Adhesive pad  | |||
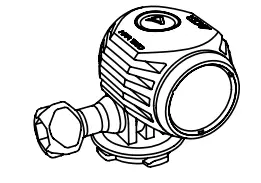


TECHNICAL DATA
| Max. Output | 1300 Lumen | |
| LED | CREE XHP50 | |
| Lighting modes | High – Mid – Low – Ultra Low – Flash – SOS – Alpine distress signal | |
| Runtime | 1.5 h – 3.5 h – 11 h – 34 h – 6 h – 13 h – 105 h | |
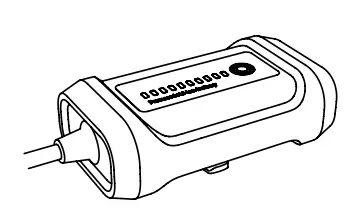
| Battery | Panasonic 18650 Li-Ion / 7.4 V / 3400 mAh | |
| Protection class | IP68 | |
| Weight | HPA 1300 light head | 52 g |
| HPA battery | 140 g | |
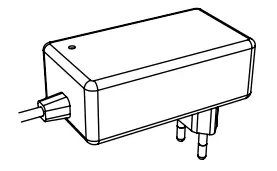
| Charger | Input: 100-240V AC, 50/60Hz Output: 8,4V DC 2A | |
| Charging time | 3 h | |
MOUNTING
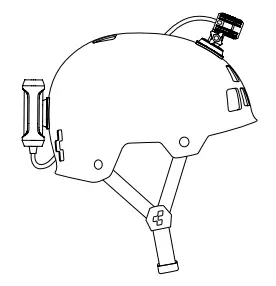
MOUNTING ON HELMETS WITH AIR VENTS
Use the helmet mount with the velcro strap to attach it to helmets with air vents. Stick the one-sided adhesive rubber pad on the back of the helmet mount. Use the velcro strap to attach the mount to the helmet. If the straps are too long you can cut them to the right length. Make sure the mount is securely attached and check it before every activity. Use the extension cable included in the package contents to carry the battery in a backpack, a cycling jersey pocket, etc.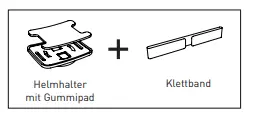
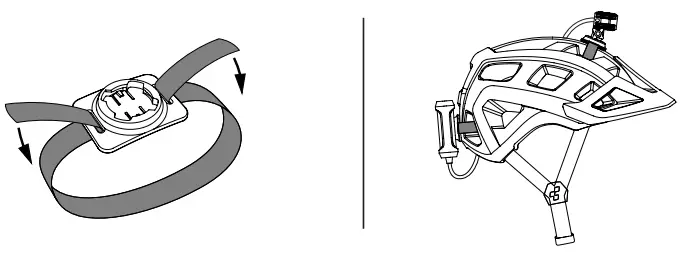
MOUNTING ON HELMETS WITHOUT AIR VENTS (DIRT-/FULLFACE-HELMETS)
Use the helmet mount with the double-sided adhesive pad to attach it to helmets without air vents. Stick the doublesided adhesive pad to the bottom of the helmet mount. When attaching the mount, be sure the adhesive pad is stuck to a smooth surface. The surface needs to be clean and free of any grease. Be sure it is securely in place before every activity.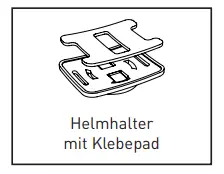
Caution!
The attachment of brackets or objects at a helmet can affect its protective effect and restrict the user‘s freedom of movement.
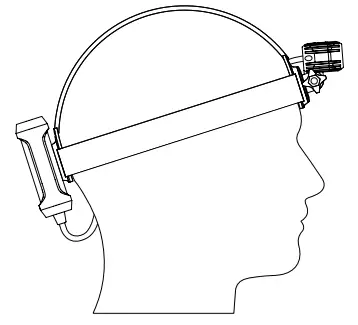
MOUNTING ON HEADBAND
The headband has two mounts with the X-Lock mounting system. This allows you to attach the light head in the front and the battery pack in the backc.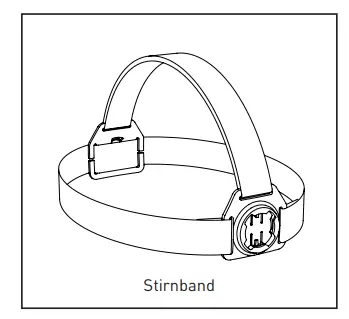
X-LOCK MOUNTING SYSTEM
The mounts are equipped with the X-Lock mounting system.
This system allows you to attach the light head and the battery to the helmet mount or the headband. The components can be mounted in 90° steps. This gives you the option of mounting the battery vertically or horizontally, for example. Before each activity, check whether the light head and the battery are locked into the bracket.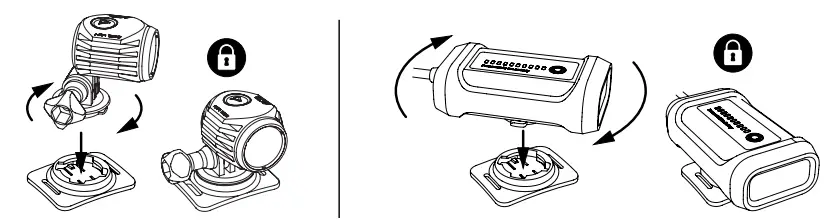
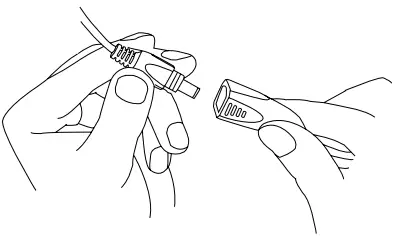
CONNECTING
Connect the light plug to the battery pack. Be sure the plugs are securely connected and you feel them click together. When mounting the light and battery, check to make sure the connection won’t be lost because of your movement.
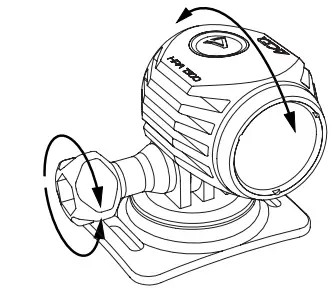
BEAM ANGLE ADJUSTMENT
To adjust the light head, loosen the fastening screw by turning it counterclockwise. To secure it, turn the fastening screw clockwise again. Make sure the light head is securely mounted before every activity.
OPERATION BATTERY
BATTERY INDICATOR
To see the current battery capacity, simply press the button once. The display contains 10 LEDs. One LED represents 10% of the capacity. Example: 7 LEDs = 70% capacity remaining After five seconds the battery charge display will automatically turn off again.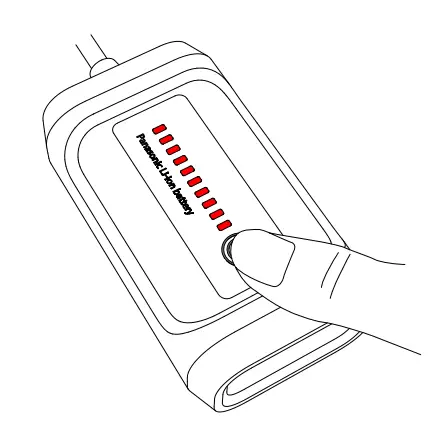
LIGHT FUNCTION
To activate the light function, hold the button down for two seconds. There are three different functions: Constant light – Flash light – Moving light You can switch through the individual functions by pressing the button. To turn it off, hold the button again for two seconds.
CHARGING
To charge the battery, connect it to the charger and plug it into the electrical socket. While loading, the LED on the charger will show you the current charge status.
Red LED is on: battery is charging
Green LED on: battery is fully charged.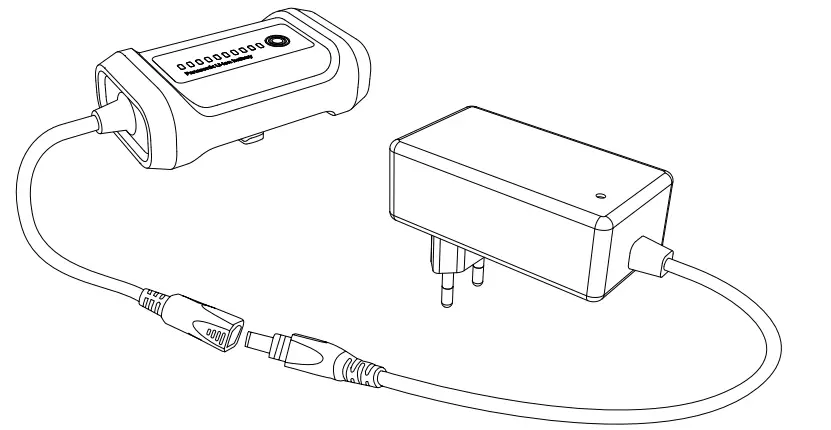
OPERATION LIGHT
The lamp can be controlled by the button on the light head or with the remote control. The remote control has a reach of roughly five meters. Ex works the remote control is already paired with the light head. To connect the lamp with a new remote control, connect the light to battery and hold the button on the lamp and the button on the remote control for five seconds simultaneously. When the lamp lights up, the pairing is finished.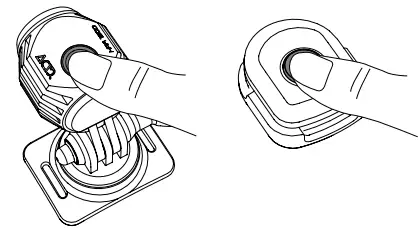
SWITCH ON
Press the button
SWITCH OFF
Keep the button pressed for 1 second
LIGHTING MODES
High Power – Mid Power – Low Power Press the button to switch
ULTRA LOW POWER
Keep the button pressed for 3 seconds
SPECIAL MODES
Flash – SOS – Alpine distress signal Keep button pressed for 5 seconds Press the button to switch.
| MODE | OUTPUT | RUNTIME |
| High | 1300 lm | 1.5 h |
| Mid | 400 lm | 3.5 h |
| Low | 150 lm | 11 h |
| Ultra Low | 80 lm | 34 h |
| Flash | 1000 lm | 6 h |
| SOS | 1000 lm | 13 h |
| Alpine distress signal | 1000 lm | 105 h |
ATTENTION! SOS is an emergency signal! Misuse may be prosecuted!
BUTTON-LED:![]() Blue LED on: Lamp on
Blue LED on: Lamp on![]() Red LED on: 20% – 10% remaining capacity
Red LED on: 20% – 10% remaining capacity![]() Red LED flashing: 10% – 0% remaining capacity
Red LED flashing: 10% – 0% remaining capacity
If the battery capacity goes below 20%, the lamp will switch to Mid Power mode to save energy. By pressing the button again you can return to high-power mode.
If the battery capacity goes below 10%, the lamp will switch to Low Power mode to save energy. By pressing the button again you can return to high-power mode.
If the battery capacity goes below 5%, the lamp will switch to Ultra Low Power mode to save energy. It is no longer possible to switch to other modes.
CAUTION! If the battery is totally discharged, the lamp will switch off.
NOTE! In a discharged state there is a risk of deep discharge. Recharge the battery as soon as possible.
PRODUCT CARE
CLEANING
If the lamp gets dirty or you use it in an environment with salty air, simply clean the outside of the light head, battery pack and cables with warm water and a small amount of washing-up liquid.
TRANSPORT
When transporting the unit, always disconnect the lamp from the battery.
STORAGE
If you know you are not going to use the battery for a while, it is best to fully charge it and store it in a cool, dry place.
TERMS OF GUARANTEE
Pending System offers a 2-year guarantee starting from date of purchase. This guarantee covers material and processing defects. The battery and mounting materials are not covered by the guarantee. The guarantee is only valid if the affected components have not been opened, no force has been used and there is no sign of willful damage. Please store the purchase receipt in a safe place as it must be submitted in the event of a complaint. If your complaint is legitimate, you will receive a comparable replacement device. You are not entitled to a replacement of the identical model if the model in question is no longer in production due to a model change. Please contact the dealer from whom you purchased the device for all complaints and guarantee claims.
CORRECT DISPOSAL OF THIS PRODUCT
 (Applicable in the European Union and other European countries with separate collection systems). This marking shown on the product or its literature, indicates that it should not be disposed with other household waste at the end of its working life. To prevent possible harm to the environment or human health from uncontrolled waste disposal, please separate this from other types of wastes and recycle it responsibly to promote the sustainable reuse of material resources. Household users should contact either their retailer where they purchased the product, or their local government office, for details of where and how they can take this item for environmentally safe recycling. Business users should contact their supplier and check the terms and conditions of the purchase contract. This product should not be mixed with other commercial waste for disposal.