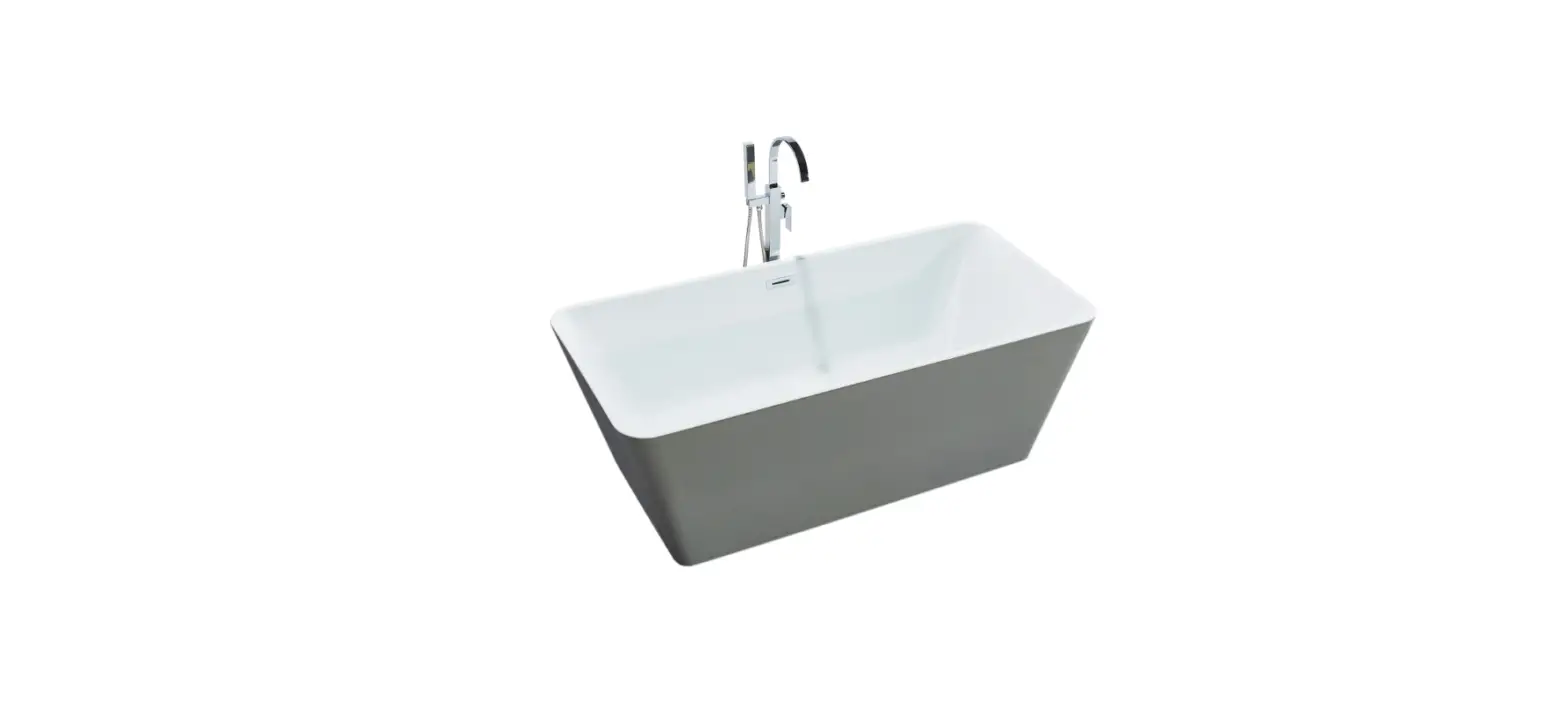
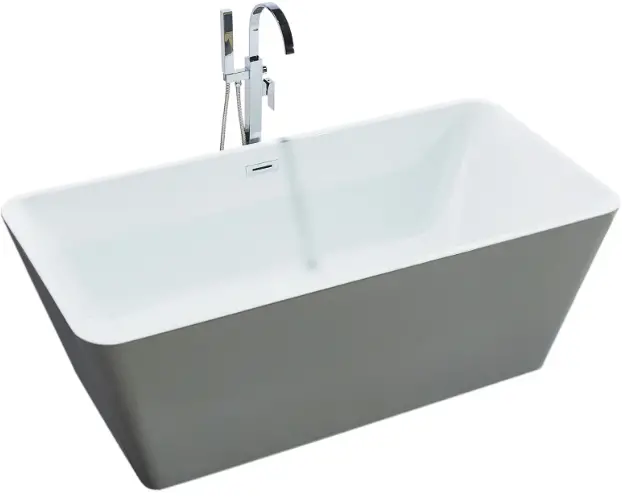
EPOWP YY-WX295001ALJ Freestanding Bathtub
READ ALL INSTRUCTIONS BEFORE UNPACKING THE PRODUCT
INSTRUCTIONS THAT, IF IGNORED COULD RESULT IN DEATH OR SERIOUS INJURY CAUSED BY INCORRECT HANDLING OR INSTALLATION OF THE PRODUCT. THESE INSTRUCTIONS MUST BE OBSERVED FOR SAFE INSTALLATION.
CAUTION!
2 PEOPLE ARE REQUIRED TO LIFT AND DURING TWO PERSON LIFT REQUIRED ENTIRE INSTALLATION OF THIS PRODUCT
This product must be installed bya fully insured and licensed plumber only. Installation of any our product by anyone other than fully insured and licensed plumber shall void limited warranty.
- We recommends that such licensed plumber have experience in the installation of products. Limited warranty is void on any commercial installation
- We are not responsible for local code compliance for this product. Building and plumbing codes may vary from state-to-state in accordance to your locašion. We are not resonsible for providing any compliance certifications.
- Under no circumstances we are shall not be liable for any and all incidental damages sustained in connection with this product
- Neither manufacture, nor distributor, nor retailer is responsible for water damage or flood caused due to use of this product
- Under no circumstances We shall not be liable for any and all fees, cost of installaSon/reinstallašon/removal, subsequent damage or transportašion in case of the product defect
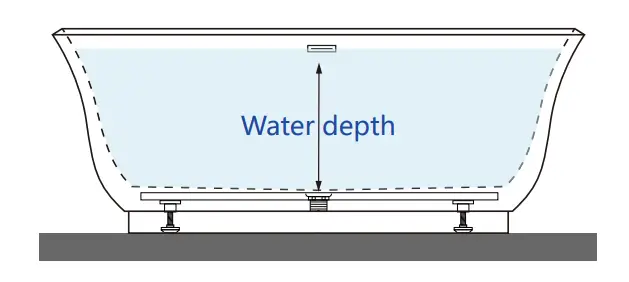
DIMENSION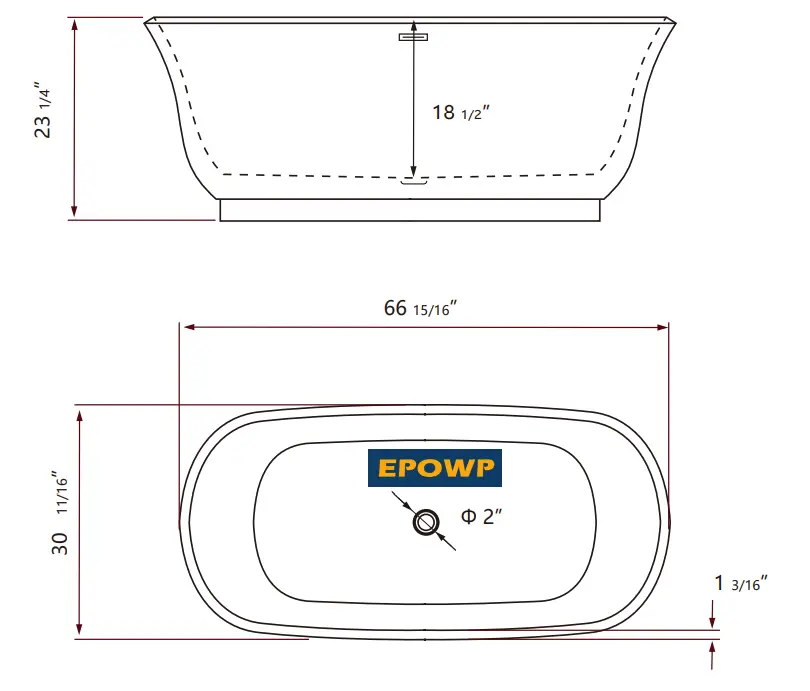
TOOLS REaUIRED FOR INSTALLATION (NOT INCLUDED)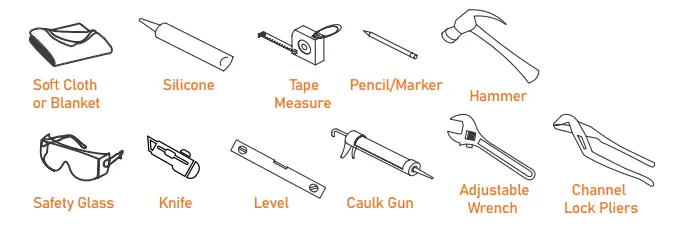
Inspect the bathtub for any damages. If any damage is found please contact your retailer
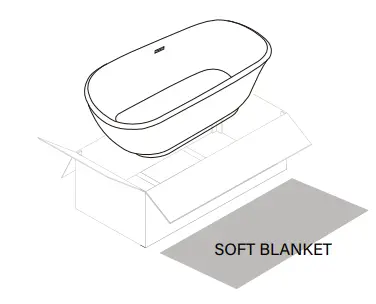
- Carefully, remove the tub from itť’s crate/box.
Important Note: Bathtub must be carried by a minimum of 2 adult people in upside down posišon only. Do not carry the bathtub by its panel. - To avoid scratches or damages to the bathtub be sure to set it on cardboard with sod blanket on top of the cardboard.
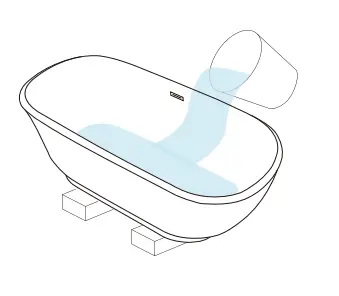
- Set your bathtub on two 4×4 pieces of lumber so you can have access from the bottom of the bathtub. Put a tray beneath the bathtub.
- Very Important! Before proceeding with instala on, please check that push scupper plug, drain, and integrated overflow are properly sealed and tightened.
- Push the scupper pluginto a close position and fill the bathtub with cold water above the overflow level to test for overflow leakage and drain leakage.
- Check for any leaks around the drain and pipe. (NOTE: Due to surface tension, it is normal for a small amount of water to pool around the drain)
- If a leakage occurs please disassemble the drain line or overflow assemblies and you can apply a plumbing puhy/silicone caulk to fix the leakage.
- Once the leakage test was performed you may proceed to the installation.
INSTALLATION WITH UNDERFLOOR ACCESS
Step 1
Clean, level and prepare the floor for installa- tion, Place the tub in the exact installed loca on on the floor and trace the outline of the bathtub with pencil and mark the drain hole locaon on the floor. Move the tub away so that the plumbing can be installed.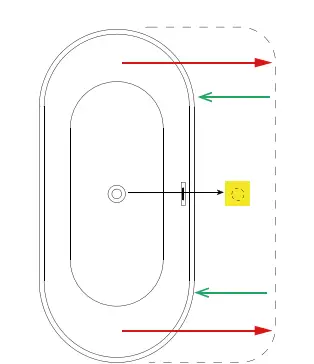
Step 2
Turn bathtub upside down and set it on a non-abrasive mat,blanket, or cardboard to prevent any scratches on tub rim.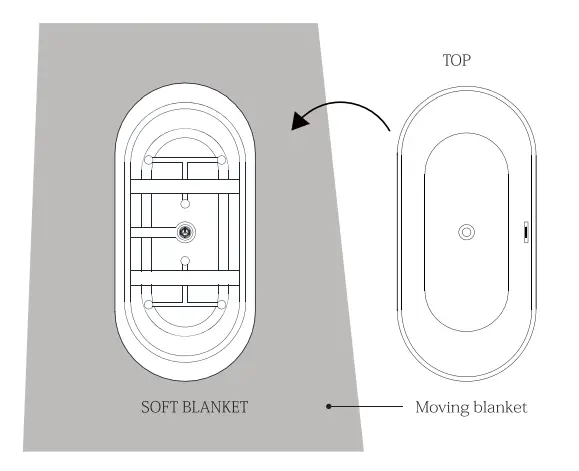
Step 3
Place a level across the bohom of the tub and adjust the tub feet leveler to touch the level. Then raise the leveler additonal 1/8″ or 3/16″ so that the weight of the tub, water and user are fully supported by the feet adjuster and not the tub walls.pop up cover drain body rubber drain gasket tail piece (provided by installer) floor drain pipe (provided by installer) trap (provided by installer) rubber drain gasket P-trap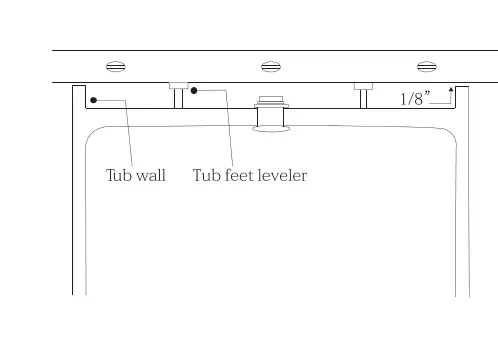
Step 4
Install an 1-1/2″ tail piece along with the corresponing flanged washer and 1-1/2″ nut to thedrain body.
Step 5
Measure and cut the tail piece to the appropriate length to reach the trap adapter When seting the tub drain, insert tail piece with 1-1/2″ slip joint and rubber washer into the trap adapter and tighten properly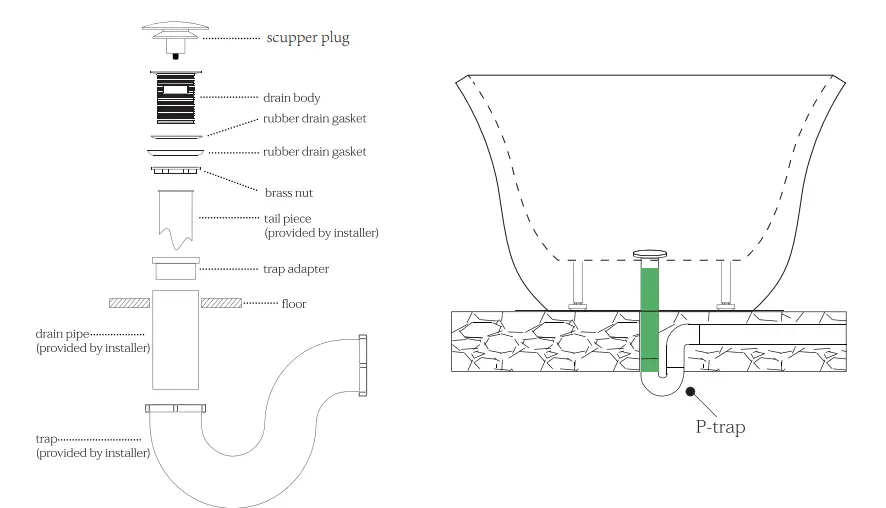
Step 6
Apply a generous bead of adhesive or waterproof silicone to the bottom of the tub and a bead of tub and tile caulk around the edge of the tub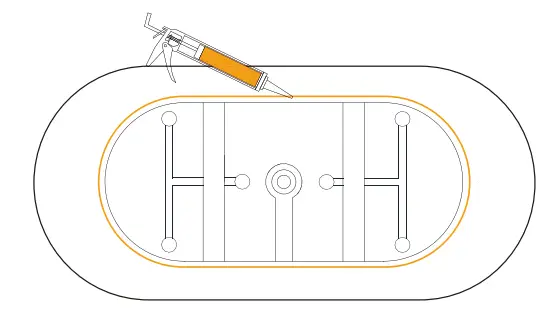
Step 7
Flip the tub over and carefully set the tub into position with tail piece assembly to P-trap and connect to the drain.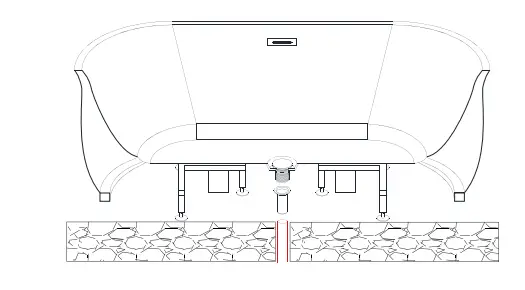
Step 8
Fill the tub with water to the overflow and then drain the tub while inspecting the waste and overflow connection below the floor for any leaks. Access from below will be necessary for this step.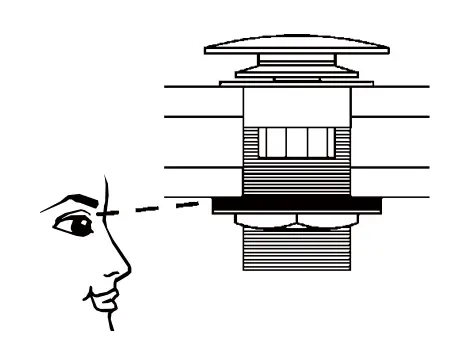
Step 10
With the tub now set in place, wipe off any excess tub or tile caulking, adhesive where the tub meets the floor with wet cloth.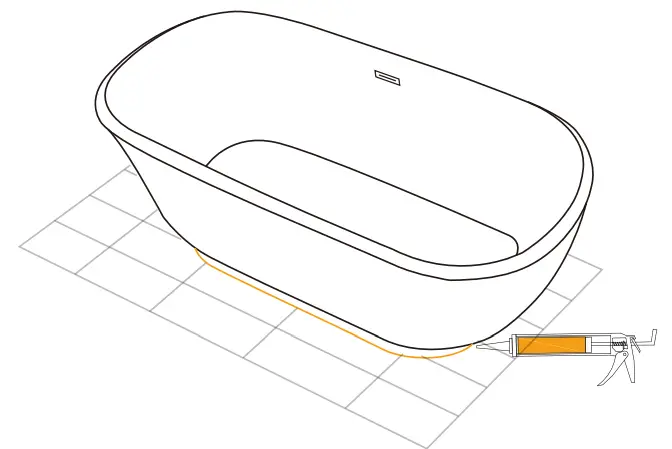
Step 10
DO NOT SHOWER or MOVE the tub after installation because it will take about 24 hours to get the silicone sealant to dry.
Note:
If installing on a concrete slab where no undertloor access or cannot move drain.
You may consider following option.
- Optional flexible drain hose from plumbing hardware or home improvement store may be used GETPRO will not supply this flexible hose). Connect one end ataches to the bathtub drain and the other end needs to be atached to the floor drain by using a transition piece.
- Optional Island tub drain may also be used.
- Create a bridge from bathtub drain to floor drain by certified plumber only because any wrong connection or loosen on connection will cause leaks.
INSTALLATION ON SLAB FLOOR (NO UNDERFLOOR ACCESS)
Step 1
Clean, level and prepare the floor for installation, Place the tub in the exact installed location on the floor and trace the outline of the bathtub with pencil and mark the drain hole location on the floor. Move the tub away so that the plumbing can be installed.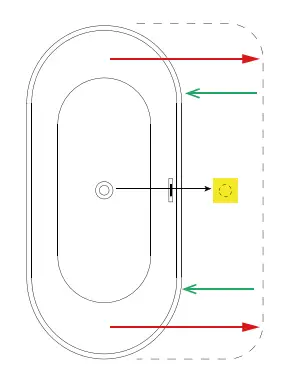
Step 2
Turn bathtub upside down and set it on a non-abrasive mat, blanket, or cardboard to prevent any scratches on tub rim.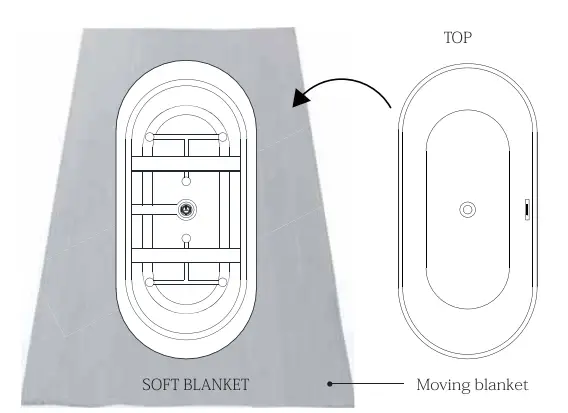
Step 3
Place a level across the bottom of the tub and adjust the tub feet leveler to touch the level. Then raise the leveler additional 1/8″ or 3/16″ so that the weight of the tub, water and user are fully supported by the feet adjuster and not the tub walls.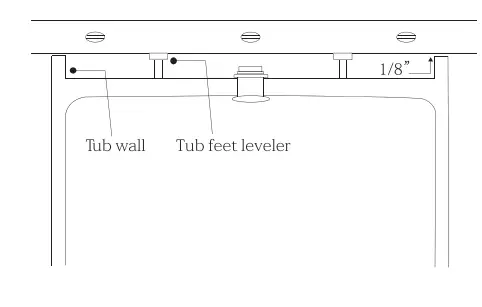
Step 4
Measure the actual distance from drain into drain pipe on floor and the drain pipe should extend approximately above the finish floor. Use a drain adapter (not provided) if necessary.
Step 5
Clean the surrounding of the drain pipe with cloth in preparation of seting the drain, the area should be dry and free of any debris. Apply a bead of clear silicon or plumber putty around the drain body and pass it through the drain hole, also apply plumber putty to the washer and slide it over the bothom of the drain body.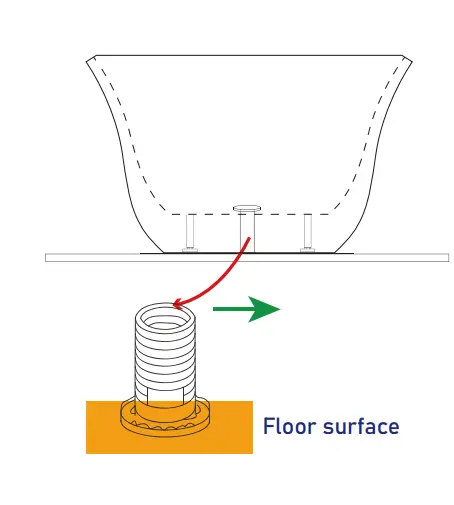
Step 6
Apply putty to fix the rubber silp gasket over the drain vent
Step 7
Apply a generous bead of adhesive or waterproof silicone to the botiom of the tub and caulk around the edge of the tub.
Step 8
Flip the tub over and carefully set the tub into position with tail piece assembly to waste vent and connect to the drain.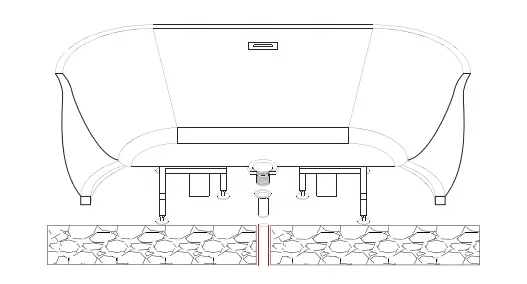
Step 9
With the tub now set in place, wipe off any excess tub or tile caulking, adhesive where the tub meets the floor with wet cloth.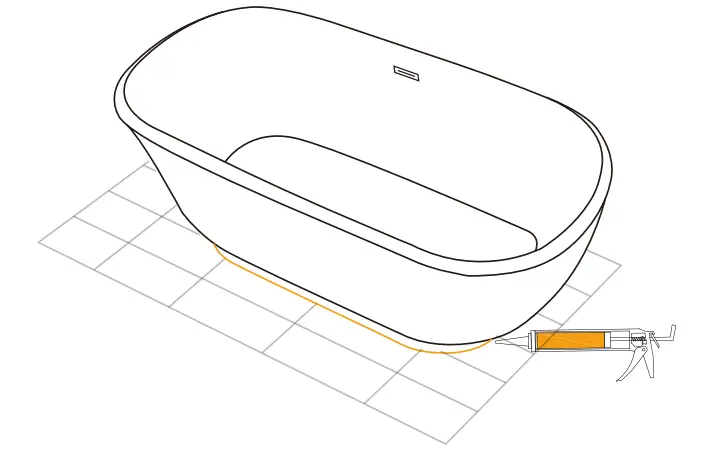
Step 10
DO NOT SHOWER or MOVE the tub after installa{on because it will take about 24 hours to get the silicone to dry.
IMPORTANT SAFETY RULES
ATTENTION! ALWAYS FLLOW THESE PRECAUTIONS WHEN USING A BATHTUB
- The bathtub must be installed and used as described in this manual
- Use caufon when entering or exiting the bathtub
- Do not permit children or persons with infirmities to use the bathtub without supervision of an adult
- People using any medications or having adverse medical history must consult a physician prior to use of the bathtub to avoid potential hyperthermia and possible drowning
- Water temperature over 1009F may cause hyperthermia and/or other health problems. Check water temperature and adjust it for your personal comfort
- Never use bathtub while intoxicated, ader taking meals or any alcoholic beverages. Consuming alcoholic beverages before or duning bathing will cause drowsiness and may result in hyperthermia, loss of consciousness, or even drowning
- If you are pregnant or you feel that you are may be pregnant, consult your doctor before using the bathtub
- Never use any electrical devices such as hair dryer, lamp, telephone, tv, radio, or others within 5 feet of the bathtub
- Do not over fill the bathtub before enetering. Entering the bathtub when filled will cause overfilow and slippery condtions. Use extreme caution when entering and exiting
Care and Cleaning
- Most dirt will wash off with mild soap and warm water.
- For tough spots, use liquid dish washing soap or non-chlorine bleach.
- Do not use abrasive material such steel wool or scouring pads to clean the acrylic surface.
- Always test the cleaning solution on a small area before using it on the eHre surtace.
- Do not allow cleaning to soak on the acrylic surface.
- Rinse thoroughly with water immediately and wipe dry with soft cloth.
Repair and Maintenance
- Use liquid polish compound such as Gel-Gloss Kitchen and Bath Polish (TM) to keep the original shine of acrylic surface.
- Light scratches can be removed with polishing compound for automobiles.
- For deeper scratches use wet sandpaper (1500 grit or higher). Always add water when sanding and lightly sand the area larger than the scratch in a circular mošon to remove the scratches.
- Repeat until the scratch is removed. Use soft cloth and small amount of polishing compound to restore shine. Repeat as needed until surtace shine Is restored.
IMPORTANT!
- DO NOT USE: Abrasive cleaners such as: acid, ammonia, bleach, and simmilar solutions. Use of such solutions may cause corrosion, finish peeling, and/or dull the surface.
- DO NOT USE: Abrasive sponges or cloth. Never use steel, wool, or wired brushes that will permanently scratch the surface.


