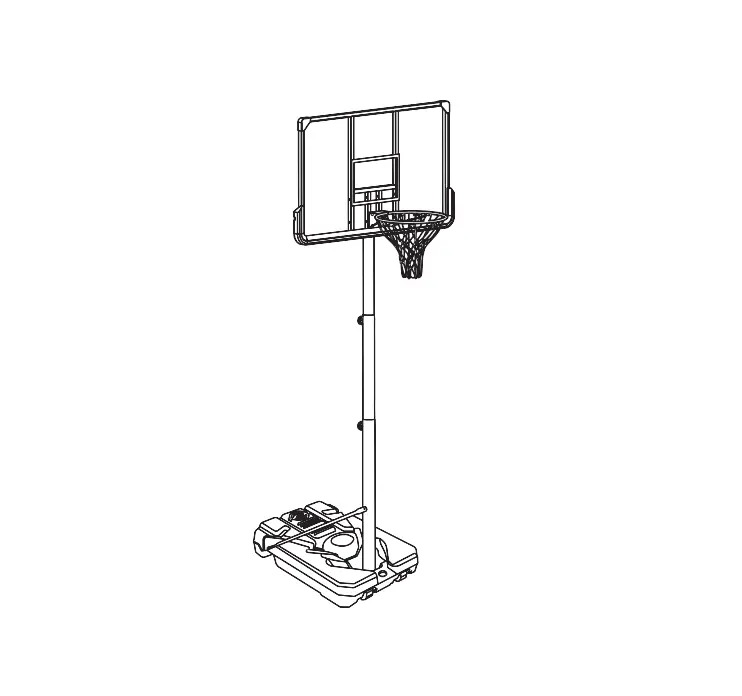
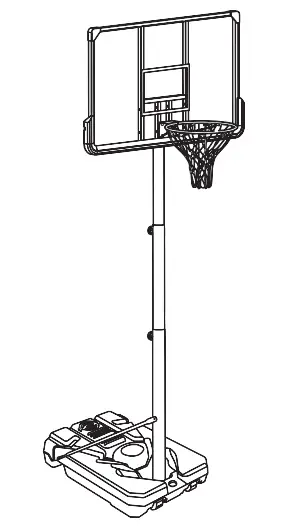
NChanmar MG-B010 Portable Basketball Hoops and Goals
Thank you for purchasing the MARNUR Portable Basketball Hoops & Goals. Please read this user manual carefully and keep it in a safe place for future reference. If you need any assistance, please contract our support team with your product model number and Amazon order number.
Product Specifications
| Model | MG-B0l0 |
| Name | Portable Basketball Hoops & Goals |
| Backboard material | PC, Transparent backboard |
| Rebound size | 112X74X3CM |
| Hoo.p diameter | 45cm (inner) |
| Lifting height | 2.0 30.5m |
| Basket material | Iron, plastic |
| aske t base size | 112x72x3cm |
| Counterweight (Maximum carrying capacity) | 80KG water or 100KG sand |
| Package dimensions | 114x7Sx27cm |
| Height | 365cm (Max) |
| Width | 112cm |
Important Safety Precautions
Notice:
- Please read all instructions before attempting to install or assemble this item. Assembly should be done by adults only.
- Firmly secure all screws before use.
- Reconfirm that all bolt, screws, and knobs are secure every 90 days.
- The product is intended for outdoor use.
- If any parts are missing, broken, damaged, or worn, stop using this item until repairs are made and/or factory replacement parts are installed.
- Do not use this item in a way inconsistent wath the manufacturer’s instructions as this could void the product warranty.
- Do not hang from the rim or climb on the pole. Do not climb on the base or structure in general, as this could result in serious injuries.
- Adjustment and moving of the basketball set must be carried out by adults.
- Always check the unit to ensure the base is full of water or sand, and that all fittings and hardware are tight before each use.
- Always place the base of the set on a fiat surface.
- Do not allow water to freeze in the base.
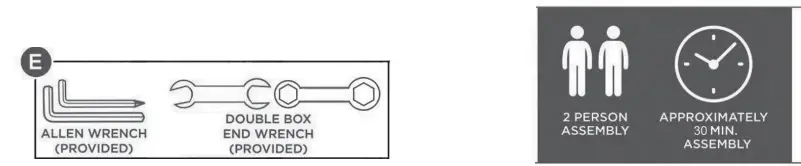
- The set requires two people for assembly.
- Check the base regularly for any leakage before playing.
Basketball Maintenance - Please check the degree of corrosion and firmness of the connection and welding parts twice a year. When abnormalities such as looseness and rust are found, repair and anticorrosive treatment should be performed in time.
- The surface of the ball rack should be cleaned with a neutral detergent to avoid damaging the surface of the ball rack plastic powder.
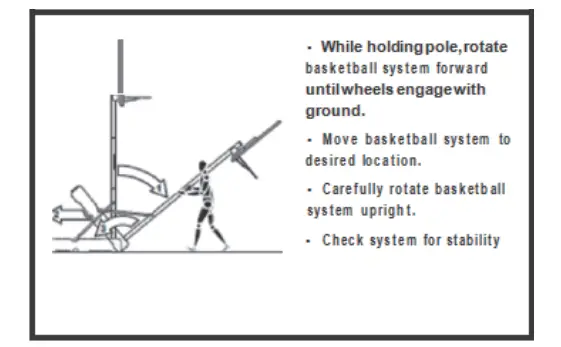
Moving System
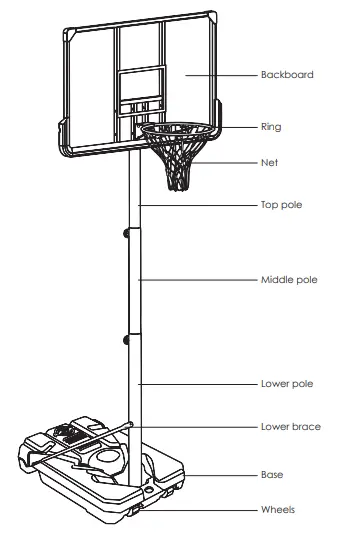
Product Design
PRODUCT ASSEMBLY

PARTS LIST
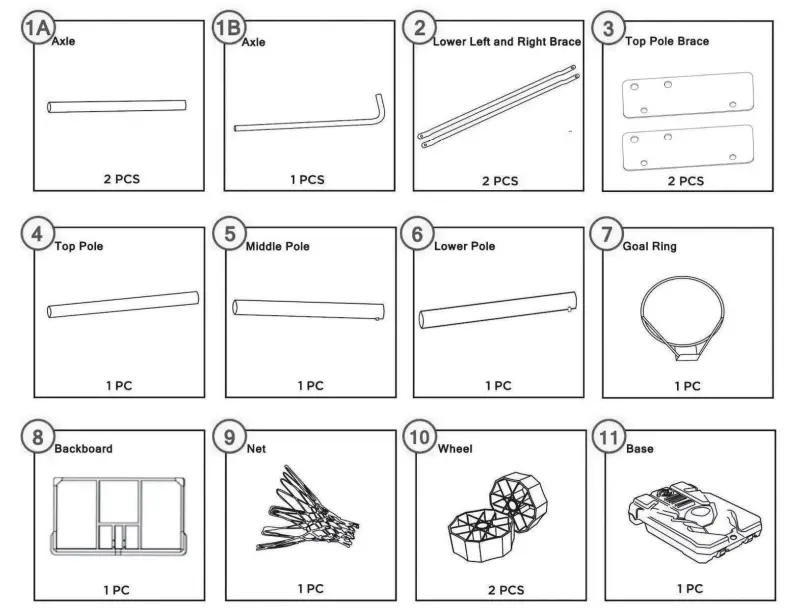
STEPl
Insert Axles ( # 1 A) into the Wheels ( # 10) as shown. Next press wheels into the Base ( # 11) . Place the Lower pole (#6) into the top side of the Base (# 11) and place into position in the base and slide Axle ( # 1 B) through holes on the bottom of the base.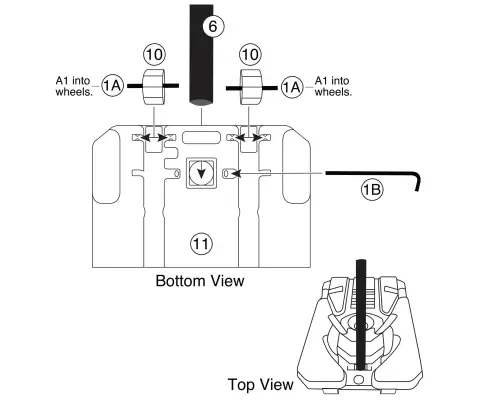
STEP2
Firstly, fix the Lower Left and Right Braces (#2) with bolts, nuts and washers (#D) to the bottom of the base. Next lock the Lower Left and Right Braces (#2) to the Lower Pole (#6) with Bolt, Nut and Washer (#B2).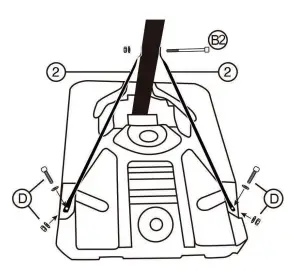
STEP3
a: Insert the Middle Pole ( #5) into the Lower Pole ( #6).
b: Insert the Bolt (#F) into the hole of Lower Pole (#6) and the groove of the Middle Pole (#5),
and then lock the bolt with washer and nuts. The design ensures safety and avoid sudden falling when loosening the knob.
c: Fix the Lower Pole (#6) and the Middle Pole (#5) with the telescopic knob (#C).
Note: You only need to partly rotate the knob out and pull it to adjust the height, then you can move the middle pole up or down. Then it will align the hole automatically.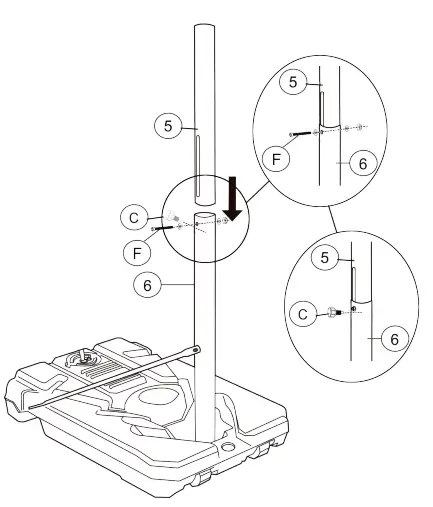
Attach Net (#9) to Rim (#7) .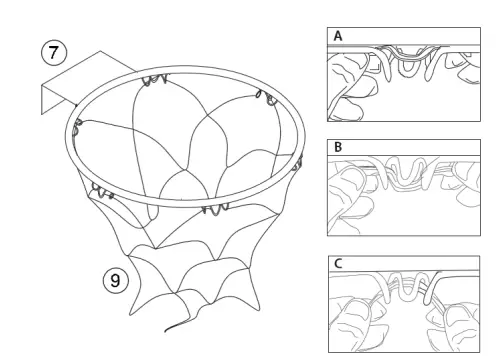
Slip the wire into both sides of thehook and into the hook from below.
STEP 4
Insert the Middle Pole (#5) into the Lower Pole (#6). Secure using Tension Knob (C). Note: Lower Pole position (#6) with Tension Knob (C) toward the back.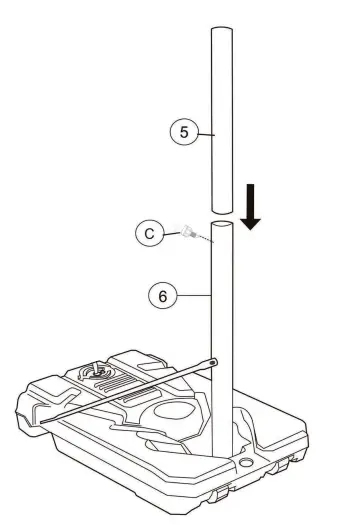
STEP 5
Lock the Top Pole Braces (#3) to the Backboard (#8) with Bolts, Nuts and Washers (#A), and then tighten them.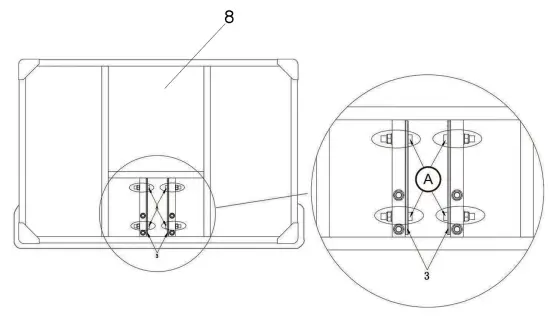
STEP 6
Attach the Goal Ring (Part# 7) to the backboard(Part# 8) using the rest 4 bolts (Part#J, K) . When completed, assembly should look like the pictures below.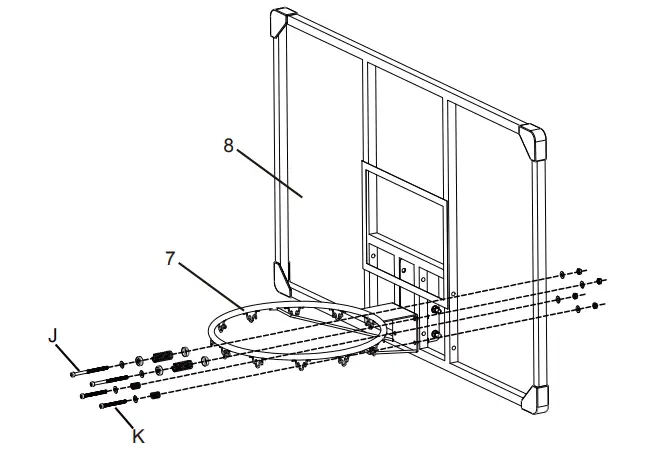
STEP 7
Fix the Top Pole (#4) to the Top Pole Braces (#3) with 2 sets of Bolts, Nuts & Washers (#Bl).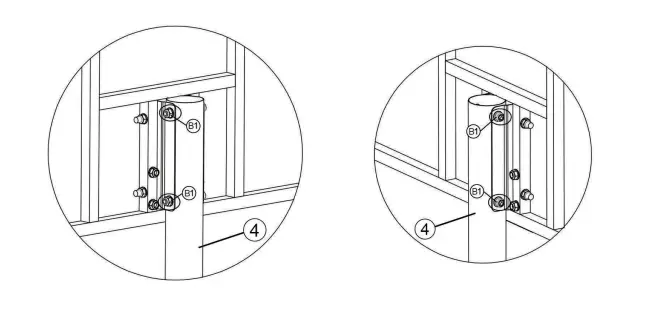
STEP 8
Insert the Top Pole (#4) into Middle Pole (#5) . Secure using the Telescopic Knob (#CJ.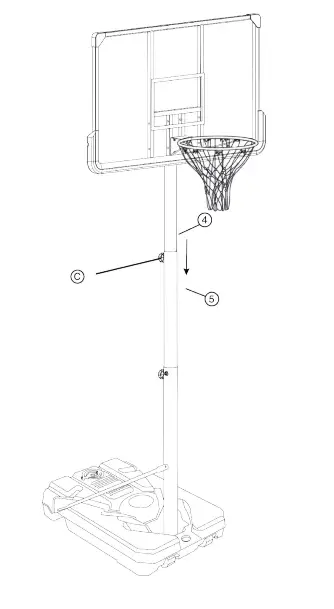
STEP 9
REMINDER
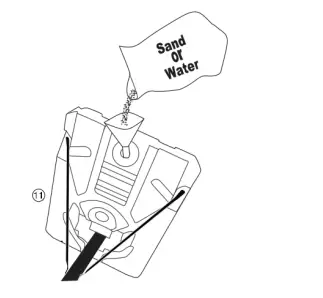
Please tighten all the nuts & Telescopic Knobs. Add sand or water to the base to make the basketball equipment stable.
Troubleshooting
| Problem | Cause | Solution |
| Parts are hard to put together. |
| Please follow the steps in the installing video provided. |
| Knob is hard to be turned. | Incorrect knob installation. | Please re-install this part of the product as we’ve already ameliorate the knob. |
| Difficult to move the product even with the moving wheel. | Incorrect moving method. | To better move the product, please tilt the base more than 40 degrees to the ground. |
| The rebound feels wobbly, not stable at all. |
|
|
| Missing parts. |
| Contact us and we’ll reship the parts to you. |
| Wobbly base. | Not enough water/sand added to the bottom. | Add more weighs to the bottom. |
Product Highlights
- Improved height adjustment, giving you the freedom to choose the height of the basketball rack.
- Added front wheels for easy movement.
- Durable, equipped with a 44-inch durable polycarbonate backboard, a bumper, an all-weather net, and sturdy heavy-duty steel poles
- Safe and convenient to use.
Customer Support
If you need help regarding product issues, after-sales service, or other relevant problems, please contact us via the email on the cover.
*Note: Products purchased directly from MARNUR benefit from our after-sales service. If the purchases are made from other selling teams, we recommend you contact them for warranty issues.
NOTICE
- Please read all instructions before attempting to install or assemble this item. Assembly should be done by adults only.
- Firmly secure all screws before use.
- Reconfirm that all bolts, screws, and knobs are secure every 90 days.
- Product is intended for outdoor use.
- If any parts are missing, broken, damaged, or worn, stop using this item until repairs are made and/or factory replacement parts are installed.
- Do not use this item in a way inconsistent with the manufacturer’s instructions as this could void the product warranty.
CAUTION DURING USE
- Do not hang from the rim or climb on the pole. Do not climb on the base or structure in general, as this could resu lt in serious injuries.
- Adjustment and moving of the basketball set must be carried out by adults.
- Always check the unit to ensure the base is full o f water or sand, and that all fittings and hardware are tight before each use.
- Always place the base of the set on a flat surface.
- Do not allow water to freeze in the base.
- The set requires two people for assembly.
- Check the base regularly for any leakage before playing.


